Categories and Tags in WordPress
Ever wonder how you can organize and navigate your WordPress website? Well, Categories and Tags are your secret weapons. These are like convenient labels that allow visitors to find exactly what they're looking for. In this guide, we will explain the categories and tags in WordPress, how they work, and why they're important. Make sure to log in first to your WordPress Admin Dashboard.
Categories
WordPress Categories are an easy way to sort your WordPress posts into groups. Creating custom categories will help your viewers sort through your website and find content quickly. This section will show you how to:
Here is a video on how to manage categories in WordPress:
How to Create a Category
- Log in to your Bluehost Portal.
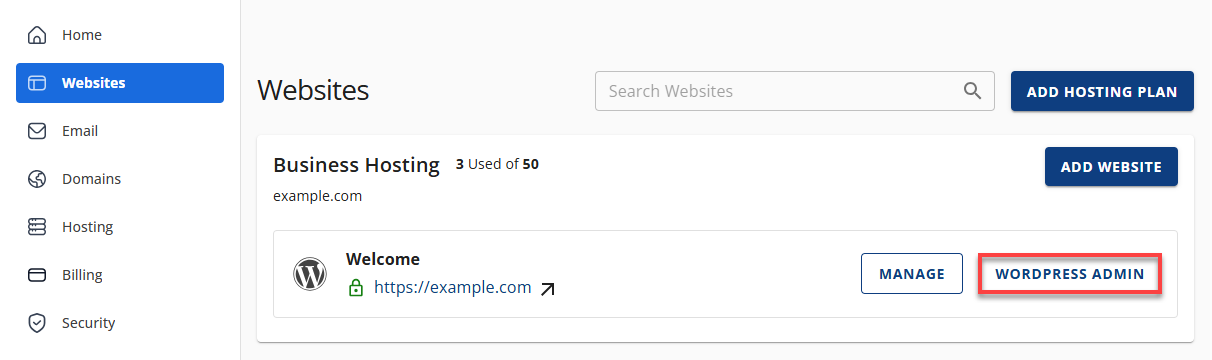
- In the left-hand menu, click Websites.
- Click the WordPress Admin button located next to the website you want to manage.
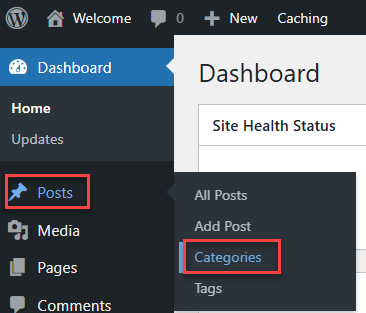
- Click on Posts in the left-hand menu, then select Categories.
- On the Categories page, you'll see on the left of the page a form to add a new category and the list of existing categories on the right.
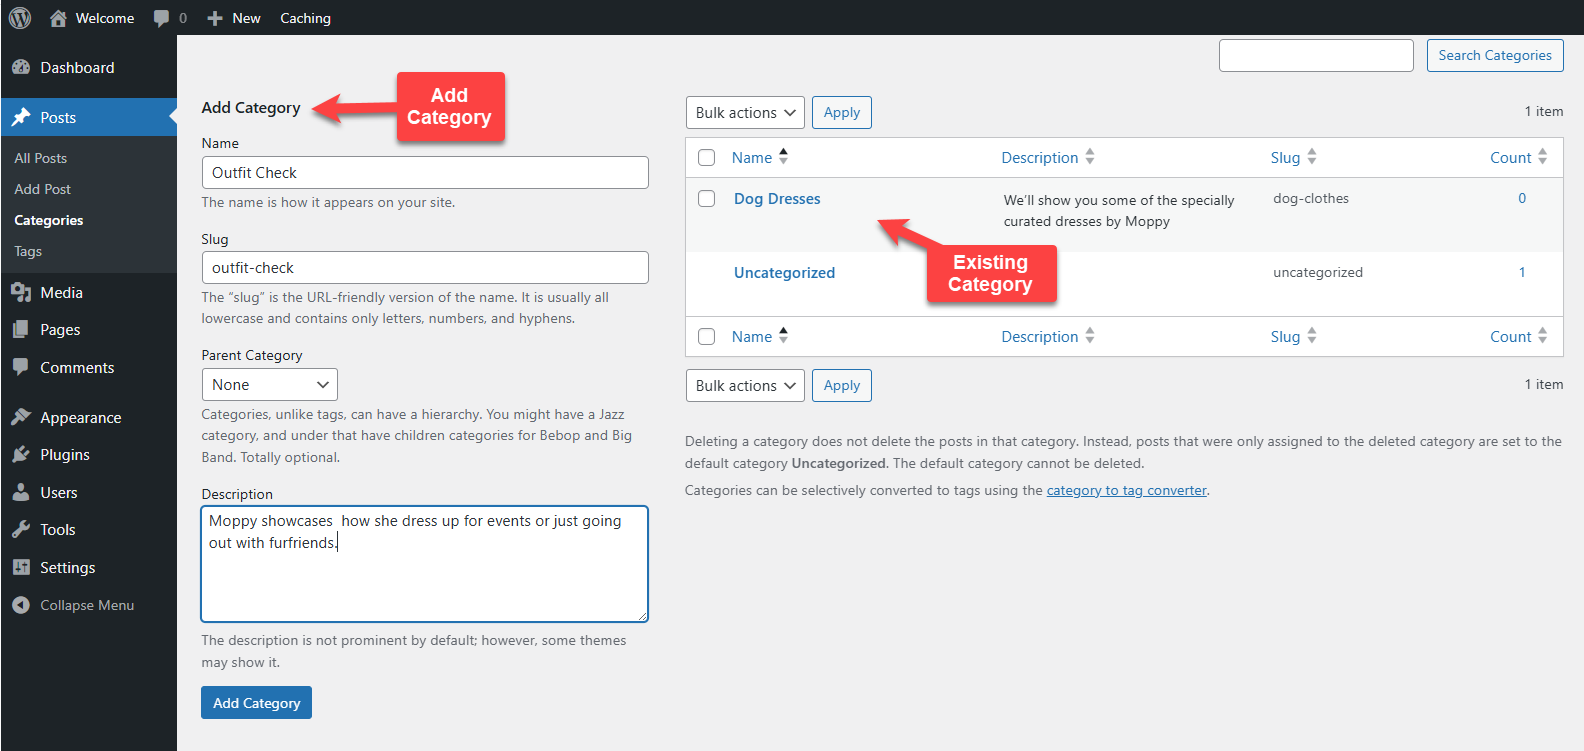
- To create a category, fill out the form with the following details:
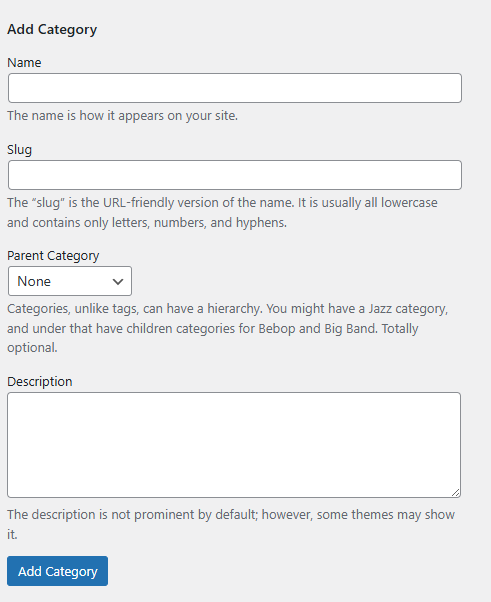
- Name: The category title
- Slug: A unique, URL-friendly version of the name
- Parent Category (Optional): Select a parent category to create a sub-category
- Description (Optional): A brief explanation of what the category includes
- Click the Add Category button.
How to Assign a Category to a Post
- Log in to your Bluehost Portal.
- In the left-hand menu, click Websites.
- Click the WordPress Admin button located next to the website you want to manage.
- Click on Posts in the left-hand menu, then select All Posts.

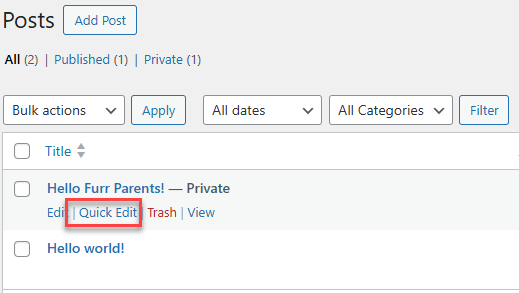
- Locate the post to which you'd like to assign a category. Click Quick Edit from the options that appear below the post title.
- Check the box next to the category you want to assign.
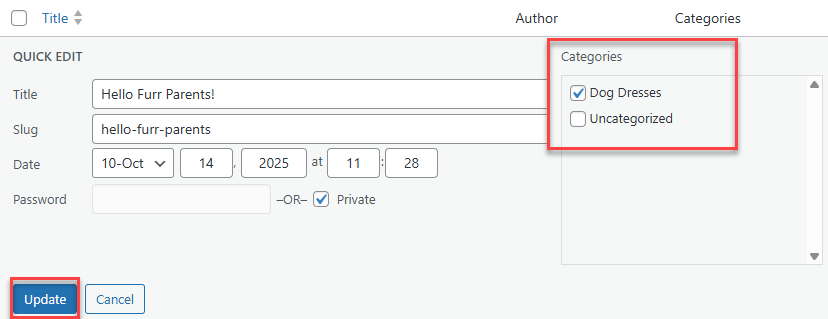
- Click the Update button at the bottom to save your changes.
How to Remove a Category from a Post
- Log in to your Bluehost Portal.
- In the left-hand menu, click Websites.
- Click the WordPress Admin button located next to the website you want to manage.
- Click on Posts in the left-hand menu, then select All Posts.
- Locate the post you'd like to remove from a category. Click Quick Edit from the options that appear below the post title.
- Check the box next to the category you want to remove.
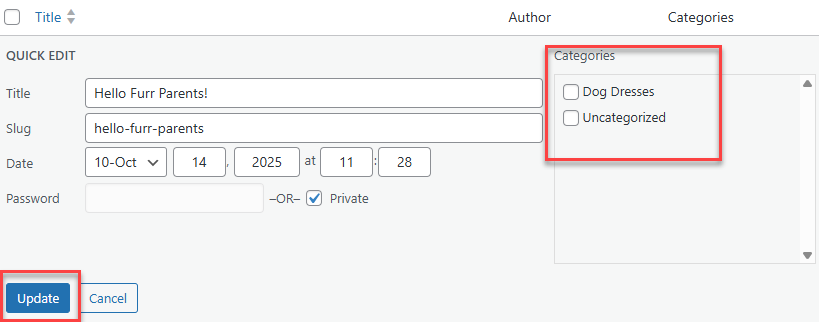
- Click the Update button at the bottom to save your changes.
Tags
Tags are another non-hierarchical way to sort content on your site to make it easier for visitors to find. Tags enhance the navigation of your website and help users locate related content that is organized together. Think of tags as the “hashtags” of WordPress—they add nuance and help your content get found. This article will show you how to:
Here is a video on how to manage Tags in WordPress:
How to Create a Tag
- Log in to your Bluehost Portal.
- In the left-hand menu, click Websites.
- Click the WordPress Admin button located next to the website you want to manage.
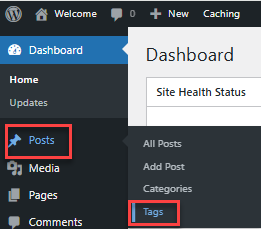
- Click on Posts in the left-hand menu, then select Tags.
- On the Tags page, you'll see a form to add a new tag on the left of the page.
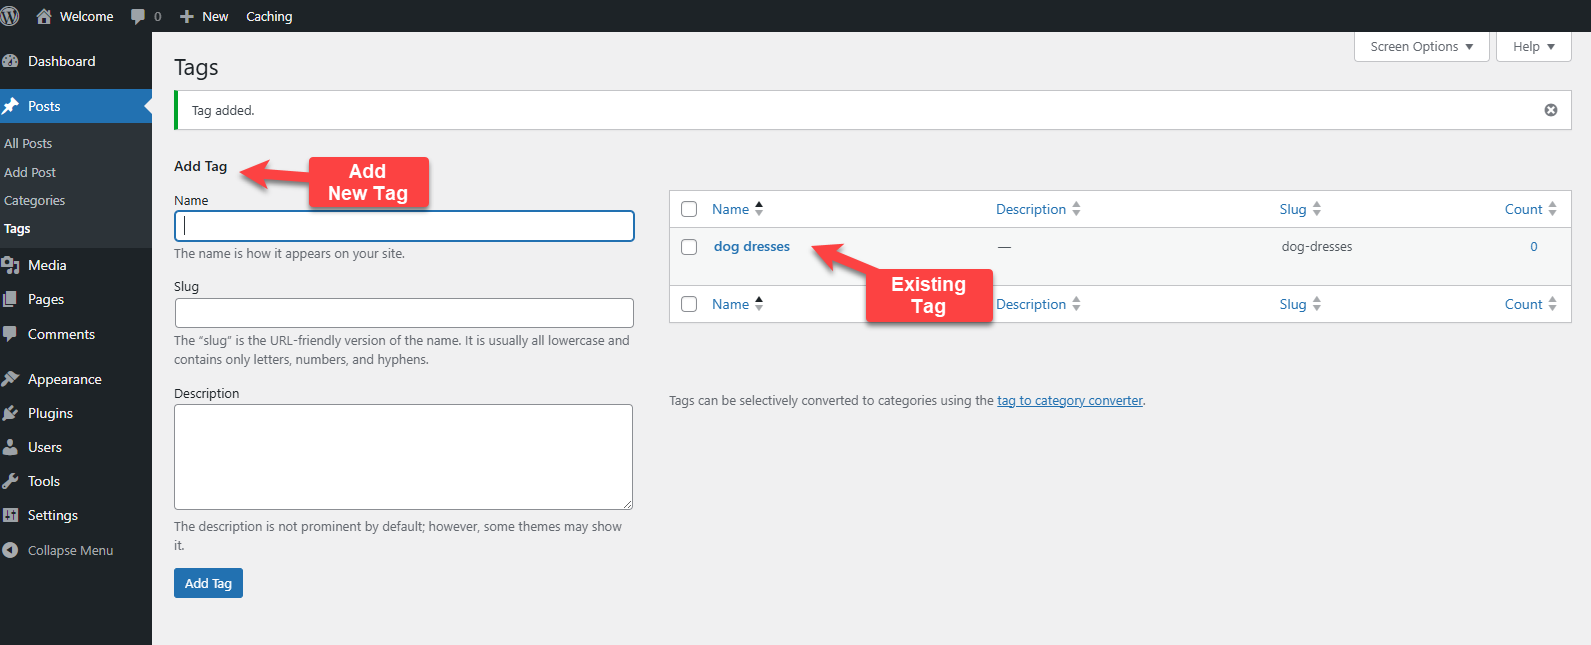
- Fill out the form with the following details:
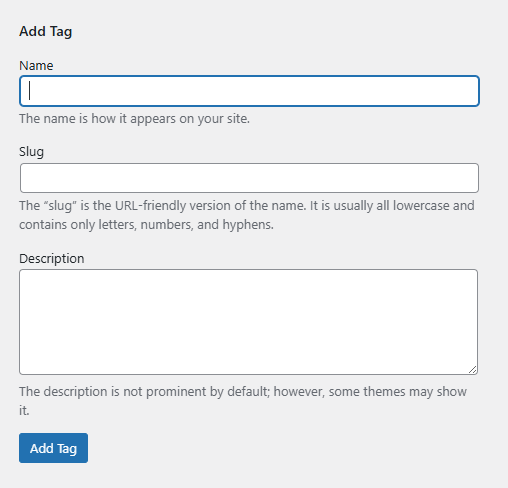
- Name: The tag title
- Slug: A unique, URL-friendly version of the name
- Description: This is an optional text field that provides additional context or explanation about a specific tag.
How Assign a Tag to a Post
- Log in to your Bluehost Portal.
- In the left-hand menu, click Websites.
- Click the WordPress Admin button located next to the website you want to manage.
- Click on Posts in the left-hand menu, then select All Posts.
- Locate the post you'd like to assign a category. Click Quick Edit from the options that appear below the post title.
- In the quick edit page, look for the Tags section beside Categories.
- Enter your desired tag name in the field provided. If you're adding multiple tags, separate each one with a comma.
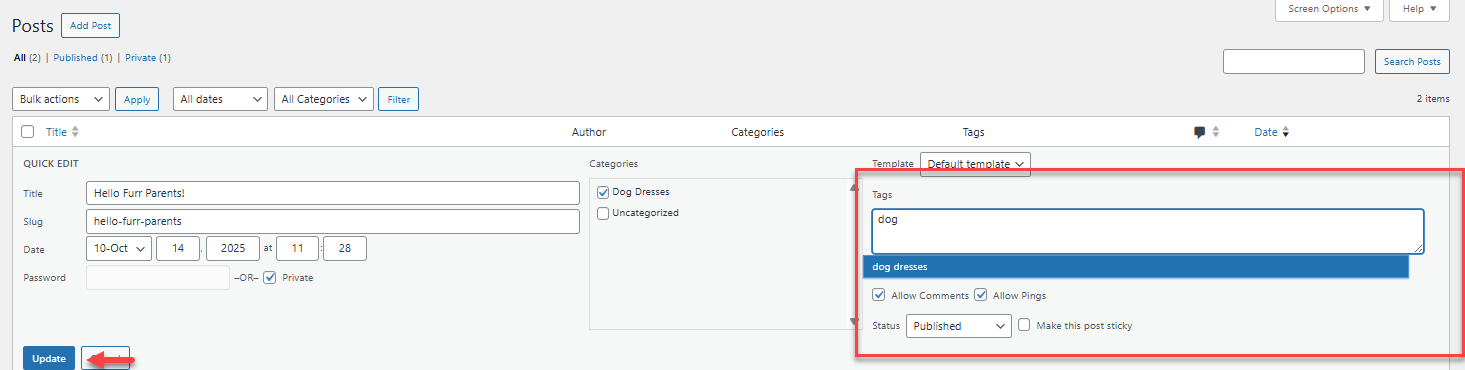
- Click the Update button at the bottom to save your changes..
How to Remove a Tag from a Post
- Log in to your Bluehost Portal.
- In the left-hand menu, click Websites.
- Click the WordPress Admin button located next to the website you want to manage.
- Click on Posts in the left-hand menu, then select All Posts.
- Locate the post from which you'd like to remove a tag. Click Quick Edit from the options that appear below the post title.
- In the quick edit page, look for the Tags section beside Categories.
- Delete the tag you want removed.
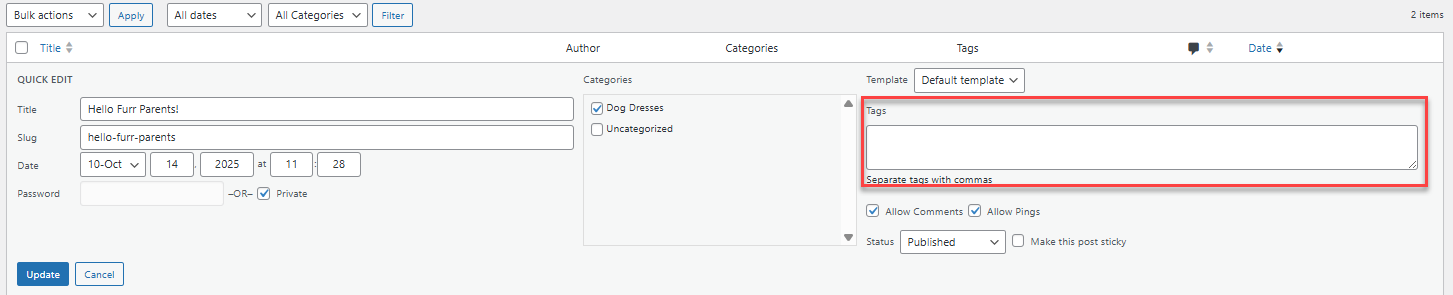
- Click the Update button at the bottom to save your changes.
Summary
So, there you go! Learning categories and tags in WordPress is all about finding a balance between organization and user experience. Using both strategically will get your site optimized, its content tidy, and very easy for visitors to find what they need.
If you need further assistance, Bluehost Chat Support is available 24 hours a day, 7days a week while Bluehost Phone Support is available 7 days a week from 7 am-12 midnight EST.
- Chat Support - While on our website, you should see a CHAT bubble in the bottom right-hand corner of the page. Click anywhere on the bubble to begin a chat session.
- Phone Support -
- US: 888-401-4678
- International: +1 801-765-9400
You may also refer to our Knowledge Base articles to help answer common questions and guide you through various setup, configuration, and troubleshooting steps.