Knowledge Base
Bluehost Self-Managed VPS: How to Install Portainer
Portainer is a simple, easy-to-use tool that helps you manage your Docker containers through a web interface. If you have a Bluehost Self-Managed VPS, this guide will walk you through how to install Portainer quickly and easily.
Portainer requires Docker to operate. If Docker isn’t installed, you’ll need to set it up first before proceeding.
Install Portainer Using Bluehost Portal
To install Portainer:
Only one application can be installed at this time, so if you already have an app installed, please uninstall it before proceeding.
- Log in to your Bluehost Portal.
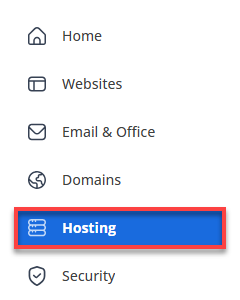
- Click Hosting in the left-hand menu.

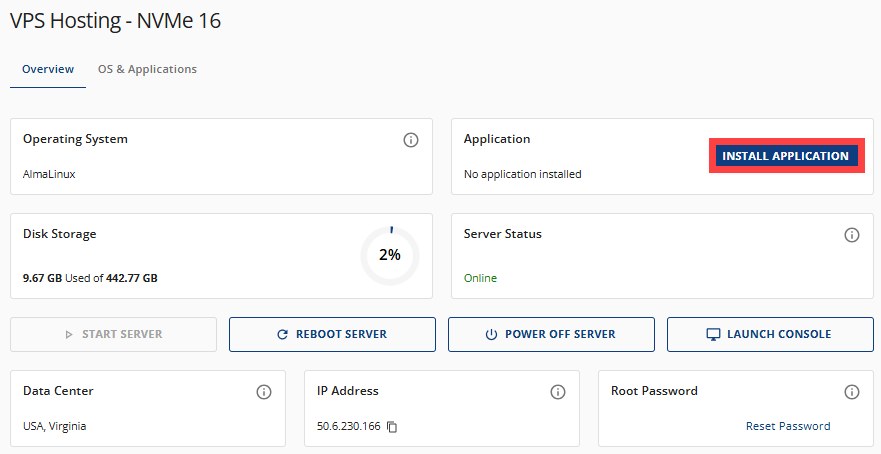
- Click the Manage button on the Self-Managed VPS package.

- On the Overview tab, click the Install Application button.

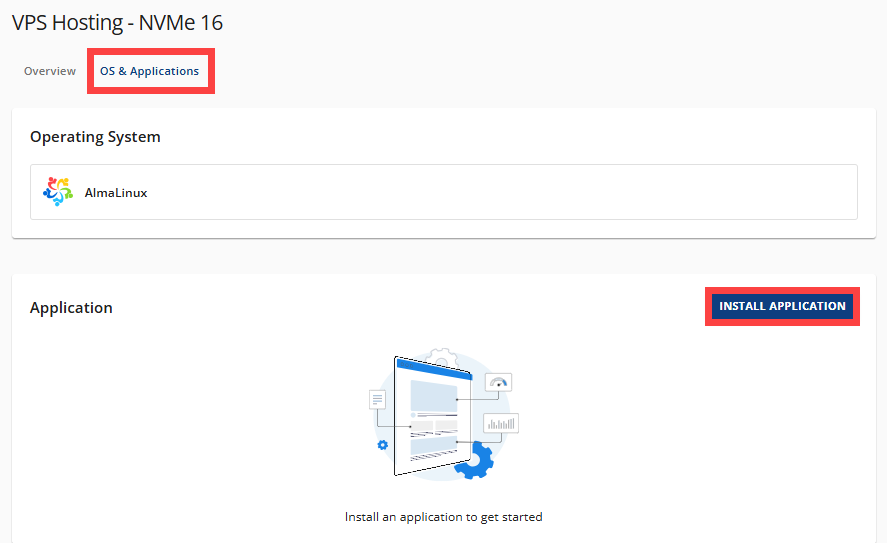
Or, navigate to the OS & Applications tab and select Install Application.

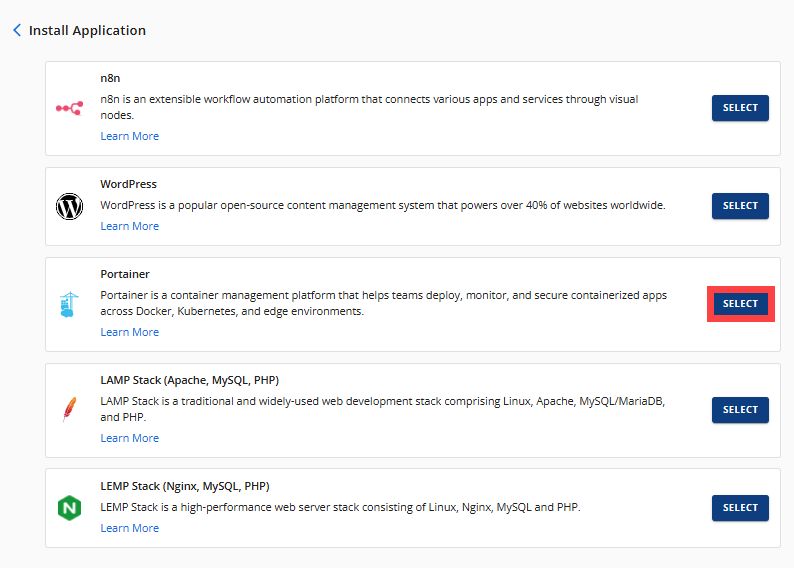
- From the list of available applications, find Portainer and click Select.

- Wait for a few seconds to complete the installation.
Access Your Portainer Dashboard
After installation completes:
- Log in to your Bluehost Portal.
- Click Hosting in the left-hand menu.

- Click the Self-Managed VPS package where the Portainer is installed, and click Manage.

- In the Application section, click Manage next to Portainer.

- The Portainer dashboard login page will open in a new browser tab.
Summary
If you’re looking for an easy way to manage Docker containers, Portainer is a great choice. First, make sure Docker is installed on your Bluehost Self-Managed VPS. Then, simply use the Bluehost Portal to install Portainer. After that, you can log in to the Portainer dashboard and manage your containers with ease.
Did you find this article helpful?