Bluehost Self-Managed VPS: Reimage Your Server for WordPress Installation
Bluehost’s Self-Managed VPS hosting offers the power and flexibility of a VPS server, combined with the ease of management via Bluehost Portal. While you have the option to manually configure everything, Bluehost Portal simplifies the process of installing popular applications like WordPress with just a few clicks. This guide will show you how to install WordPress on your Bluehost Self-Managed VPS using the Bluehost Portal interface.
Install WordPress Using Bluehost Portal
To install WordPress:
- You can install only one application using the one-click installer.
- The system will automatically install Docker when reimaging to WordPress.
- To change or delete your application, follow the guide: Bluehost Self-Managed VPS: How to Change and Delete an Application. Create a backup of your existing applications or templates.
- If you want to keep your current template, install the new application manually using SSH. The system will automatically apply the recommended OS for WordPress.
- Log in to your Bluehost Portal.
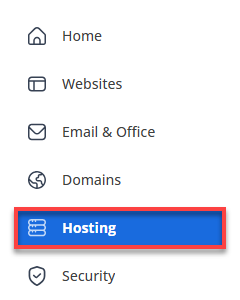
- Click Hosting in the left-hand menu.
- Click the Manage button on the Self-Managed VPS package.

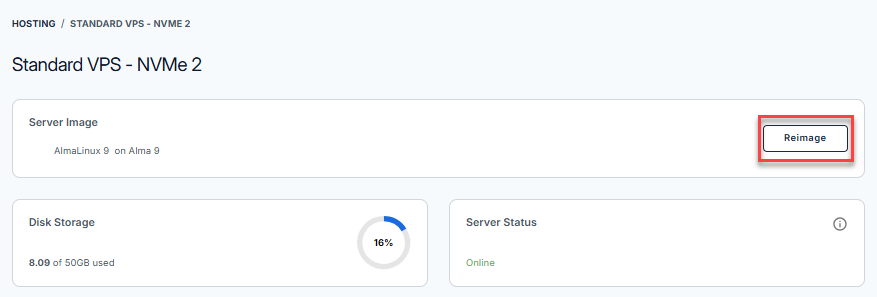
- Click the Reimage button.
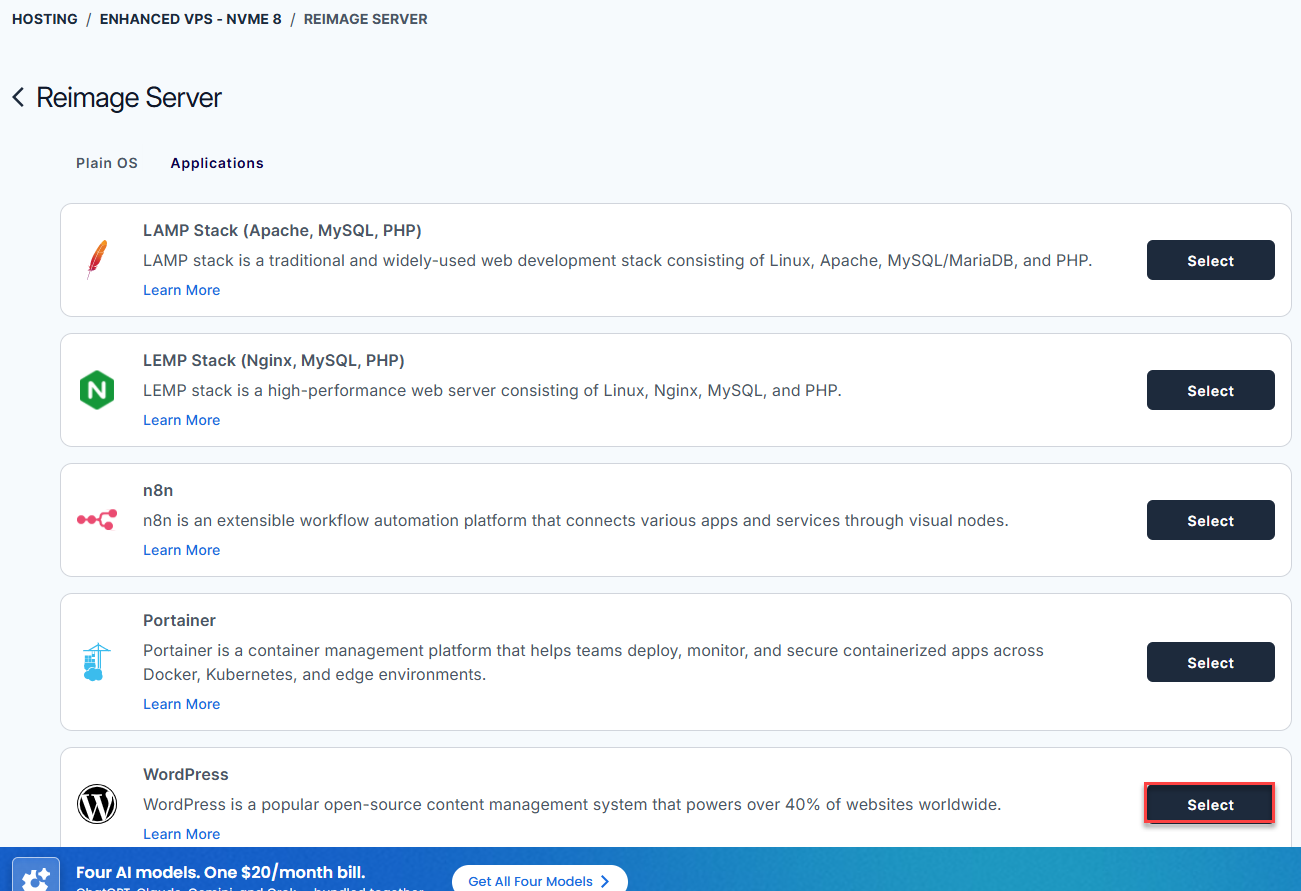
- Select the Applications tab.
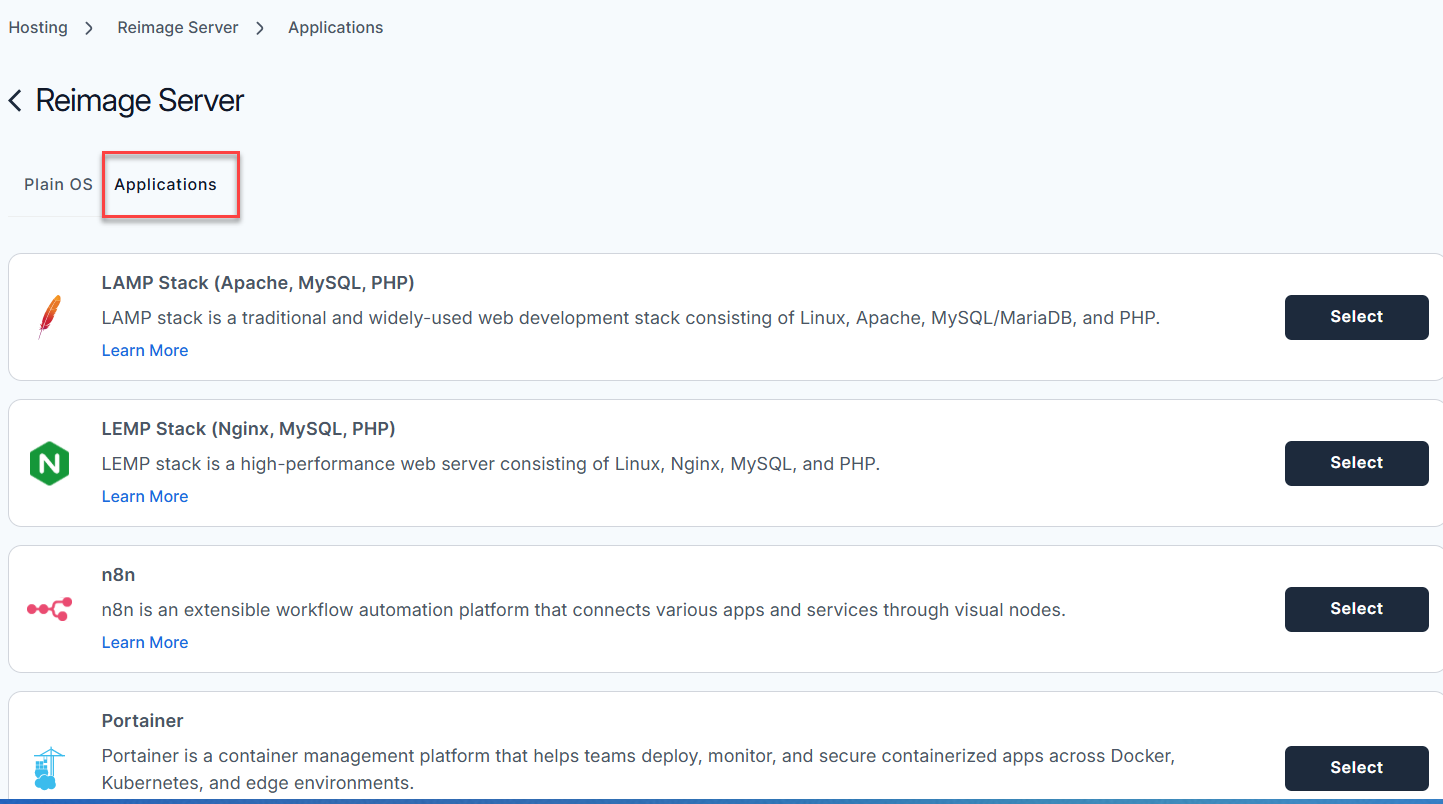
- From the list, find WordPress and click Select.
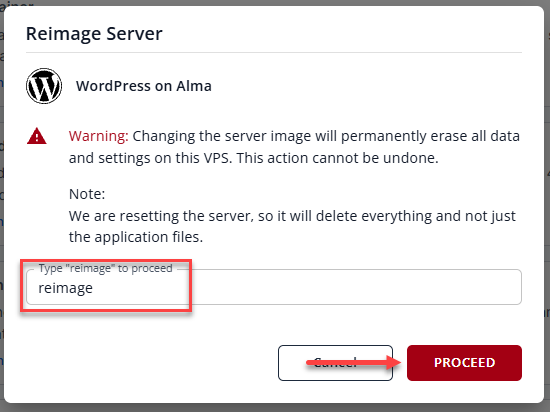
- To confirm, please type "reimage" and then click Proceed to start the process.
- Wait a few moments while the installation completes.

- Once completed, you will see WordPress listed in the Server Image section.
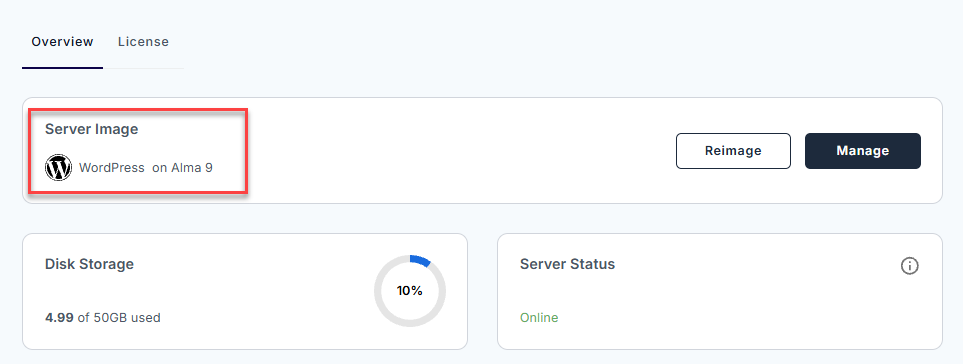
- Once completed, you will see WordPress listed in the Server Image section.
Access Your WordPress Dashboard
After installation completes:
- Log in to your Bluehost Portal.
- Click Hosting in the left-hand menu.
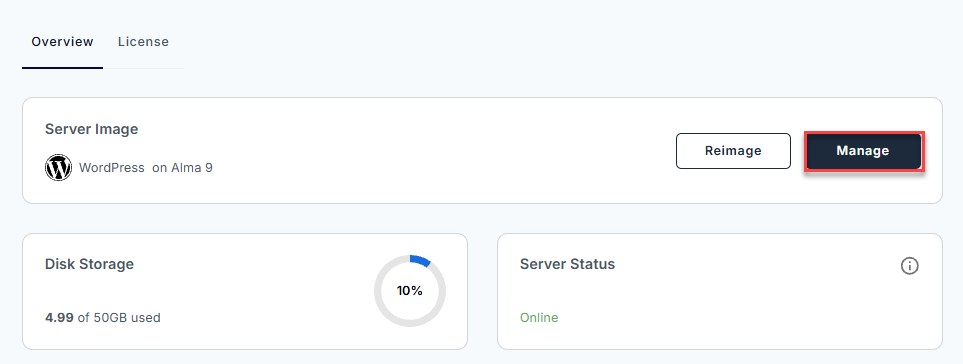
- Click the Self-Managed VPS package where WordPress is installed, and click Manage.
- In the Overview section, click Manage next to WordPress.
- The WordPress dashboard login page will open in a new browser tab.
Summary
Installing WordPress on a Bluehost Self-Managed VPS using the Bluehost Portal is a straightforward way to get your site online quickly without manually configuring your server or database. It combines the power of VPS hosting with the convenience of Bluehost’s user-friendly control panel.