VPS & Dedicated Hosting: ConfigServer Security & Firewall
ConfigServer Security & Firewall (CSF) is a firewall for VPS and Dedicated servers. CSF is not installed as part of our default images on VPS or Dedicated servers; however, it is quite a popular add-on, as it greatly simplifies tasks such as opening or closing ports. Rather than figuring out iptables command syntax, CSF offers a GUI-based approach integrated with WHM.
Customers can either install it themselves or request that support install it. We may also suggest its installation. While we do not provide detailed support for the application, you are likely to encounter it while supporting servers, so some familiarity with its operation is recommended.
Installation
We can install CSF on request. This is done as root through the command line. The commands are given below for your convenience, but you should always check the manufacturer's site for the current version.
            cd /usr/local/src/
            wget https://download.configserver.com/csf.tgz
            tar -xzf csf.tgz
            cd csf
            sh install.sh
You will see Installation Completed.
            cd ..
            rm -Rfv csf/ csf.tgz
Setup
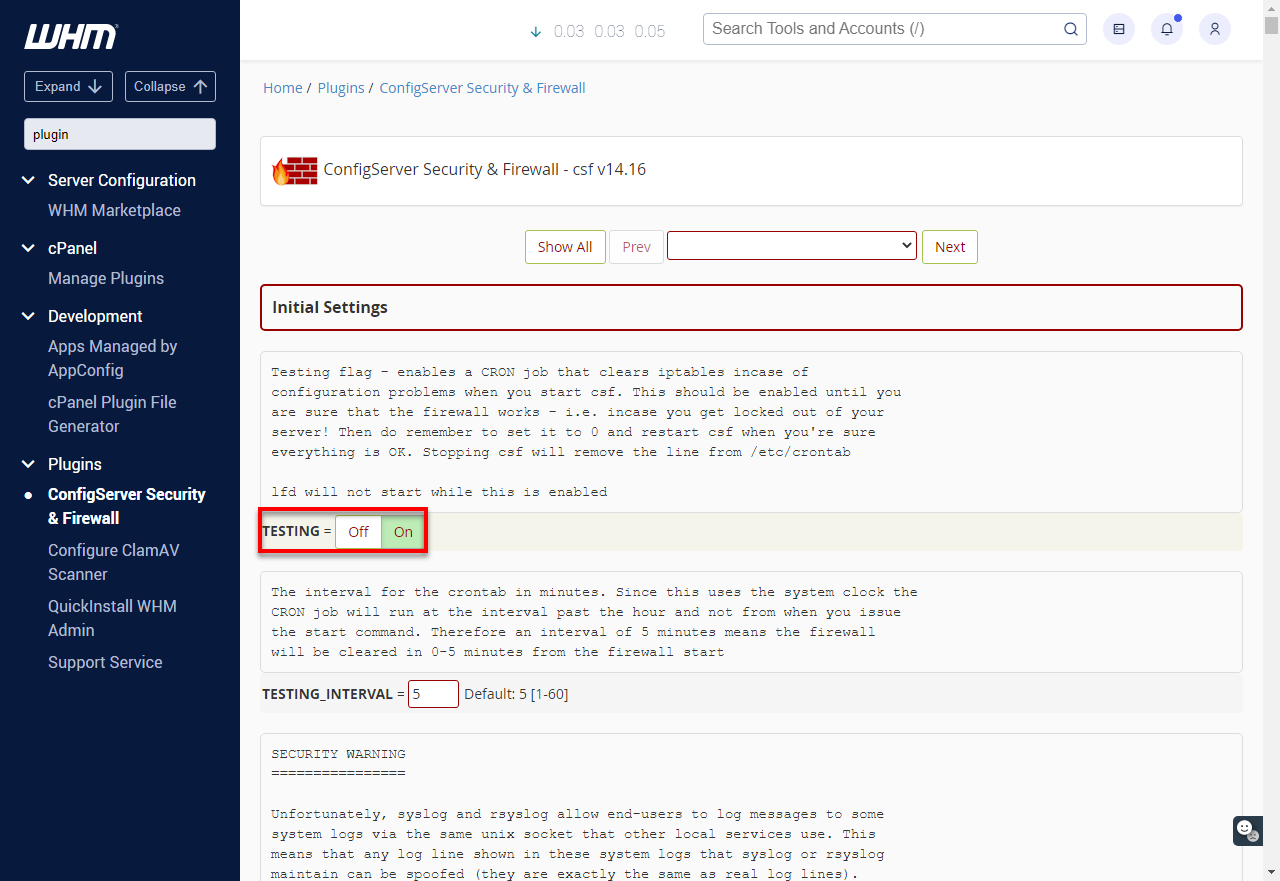
This will install the application and create the plugin for WHM, but it will initially be set to Testing mode. This can be disabled by:
To disable test mode:
- Log in to WHM.
- Look for and expand the Plugins sections in the Search field, and select ConfigServer Security & Firewall from the list.
- On the ConfigServer Security & Firewall page, click the CSF tab.
- Scroll down and click on the Firewall Configuration button.
Testing appears at the top, as in the screenshot below, and can be set to OFF.
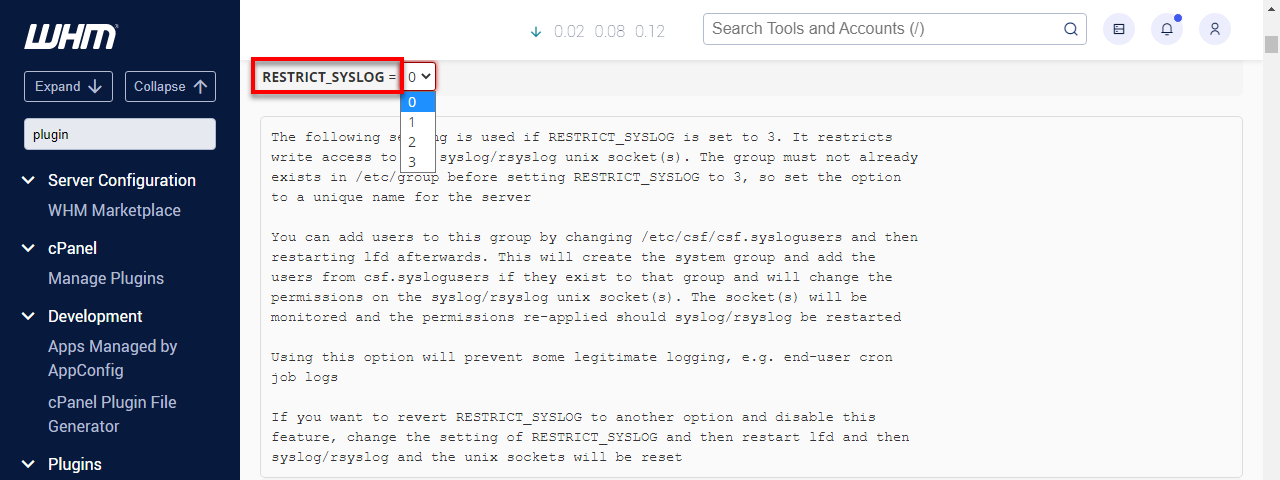
By default, the RESTRICT_SYSLOG option is disabled, which will give a warning in the CSF control panel. As shown below, this should be changed, with 3 being the recommended setting.
- After making the updates, you need to scroll down to the bottom and press the 'Change' button, and you will be prompted to "Restart csf+lfd," completing the process of enabling CSF.
This should be followed by disabling cPHulk, since its operation can potentially conflict with CSF. This should be done in WHM > Security Center » cPHulk Brute Force Protection.
Configuration
By default, the initial configuration will open up a standard set of ports, as used by cPanel and associated services. Suppose the customer has made any changes, for example, changing SSH/SFTP to run on a port other than 22. In that case, CSF's configuration should be updated to take these into account. Support IP addresses can also be whitelisted to help avoid potential future issues.
CSF configuration can be done in two ways: through the WHM GUI or on the command line.
Through the GUI
As mentioned above, most configuration is done through WHM > Plugins » ConfigServer Security & Firewall > csf tab > csf -- ConfigServer Firewall section > Firewall Configuration.
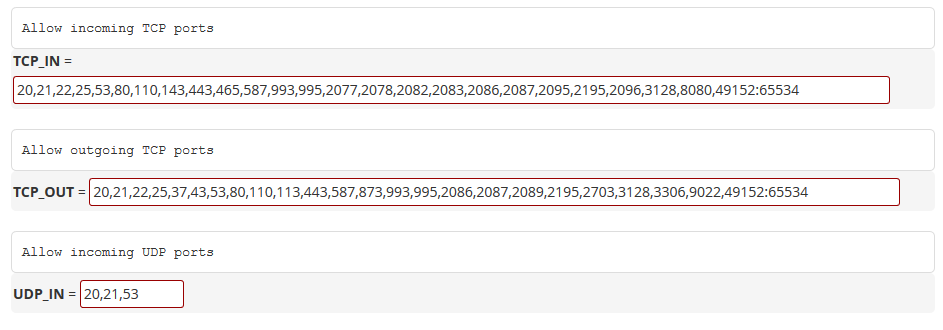
This offers detailed information about each section's purpose and potential settings. The most commonly accessed section is the one that sets the open or closed ports:

You can add, delete, or change ports, inbound or outbound, by editing the list, separating each with a comma. A range of ports to be opened can be specified by separating them with a colon, e.g., 49152:65534.
After making changes, update the configuration file using the 'Change' button and restart csf/lfd, as discussed above.
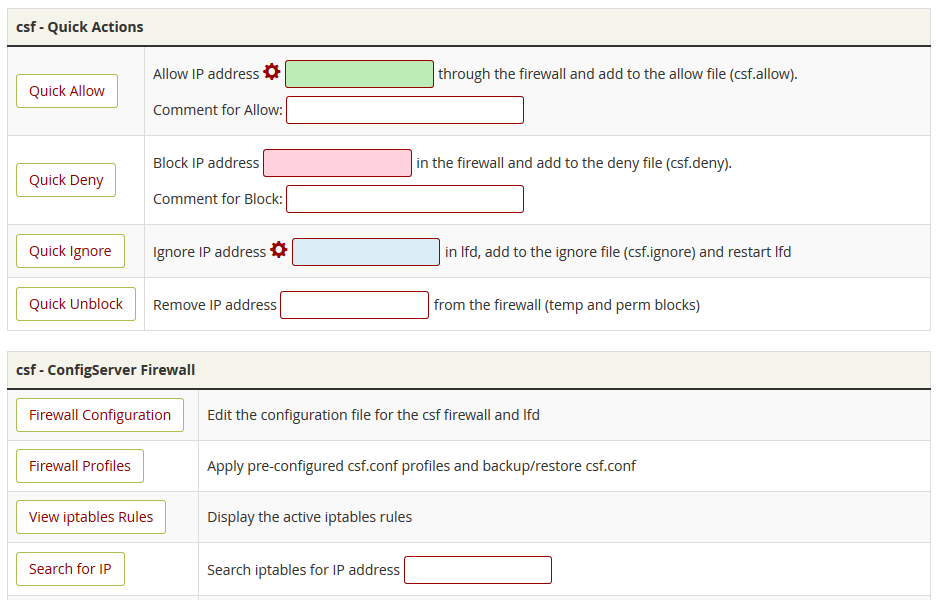
However, IP addresses can be blocked, unblocked, or whitelisted "on the fly" directly from the CSF tab. You can also search for an IP address and see if CSF has blocked it.

A little further down, you can find Firewall Enable and Firewall Disable options, which allow you to turn on and off CSF monitoring.
Using the Command Line
The configuration files for CSF live in /etc/csf can be edited manually using your tool of choice. The main ones to know are:
- csf.conf -- the main configuration file
- cff.allow -- a list of IPs that should always be allowed through the firewall
- csf.deny -- a list of IPs that should never be allowed through the firewall
- csf.ignore -- a list of IPs that lfd should ignore and not block if detected
csf -rUseful Commands
Many functions of CSF can be carried out from the command line, saving you the need to log in to WHM. Here are some of the most common ones.
- csf -e -- Enable CSF
- csf -x -- Disable CSF. This is especially useful as it can be run through the HAL command line and help us get onto the server if CSF has blocked support IPs.
- csf -s -- Start the firewall rules
- csf -f -- Flush/Stop firewall rules
- csf -r -- Restart or reload the firewall rules
- csf -a 12.34.56.78 [Optional comment] -- Allow IP 12.34.56.78 and add to /etc/csf/csf.allow
- csf -td 12.34.56.78 [Optional comment] -- Place IP 12.34.56.78 on the temporarily deny list
- csf -tr 12.34.56.78 -- Remove IP 12.34.56.78 from the temporary IP ban csf -tf -- Flush all IPs from the temporary IP entries
- csf -d 12.34.56.78 [Optional comment] -- Deny IP 12.34.56.78 and add to /etc/csf/csf.deny
- csf -dr 12.34.56.78 -- Unblock IP 12.34.56.78 and remove from /etc/csf/csf.deny
- csf -df -- Remove and unblock all entries in /etc/csf/csf.deny
- csf -g 12.34.56.78 -- Search the iptables rules for a match (e.g., IP, CIDR, Port Number)
- csf -t -- Displays the current list of temporary allow and deny IP entries with their TTL and comments
Uninstallation
If you want to remove csf from your server, this can be done by running the following commands as the "root" user:
            cd /etc/csf
            sh uninstall.sh
You can then re-enable cPHulk or install another firewall of your choice.
Common Questions
What is the difference between allow and ignore?
Allowing an IP means it should always be allowed through the firewall. Ignoring an IP means it won't get blocked if detected, such as if there are multiple failed login attempts. Both allow and ignore an IP, and you want to permit the safest bet.
Can IP ranges be blocked?
Yes. This can be done through the GUI or command line, but the range needs to be specified in CIDR format in both cases. For example, to block the range from 14.215.176.0 through 14.215.176.255, you must input it into the system as 14.215.176.0/24.
Summary
ConfigServer Security & Firewall, or CSF, is one type of firewall that works on VPS and Dedicated servers. It describes what exactly CSF is and how it can be installed. The article further outlines how to configure CSF and uses various features that it offers. Lastly, the article describes how to troubleshoot and uninstall CSF. Some key things to note include: CSF is not installed by default and can either be installed directly by the customer or by Bluehost support. Disabling the cPHulk after installation of CSF is also advisable.
If you need further assistance, feel free to contact us via Chat or Phone:
- Chat Support - While on our website, you should see a CHAT bubble in the bottom right-hand corner of the page. Click anywhere on the bubble to begin a chat session.
- Phone Support -
- US: 888-401-4678
- International: +1 801-765-9400
You may also refer to our Knowledge Base articles to help answer common questions and guide you through various setup, configuration, and troubleshooting steps.