How to Manage Calendars in Cloud Mail
To keep track of meetings and appointments, we utilize our calendars. They are also used by us to keep track of team activities, events, and timetables. By saving private and professional appointments separately on your calendar, you can organize your appointments. You will discover how to add calendars, subscribe to shared and public calendars, add external calendars, and import calendars from files in this post.
On the left menu of the calendar application, you may access both new and current calendars. To access your calendars, if you don't see a list of them, click the icon labeled "Open Folder view" in the lower left corner of your calendar application.
For more information, please select from the options below:
Adding Calendars
To create a calendar, follow these steps:
- Once logged in to Cloud Mail, click the Calendar icon on the top left portion of your mail.
- When the Folder view is active, you may access your list of calendars from the left menu. If not, open the Folder view by clicking the icon labeled Open Folder view in the lower left corner of your calendar application.
- After that, select Add New Calendar by clicking the plus sign next to My Calendars.
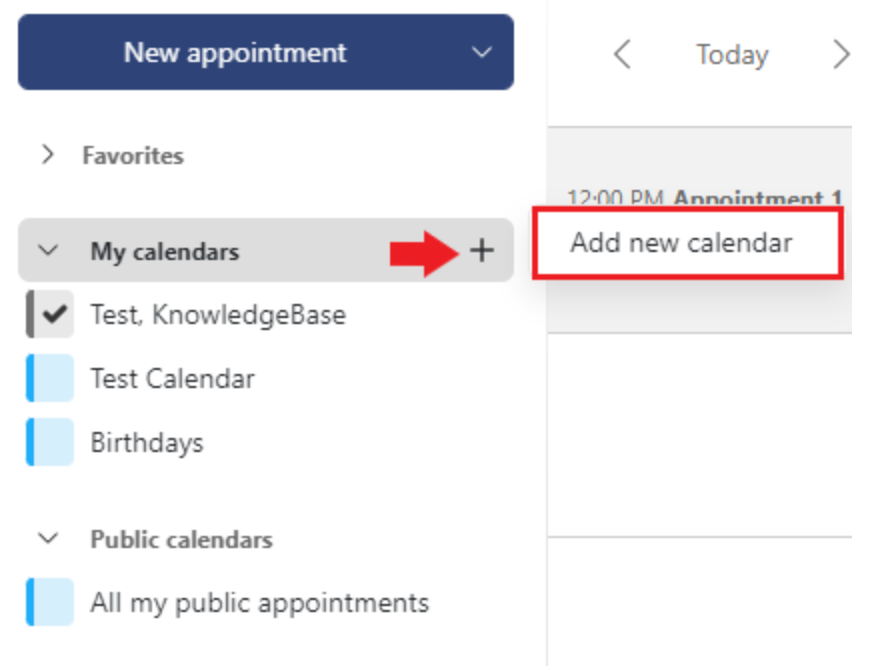
- For your new calendar, type a name. Enable the Add as Public Calendar checkbox if you want the new calendar to be visible to the public.
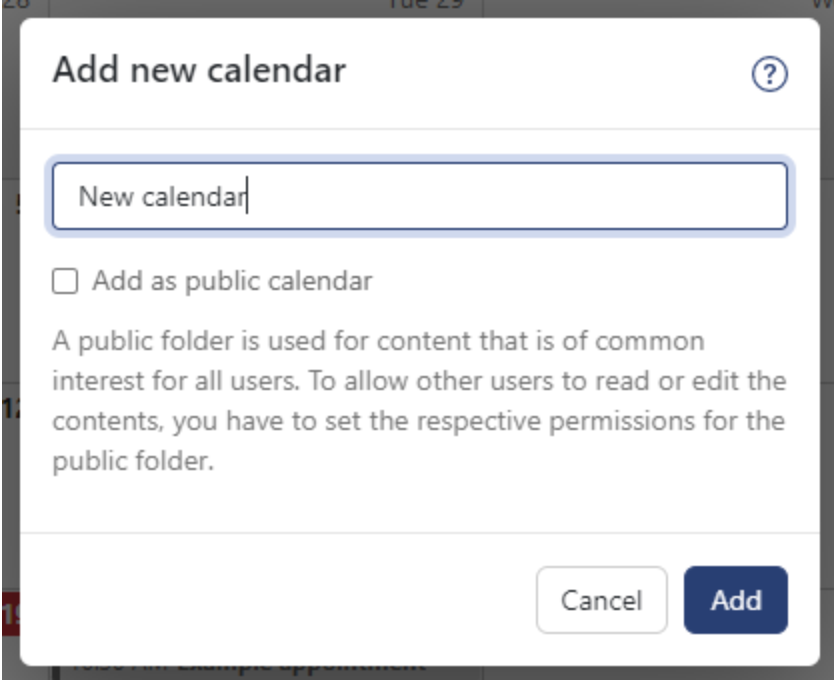
- Click Add.
You have added a new calendar. Your calendar will automatically show in the Folder view under My Calendars.
Importing Calendars from Files
Calendars generated by programs that support iCalendar can be imported. You can share calendars with other users using the iCalendar (iCal) file type. The .ics extension is used for iCal files. It is supported by a number of products, including Apple Calendar, Google Calendar, Microsoft Outlook, and more.
To import calendars from a file, follow these steps:
- Once logged in to Cloud Mail, click the Calendar icon on the top left portion of your mail.
- When the Folder view is open, your list of calendars will be visible on the left menu. If not, access the Folder view by clicking the icon labeled Open folder view in the lower left corner of your calendar application.
- Import File can be chosen by clicking the drop-down arrow next to the New Appointment button.
- Alternatively, you can choose Import File by clicking on the Settings icon.
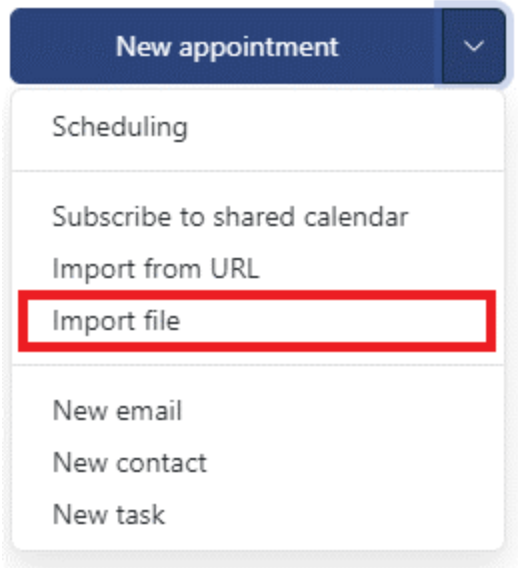
- Alternatively, you can choose Import File by clicking on the Settings icon.
- Select the Upload File button. Next, pick a file.
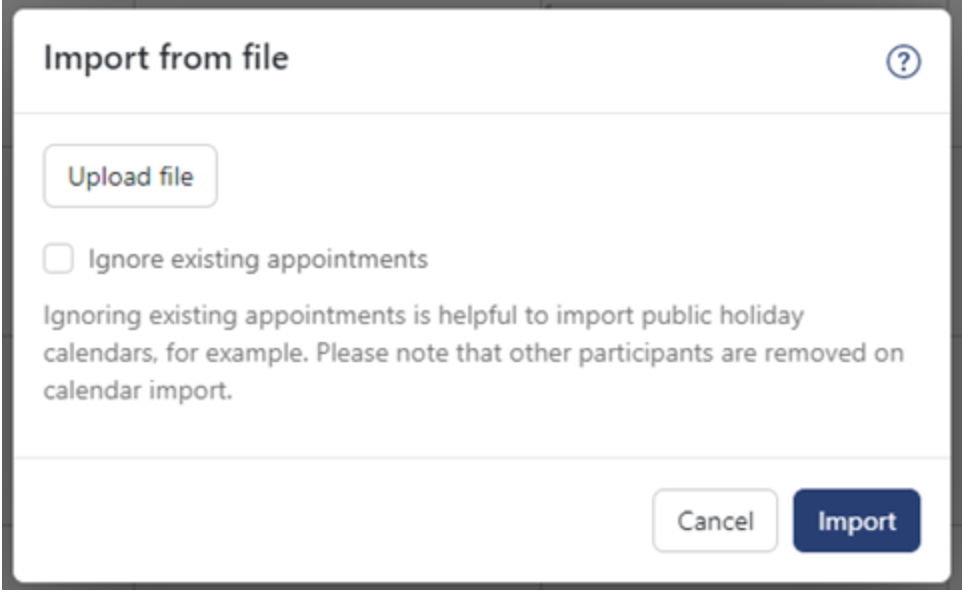
- Enter a name for the new calendar.
- Click Import.
The imported calendar will automatically be added to the Folder view under My Calendars.
Adding Yourself to Shared and Public Calendars
You can use calendars that are public or shared by other users as follows:
- If you have subscribed to a public or shared calendar, it will show in your Folder view under Shared or Public calendars.
- If you have subscribed to a public or shared calendar, you can set whether the calendar will be synchronized with other clients (e.g., with your smartphone).
- If you no longer need to subscribe to a public or shared calendar, you can cancel it.
To set the calendar you want to subscribe to, follow these steps:
- Once logged in to Cloud Mail, click the calendar icon on the top left portion of your mail.
- You will see your list of calendars on the left menu when the Folder view is open. If not, click the Open Folder view icon in the lower left corner of your calendar app to open the Folder view.
- Click the drop-down arrow beside the New Appointment button, then select Subscribe to shared calendar.
- Alternatively, you can click on the Settings icon and select Subscribe to Shared Calendar.
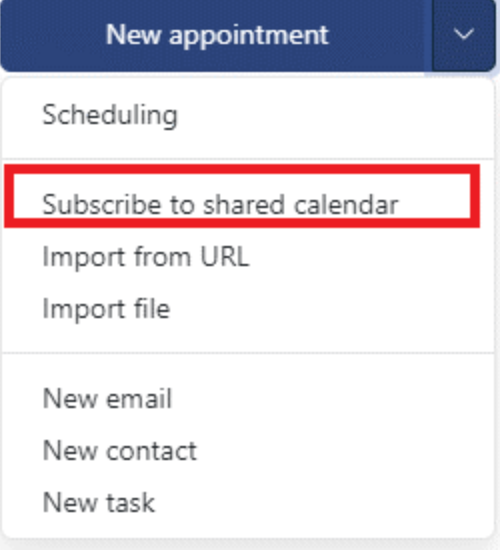
- Alternatively, you can click on the Settings icon and select Subscribe to Shared Calendar.
- If you want a calendar displayed in the Folder view, enable the Subscribe to Calendar toggle. To define that a displayed calendar is synchronized, enable the Synchronize via DAV checkbox. Disable the Subscribe to Calendar toggle if you no longer want a calendar displayed and synchronized. Subscribe to the toggle.
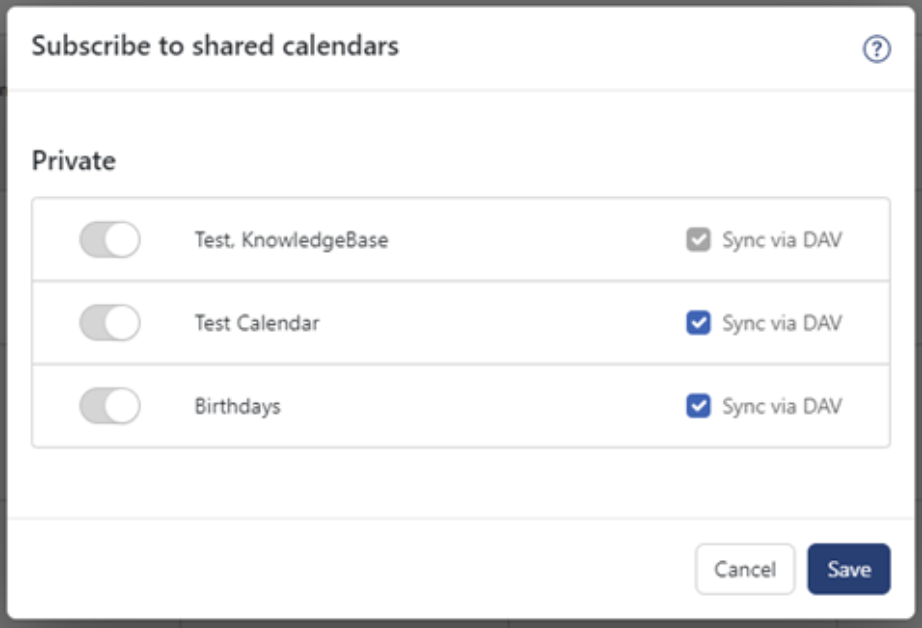
You have set the shared or public calendar you have subscribed to.
Summary
Using Cloud Mail’s calendar application, you can organize and segment your appointments by creating, importing, and subscribing to various calendars. This helps you efficiently manage both personal and professional schedules and stay up-to-date with team and public events.
If you need further assistance, feel free to contact us via Chat or Phone:
- Chat Support - While on our website, you should see a CHAT bubble in the bottom right-hand corner of the page. Click anywhere on the bubble to begin a chat session.
- Phone Support -
- US: 888-401-4678
- International: +1 801-765-9400
You may also refer to our Knowledge Base articles to help answer common questions and guide you through various setup, configuration, and troubleshooting steps.