How to Manage Distribution Lists in Cloud Mail
Simplify group communication: Distribution lists let you send emails to a defined group of recipients, eliminating the need to type individual names.
Create a New Distribution List
Add contacts to a new distribution list for quick and targeted emails.
- Sign in to Cloud Mail and click the Address Book icon.

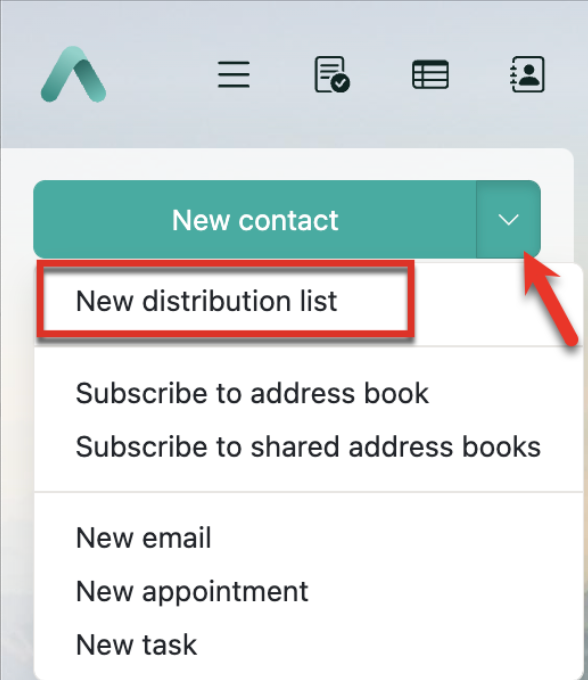
- Next, click on the drop-down arrow beside New Contact, then choose New distribution list from the options.
- Enter a name for your distribution list.
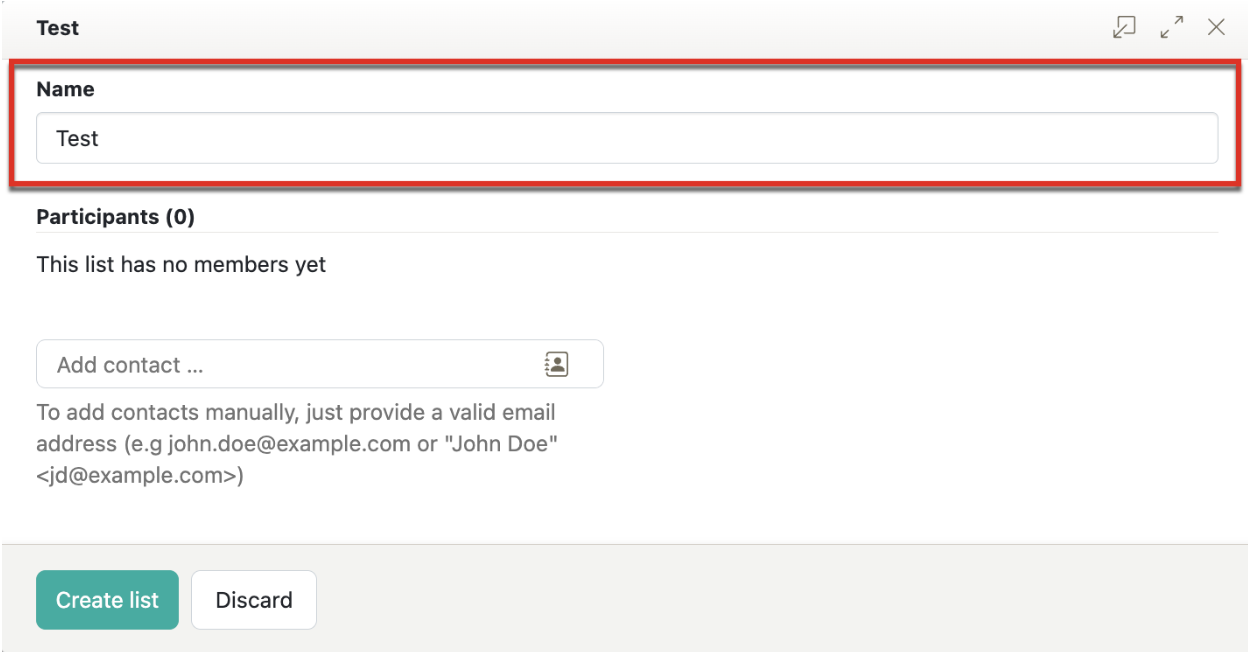
- Next, add contacts to your distribution list by entering a contact in the Add Contact Field or clicking the Select Contacts icon.
- Once you have added a name and contacts for your distribution lists, click the Create list button at the bottom.
- Once done, a Distribution list has been saved, and a pop-up will appear.

Create a Distribution List from a List of Participants
- Sign in to Cloud Mail and click the 3 horizontal lines.

- Click the Calendar icon.

- Depending on the selected view, you can do the following:
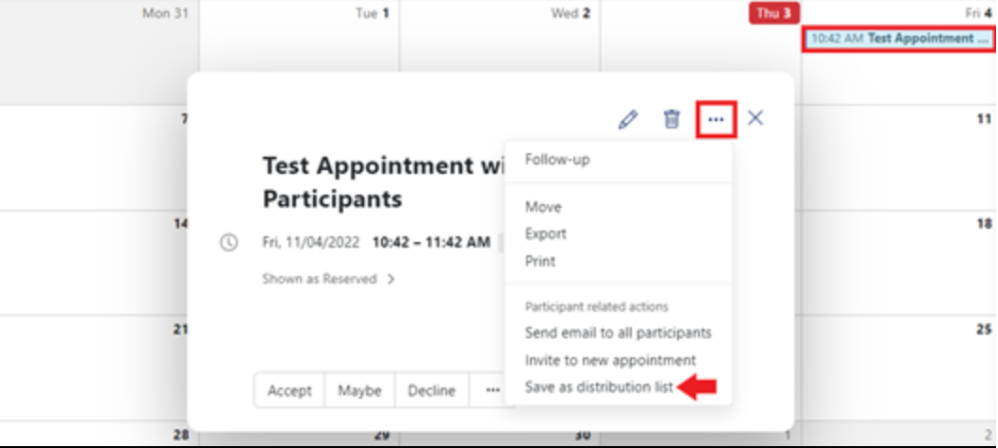
- In the Calendar view (Day, Workweek, Week, Month, or Year), select an appointment with multiple participants. A pop-up opens. Click the More Actions icon, then select Save as distribution list. For example:
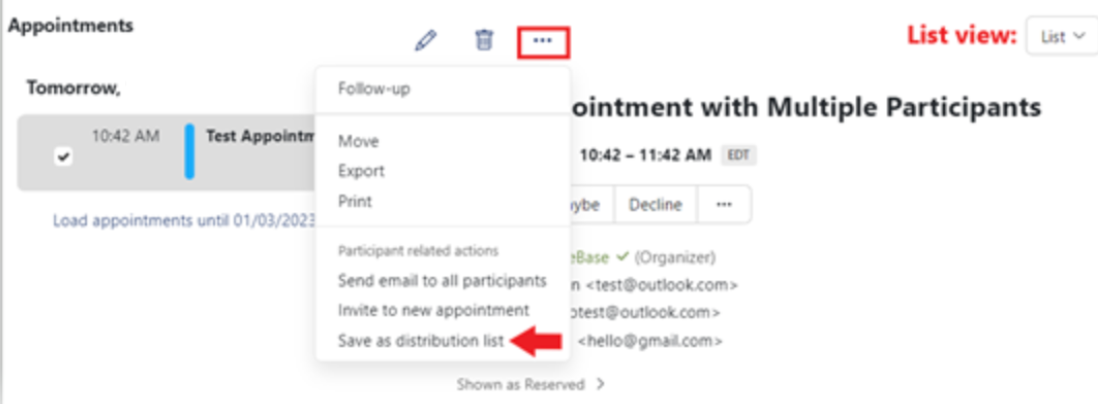
- In the List view, select an appointment with multiple participants. Once you view the appointment details, click the More Actions menu and choose Save as distribution list to easily add these attendees to a new group. For example:
- The pop-up that appears will automatically add the recipients to the distribution list. Click the Create List button after making the necessary changes to your distribution list.
- Once done, a Distribution list has been saved, and a pop-up will appear.

Save Email Recipients as a Distribution List
- Choose an email from your Sent items and click the More Actions icon.
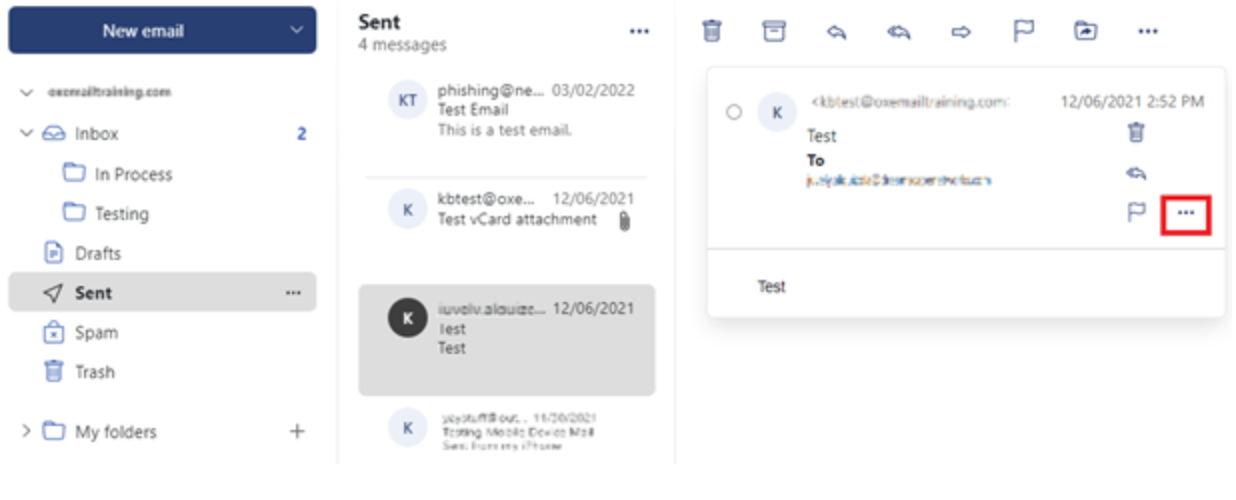
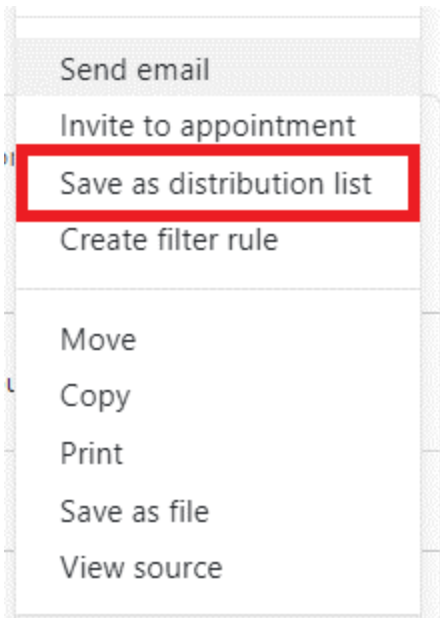
- Choose Save as distribution list from the options.
- The pop-up that appears will automatically add the recipients to the distribution list. Click the Create List button after making the necessary changes to your distribution list.
- Once done, a Distribution list has been saved, and a pop-up will appear.
Edit Contacts or Distribution Lists
Note: To edit objects in the address book containing the contact, you must have the appropriate permissions. Select Share/Permissions from the Actions icon next to a specific address book to view and modify permissions.
Follow these steps to edit a contact or a distribution list:
- Sign in to Cloud Mail and click the Address Book icon.

- Choose a contact or a distribution list from an address book.
- Then, click the pencil icon.
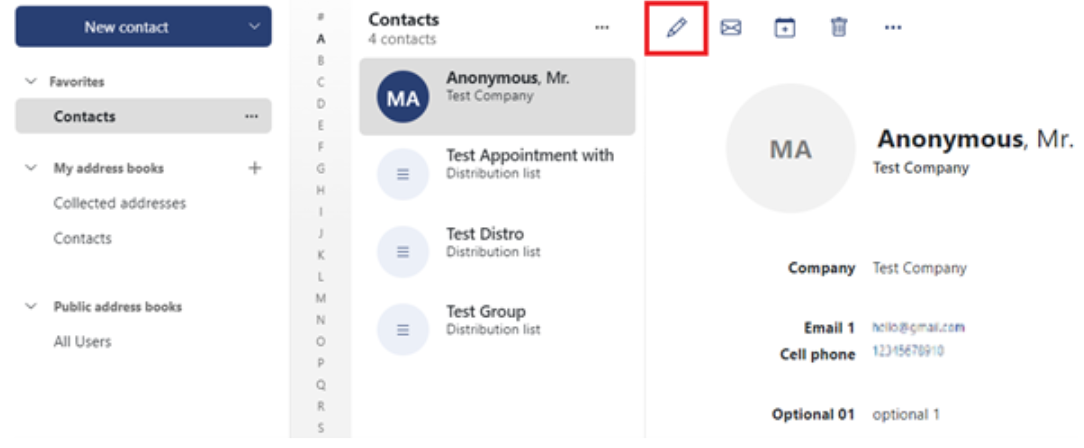
- Modify the data, then click Save.
Summary
Creating and managing distribution lists in Cloud Mail streamlines group communication. Users can easily create lists from contacts, calendar participants, or email recipients. The process also includes editing existing contacts and distribution lists through the Address Book, making it more efficient to communicate with defined groups.
If you need further assistance, feel free to contact us via Chat or Phone:
- Chat Support - While on our website, you should see a CHAT bubble in the bottom right-hand corner of the page. Click anywhere on the bubble to begin a chat session.
- Phone Support -
- US: 888-401-4678
- International: +1 801-765-9400
You may also refer to our Knowledge Base articles to help answer common questions and guide you through various setup, configuration, and troubleshooting steps.