How to Install WordPress Using the Bluehost Portal
Starting your website journey with WordPress is an exciting opportunity, and there’s good news—Bluehost provides WordPress hosting to help you set up your website. Whether you're a complete newbie eager to launch your first blog or an experienced web developer setting up a new project, this article will walk you through each step on how to install WordPress through your Bluehost Bluehost Portal.
We also created a video to guide you with the installation process.
How to Install WordPress via the Bluehost Portal
Follow the steps below to install WordPress.
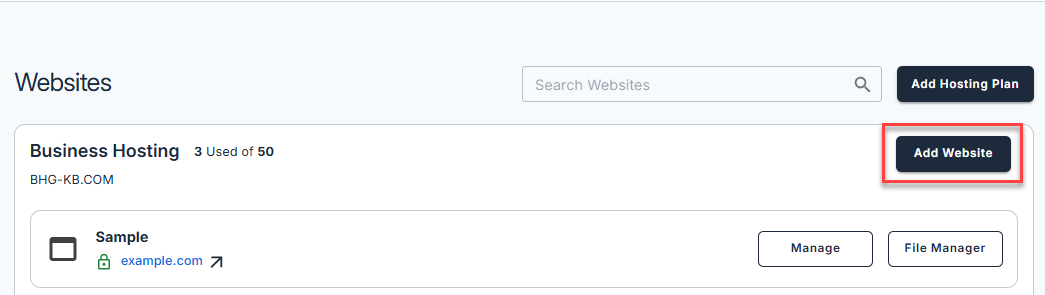
Step 1: Install WordPress via the Websites tab
- Log in to your Bluehost Portal.
- Click Websites on the left-side menu.
- On the Websites page, click the Add Website button on the right.
- Select WordPress.
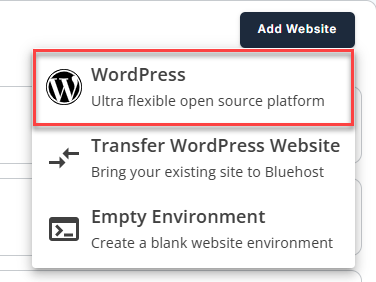
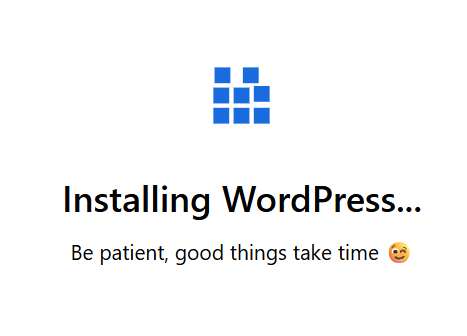
- The installation of your WordPress site will begin.
Step 2: Configure your WordPress Installation
- Once WordPress has finished installing, you will be presented with two options:
- AI Site Creator - Use this if you want to create a brand-new WordPress website.
- Import an Existing WordPress Site - Choose this if you already have a WordPress site and want to move or clone it into a new installation.
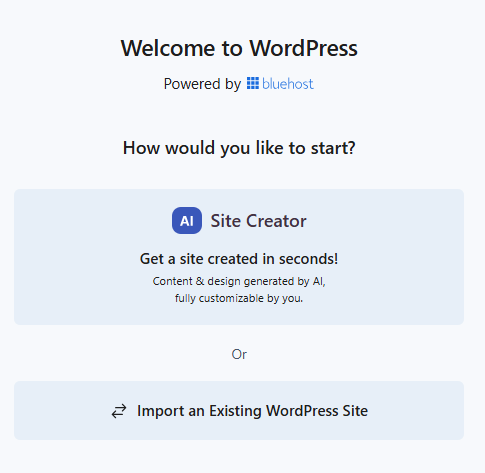
- Select AI Site Creator.
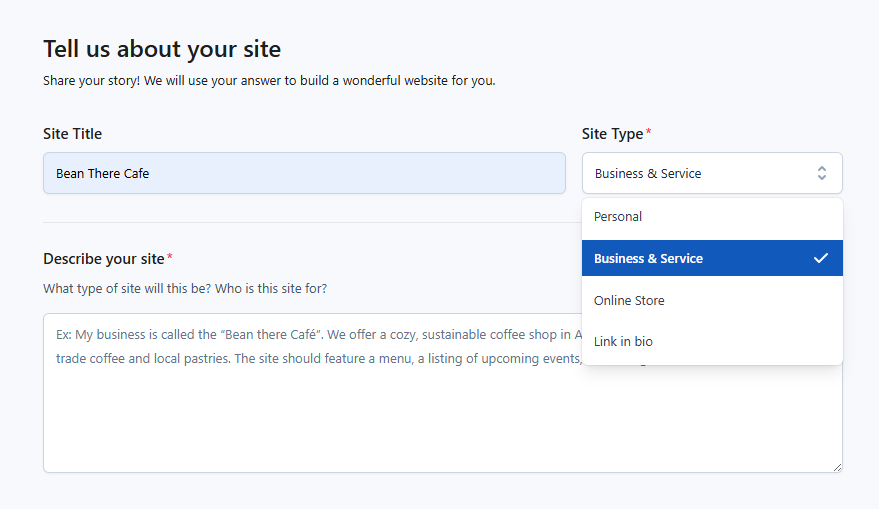
- Enter a title, a description, and choose a site type for your website, then click Next.
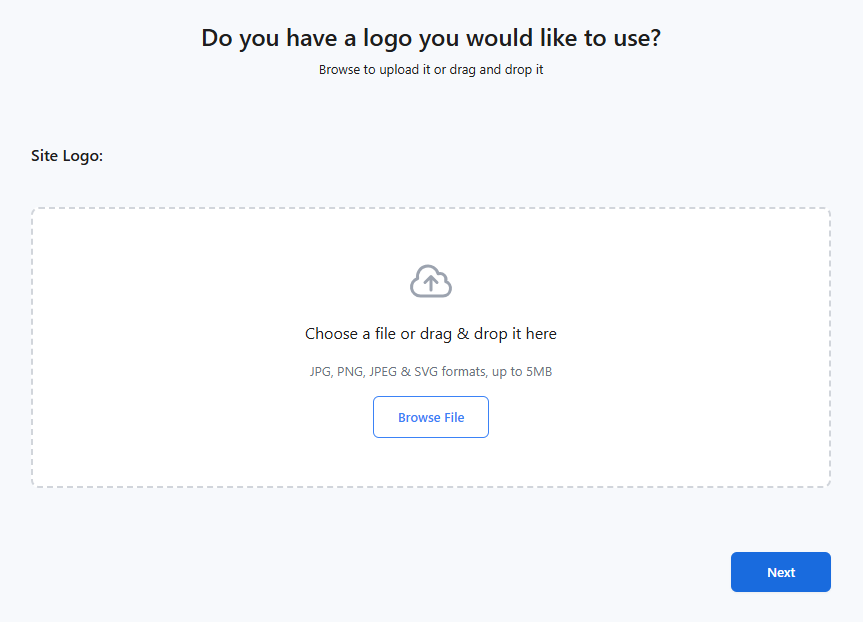
- You can also add a logo to your WordPress website. If you have one available, click the Browse button, locate, and select your logo. If you don’t have a logo yet, you can create one by clicking Create with AI to help you design your own logo, then click Next.
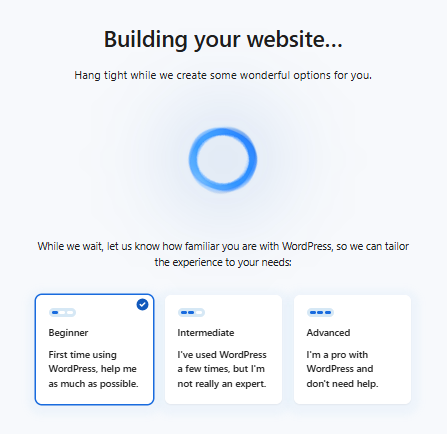
- The AI tool will begin building your website. You will be asked about your familiarity with WordPress so that the tool can customize the installation based on your needs. Select from Beginner, Intermediate, or Advanced.
- You will be presented with different website designs.
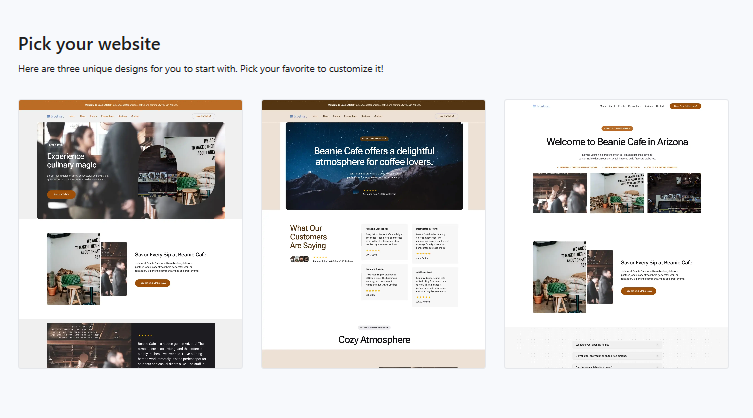
- You can hover your mouse over each layout.
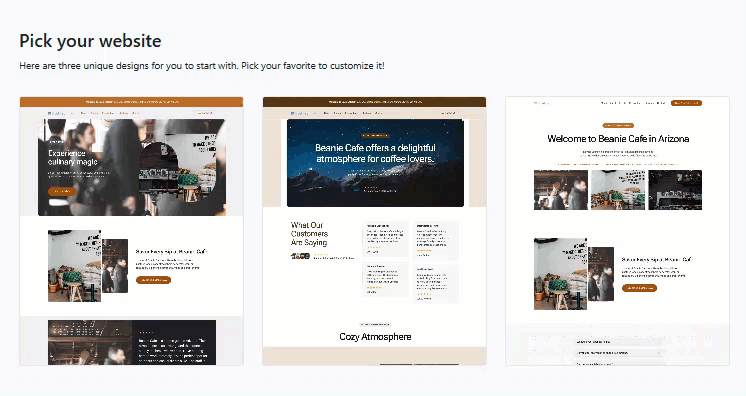
- Click the Preview button over your preferred layout to customize.
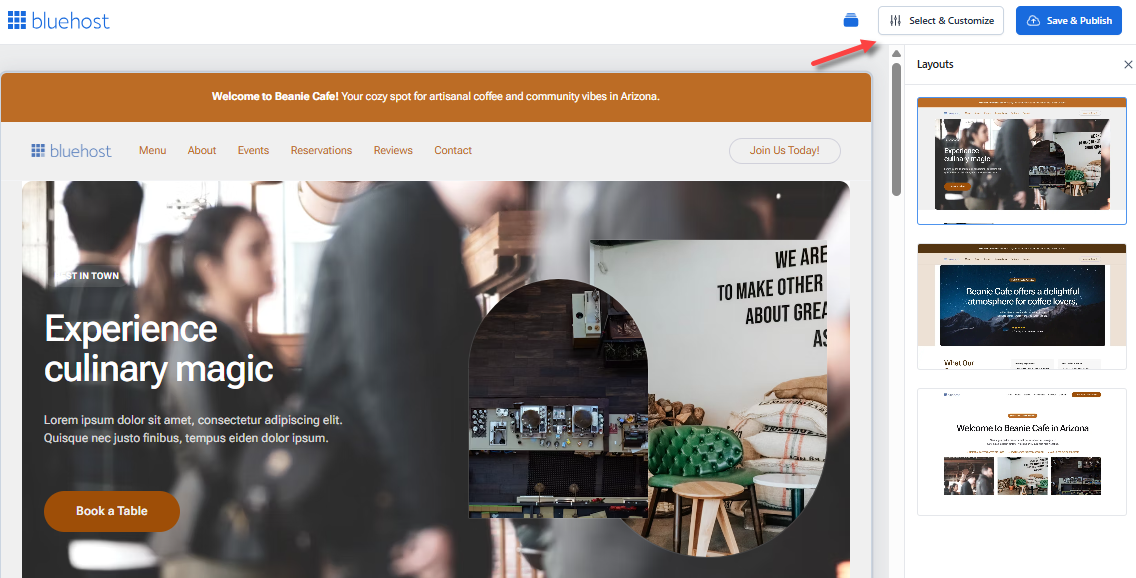
- In the Preview mode, you can view the layout further. The right pane will show the other designs created by the AI tool.
- If you're happy with your selected layout, click the Save & Publish button in the top-right corner.

If you want to make additional adjustments, click on Select & Customize.
- Once you have chosen a template, you will automatically be redirected to your WordPress admin dashboard.
Summary
Learn how to install WordPress and launch your website using the Bluehost AI Site Creator tool. This article provides a step-by-step guide to installing WordPress through your Bluehost Portal. With Bluehost’s user-friendly AI Site Creator, setting up WordPress is quick and straightforward. A helpful video tutorial is also included in this article to guide you through the entire process.
If you need further assistance, Bluehost Chat Support is available 24 hours a day, 7days a week while Bluehost Phone Support is available 7 days a week from 7 am-12 midnight EST.
- Chat Support - While on our website, you should see a CHAT bubble in the bottom right-hand corner of the page. Click anywhere on the bubble to begin a chat session.
- Phone Support -
- US: 888-401-4678
- International: +1 801-765-9400
You may also refer to our Knowledge Base articles to help answer common questions and guide you through various setup, configuration, and troubleshooting steps.