Jetpack Account Setup: Account Creation, Purchase, and More
You may have encountered the Jetpack WordPress plugin before, as it is one of the premier plugins created by Automatic, the team that designed WordPress.com. Jetpack gives WordPress sites a powerful boost with features that streamline the management and performance of your site. As a plugin, Jetpack brings some of the essential features of WordPress.com to your self-hosted WordPress sites - a single solution for some of the most needed functions of any website. No matter where you host your WordPress site, you can use Jetpack - all you need is a free WordPress.com account to connect to, and this Jetpack account setup guide to get started.
Create a WordPress.com Account
- Visit the WordPress.com sign-up page.
- Fill out the form with your email, desired username, and password. Alternatively, sign up using Google, Apple, or GitHub.
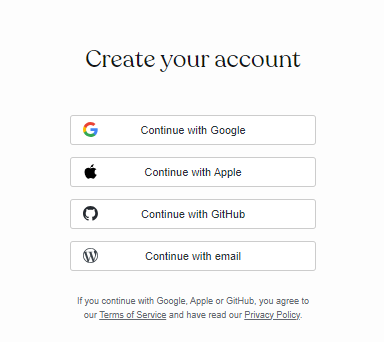
If you choose to use Google, Apple, or GitHub, you agree to the Terms of Service and have read the Privacy Policy.
Purchase Jetpack Backup
Jetpack Backup is designed to provide backup and restore capabilities for WordPress websites. There are 2 ways to add Jetpack to your WordPress site. Here's how to add Jetpack Backup:
Via Websites tab
- Log in to your Bluehost Portal.
- In the left-hand menu, click Websites.
- Click the Manage Site button located next to the website you want to manage.

- In the Backups section, click the Install Jetpack button.
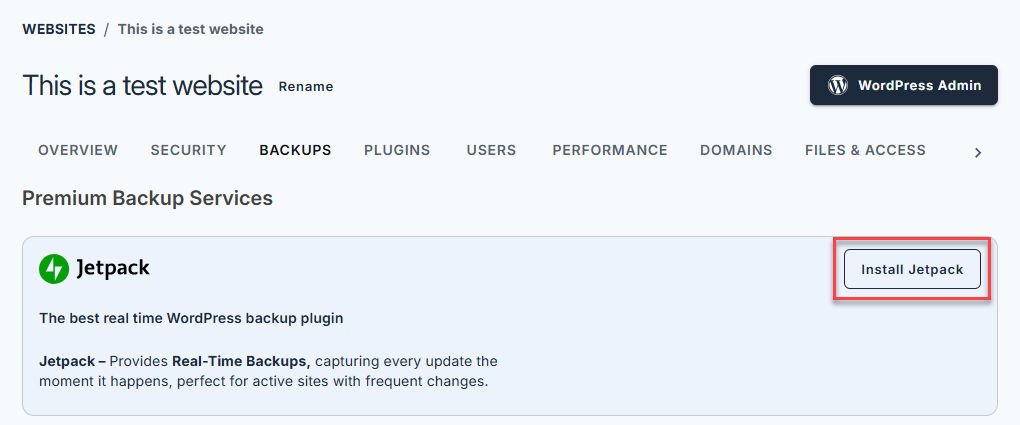
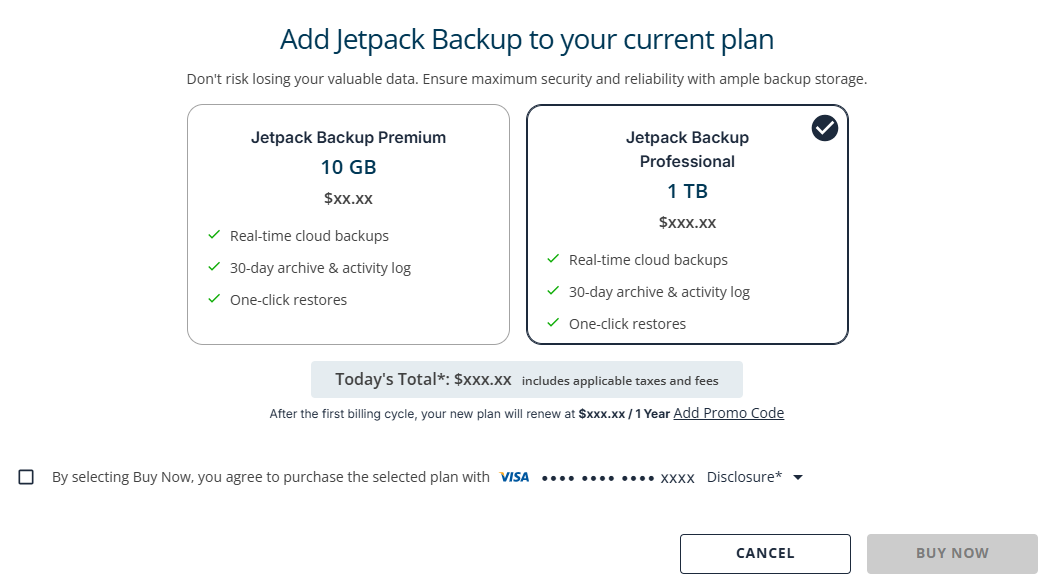
- Select a plan to continue.
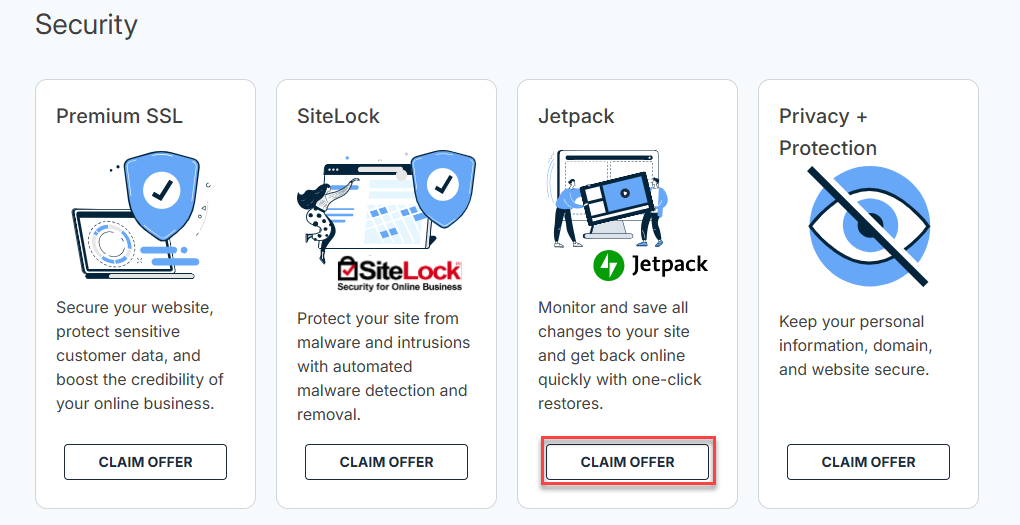
Via Marketplace
- Log in to your Bluehost Portal.
- Click Marketplace on the left-side menu.
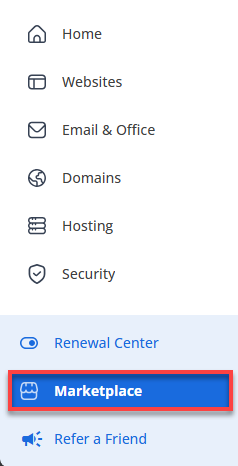
- Scroll down to the Security section, look for Jetpack, and click CLAIM OFFER.
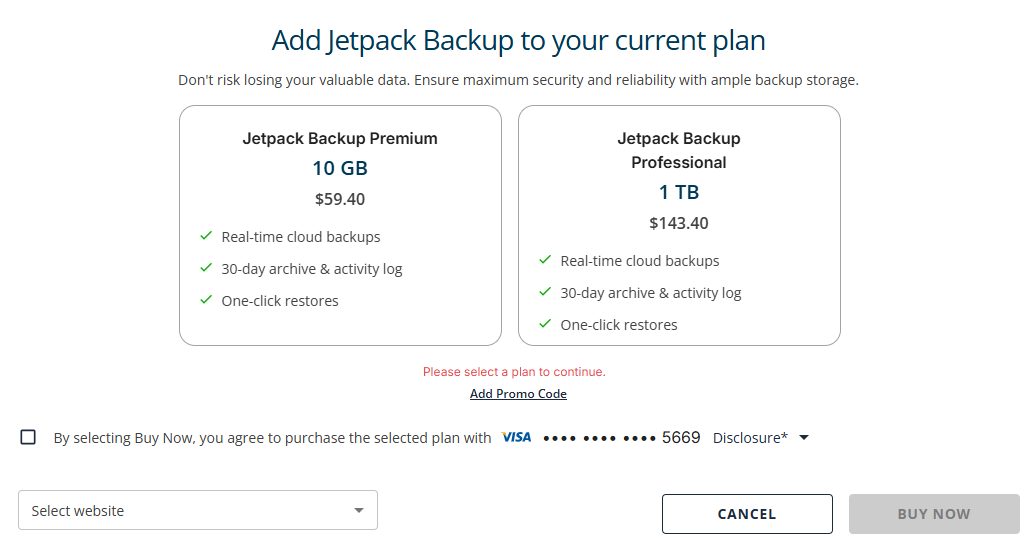
- Select the plan, check the box, select the website where you want to add the Jetpack, and click BUY NOW.
Jetpack Account Setup
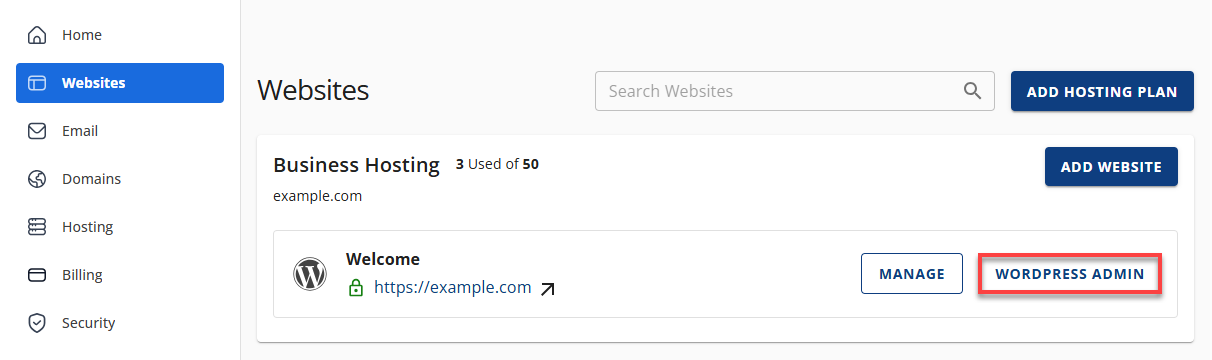
- Log in to your Bluehost Portal.
- In the left-hand menu, click Websites.
- Click the WordPress Admin button located next to the website you want to manage.
- Under Dashboard or Plugins, you can see a Jetpack Banner with the Setup Jetpack button.

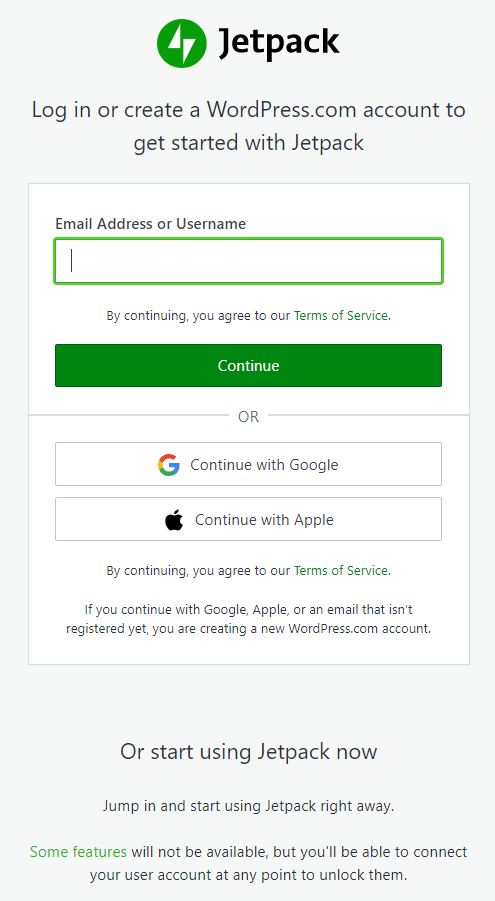
- Click the Set up Jetpack button and log in using your WordPress.com account credentials.
or
- Log in to your Bluehost Portal.
- In the left-hand menu, click Websites.
- Click the WordPress Admin button located next to the website you want to manage.
- Click Jetpack on the left-hand side menu.
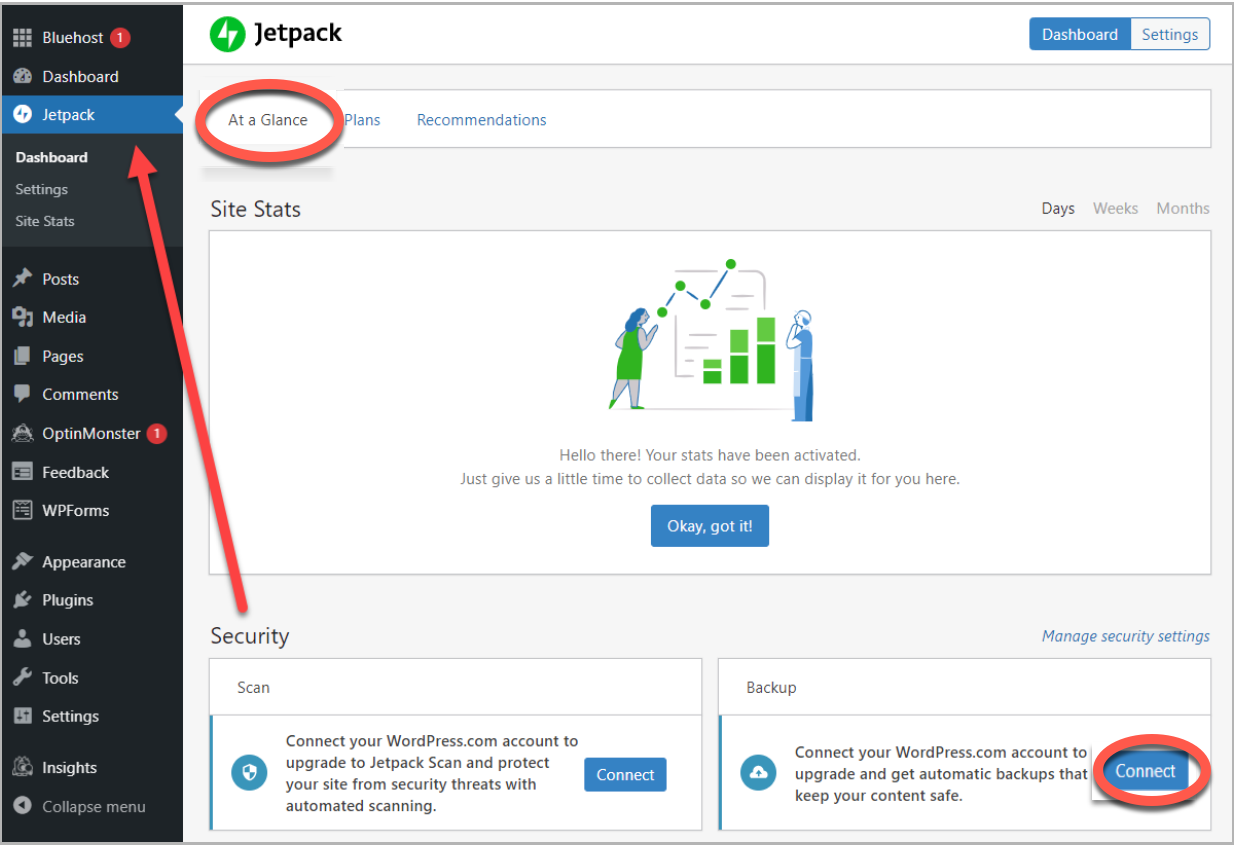
- Under the At a Glance tab, scroll down to Security.
- Under Backup, click the Connect button.
- Log in using your WordPress.com account credentials.
Summary
The Jetpack account setup process is straightforward and essential for maximizing the potential of your WordPress site. Following this Jetpack account setup guide, you can easily create a WordPress.com account, purchase Jetpack Backup for enhanced security, and easily add new sites to your existing account. With the Jetpack WordPress plugin installed, you’ll unlock powerful features that streamline management and improve performance.
If you need further assistance, Bluehost Chat Support is available 24 hours a day, 7days a week while Bluehost Phone Support is available 7 days a week from 7 am-12 midnight EST.
- Chat Support - While on our website, you should see a CHAT bubble in the bottom right-hand corner of the page. Click anywhere on the bubble to begin a chat session.
- Phone Support -
- US: 888-401-4678
- International: +1 801-765-9400
You may also refer to our Knowledge Base articles to help answer common questions and guide you through various setup, configuration, and troubleshooting steps.