How to Change MailMan List Name
Navigating your email client to manage your contacts effectively is crucial for maintaining organized communication. Whether for personal use or managing a bustling business's outreach, knowing how to adapt your email lists to changing needs without causing disruption is key.
Have you ever wondered, "Can I change a mail list name without deleting it?" or "How to change a Mailman list name?" These questions arise when the purpose of your email list evolves.
Changing the name of a Mailman list is more complex than it might seem since Mailman doesn't provide a built-in command or feature specifically for renaming a list. However, you can effectively change a list's name by creating a new list with the desired name and then transferring the settings and subscribers from the old list to the new one.
What is MailMan?
Mailman is a software application integrated into cPanel for managing electronic mailing lists. Mailman allows you to create, manage, and control mailing lists on your website with an easy-to-use web interface. It's a powerful tool for group communication, allowing subscribers to send emails to a single email address that then distributes the message to all list members.
With Mailman through cPanel, website administrators can:
- Set up multiple mailing lists.
- Configure settings for each list, such as who can subscribe and whether posts need to be approved.
- Customize welcome messages and other notifications.
- Manage subscriptions and unsubscriptions.
- Moderate posts to prevent spam or off-topic discussions.
Change MailMan List Name
In this guide, we'll walk you through changing the name of a MailMan list. The steps provided use a mostly command-line interface; remember, the specific commands and steps vary slightly depending on your Mailman version, so it's a good idea to consult the Mailman documentation for specific instructions tailored to your setup.
Create a New List
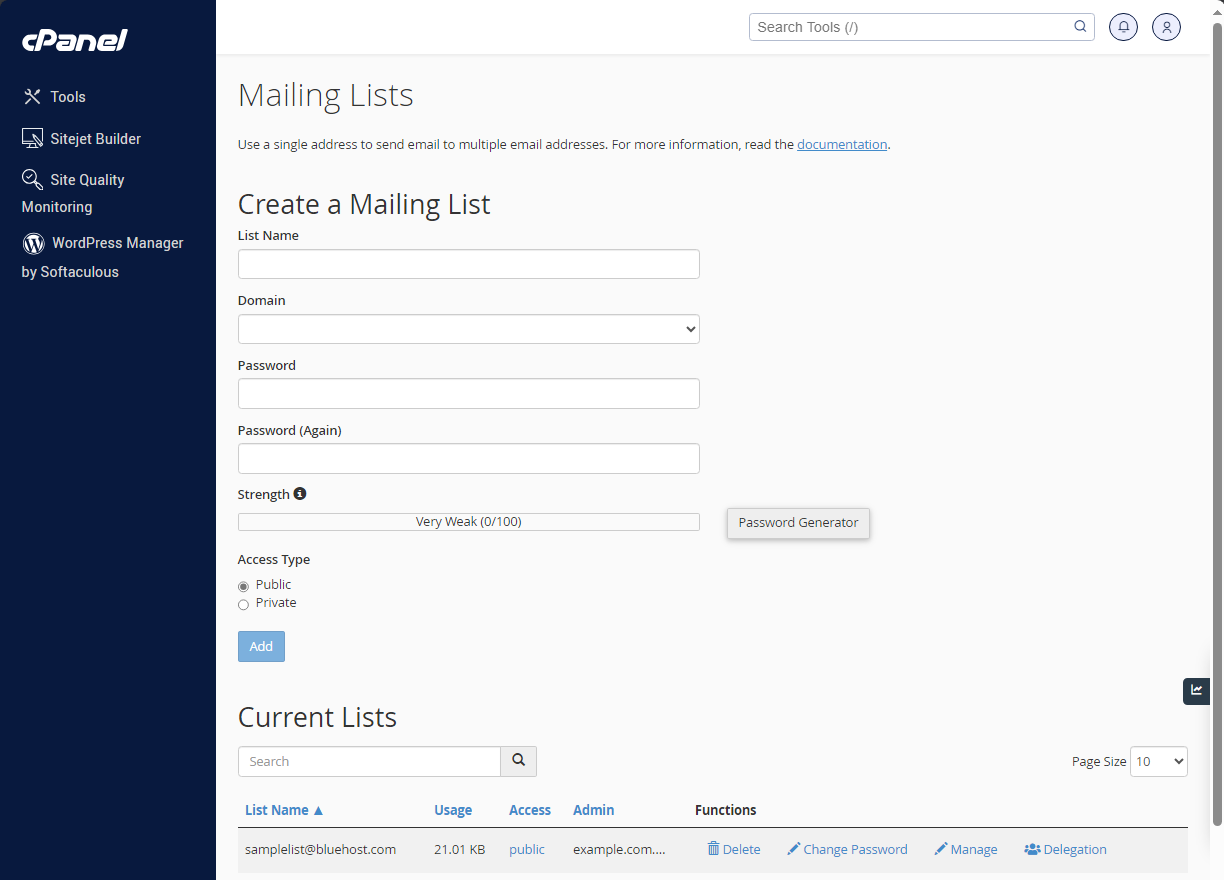
Create a new Mailman list with the desired name using the `newlist` command or your web hosting control panel, depending on how you usually manage lists. For example, if you're using a command-line interface, you could use: `newlist newlistname`.
To access the Mailing List, follow the steps below:
- Log in to your Bluehost Portal.
- Click Hosting in the left-hand menu.
- In the hosting details page, click the cPanel button.

- Your cPanel will open in a new tab.

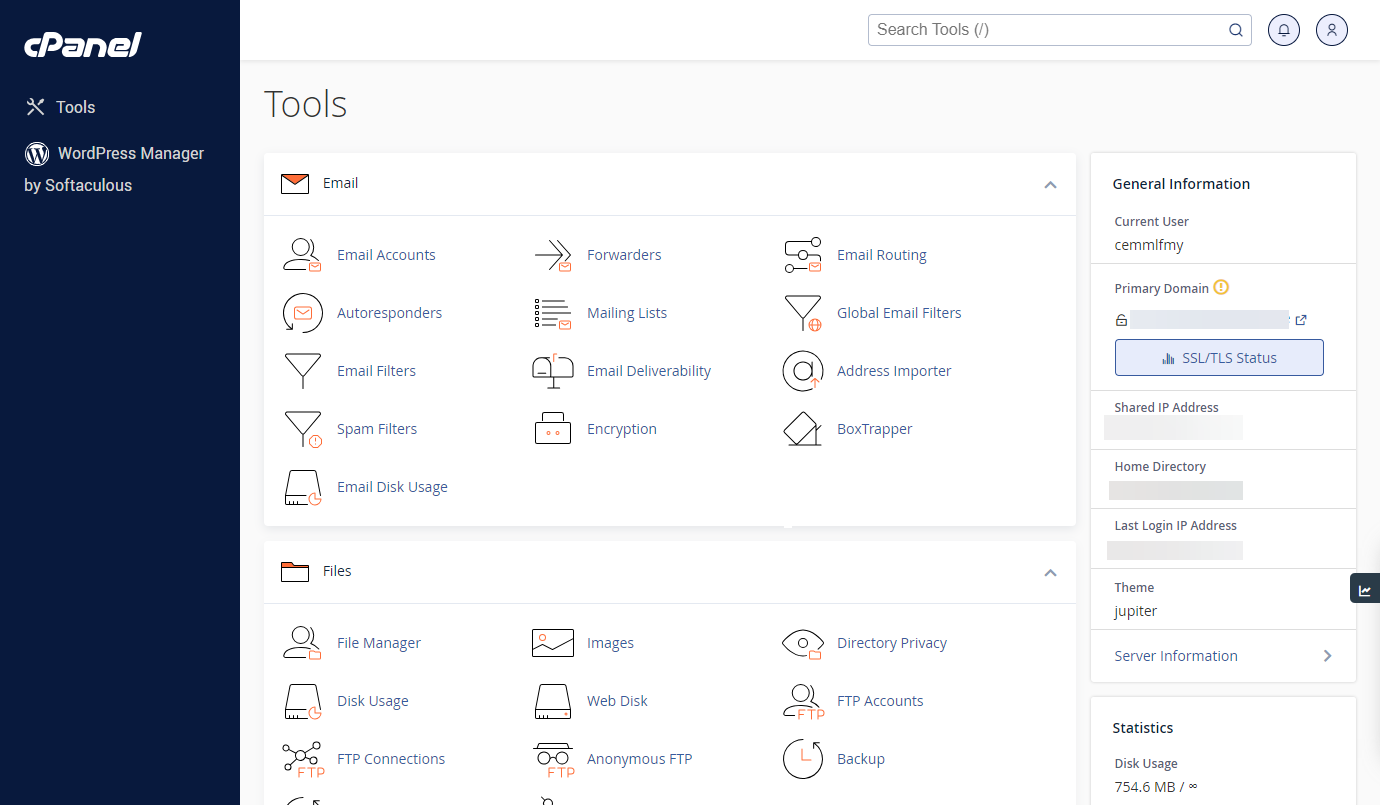
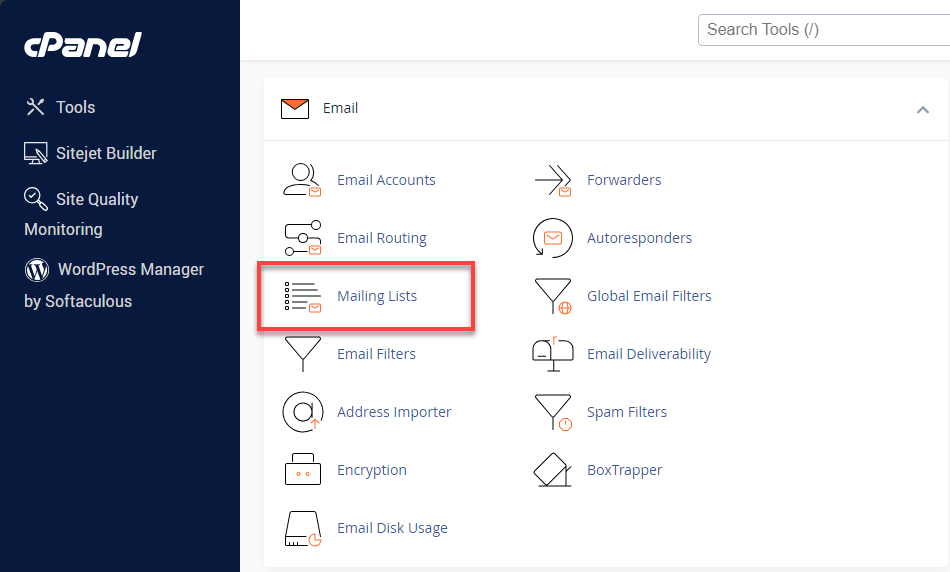
- Once successfully logged in, navigate to the Email section and look for the Mailing Lists option.

- From there, you can create new lists, manage existing ones, and adjust settings according to your needs.

Note the administrative password for the new list, as you'll need it to manage the list later.
Export Subscribers from the Old List
You will need to export the list of subscribers from your old list. This can be done from the Mailman web interface or a command-line tool. For example, to export subscribers from the command line, you could use: `list_members oldlistname > oldlistmembers.txt`
This command will export the email addresses of all the members of `oldlistname` into a file named `oldlistmembers.txt`.
Import Subscribers to the New List
You can add your subscribers to the new list once they are exported. If you're comfortable with the command line, you can use the `add_members` command like so: `add_members -r oldlistmembers.txt newlistname`
This command reads the email addresses from `oldlistmembers.txt` and adds them to `newlistname`.
Transfer Configuration
Transferring the exact configuration from the old list to the new one can be tricky, as there's no direct way to export and import all settings. You should manually replicate the configuration settings from the old list to the new one through the web interface or by manually editing the configuration files, depending on your level of access and expertise.
Inform Subscribers
Remember to inform your subscribers about the change. You can send an email from the old list informing them of the new list name and any other pertinent information, such as whether they need to update their address books or filter settings.
Disable or Delete the Old List
Once you've confirmed that the new list is working correctly and all subscribers have been moved over, you can disable or delete the old list. This can be done through the Mailman web interface, command line, or cPanel. Make sure that you delete the old list, as this action cannot be undone.
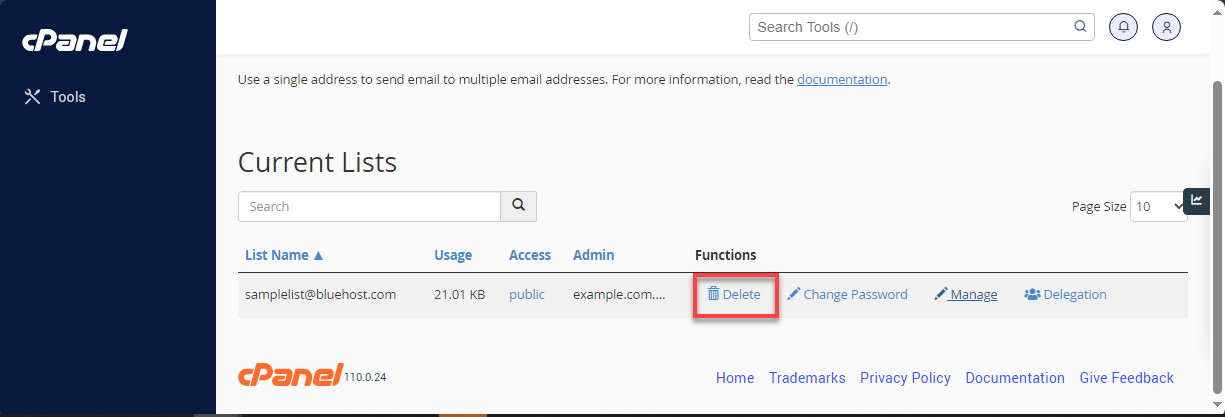
To delete a mailing list, follow the steps below:
- Go to the Current Lists section in the interface.
- Scroll down or use the Search box to find the mailing list you want to delete.
- In the Functions column, click the Delete button next to the mailing list name. This will open a new interface.

- Click on the Delete Mailing List button to confirm.

Summary
Mailman, a software application integrated into cPanel, enables creating, managing, and controlling mailing lists with an easy-to-use web interface. It's designed for group communication, allowing emails to be sent to a single address and distributed to all list members.
While Mailman does not provide a straightforward method for how to change a MailMan list name, with careful planning and execution, you can effectively change a list's name without disrupting its function.
Create a new list with the desired name and transfer the settings and subscribers from the old list to the new one. Detailed steps include:
- Creating a new list through the command line or cPanel.
- Exporting subscribers from the old list.
- Importing them into the new list.
- Manually replicating configuration settings.
- Informing subscribers of the change.
Finally, it advises disabling or deleting the old list once the transition is complete.
If you need further assistance, feel free to contact us via Chat or Phone:
- Chat Support - While on our website, you should see a CHAT bubble in the bottom right-hand corner of the page. Click anywhere on the bubble to begin a chat session.
- Phone Support -
- US: 888-401-4678
- International: +1 801-765-9400
You may also refer to our Knowledge Base articles to help answer common questions and guide you through various setup, configuration, and troubleshooting steps.