How to Set up Microsoft 365 for Desktops
Staying on top of your emails is crucial in today’s connected world. For both professionals and students, reliable access to email ensures better organization and productivity. As a premier email management service, Microsoft Outlook delivers both browser-based and desktop options to ensure constant access. In this article, we'll guide you through accessing your Outlook email online and setting up your Outlook email for desktop use. Whether you're new to Outlook or looking to streamline your email management, this guide is designed to help you every step of the way. This article will help you set up Microsoft 365 for desktops and browsers.
How to Set up Microsoft 365 Online (Browsers)
- To set up an email on your desktop, log in to the Microsoft portal using the Microsoft 365 username and password you created during the account setup.
- Once signed in, click the Outlook icon to use Outlook from your browser. To set up Outlook for your desktop, see Desktop Setup below.
How to Set up Microsoft 365 on Desktops
- Sign in to the Microsoft Login Portal.
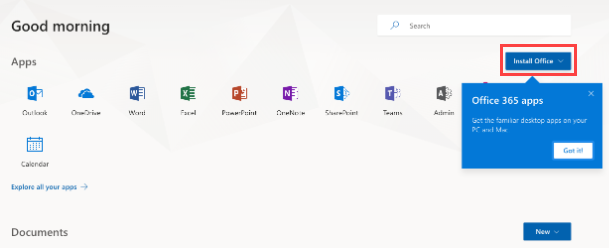
- Click the Install Office button in the upper-right-hand corner.

- Once you click Install Office, click on Microsoft 365 Apps.
If you need to select other applications that are not included in the Standard Office Suite, or if you want to select a different language or bit version. By default, it will download the 32-bit English version.
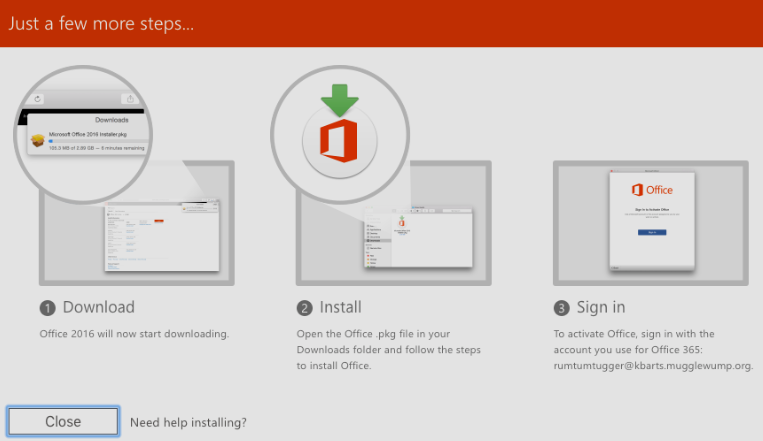
- Be sure to allow and save the app file on your computer. Click the Save File to continue.
- When the download is complete, run the file and follow the prompts to install Office on your device.

- Start the Office app, log in with your Microsoft 365 account details, and enjoy full Outlook functionality.
You can add your Microsoft Outlook email account to email applications like iCloud, Thunderbird, Gmail, and others.
Refer to the Email Client Settings below, and based on your preferences (IMAP or POP), enter the server name, port numbers, and encryption methods for the Incoming Mail and Outgoing Mail servers. Take note: Incoming and outgoing server details are the same.
IMAP Settings POP Settings SMTP Settings Server:
outlook.office365.comServer:
outlook.office365.comServer:
smtp.office365.comPort: 993 Port: 995 Port: 587 Encryption: SSL/TLS Encryption: SSL/TLS Encryption: STARTTLS More details from the Microsoft support website: POP, IMAP, and SMTP settings for Outlook.com.
Summary
Managing emails is crucial because you need to stay on top of your personal and professional correspondence. Outlook is a leading solution for seamless email access across desktop and browser. This guide walks you through setting up Microsoft 365 for both platforms, helping new and existing users optimize their email workflow.
Microsoft Outlook simplifies email management across desktop and web, enhancing communication and productivity. This comprehensive guide walks you through setting up Microsoft 365 for both platforms for a seamless experience. Aside from Microsoft Outlook, Bluehost also has Professional Email and Google Workspace solutions if you need more options for your email management.
If you need further assistance, feel free to contact us via Chat or Phone:
- Chat Support - While on our website, you should see a CHAT bubble in the bottom right-hand corner of the page. Click anywhere on the bubble to begin a chat session.
- Phone Support -
- US: 888-401-4678
- International: +1 801-765-9400
You may also refer to our Knowledge Base articles to help answer common questions and guide you through various setup, configuration, and troubleshooting steps.