How to Modify WordPress Header and Footer
The header and footer are important components of every website built on the WordPress platform. These sections are the first and last elements that visitors see on your site. They appear on every page, making them valuable spaces for branding, navigation, and improving user experience.
Here is a video we created to guide you through the steps.
What are Headers and Footers?
A Header is located at the top of the webpage and typically includes your site logo, site name, main navigation menu, and sometimes search bars, social media icons, or call-to-action buttons.

A Footer is located at the bottom of your webpage, often displaying copyright text, contact details, privacy policy links, and a secondary navigation menu. It can also be used for additional navigation, social media links, newsletter signup forms, and legal disclaimers.

- Always make sure to back up your theme files before making any code changes.
- If you're unsure about editing code, consider using the theme customizer or a plugin for a safer approach.
Method 1: Using the Theme Customizer (Beginner-friendly)
The options you see in the Customizer depend on the theme you are using.
- If a default WordPress theme is active (for example, Twenty Twenty-Four), customization options will be limited. You may need to use the Editor to make more detailed changes.
- If another theme is installed (for example, a Bluehost theme or a premium theme), the options may vary, but clicking "Customize" will still redirect you to the "Editor" for deeper changes.
Here are the steps on how to edit your header or footer via the Theme Customer method.
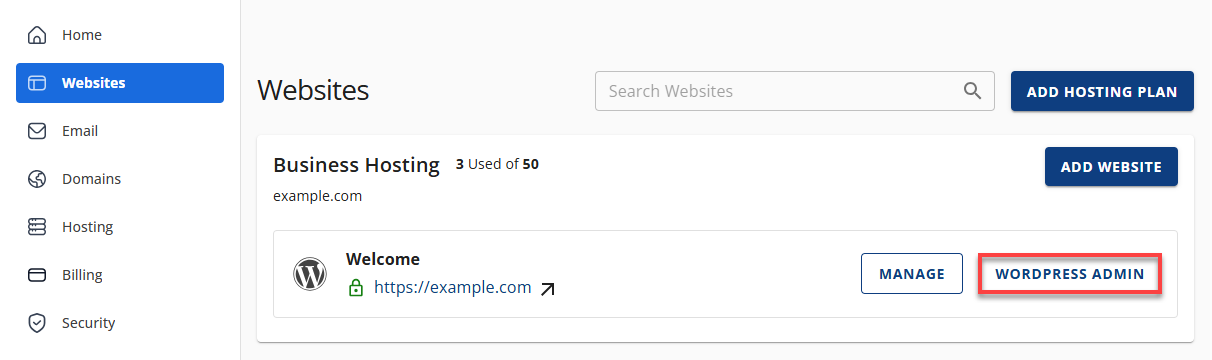
- Log in to your Bluehost Portal.
- In the left-hand menu, click Websites.
- Click the WordPress Admin button located next to the website you want to manage.
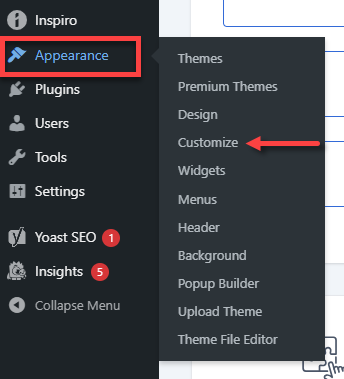
- Once logged in, click Appearance in the left menu, then select Customize.
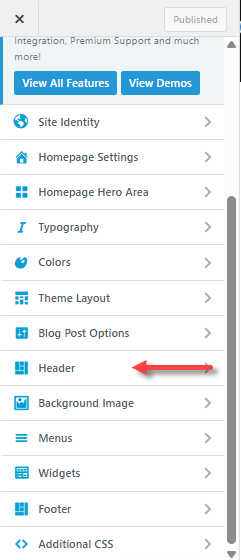
- In the Customizer menu, you'll find sections like header and footer, which may have different labels based on your theme. Let's start with the header. Click Header on the left menu.
- Use the available settings to customize your header.
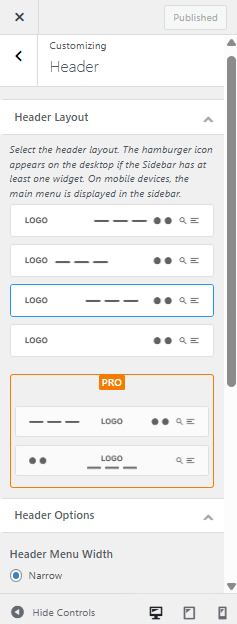
Click the pencil icon to edit the logo, site title, site icon, and tagline.
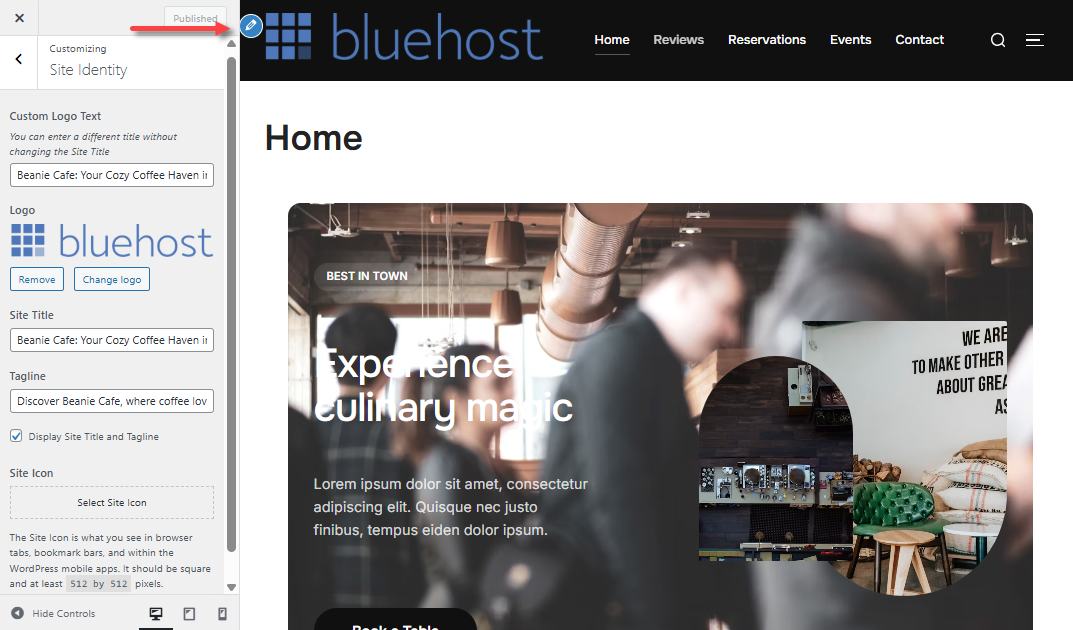
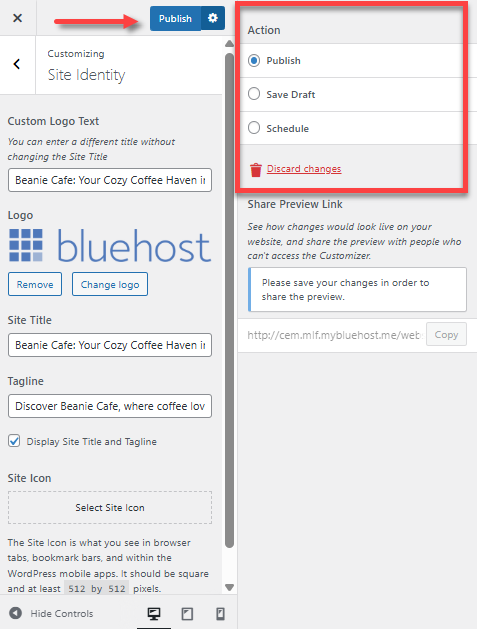
- Once done, you can save your changes as a draft or publish them right away.
Method 2: Using a Block Editor (Full Site Editing)
This method is the most flexible for block-based themes, letting you build headers and footers visually while maintaining consistency across your website.
- Log in to your Bluehost Portal.
- In the left-hand menu, click Websites.
- Click the WordPress Admin button located next to the website you want to manage.
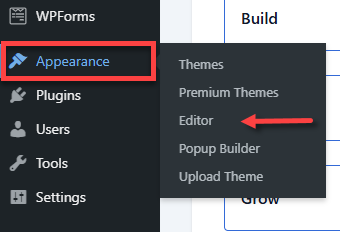
- Once logged in, click Appearance in the left menu, then select Editor.
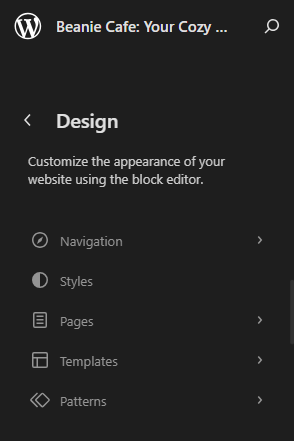
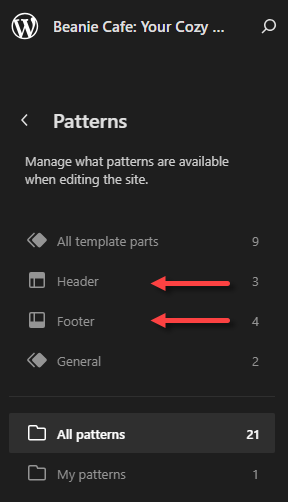
- In the editor menu, look for the header and footer sections. Typically, it is under Patterns. Click on Patterns.
- Click Header or Footer in the left menu.
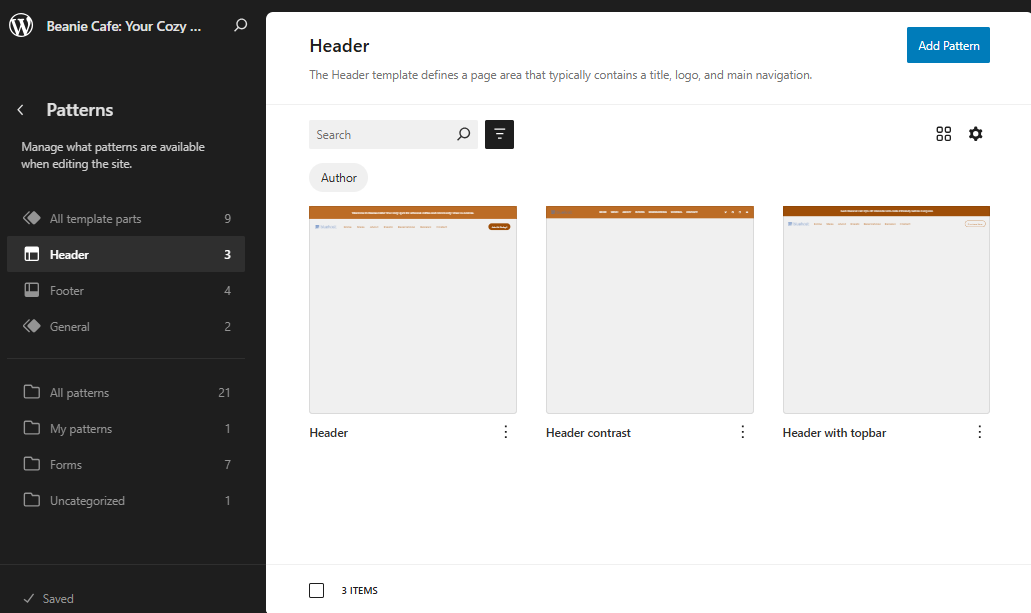
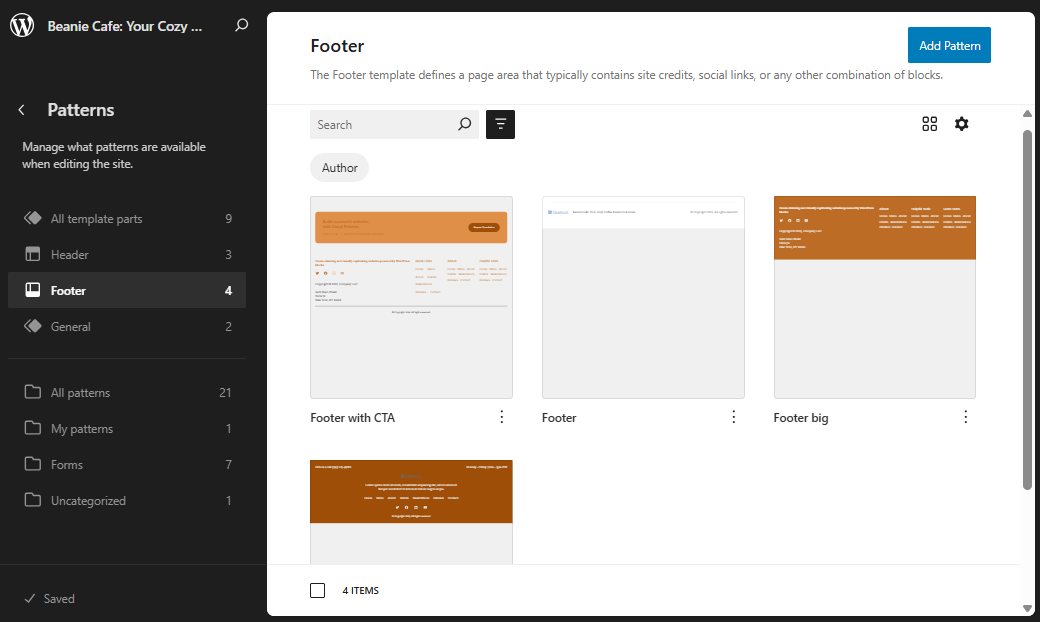
- Click the header or footer template you want to customize.
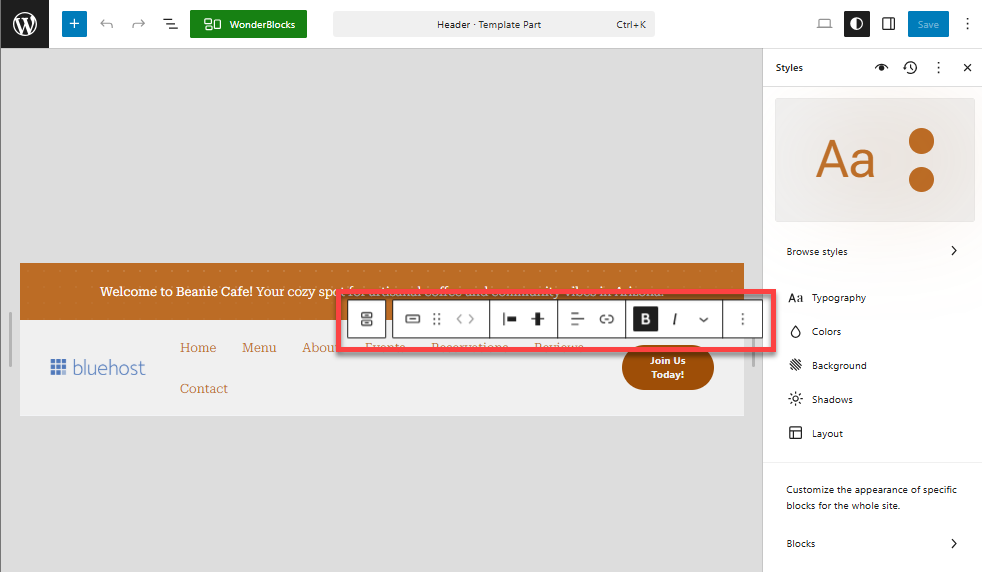
Header:
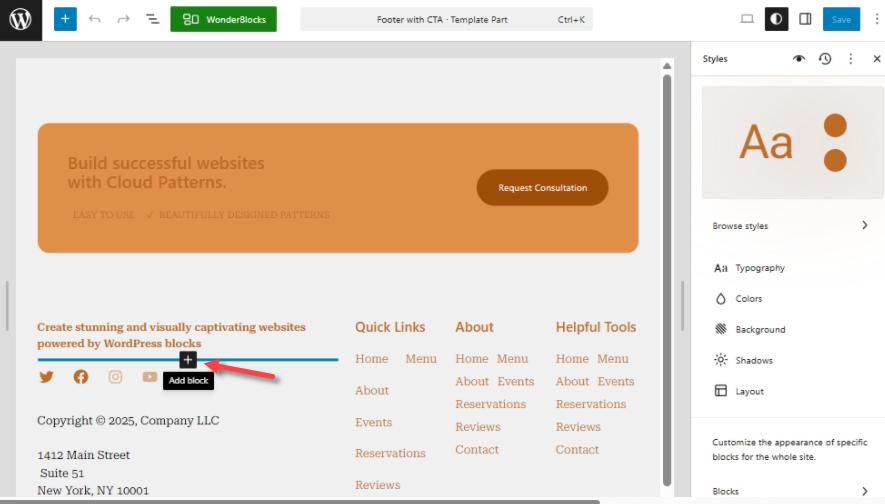
Footer:
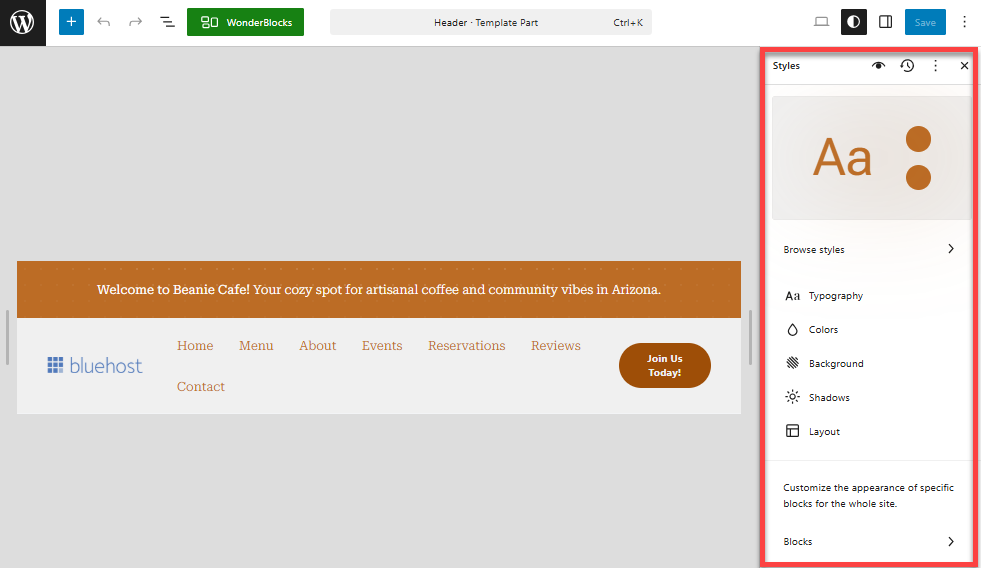
- Click the Style icon in the top right corner to view more customization settings.

- Use the Style settings on the right pane to customize the elements of your header or footer.
- Click the + icon or block inserter to add more elements to your header or footer.
- You can also use the toolbar to customize each element.
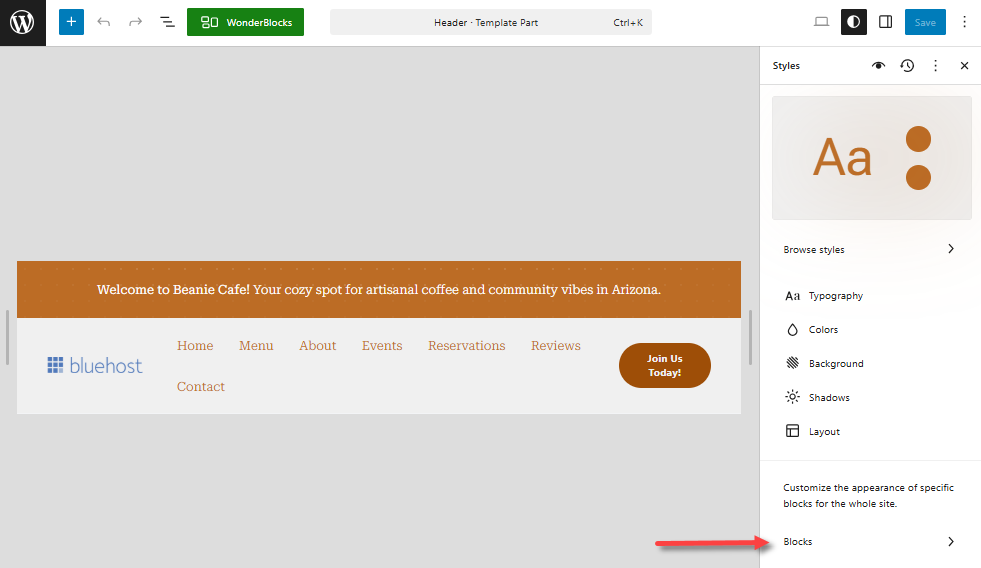
Another way to customize each block is to go to the Styles main menu, scroll down, and click on Blocks. You'll find various blocks that you can customize and add to the header or footer template.
Method 3: Using a Plugin
Another method to customize your header and footer is to use plugins. There are plugins available in WordPress that allow you to edit your site's header and footer without coding knowledge, such as Elementor. They usually offer pre-designed templates and drag-and-drop features for elements, such as menus, logos, and social media links.
- Within your WordPress dashboard, install your preferred header or footer plugin by navigating to the Plugins section in the left menu, then clicking on Add Plugin.
- Install and activate your plugin.
- Go to the plugin's settings or editor.
- Use the available settings and drag-and-drop blocks, such as menus, logos, widgets, or social media icons, to design your header or footer.
- Save and preview before publishing.
Method 4: Using the Theme File Editor (Advanced users)
For full control, you can directly edit your theme’s PHP files. This method requires coding knowledge and should only be done with backups in place, preferably on a staging site first..
This approach involves editing the header.php and footer.php files of your WordPress website.
- Within your WordPress dashboard, click Tools in the left menu.
- Click Theme File Editor.
- In the right pane, under Theme Files, select the header.php or footer.php.
- Edit the code using HTML, CSS, or PHP as necessary.
- Save your changes and thoroughly test your website on the staging site to ensure everything is functioning correctly before making any updates to your live site.
Best Practices for Editing Headers and Footers
- Backup before making changes: Always create a backup of your theme files, especially if editing the code.
- Use child themes: If you plan to modify the theme files frequently, consider using a child theme to avoid losing your customizations during theme updates.
- Test on a staging site: It is recommended that you use and test your changes on a staging site before updating a live site.
- Start simple: Unless you're comfortable with code, it is recommended to use the Theme Customizer or Block Editor method to customize your header or footer.
Summary
Learn how to modify your WordPress header and footer to enhance branding, navigation, and user experience of your website. This article discuses the common methods: the Theme Customizer, the Block Editor, plugins, and manual theme file edits. Discover best practiecs for safely editing your site's header and footer. Remember to back up files, use child themes, and test changes on a staging site.
If you need further assistance, Bluehost Chat Support is available 24 hours a day, 7days a week while Bluehost Phone Support is available 7 days a week from 7 am-12 midnight EST.
- Chat Support - While on our website, you should see a CHAT bubble in the bottom right-hand corner of the page. Click anywhere on the bubble to begin a chat session.
- Phone Support -
- US: 888-401-4678
- International: +1 801-765-9400
You may also refer to our Knowledge Base articles to help answer common questions and guide you through various setup, configuration, and troubleshooting steps.