Modifying Table Columns in phpMyAdmin
If you manage MySQL or MariaDB databases, phpMyAdmin offers a simple way to handle columns. You can easily add, remove, or edit them through its user-friendly web interface, which is ideal for restructuring tables or applying new constraints. In this tutorial, you’ll learn how to update table columns in phpMyAdmin to streamline your database management tasks.
Modifying Table Columns in phpMyAdmin
When working on column modifications in phpMyAdmin, make sure you follow some basic safety steps to keep your changes accurate and problem-free.
- Log in to your Bluehost Account Manager.
- In the left-hand menu, click Websites.
- Click the Manage button located next to the website you want to manage.

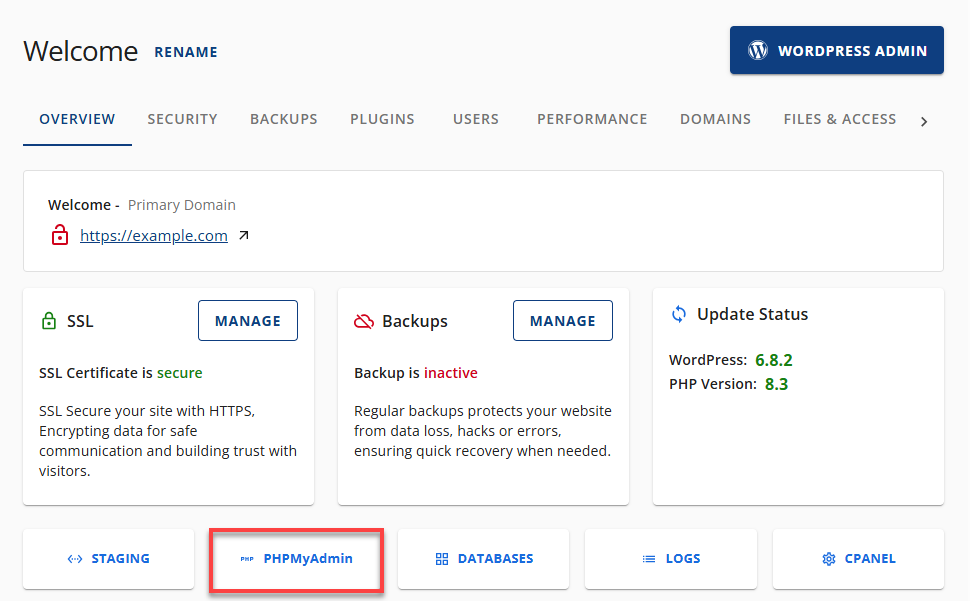
- In the OVERVIEW tab, click the PHPMyAdmin button.

- After the site redirects, navigate to the left column of the phpMyAdmin interface and choose the database you wish to modify by clicking its name.

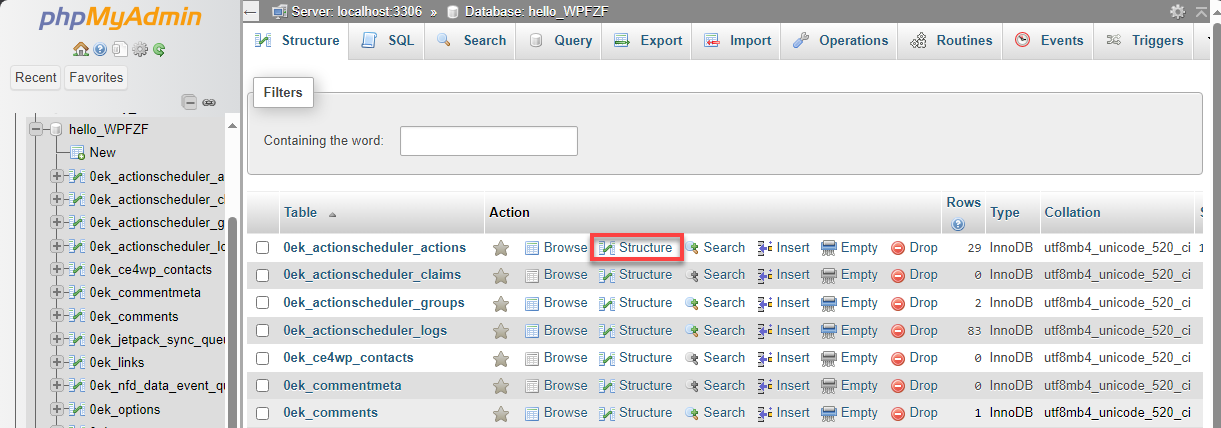
- Once you’re inside the selected database, a list of tables will appear. Choose the one you need to modify by clicking its name.
- Select Structure from the menu.

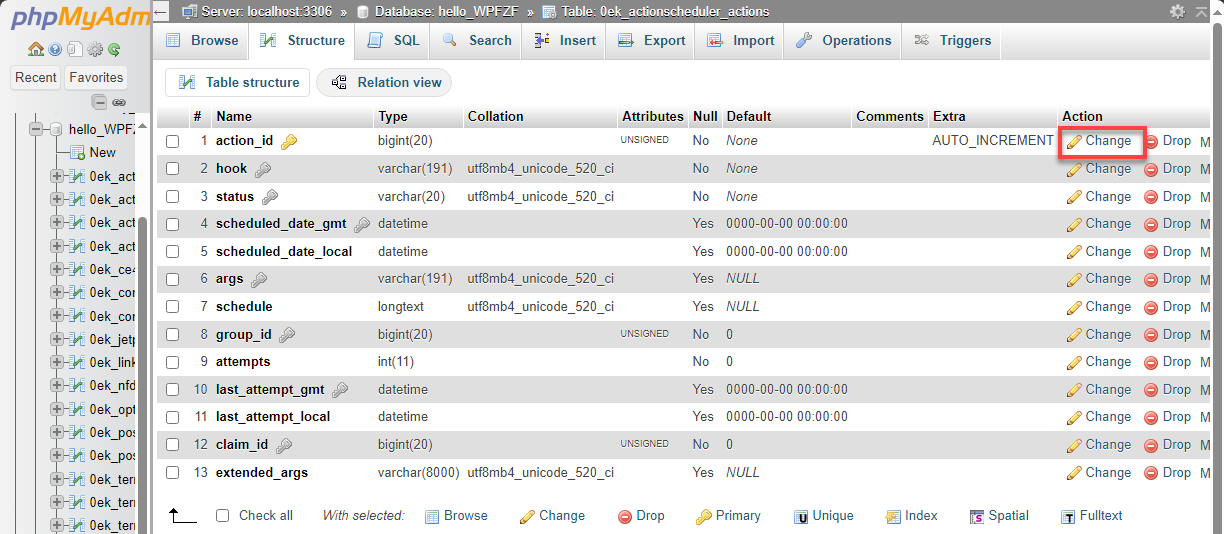
- Next to the column name, you’ll find a Change option under the Actions menu. Click Change for the column you want to edit.

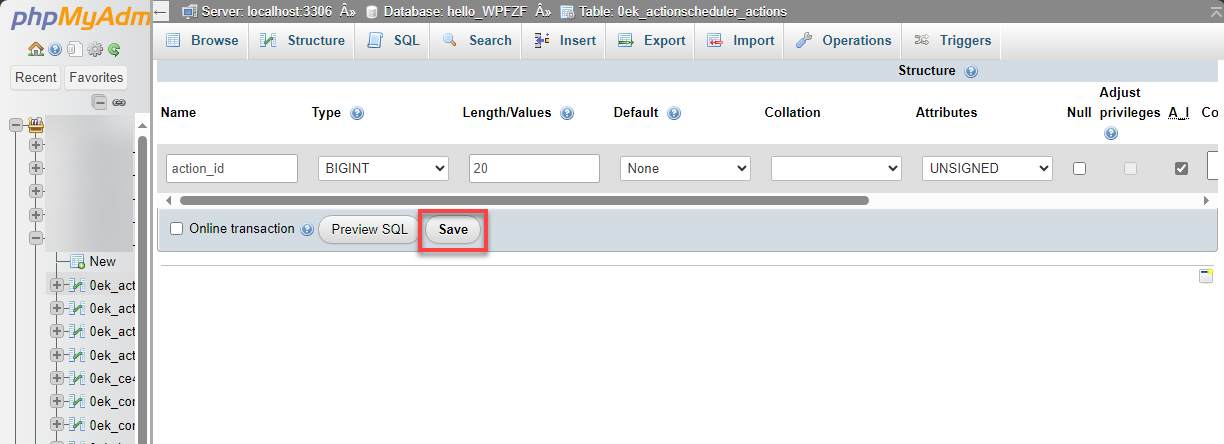
- You can change various things, including the column's name, field length (maximum number of characters allowed), default value, and more.
- Once you are ready, click Save to proceed with the changes.

The modifications you made have been saved and implemented.
Summary
Modifying table columns in phpMyAdmin can be a simple and efficient way to manage your database. However, taking the necessary precautions before making any changes, such as backing up your database, is crucial. Additionally, it is important to be mindful of the potential consequences of modifying certain table-column aspects of your data. Armed with these steps and a cautious mindset, you can handle column modifications smoothly and ensure your database stays properly organized.
If you need further assistance, feel free to contact us via Chat or Phone:
- Chat Support - While on our website, you should see a CHAT bubble in the bottom right-hand corner of the page. Click anywhere on the bubble to begin a chat session.
- Phone Support -
- US: 888-401-4678
- International: +1 801-765-9400
You may also refer to our Knowledge Base articles to help answer common questions and guide you through various setup, configuration, and troubleshooting steps.