How to Use the Renewal Center
Welcome to the Renewal Center! This is your one-stop solution for managing account renewals and ensuring that your services with Bluehost continue without interruption. Whether you want to review or update your subscriptions, your Bluehost Portal makes the process smooth and efficient. In this article, we will walk you through the steps to access and navigate the Renewal Center, allowing you to keep your account and services up to date with ease.
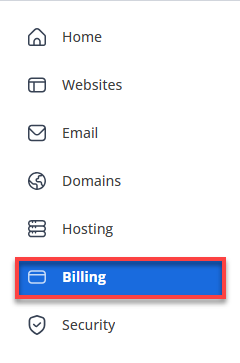
Accessing the Renewal Center
- Log in to your Bluehost Portal.
- In the left-hand menu, click Billing.
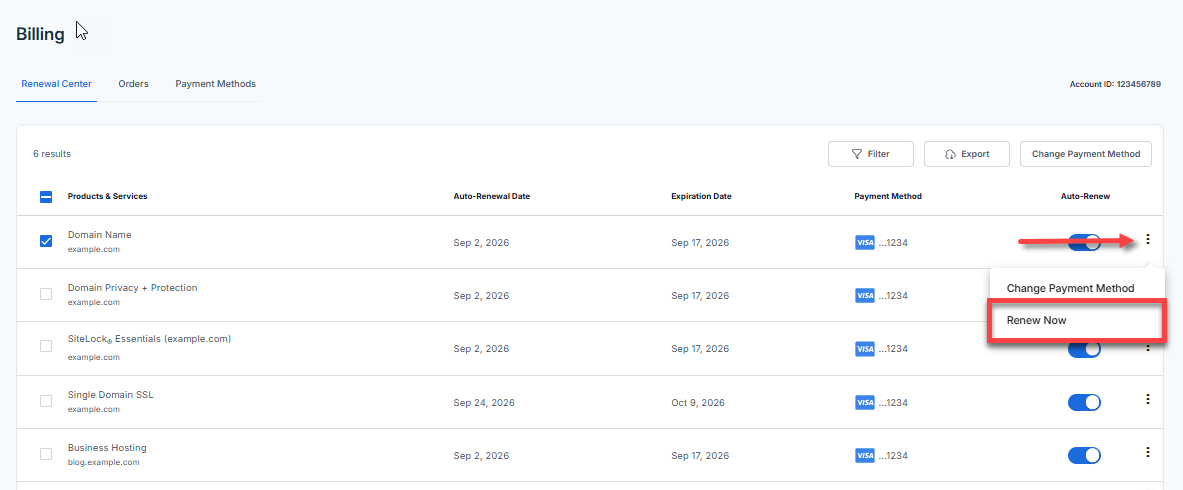
- On the right pane, you will see the subscriptions you have in your Bluehost account.
Managing your Renewal Settings
At the Renewal Center, you can manage your Bluehost subscriptions by performing the following actions.
Renew a Product/Service
Under the Renewal Center tab, you can renew your product or service right away.
- Under the Renewal Center tab, select the product or service you want to renew.
- Click the vertical ellipsis on the right side of your subscription, then select Renew Now.
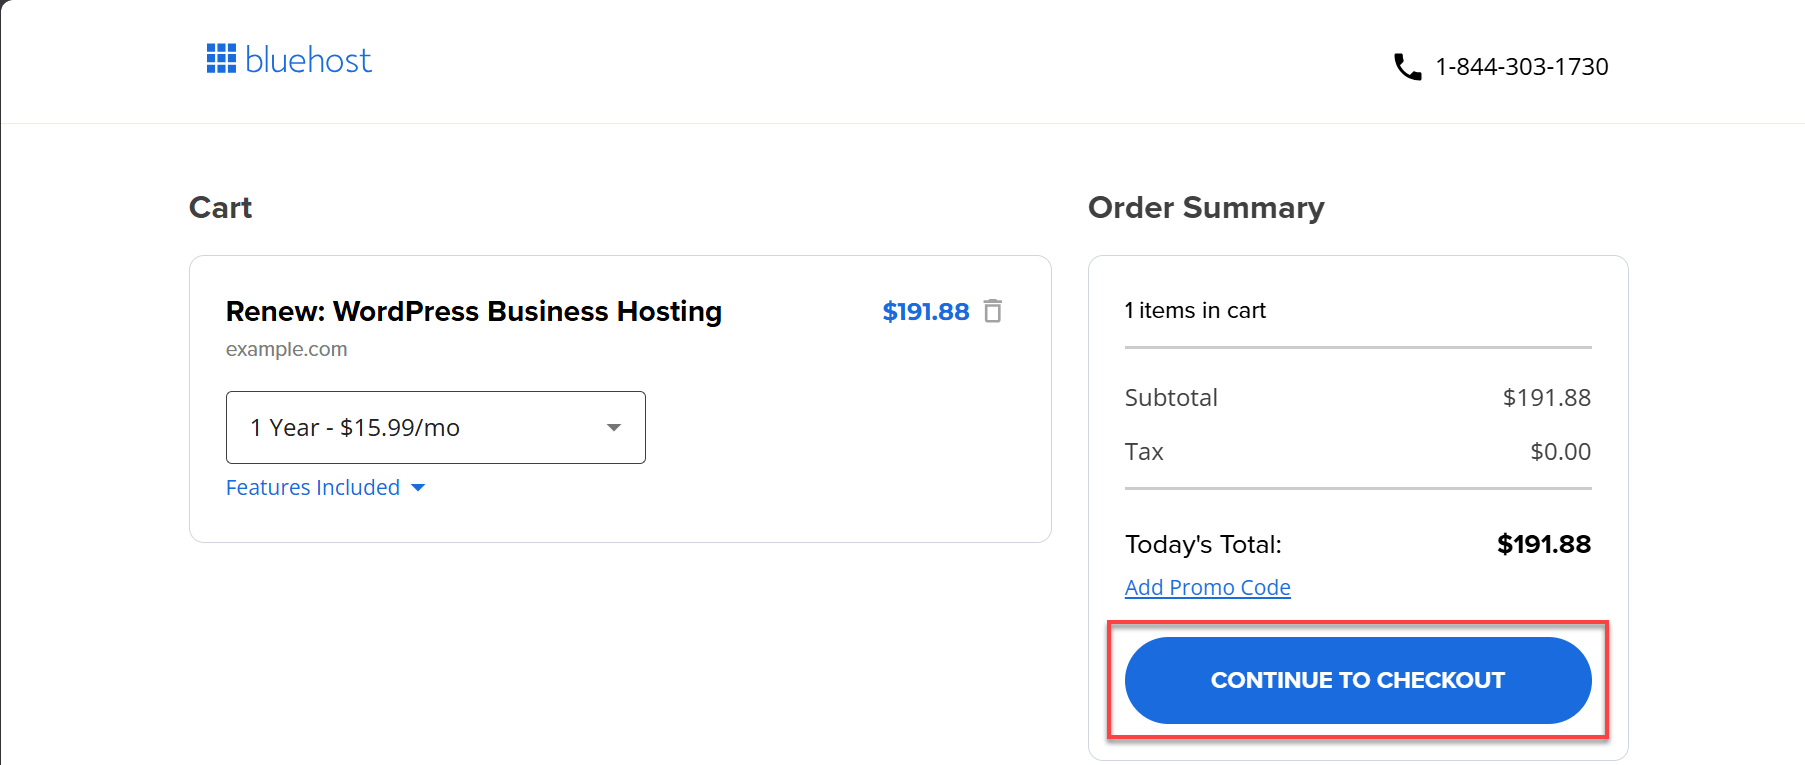
- You will be redirected to the Cart. Double-check the selected product/service to be renewed and select the preferred billing term from the drop-down menu. If you have a Promo Code available, you can also add one.
- Click Continue to Checkout to proceed.
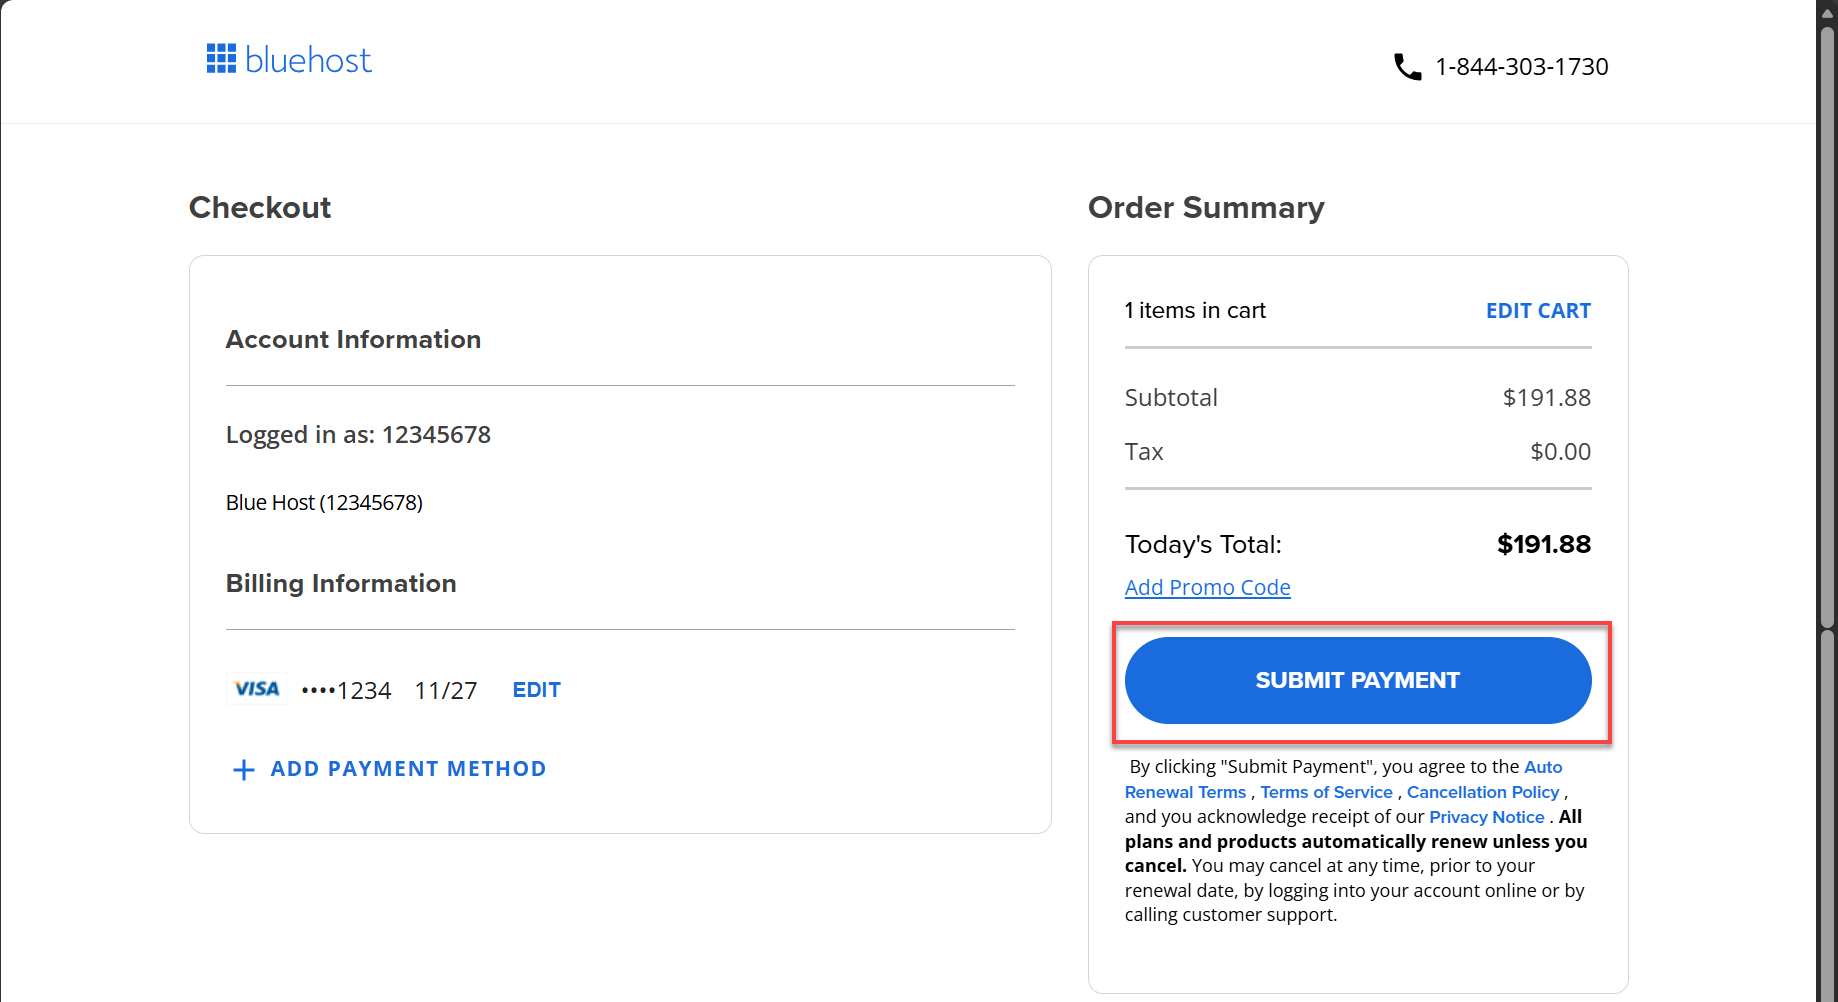
- On the Checkout page, review your Account and Billing Information. Click the + Add Payment Method link if you need to add a new mode of payment, and fill out the billing details.
- Once done, click Submit Payment to proceed.
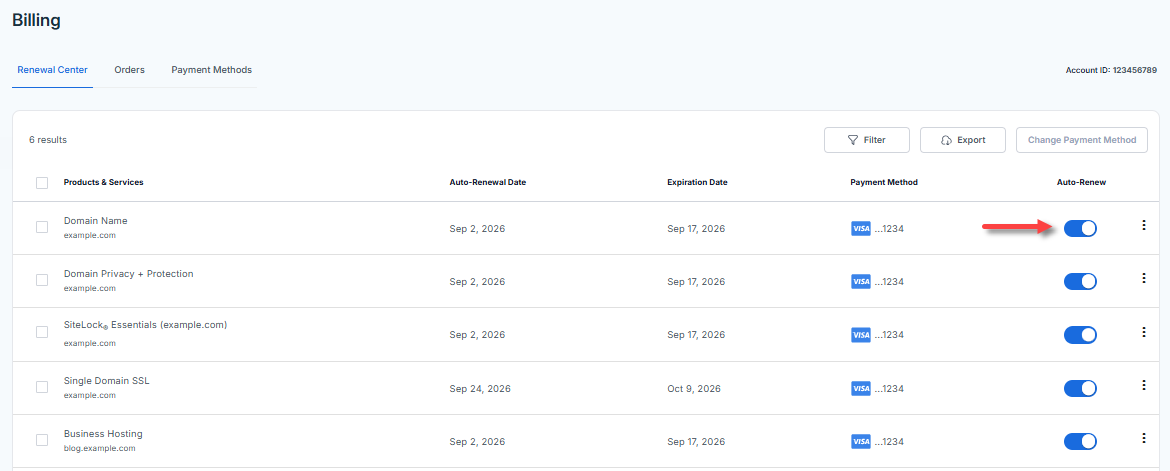
Manage your Auto-Renewal Settings
You can enable or disable your Auto-Renewal feature under the Renewal Center tab.
- Select the product or service for which you want to update the renewal settings.
- Under the Auto-Renew column, use the toggle to enable or disable the Auto-renew settings.
- In the pop-up, you can choose to Chat with an Expert or Continue enabling or disabling your selected subscription.
- Click Continue to confirm your choice to enable or disable Auto-Renew.
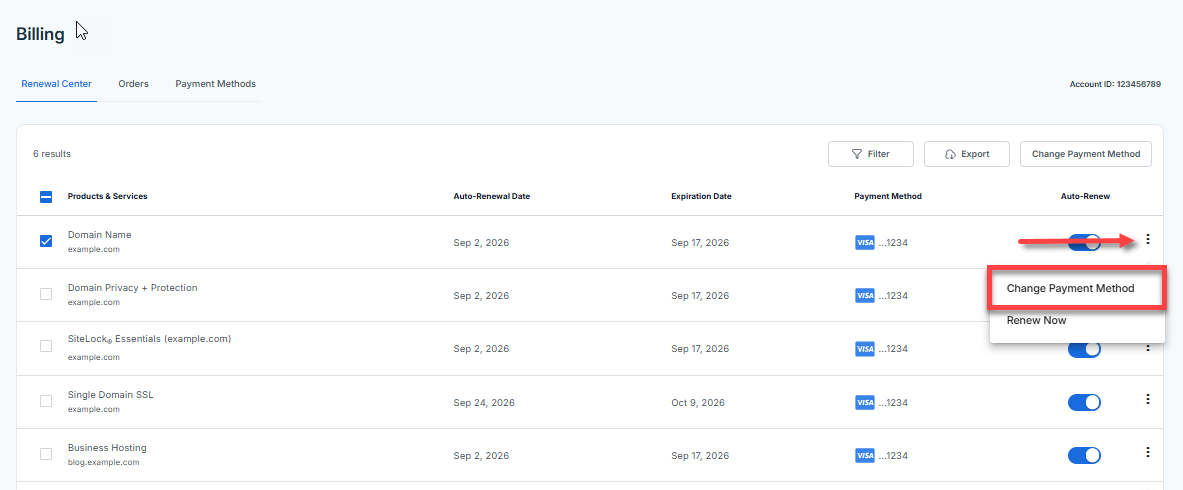
Change your Payment Method
If you need to update your payment method for a product or service, you can easily do so by selecting the Change Payment Method option. Processing the update may take some time, so please be patient.
- Under the Renewal Center tab, select the product or service for which you want to update your payment method.
- Click the vertical ellipsis on the right side of your subscription, then select Change Payment Method.
- In the Select a Payment Method window, choose your preferred payment method.
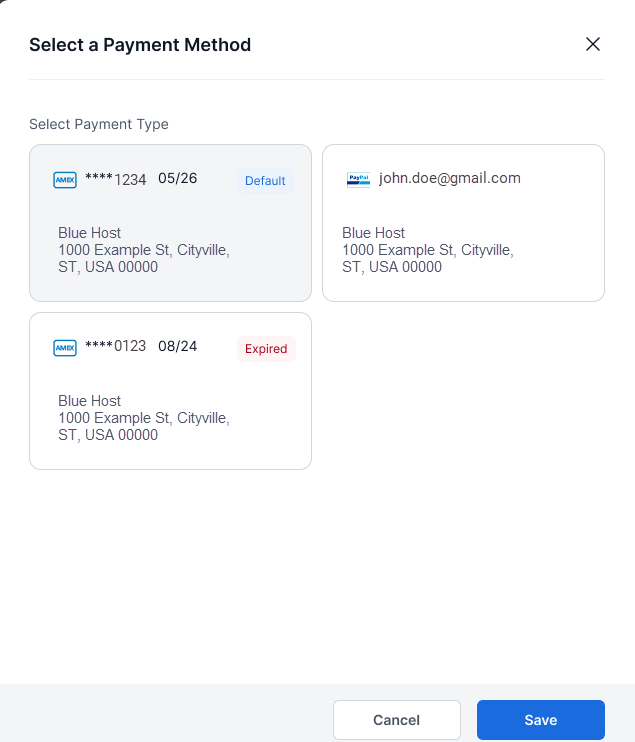
- Click Save to save your changes.
Summary
Managing your renewals has always been challenging, but with the help of the Bluehost Portal Renewal Center, you can conveniently manage all your products and services in one place. Whether renewing a subscription or updating your account information, Renewal Center makes it simple and hassle-free. Keep everything organized and stay on top of your renewals with ease.
If you need further assistance, Bluehost Chat Support is available 24 hours a day, 7days a week while Bluehost Phone Support is available 7 days a week from 7 am-12 midnight EST.
- Chat Support - While on our website, you should see a CHAT bubble in the bottom right-hand corner of the page. Click anywhere on the bubble to begin a chat session.
- Phone Support -
- US: 888-401-4678
- International: +1 801-765-9400
You may also refer to our Knowledge Base articles to help answer common questions and guide you through various setup, configuration, and troubleshooting steps.