How to Upgrade a Bluehost Hosting Plan
Is your hosting plan starting to affect your website's speed and performance? Your website traffic needs more storage, better processing power, and additional features as it grows. You might want to upgrade your hosting plan. It is a great way to give your website the resources it deserves and help it reach its full potential.
In this article, we will guide you through upgrading your hosting plan through your Bluehost Portal.
We have also created a video to assist you with the hosting plan upgrade process.
Upgrading your Hosting Plan
- Log in to your Bluehost Portal.
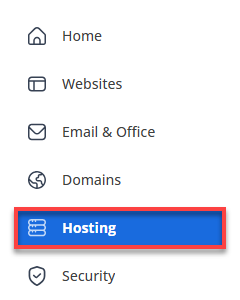
- Click Hosting in the left-hand menu.
- Click the Upgrade button beside the WordPress Professional Hosting name.
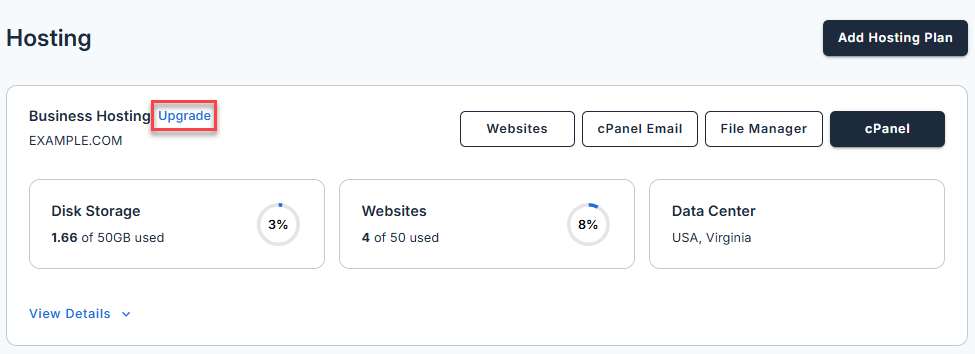
- This also applies to multiple hosting plans. Simply click the Upgrade button next to the plan you'd like to upgrade.
- This also applies to multiple hosting plans. Simply click the Upgrade button next to the plan you'd like to upgrade.
- In the pop-up window, select the hosting plan you want to upgrade to.
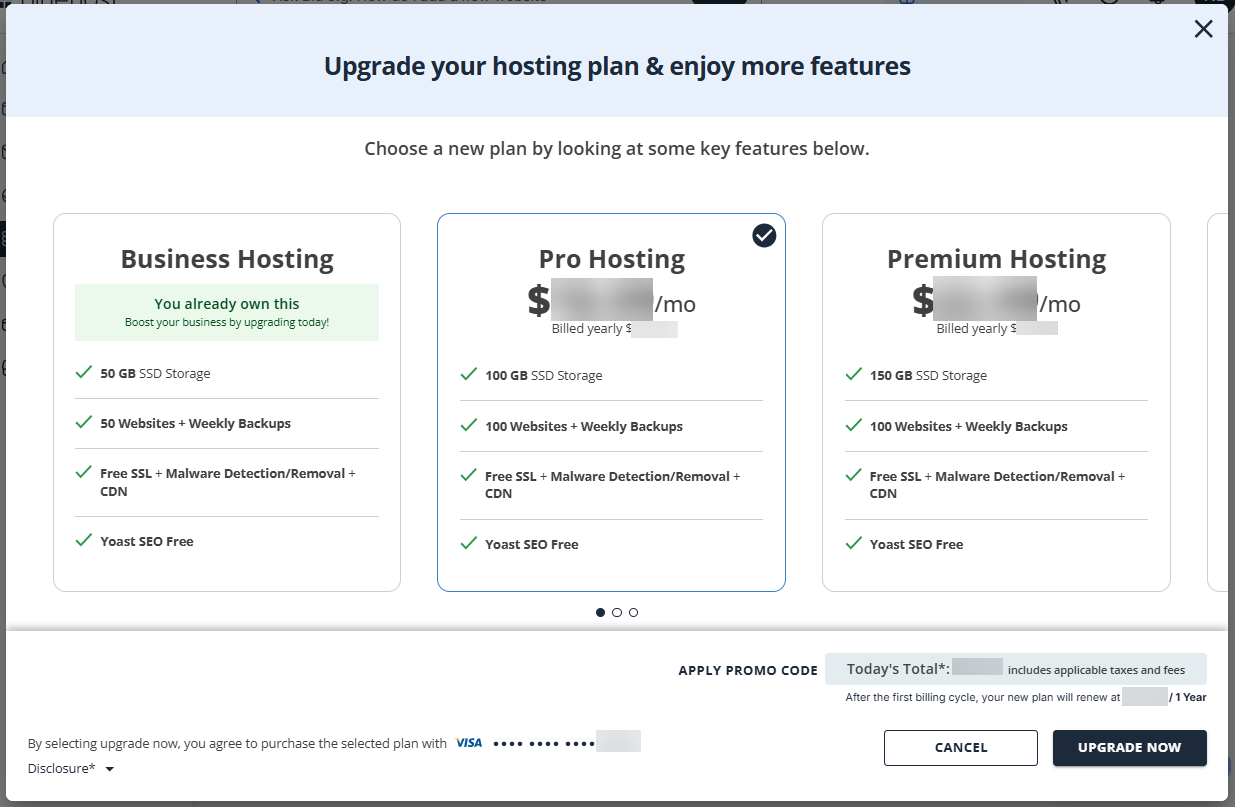
The prices shown in the image above may change in the future.
If you're on a Pro hosting plan, you can upgrade to a higher-tier Pro hosting plan! Click the arrow bar on the right to view the higher-tier Pro hosting plans.
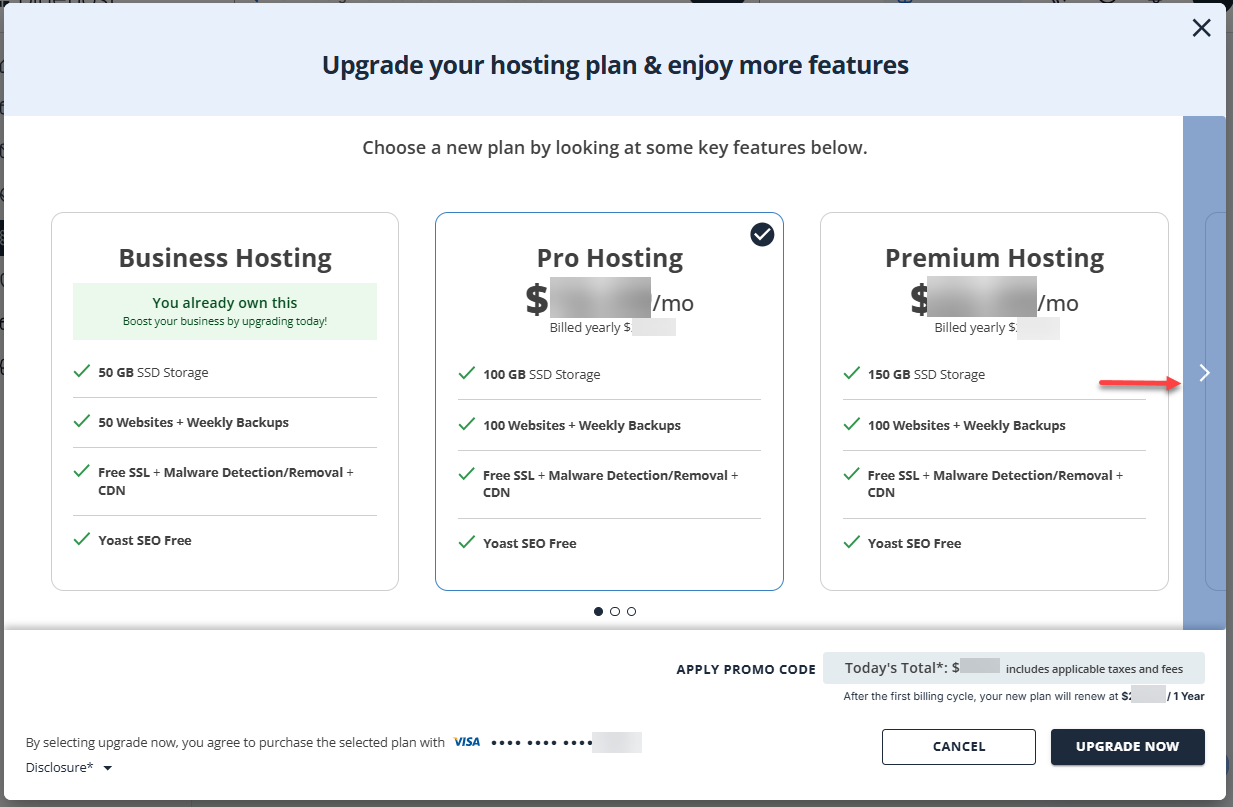
The prices shown in the image above may change in the future.
Select your preferred Pro hosting plan (Premium, Enhanced, or Elite)
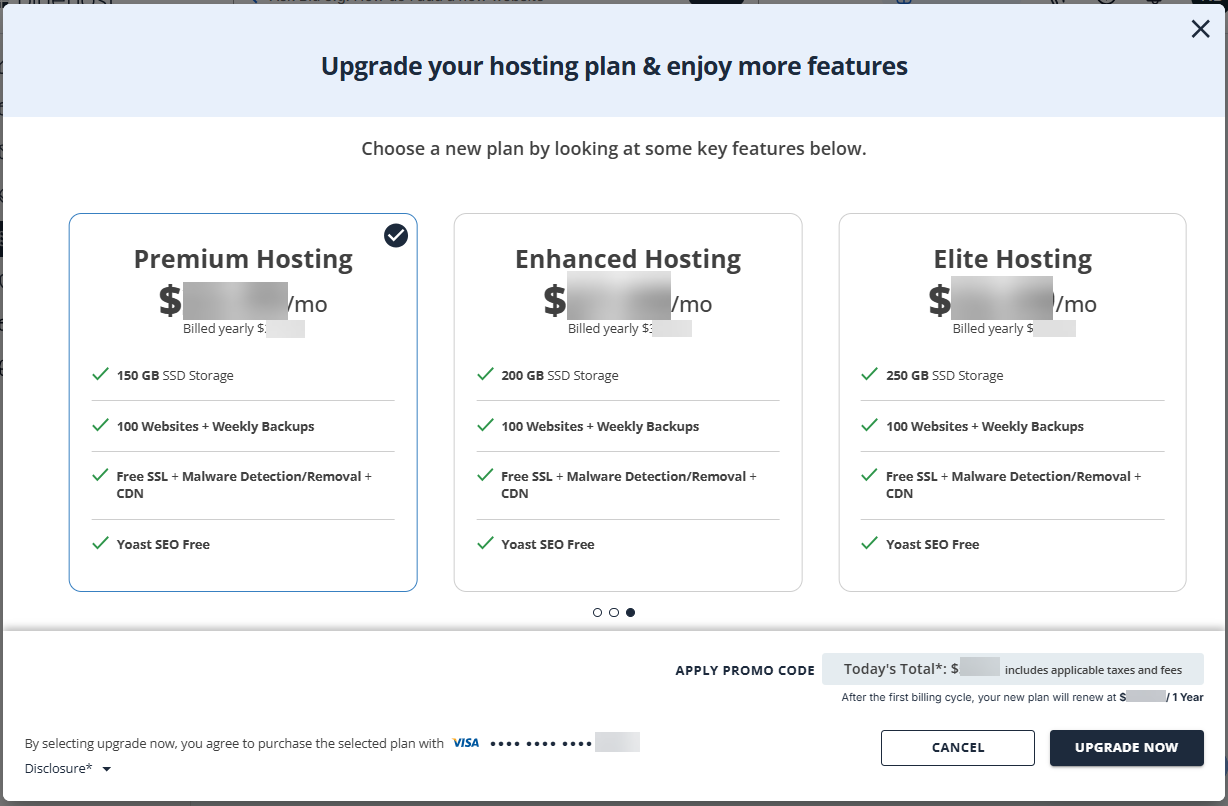
The prices shown in the image above may change in the future.
- Click the Upgrade Now button and complete your payment transaction.
Summary
If your site has outgrown its hosting plan and is now experiencing slow performance or limited resources, it might be time to upgrade. This article walks you through the steps to upgrade your hosting plan via your Bluehost Portal. Whether you need more storage, better speed, or advanced features, upgrading ensures your site can handle growing traffic and deliver a better user experience.
If you need further assistance, Bluehost Chat Support is available 24 hours a day, 7days a week while Bluehost Phone Support is available 7 days a week from 7 am-12 midnight EST.
- Chat Support - While on our website, you should see a CHAT bubble in the bottom right-hand corner of the page. Click anywhere on the bubble to begin a chat session.
- Phone Support -
- US: 888-401-4678
- International: +1 801-765-9400
You may also refer to our Knowledge Base articles to help answer common questions and guide you through various setup, configuration, and troubleshooting steps.