Website Builder (for WordPress) - How to Add a Map
A service-based website or website informing people of dates, times, places, or locations makes sense to provide their audience with a visual reference like a Google Map. Google Maps aren't just for business purposes either; It helps build trust and provide a great customer experience by letting new audiences learn about you, which builds your overall relevance. Ideally, showing where you're coming from is essential!
This article will cover adding an interactive map to help viewers visualize your location clearly and find you faster. We will also discuss some of the basic settings available to enhance your map.
Adding a Map
Once you have launched the Website Builder:
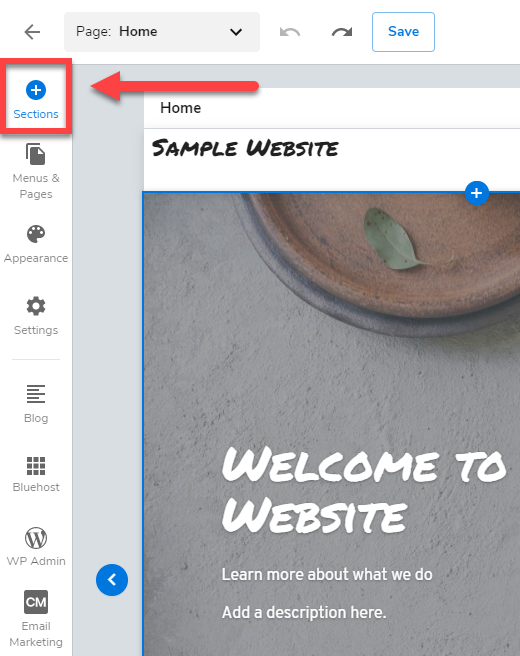
- Navigate to the Sections tab in the left-hand corner of the main design dashboard.
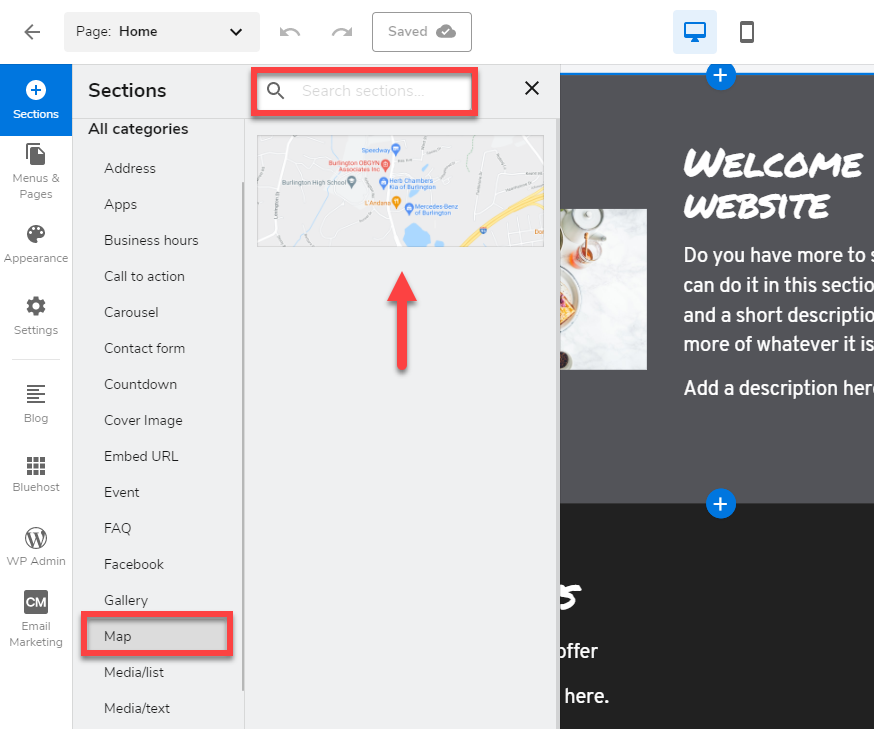
- Type Map on the top search bar or click on the Map element from the list on the left panel.
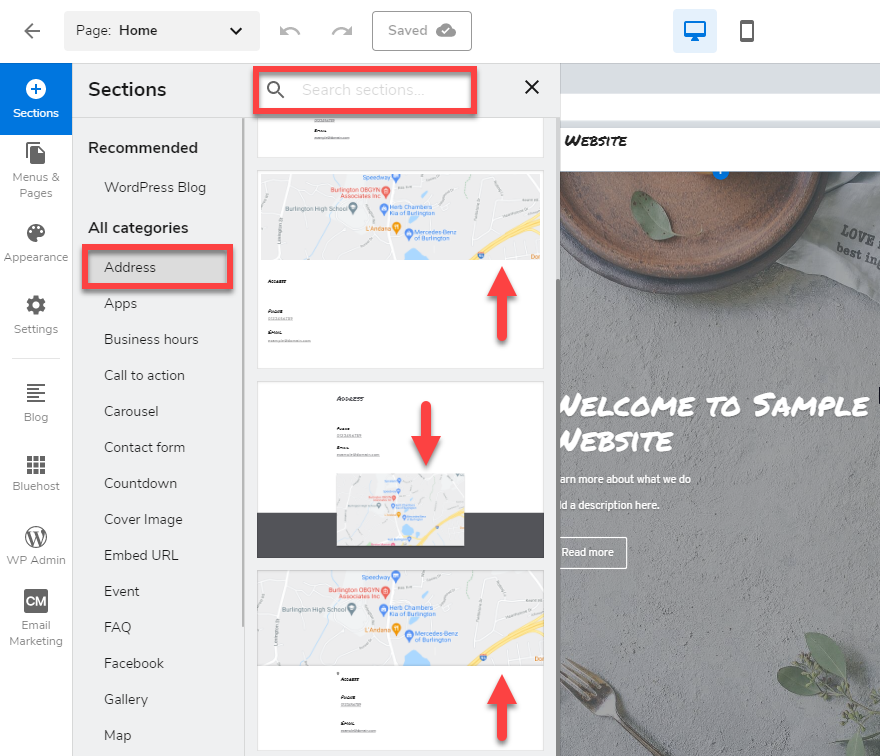
- You may also click on Address if you want to include a textual address with your map.
- After you click your chosen Google Map element, you will be able to drag and drop the map anywhere on your page.
- Once you place your map, the Map Toolbar will appear on the right side. This is where you can adjust some basic settings.
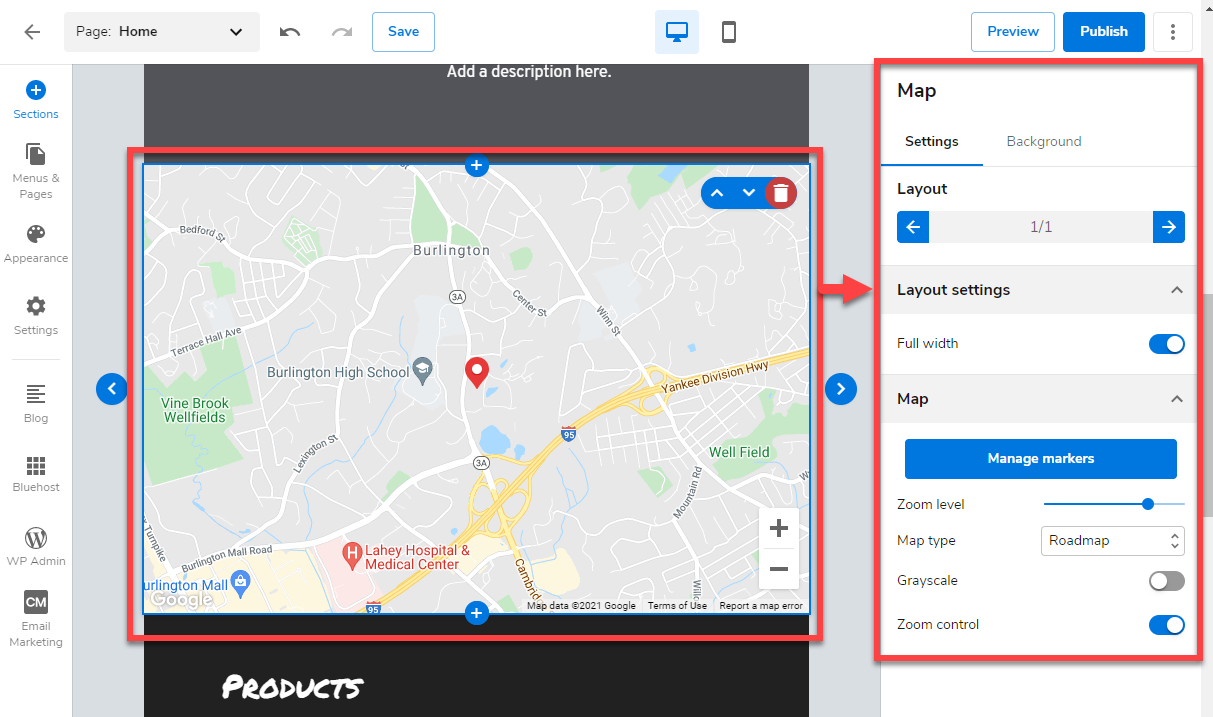
- Under Settings tab:
- You will choose from the different available Layouts and whether you want it displayed in Full width or not.
- You may also click on Manage Markers or the visual points in the map: Zoom in or out of the displayed map, change Map Type from Roadmap to Terrain, Satellite view, or Hybrid, and even enable or disable Greyscale mode.
- Under Background tab:
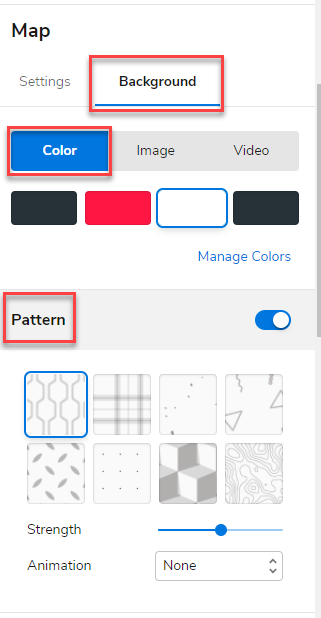
- You will be able to choose a Color and customize a Pattern, including its Strength and Animation.
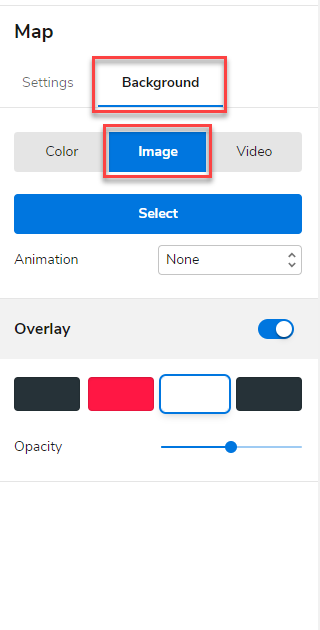
- You may also add a background Image and personalize its Overlay function, such as Opacity and Animation.
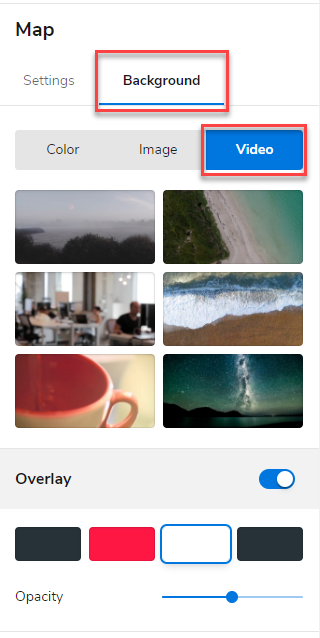
- Adding a video is also possible with the same editable attributes as the image.
- You will be able to choose a Color and customize a Pattern, including its Strength and Animation.
- Under Settings tab:
- Be sure to Save and Publish your site to save the changes.
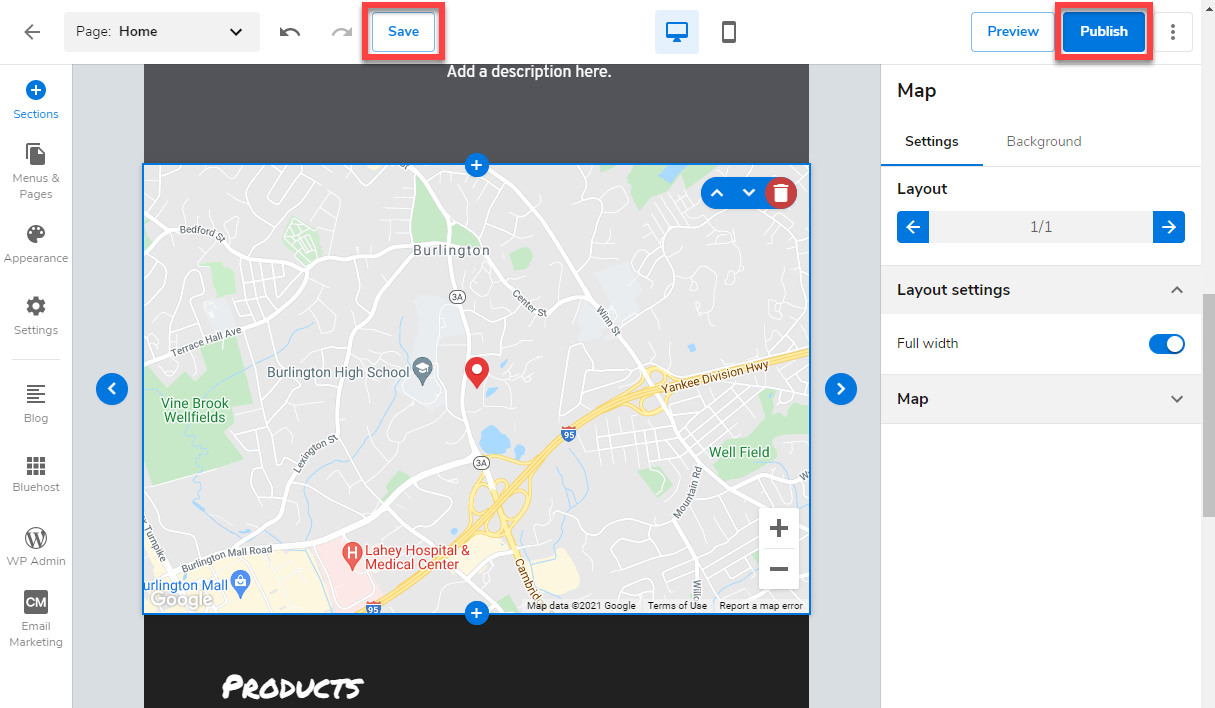
Although there are many options in the Map Toolbar, these are all essential for fully personalizing your page and elements; its behaviors or style, size & position. The best recommendation is to start by getting in there and testing all the options to see what they do.