Website Builder (for WordPress) - Adding Subscribe button
Subscribe feature allows you to add a subscribe button to your site, capturing customers' contact information for re-engagement. So in this article, we will walk you through how-to add the Subscribe section to your Website Builder. Let's get started.
How-to add Subscribe section
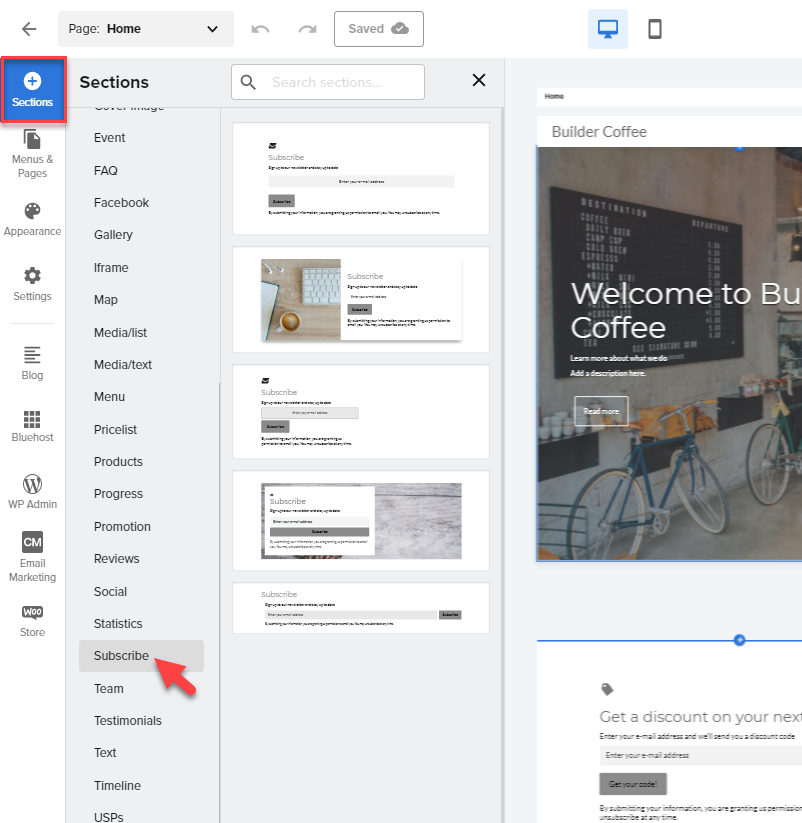
- Click the + (Sections) icon from your Website Builder, navigate through All categories, then select Subscribe.
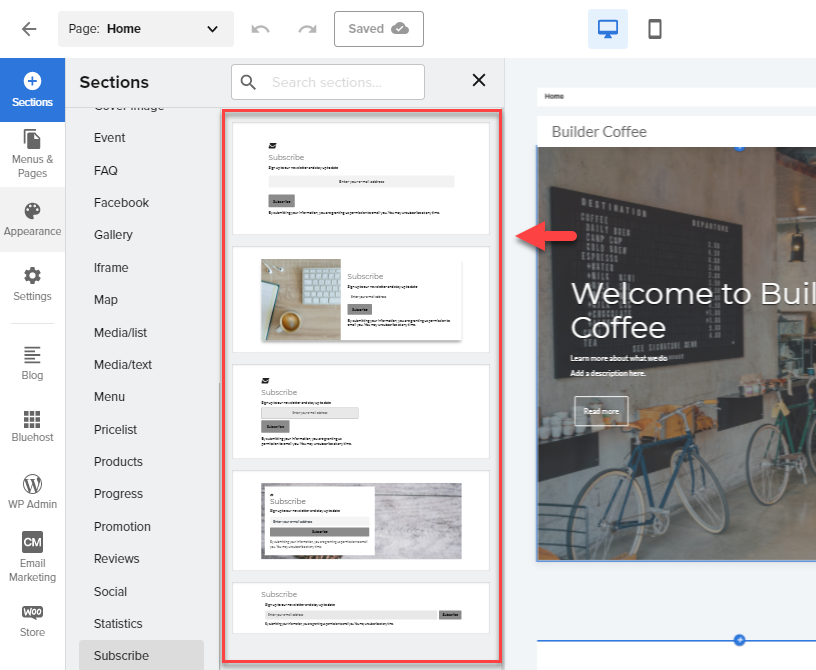
- Once you have selected Subscribe, select the layout you prefer for the Subscribe section.
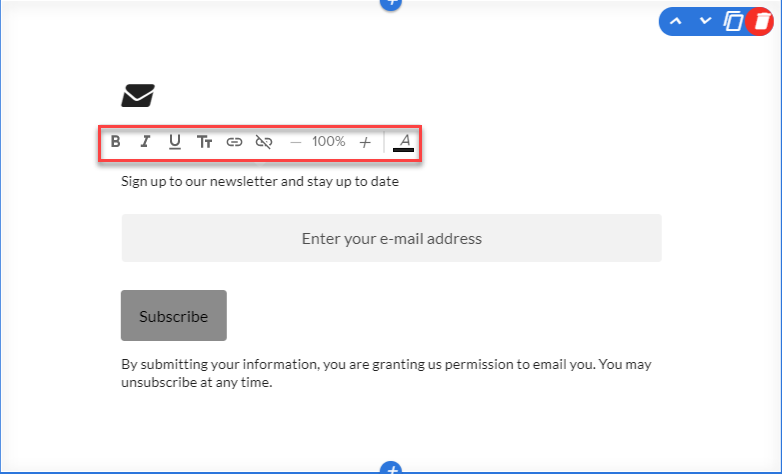
- To edit the text from the Subscribe section, click on any description from the template, and the text toolbar will pop up to allow you to format your text.
To access the Subscribe options, click the gear icon on the "Enter your e-mail address" field.
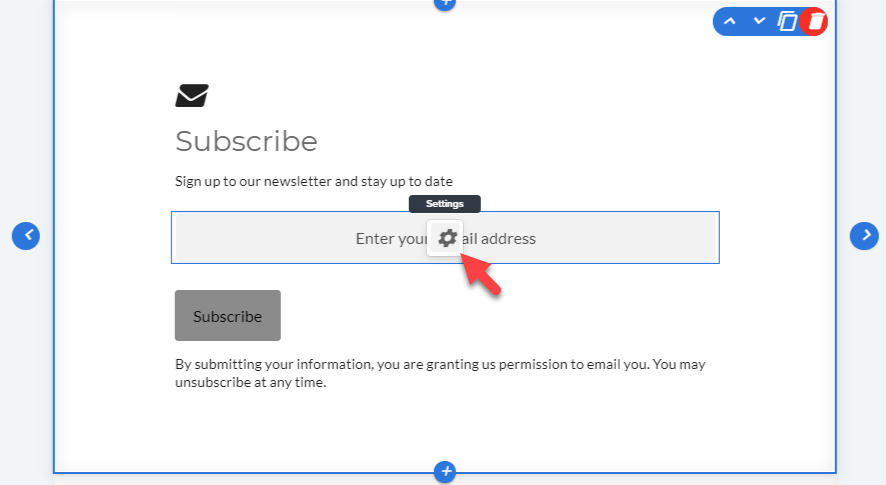
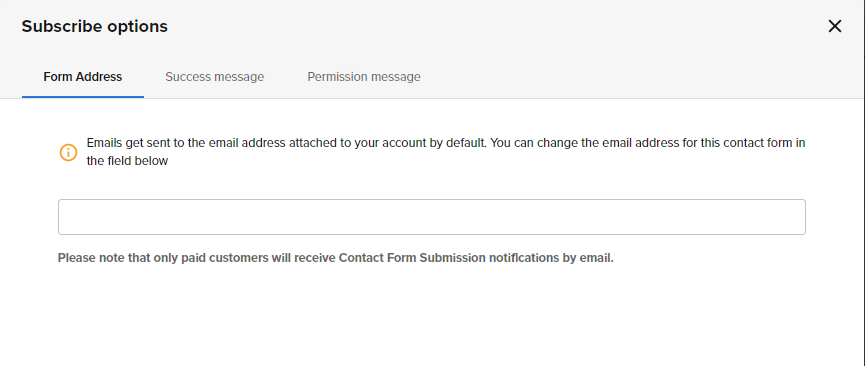
From the Subscribe options, you can edit the Form Address:
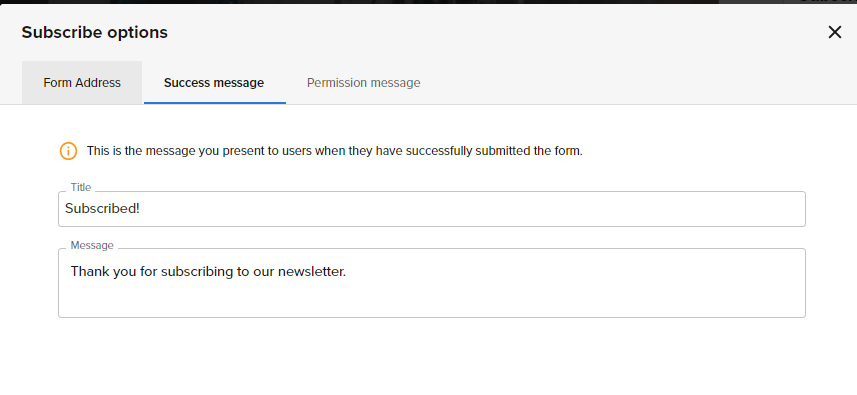
Success Message:
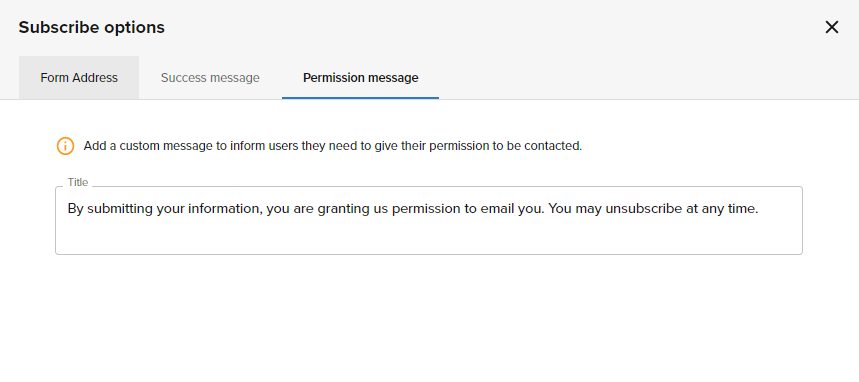
Permission Message:
- To edit the Settings of this section, navigate through to the right-hand side menu.
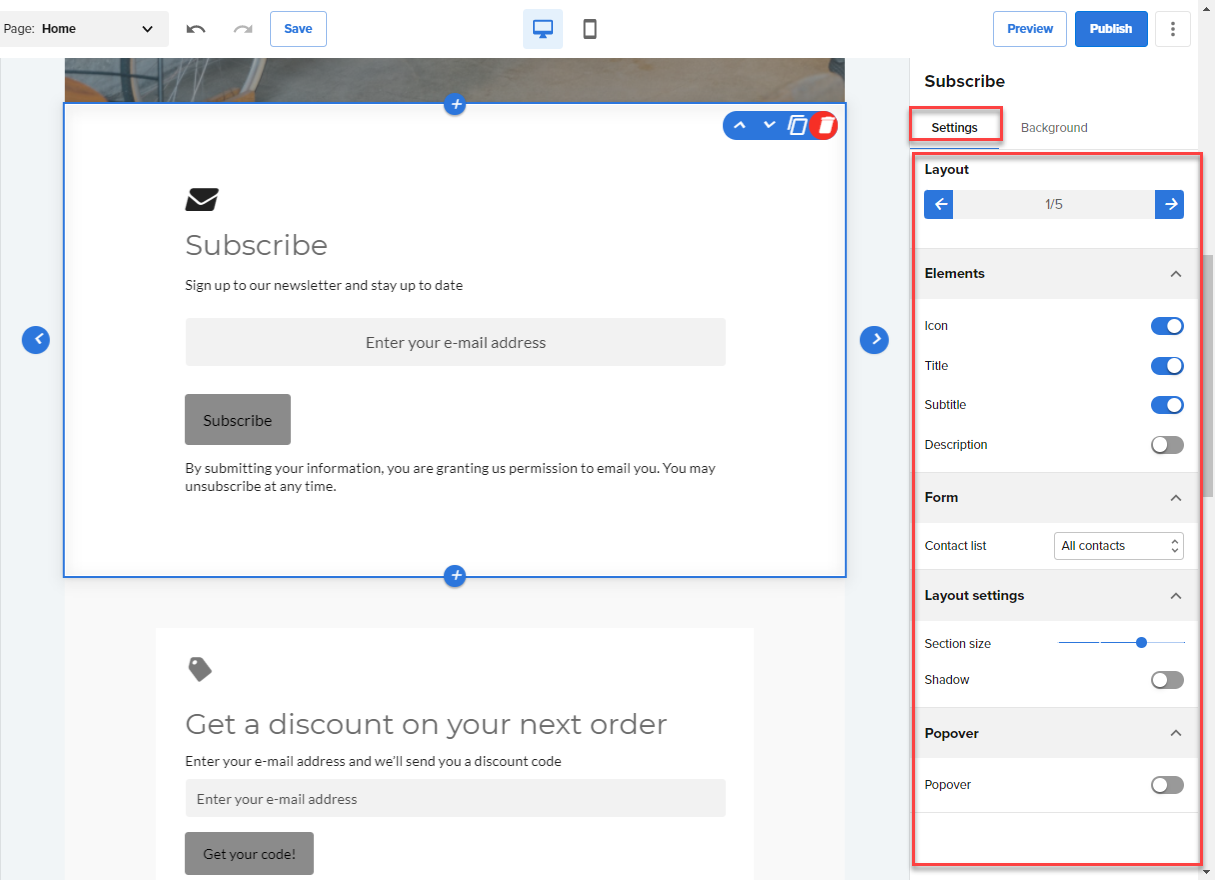
- Navigate through the Subscribe > Background tab from the right-hand side navigation menu to design your Subscribe section.
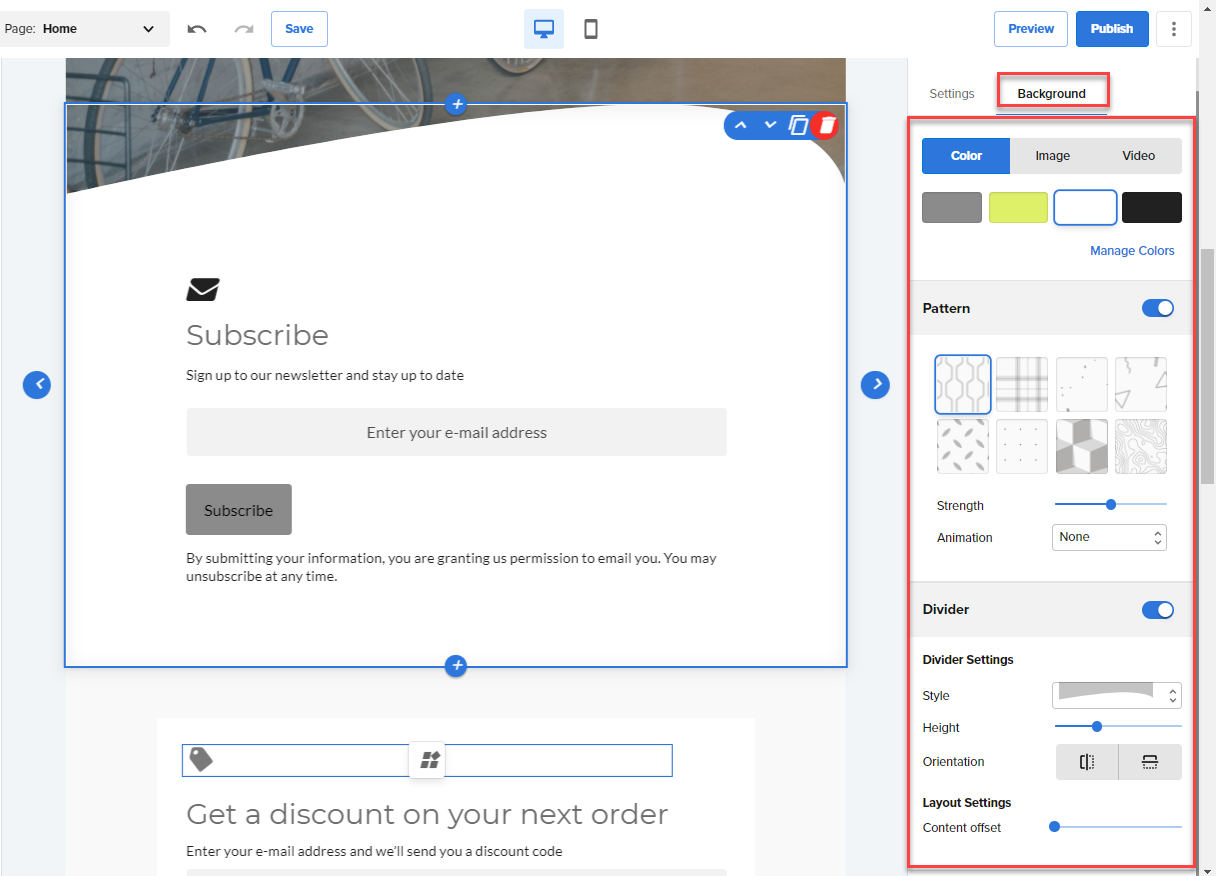
Note: Your edits and updates are reflected instantly in Website Builder, but don’t forget to hit Save or Publish to save your work.
If you need further assistance, feel free to contact us via Chat or Phone:
- Chat Support - While on our website, you should see a CHAT bubble in the bottom right-hand corner of the page. Click anywhere on the bubble to begin a chat session.
- Phone Support -
- US: 888-401-4678
- International: +1 801-765-9400
You may also refer to our Knowledge Base articles to help answer common questions and guide you through various setup, configuration, and troubleshooting steps.