Website Builder (for WordPress) - Step up your Web Design by Using WP Elements
One of the neat features in WordPress that was integrated into Website Builder is WP Elements. This article will give you a step-by-step walkthrough on how-to add WP elements, how-to-use blocks and step up your web design game.
Adding WP Elements and Blocks
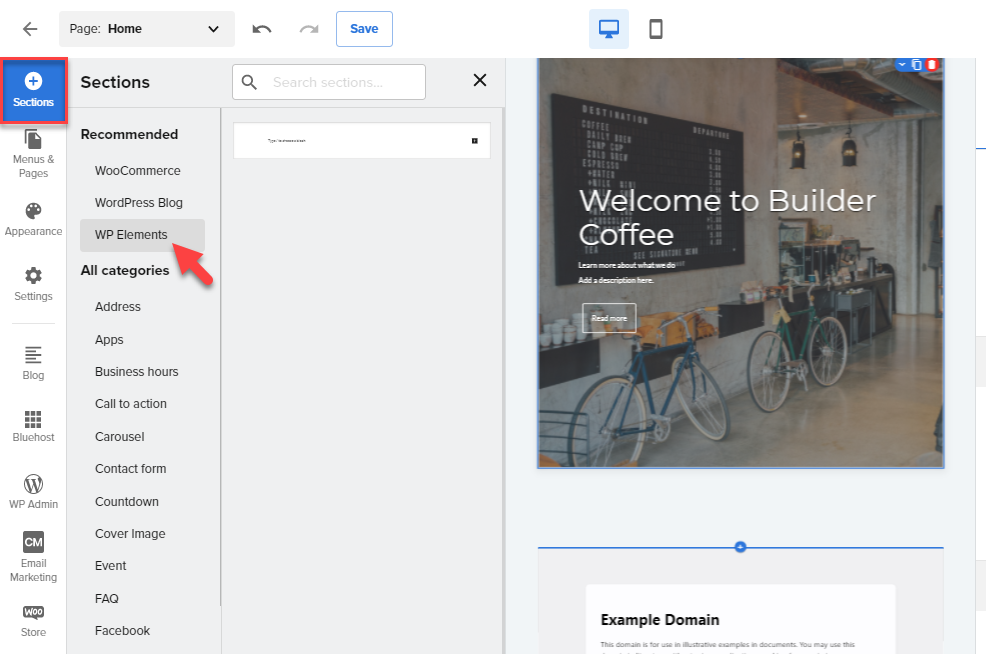
- From your Website Builder, click the + (Sections) icon and navigate through Recommended categories then select WP Elements.

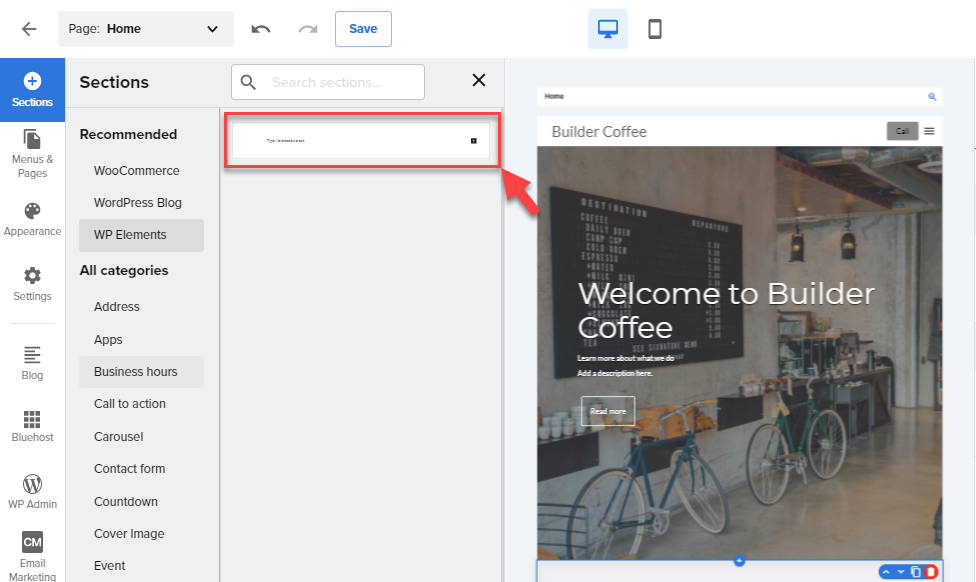
- Once you selected WP Elements, select the block section for you to add the WP Elements section.

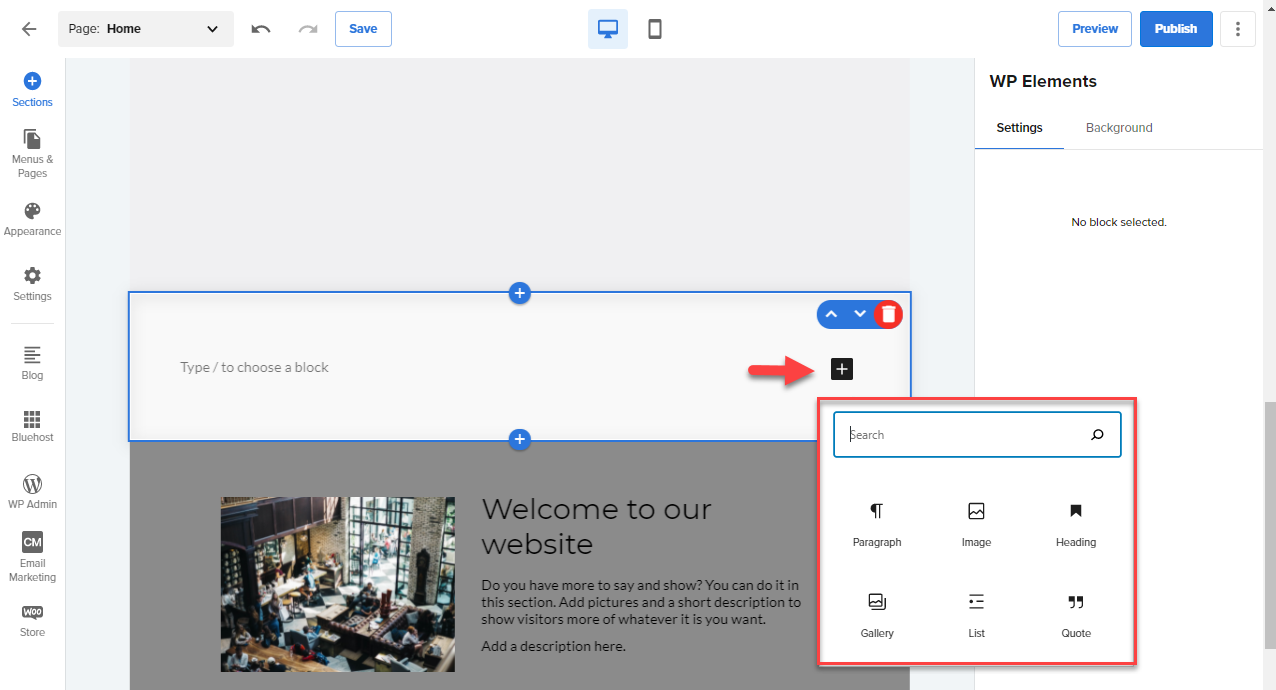
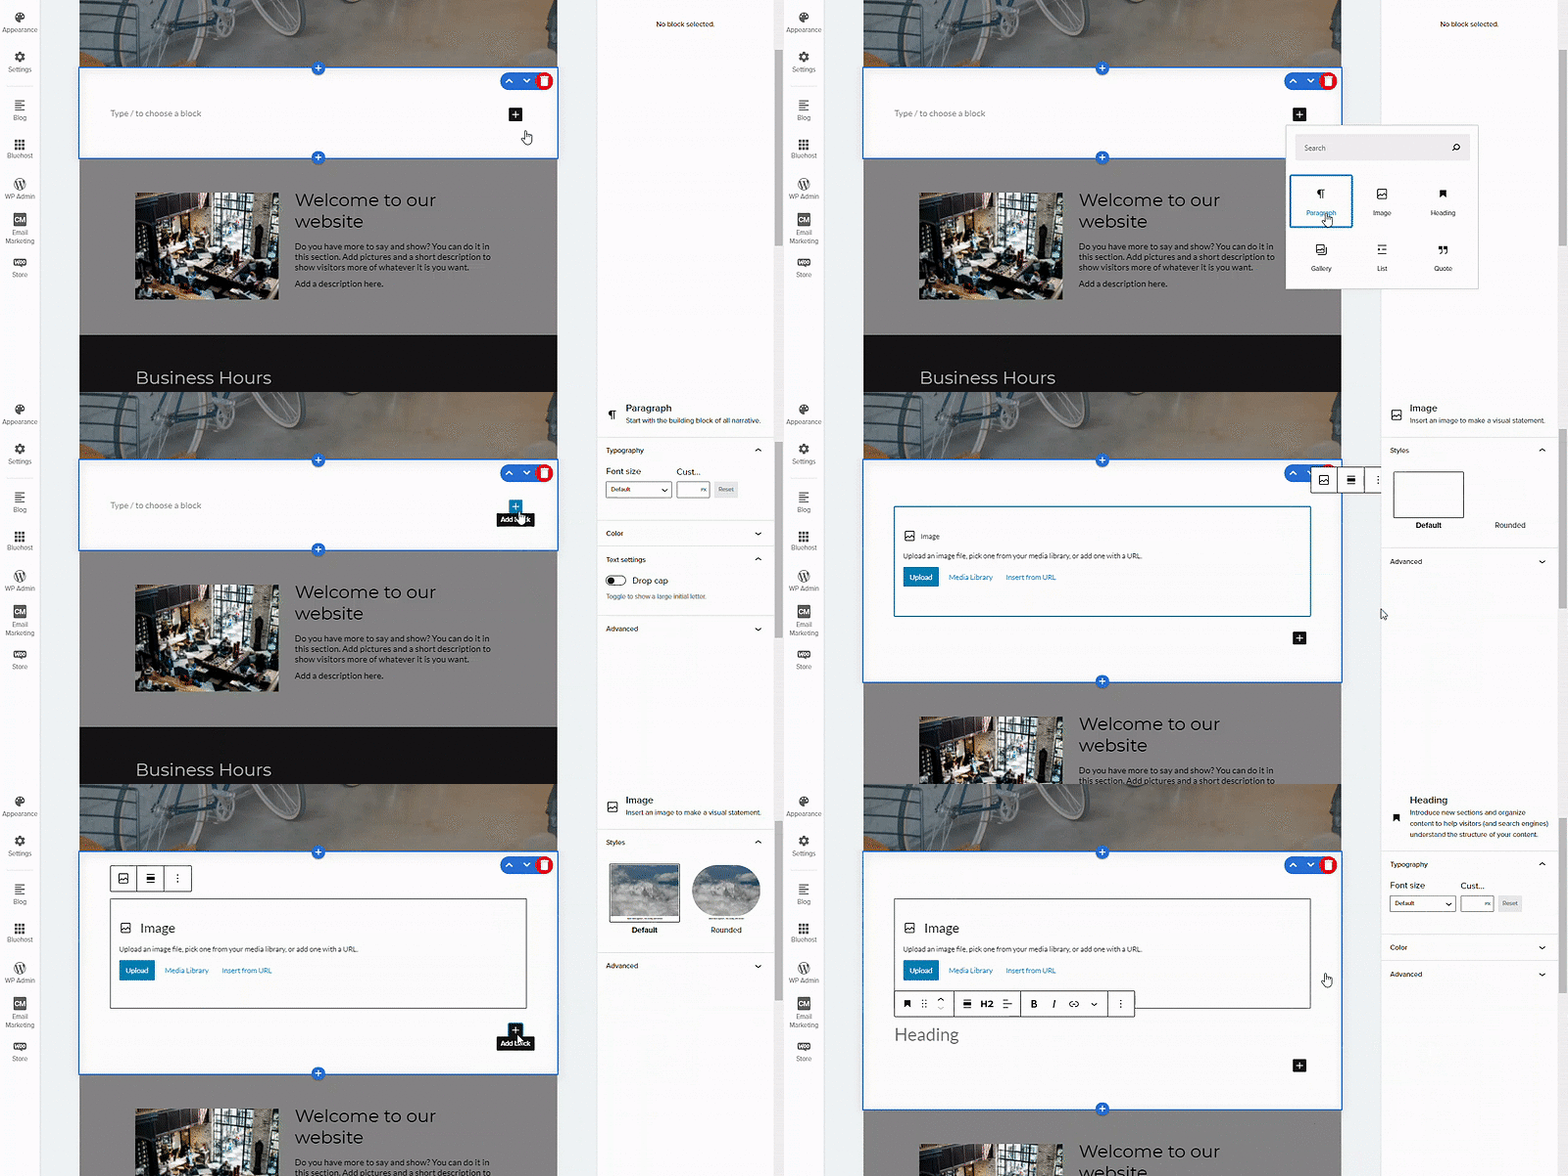
- To add a block in your WP Elements section, click the (+) inserter icon. From the inserter, you can select the common blocks provided.

Aside from that, you can also type the name of the block or the keyword on the search box. From this example, I type in "Table."

Tip: To learn more about Blocks and what other content you can add in WP Elements, check out this WordPress Help Article.
- On WP Elements, you can also add multiple blocks by clicking the (+) inserter icon.

Note: Your edits and updates are reflected instantly in Website Builder, but don’t forget to hit Save or Publish to save your work.
If you need further assistance, feel free to contact us via Chat or Phone:
- Chat Support - While on our website, you should see a CHAT bubble in the bottom right-hand corner of the page. Click anywhere on the bubble to begin a chat session.
- Phone Support -
- US: 888-401-4678
- International: +1 801-765-9400
You may also refer to our Knowledge Base articles to help answer common questions and guide you through various setup, configuration, and troubleshooting steps.