How to Create, Edit, and Remove WordPress Posts
In this article, we'll discuss how to create, edit, and delete WordPress posts directly from your WordPress dashboard. The steps below outline how to perform each action from the WordPress dashboard, including options available in the default WordPress Editor and the WonderBlocks Editor.
Here are the topics we will discuss in this article.
Here is a video guide we created to walk you through the steps.
How to Create a New Post in WordPress
You can create a WordPress post directly from the dashboard. WordPress gives you two ways to build content - the default Block Editor (commonly called Gutenberg) and WonderBlocks, a drag-and-drop tool available if your site was created with the AI Site Builder.
- Step 1: Launch the Editor to Add a Post
- Step 2: Add Content with Blocks or WonderBlocks
- Step 3: Organize Your Post
- Step 4: Save, Preview, then Publish Your Post
Step 1: Launch the Editor to Add a Post
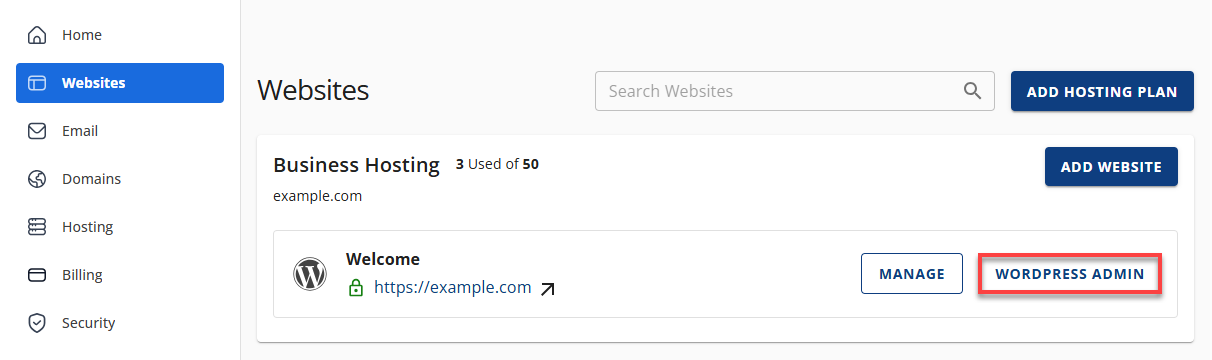
- Log in to your Bluehost Portal.
- In the left-hand menu, click Websites.
- Click the WordPress Admin button located next to the website you want to manage.
- Once logged in to WordPress, there are two editors available.
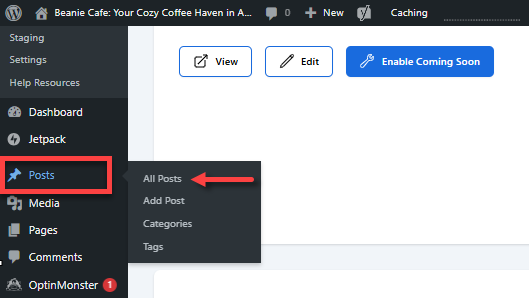
For the default Block Editor, click the + New icon at the top of the dashboard, then select Post.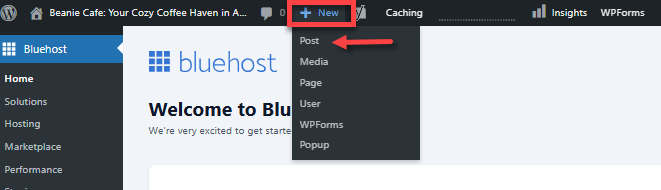
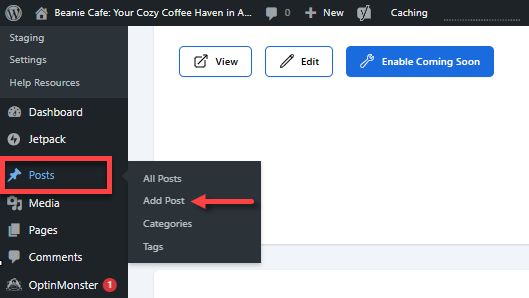
You can also click Post in the left-side menu, then select Add Post from the list of options.
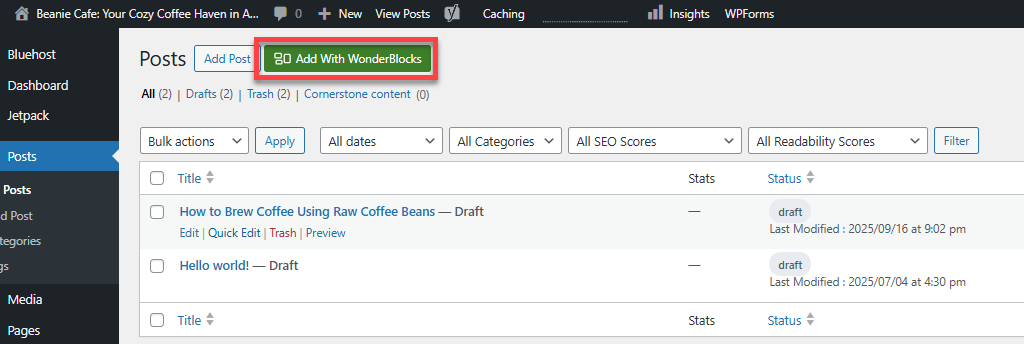
For WonderBlocks, if available on your site, click Add With WonderBlocks at the top.
Step 2: Add Content with Blocks or WonderBlocks
If you selected the default Block Editor, you'll be redirected to the WordPress block editor.
- Enter your post title at the top.
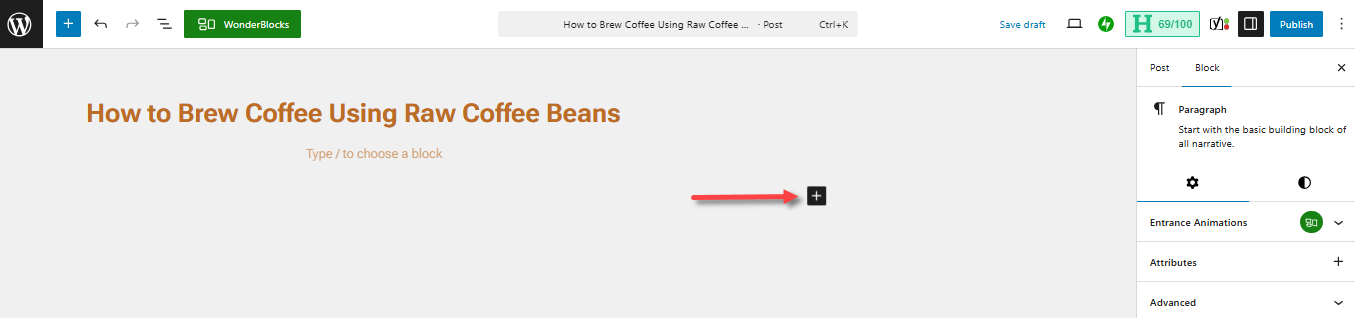
- Click the + icon (block inserter) to open the "blocks" menu. Select a block, such as the Paragraph block.
- You can choose other blocks, such as headings, tables, images, galleries, embeds, widget, and a lot more to add content to your post.
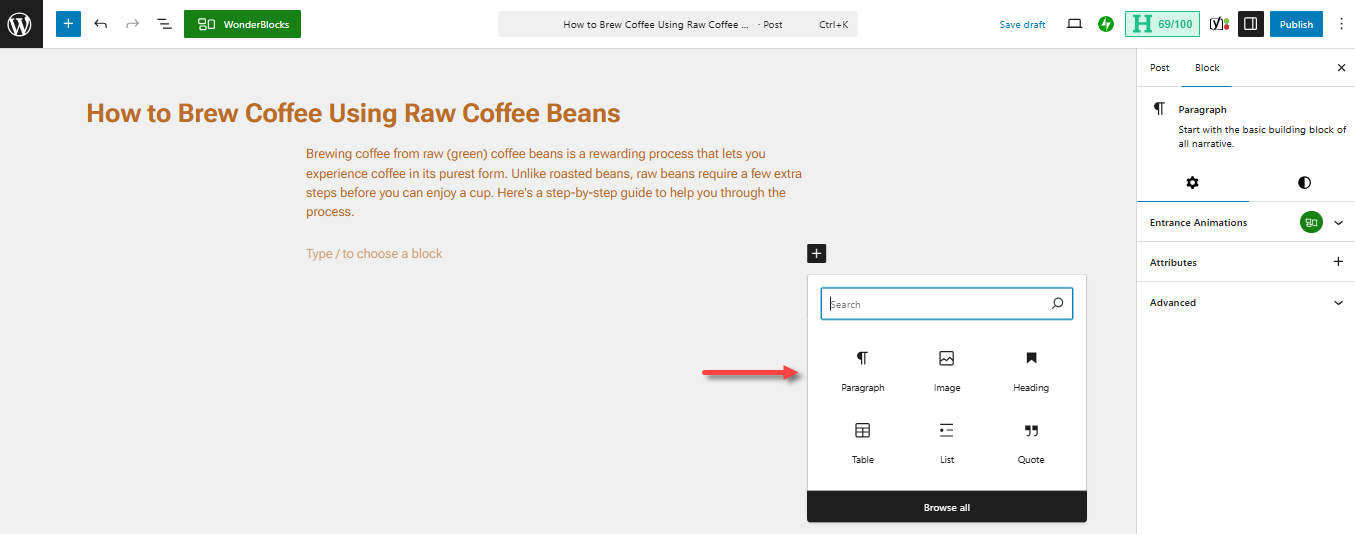
You can either scroll down the blocks menu or type the block you want to use directly.
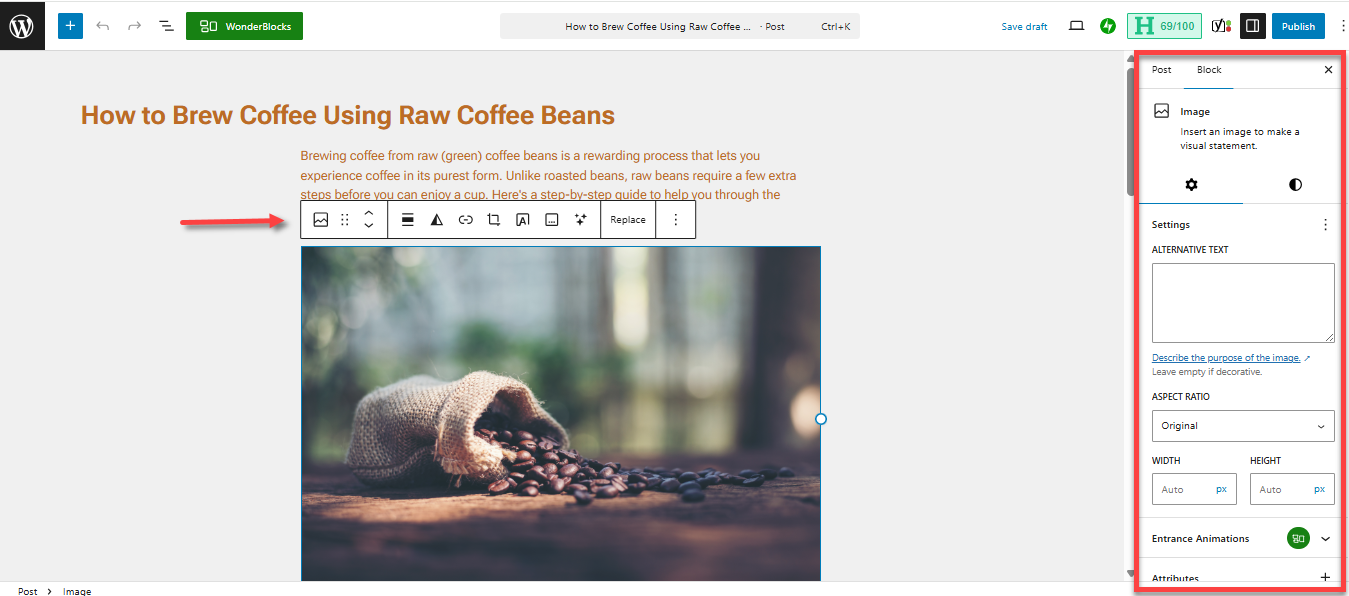
- Use the toolbar above the selected block or Settings on the right pane to configure your chosen blocks.
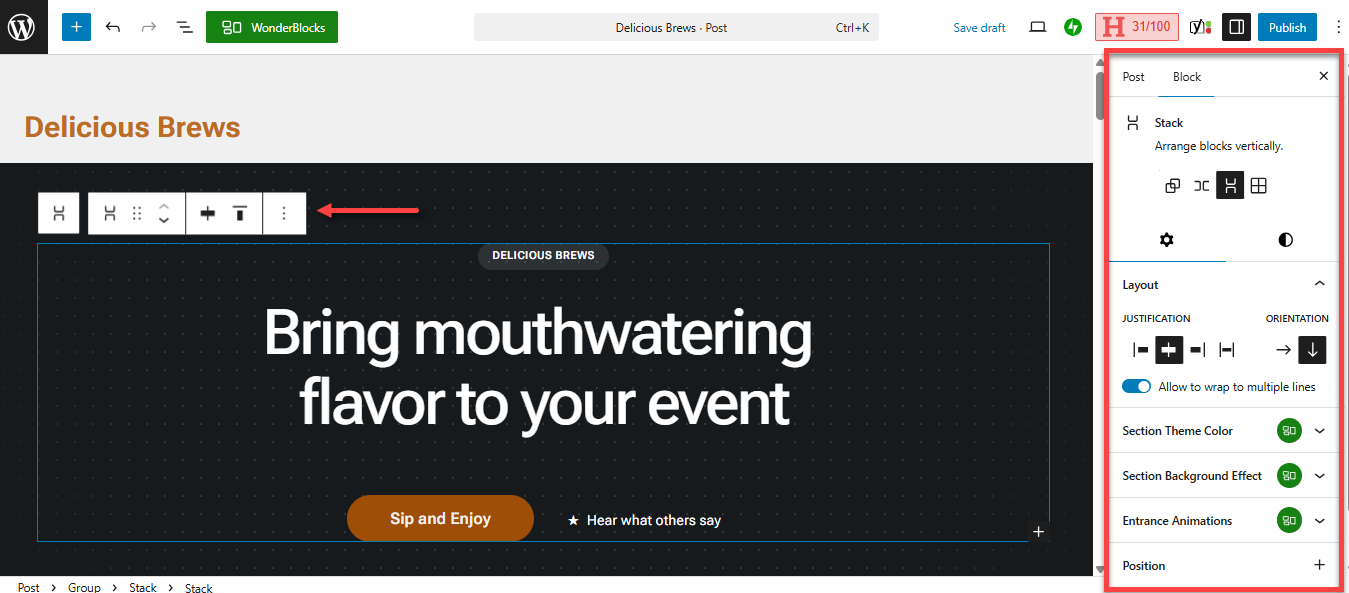
If you selected WonderBlocks, you can browse for ready-made layouts, such as blog sections, image galleries, or call-to-action blocks.
- Click the + icon of your preferred layout.

- In the editor, enter a name for your post. You can also customize each block using the toolbar above it or the Settings panel on the right.
Step 3: Organize your Post
You can organize your content using Categories and Tags, which are found in the Settings panel on the right.
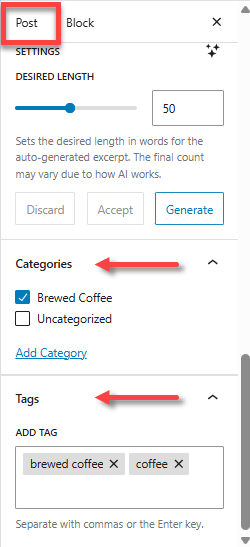
- Categories: Assign categories to your post to group related content together. This improves navigation for your readers.
- Tags: Add relevant tags to your post. This makes it easier for users to find your content through search and allows you to link similar articles.
Step 4: Save, Preview, then Publish Your Post
Once done, you can save your post as a draft or publish it right away.
- Click Save draft at the top to keep working on your post privately.

- You can also preview your website by clicking the Preview icon next to the Save draft option at the top. This allows you to see how your post will look once published.

- When you are ready, click Publish to make your post go live.

How to Edit a Post in WordPress
- Within the WordPress dashboard, click Posts in the left-side menu, then select All Posts.
- Look for the post you wish to edit, then click the Edit or Quick Edit link just below it.
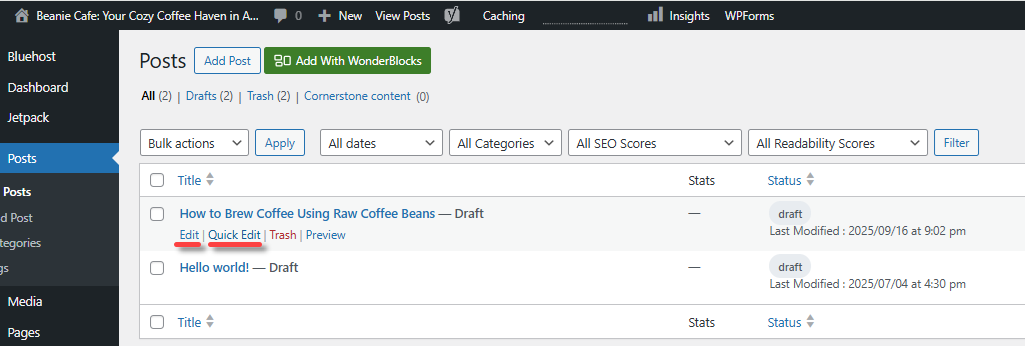
Edit vs. Quick Edit. What's the difference?
- The Edit link opens the full editor for changing the content and design of the post.
- The Quick Edit option lets you make minor adjustments, like title, categories, and tags directly from a pop-up interface, saving time by avoiding the full editor.
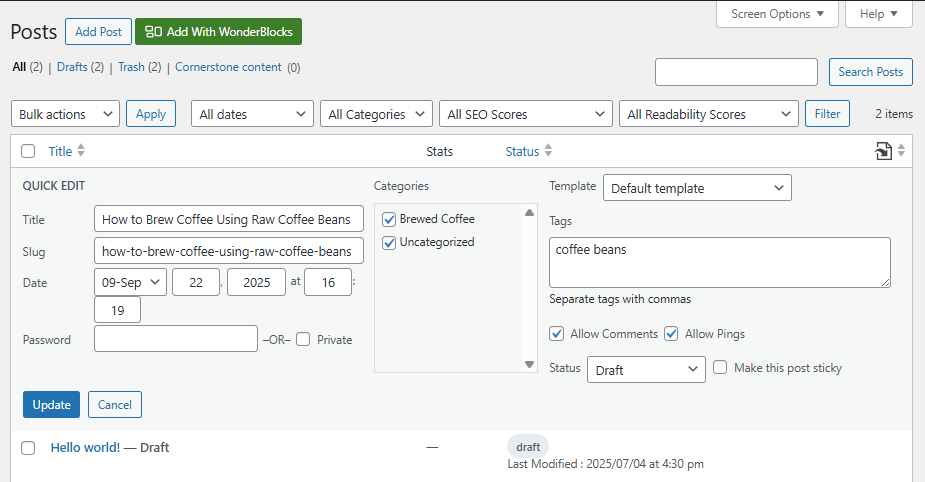
- Make your necessary edits, then click Publish to save and make it live again.
How to Remove or Restore a Post in WordPress
Sometimes you may need to remove a post - whether it’s outdated, duplicated, or no longer relevant. WordPress gives you two options: move it to Trash (temporary removal) or delete it permanently.
To temporarily remove a post:
Please note that this only temporarily deletes the post. It only moves the post to the Trash section.
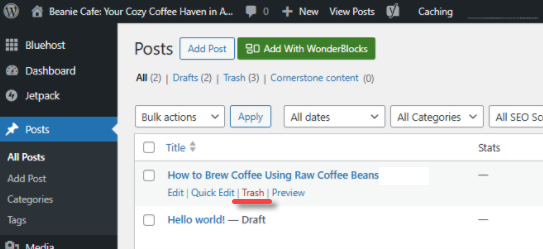
- Within the WordPress dashboard, click Posts in the left-side menu, then select All Posts.
- Hover your mouse over the post you want to delete, then click the Trash link below it.
Another method is to go to the post itself, click the vertical ellipsis on the right panel, then select Move to trash.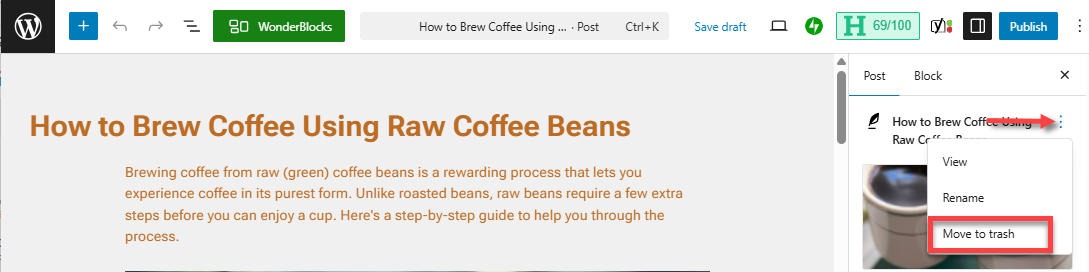
- In the pop-up, click Trash.
To restore a previously deleted post (deleted temporarily):
If you need to restore or send a post back to the published or draft list, follow these steps.
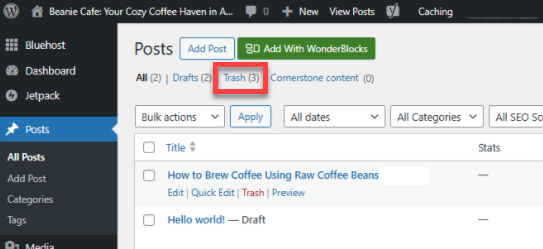
- Within the WordPress dashboard, click Posts in the left-side menu, then select All Posts.
- Click the Trash link in the top menu.
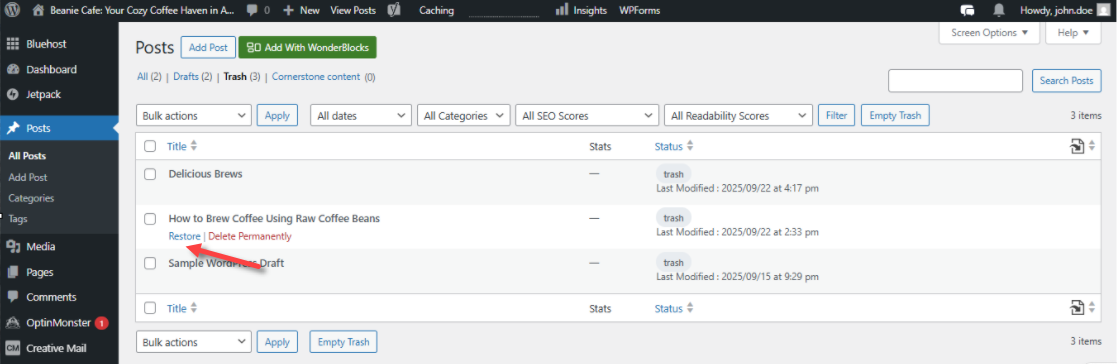
- Hover your mouse over the post you want to restore, then click the Restore link below it.
To permanently delete a post:
- Within the WordPress dashboard, click Posts in the left-side menu, then select All Posts.
- Click the Trash link in the top menu.
- Hover your mouse over the post you want to delete permanently, then click the Delete Permanently link below it. Please note that there won't be a pop-up this time.

Summary
Managing your WordPress content is simple using the dashboard's built-in tools. This article walks you through how to create, edit, and remove posts using both the default Block Editor and the WonderBlocks Editor. Learn how to publish new posts, update existing content, and delete irrelevant posts—all from one place. Whether you're a newbie or an advanced user, learning thee core actions helps keep your website content, relevant, organized, and engaging.
If you need further assistance, Bluehost Chat Support is available 24 hours a day, 7days a week while Bluehost Phone Support is available 7 days a week from 7 am-12 midnight EST.
- Chat Support - While on our website, you should see a CHAT bubble in the bottom right-hand corner of the page. Click anywhere on the bubble to begin a chat session.
- Phone Support -
- US: 888-401-4678
- International: +1 801-765-9400
You may also refer to our Knowledge Base articles to help answer common questions and guide you through various setup, configuration, and troubleshooting steps.