How to Clear WordPress Cache and Optimize Performance
Knowing how to clear WordPress cache helps ensure your site displays recent changes while maintaining fast performance. When a website receives many simultaneous visitors, large numbers of PHP processes can run on the server. One way to improve performance is through caching.
Bluehost includes built-in caching through the Bluehost Portal and the Bluehost plugin. This feature is automatically enabled for all WordPress installations and helps improve performance without manual configuration.
How to Clear WordPress Cache
There are several ways to clear cached content depending on where the cache is stored.
Clear Plugin Cache
If you are using a caching plugin, open the plugin settings and select the option to clear cache.
Most plugins include a button labeled:
- Delete Cache
- Empty All Caches
- Clear Cache
- Delete Cache and Minified CSS/JS
Clear Browser Cache
Sometimes your browser stores old files.
Clear your browser cache to ensure you see the latest changes:
- Chrome
- Click the three dots in the upper-right corner.
- Select Settings.
- Go to Privacy and Security.
- Then select Delete browsing data, choose Cached images and files, and then click Clear Data.
- Firefox
- Click on the Menu button.
- Go to Settings.
- Then, select Privacy and Security.
- Under the Cookies and Site Data, click Clear Data for Cached Web Content.
- Safari
- Open Safari.
- Click Safari at the top of the screen.
- Go to Settings or Preferences(depends on the macOS version you have).
- Go to the Privacy tab, and click on Manage website data.
- You can select each website to remove, or to Remove All websites.
Clear Bluehost Hosting Cache
If your site is hosted on Bluehost:
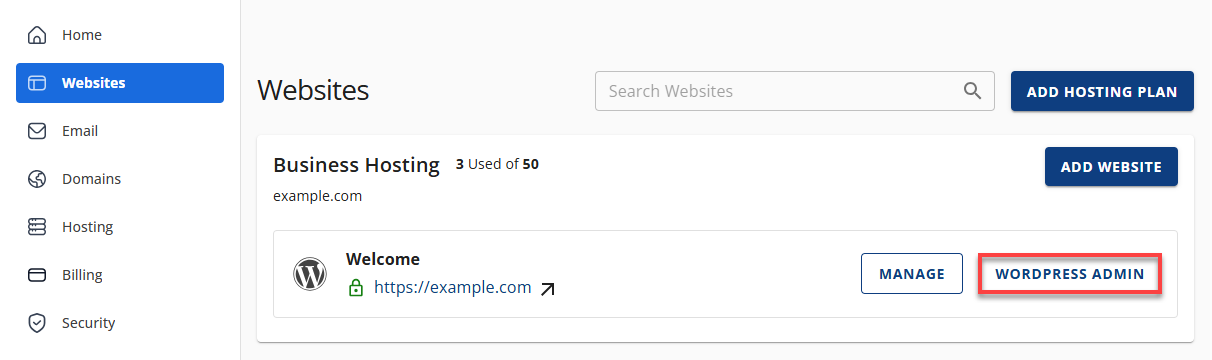
- Log in to your Bluehost Portal.
- In the left-hand menu, click Websites.
- Click the Manage Site button located next to the website you want to manage.

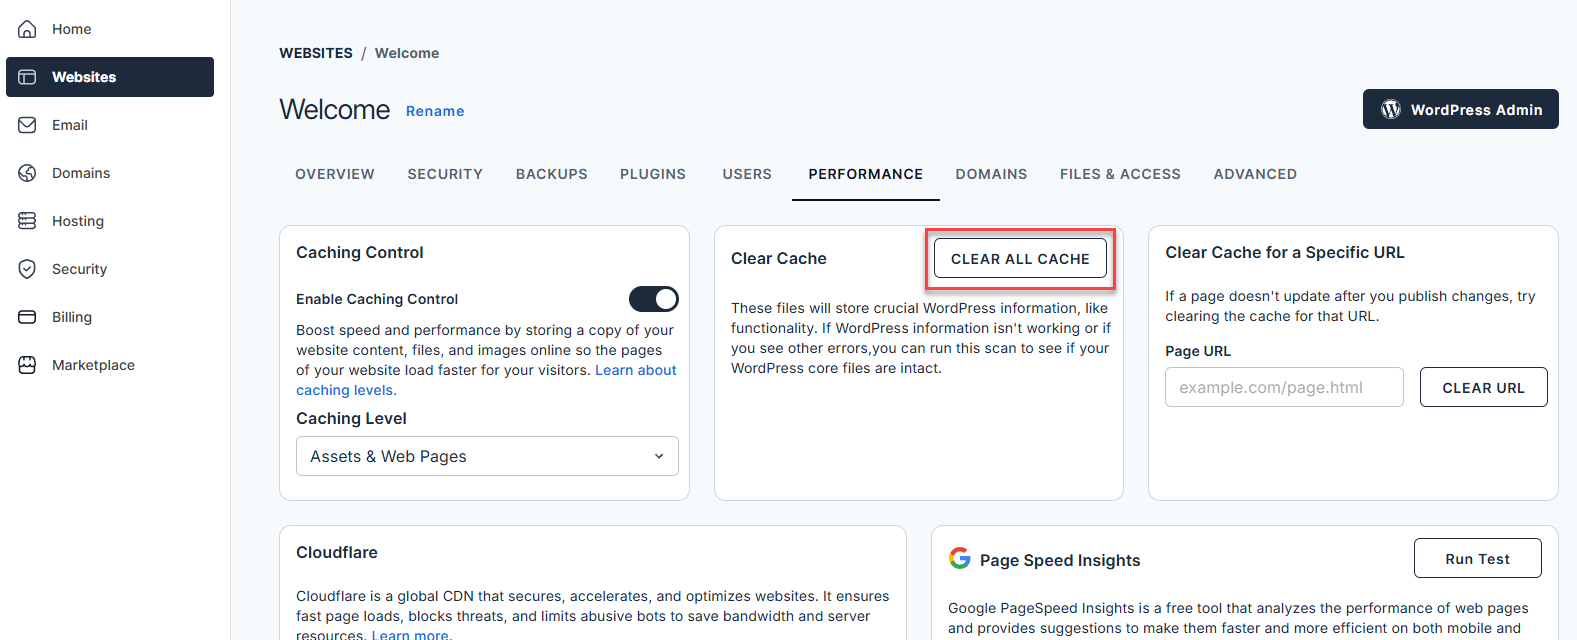
- Open the Performance tab.
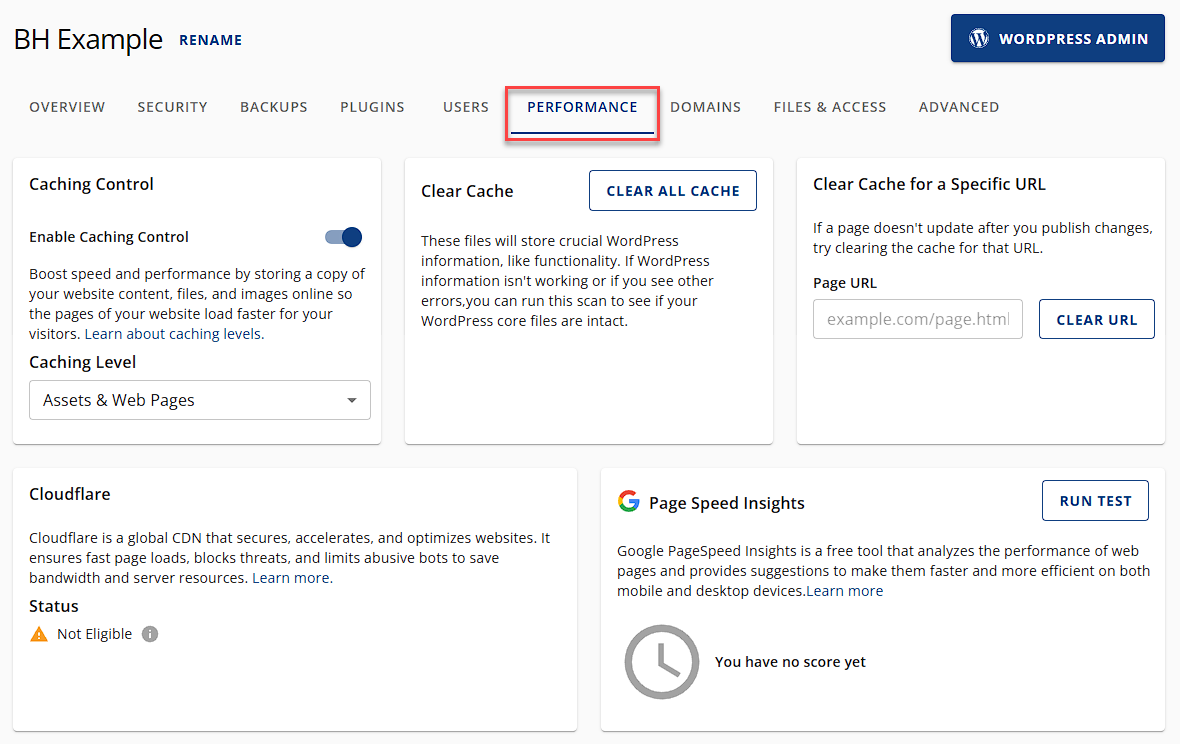
- Then, on the Clear cache tile, click Clear all cache.
Clear CDN Cache
If you're using a CDN (Content Delivery Network) like Cloudflare to speed up your website, you'll need to clear its cache too. Log in to your Cloudflare account, select your website, head over to the Caching tab, and click on 'Purge Everything'. This action ensures that the CDN serves visitors the most recent version of your site.
Clear Cache Manually
For manual cache clearing or when other methods are not applicable, you can directly delete the cache files using FTP or the File Manager provided by your web hosting service. Navigate to the wp-content/cache directory of your WordPress installation and manually delete the contents of this folder.
Be careful to only remove cache files to avoid accidentally deleting important data.
Benefits of Setting Up WordPress Caching Features
Setting up caching features on your WordPress site brings numerous benefits, enhancing both user experience and website performance. Here's a look at the key advantages:
- Improved Site Speed - Caching your WordPress site is a smart move to improve your website's speed and visitor experience. It works by saving a version of your webpages, so the server doesn't have to rebuild the page each time someone visits. This cuts down loading times and keeps visitors engaged.
- Enhanced User Experience - A website that loads quickly keeps users happy. Since no one likes to wait, they'll stick around longer, check out more pages, and aren't as likely to bounce. If they have a good experience, they're likely to come back.
- Higher Search Engine Rankings - Google cares about how fast your site is. If your site loads faster, it can rank higher in search results. Caching can really help to speed things up, which means more people might find your site when they search for stuff. More visitors can mean a bigger online presence.
- Reduced Server Load - Caching minimizes the number of requests to your server by not having to dynamically generate a page each time it's requested. This reduces server load, which is especially beneficial during traffic spikes. A lower server load means your site remains stable and responsive, even under heavy traffic.
- Lowered Bandwidth Consumption - Using cached pages means your site uses less bandwidth. This is great if you have bandwidth limits or pay for what you use. Less bandwidth can also save you money, especially if your site gets a lot of visitors.
- Improved Site Reliability - Caching improves website performance by handling more traffic and preventing crashes during busy times. It keeps your site online by cutting down on server requests, which is helpful when there are lots of visitors.
- Scalability - As your WordPress site grows, caching helps it scale. You can serve more visitors without needing to upgrade to a significantly more powerful (and expensive) hosting solution right away. This scalability is crucial for websites that experience rapid growth or have fluctuating traffic patterns.
Types of Caching Used by Bluehost
Bluehost uses multiple caching layers automatically.
Page Caching
Page caching stores full generated pages so they can be delivered instantly instead of being rebuilt every request.
This is the primary performance improvement visitors notice.
Object Caching
In addition to page caching, Bluehost also uses object caching with Redis.
Object caching stores frequently requested database data in memory rather than repeatedly querying the database.
This improves:
- WordPress admin speed
- Dynamic page generation
- WooCommerce and membership plugins
- High-traffic stability
Object caching runs automatically and requires no setup. Please check out the What is Object Caching at Bluehost article to learn more.
CDN & Browser Caching
Bluehost may also use CDN and browser caching to store static files closer to visitors and locally on their devices, reducing load time.
How to Enable Caching Feature in WordPress
- Log in to your Bluehost Portal.
- In the left-hand menu, click Websites.
- Click the WordPress Admin button located next to the website you want to manage.
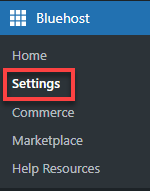
- Select Bluehost from the left-side menu and click on Settings.
- On the Settings page, click the Performance dropdown.

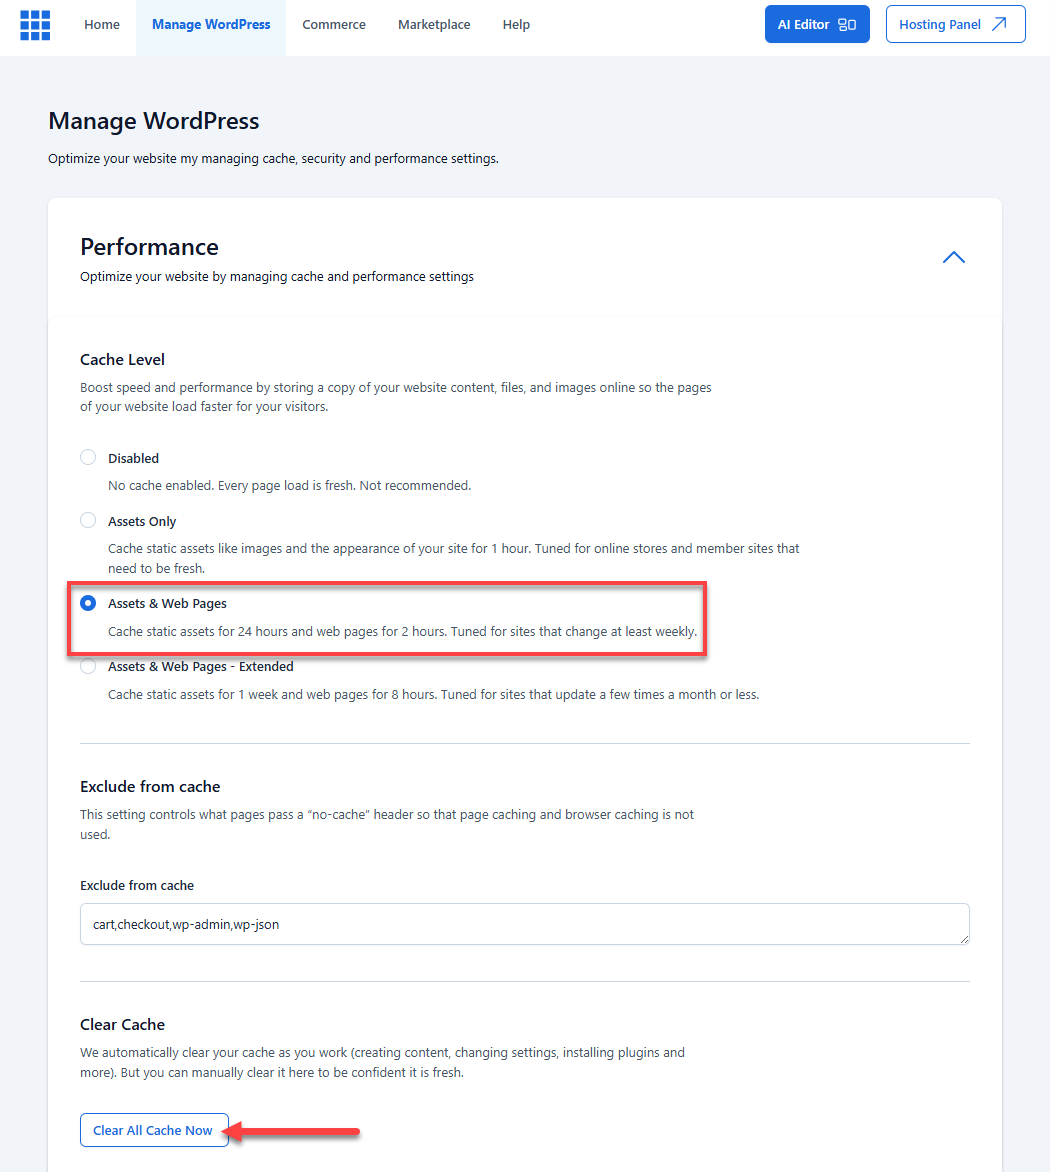
- Choose Assets & Web Pages. You may also choose other options under Caching Level depending on the length of time you prefer your site to store cache (5 mins/6 hours/1 week). There is also an option to clear the cache under the Clear Cache section.
Summary
Learning how to clear WordPress cache helps ensure visitors see updated content while maintaining performance. Bluehost automatically provides page caching and object caching using Redis to reduce database requests and speed up your website. Clearing the cache refreshes stored data so your site rebuilds optimized content when needed.
If you need further assistance, Bluehost Chat Support is available 24 hours a day, 7days a week while Bluehost Phone Support is available 7 days a week from 7 am-12 midnight EST.
- Chat Support - While on our website, you should see a CHAT bubble in the bottom right-hand corner of the page. Click anywhere on the bubble to begin a chat session.
- Phone Support -
- US: 888-401-4678
- International: +1 801-765-9400
You may also refer to our Knowledge Base articles to help answer common questions and guide you through various setup, configuration, and troubleshooting steps.