How to Set up Outlook 2013 on Windows
If you plan on using Outlook for your email needs, knowing how to set up Outlook 2013 correctly is essential. Fortunately, the process is quite simple, and this guide will walk you through the steps. While the steps may differ slightly for other versions of Outlook, the instructions provided here are specific to Outlook 2013.
Setting up an email account on Outlook 2013 is quick and easy; it can be done in just a few steps. You'll need some information, such as your email address, password, and server settings. Once you have all this information, you can start setting up your account.
- Before we start the setup process, take note that Outlook 2013 is only compatible with Windows operating systems. You must use a different email client if you're using a Mac or another operating system.
- This version no longer receives updates from Microsoft. Using it may expose you to security risks.
In this article, we will discuss the following:
How to Set up Outlook 2013
Below are the steps to easily configure your email account and start using Outlook 2013 to manage your emails.
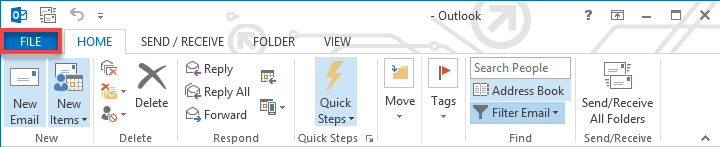
- Open Outlook and select the File menu in the top menu.
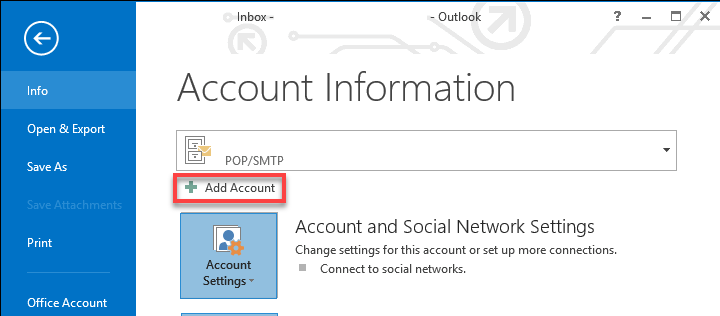
- Click Info and select Add Account.
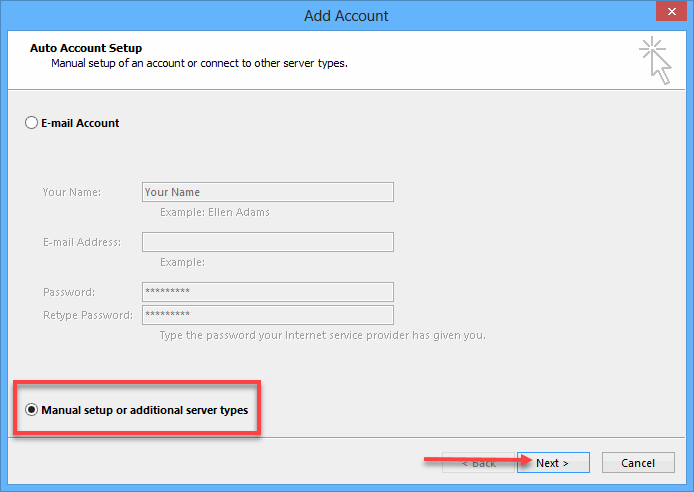
- Choose Manual setup or additional server types, then click the Next button.
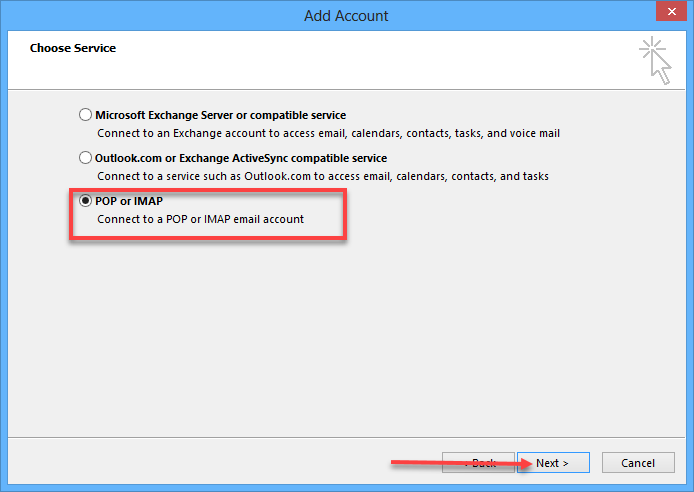
- Choose the POP or IMAP option and click Next.
POP and IMAP Account Settings
POP (Post Office Protocol) and IMAP (Internet Message Access Protocol) are different email retrieval protocols. POP is an older protocol that downloads email messages from the server to the client and then typically deletes them from the server. Alternatively, IMAP keeps your email messages stored on the server, allowing you to access them from any device. Overall, IMAP is the better option for most users, as it provides more flexibility and enables you to access your email from multiple devices more easily.
Please visit our article on POP vs. IMAP to learn more about the difference between the two.
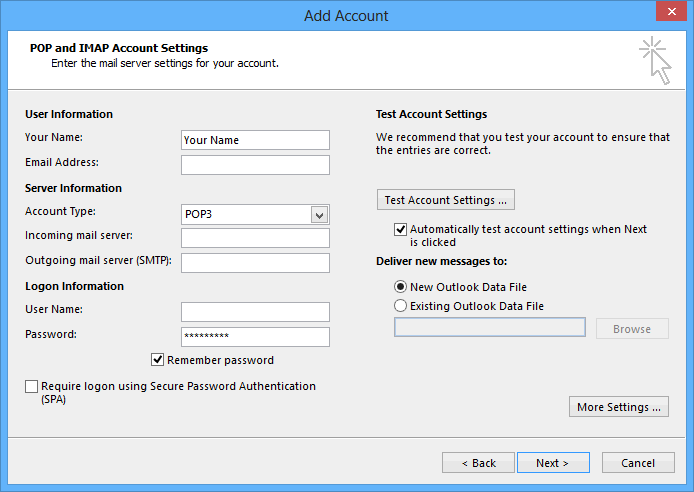
- Fill out the User, Server, and Logon Information fields.
- Your Name: Enter your full name as you want it to appear on your outbound emails.
- Email Address: Enter your complete email address.
- Account Type: Click the drop-down menu and select IMAP or POP. We recommend IMAP.
- Incoming and Outgoing mail servers: mail.example.com, where "example.com" is your domain name.
- User Name: Enter your email address again.
- Password: Enter your email password.
- Remember password: Select if you want the application to remember your password.
- Click Next.
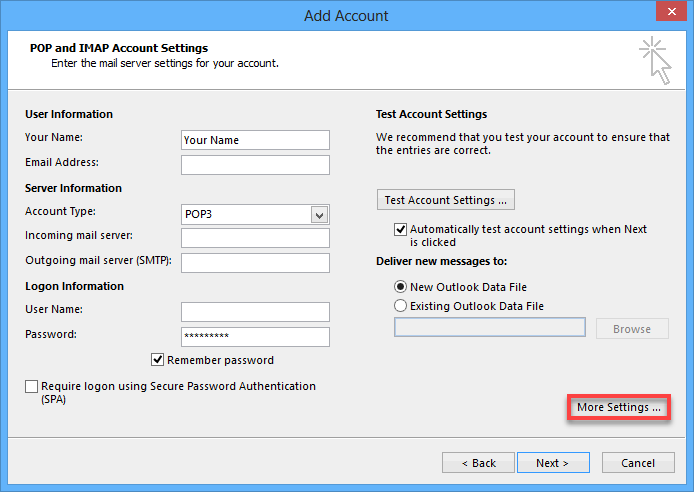
More Settings
More Settings is an advanced option in Microsoft Outlook that allows you to customize email account settings beyond the basic options. It helps configure server settings, security options, and other advanced settings specific to your email provider.
- Click the More Settings... button in the bottom right corner.
- Go to the Outgoing Server tab and select the My outgoing server (SMTP) requires authentication box.
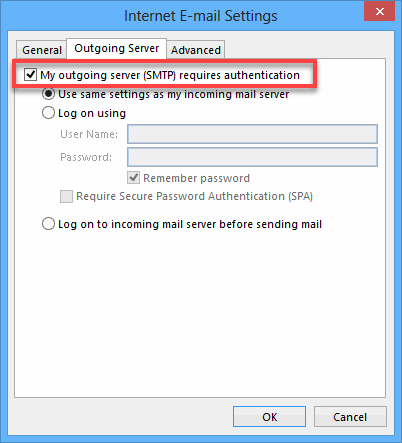
- Make sure it's using the same settings as your incoming mail server.
- Go to the Advanced tab.
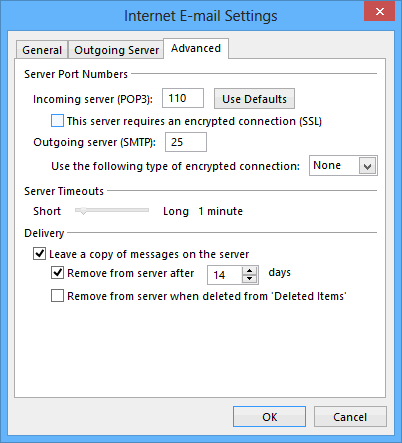
The server port numbers you'll type here will depend on the account and connection type you're setting up. Refer to your email configuration settings as necessary.
- Click the OK button.
- On the E-mail Accounts window, click Next.
- Click the Finish button.
You should be all set once you've entered your account information and configured your server settings! Outlook will automatically start syncing your email, and you can send and receive messages from the program.
Summary
To know how to set up Outlook 2013 is an easy task that can be done in just a few steps. Whether you're using a personal or work email account, Outlook 2013 is a great tool for managing your emails. Following the instructions in this guide, you should be able to configure your account settings and start using Outlook for all your email needs. Once you have set up your email account, you can easily create, send, receive emails, and manage your contacts and calendar. With its user-friendly interface and convenient features, Outlook 2013 is a reliable and efficient email client that can help you stay organized and productive. So, if you're looking for a simple and effective way to manage your emails, give Outlook 2013 a try!
If you need further assistance, Bluehost Chat Support is available 24 hours a day, 7days a week while Bluehost Phone Support is available 7 days a week from 7 am-12 midnight EST.
- Chat Support - While on our website, you should see a CHAT bubble in the bottom right-hand corner of the page. Click anywhere on the bubble to begin a chat session.
- Phone Support -
- US: 888-401-4678
- International: +1 801-765-9400
You may also refer to our Knowledge Base articles to help answer common questions and guide you through various setup, configuration, and troubleshooting steps.