Enhancing Webmail Security: A Guide to Guard Encryption
Email encryption scrambles your messages to protect them from prying eyes. Guard is a tool that lets you encrypt emails and files right from your webmail. This guide will show you how to use Guard Encryption.
Advantages of Guard Encryption
Guard Encryption is a powerful tool that boosts your email security. By encrypting your emails and files, you can safeguard sensitive information from potential cyber threats. This feature allows you to set different encryption levels and protect your data with a strong password. If you forget your password, you can easily reset it within your webmail account.
Before you start using Guard Encryption, you'll need to set up a strong password and a recovery email. The password will protect your encrypted data, and the recovery email will help you regain access if you forget your password.
Choose the correct option below for step-by-step instructions based on your email platform. To identify your email platform, check out our guide: How Do I Determine My Email Platform.
Securing Your Cloud Mail: Setting Up Guard Encryption
Let's walk you through the steps to set up Guard Encryption in your webmail:
- In your web browser's address bar, type "mail." followed by your domain name and extension (e.g., mail.example.com if your domain is "example" and the extension is ".com").
- Provide your login details.
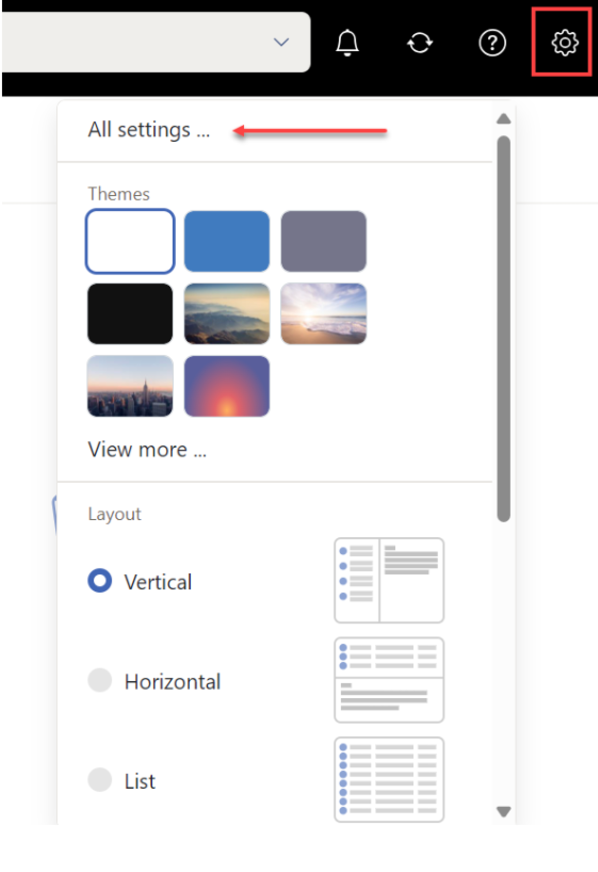
- After logging in, find the gear icon and select All Settings.
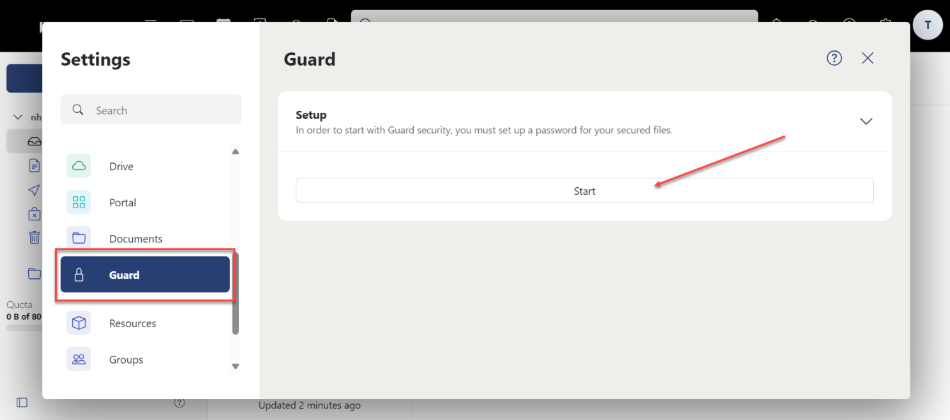
- Go to the Guard section, located in the left-hand menu, and then click the Start button to begin the process.
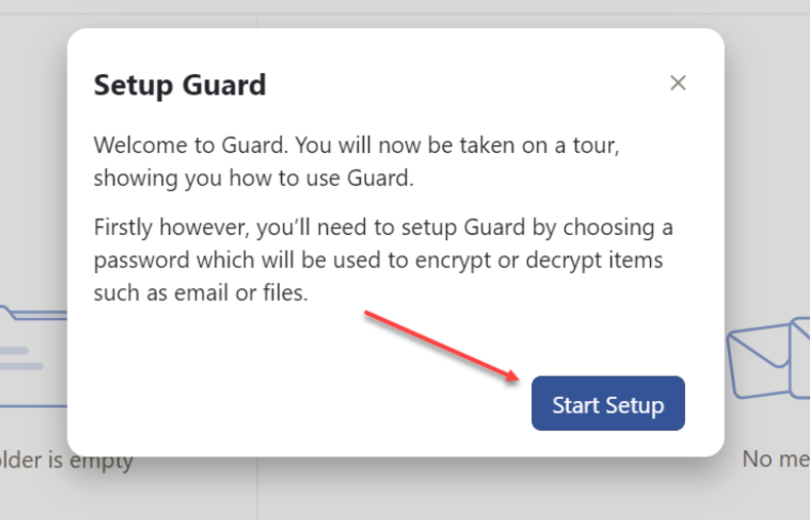
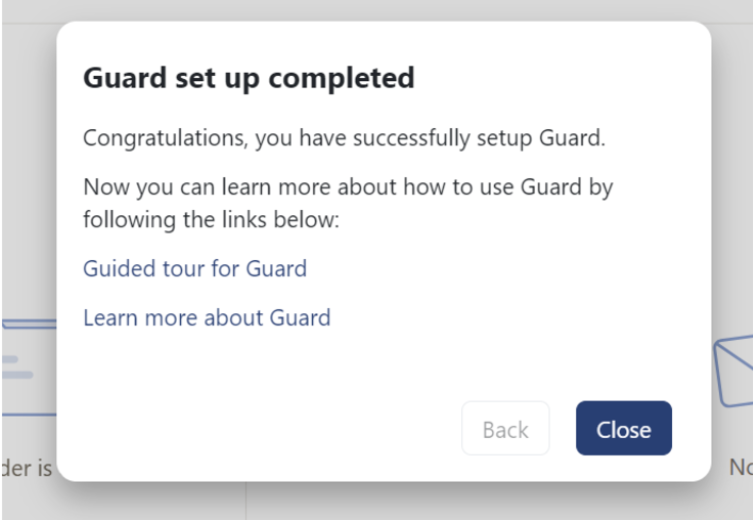
- Once you see the welcome pop-up, click the Start Setup button to get started.
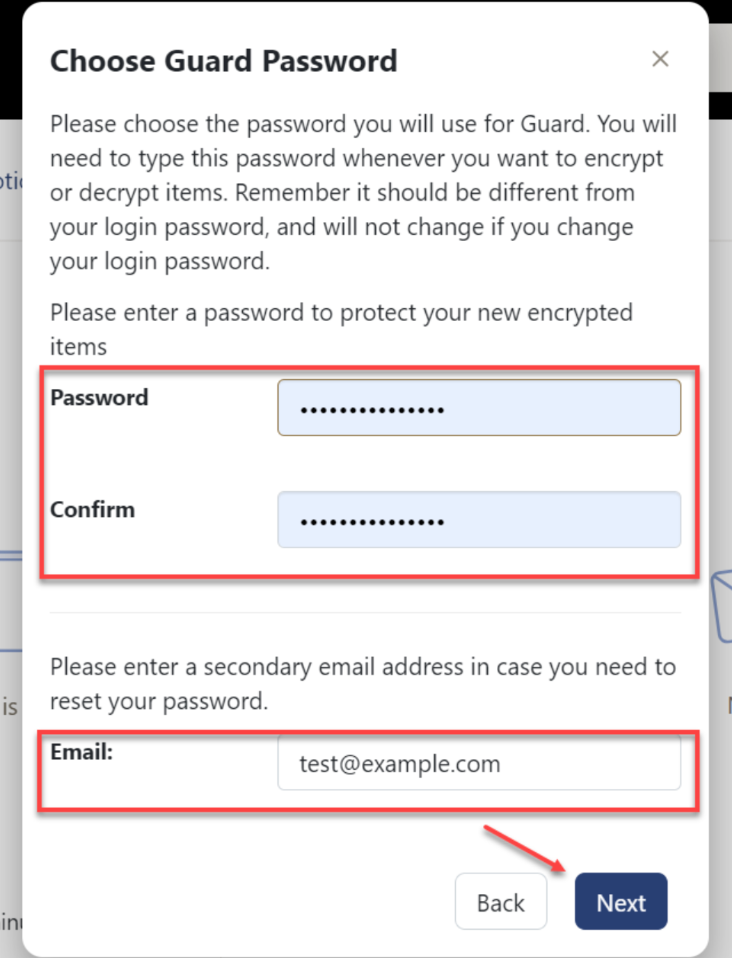
- Set a secure password to protect your data. Confirm this password to ensure accuracy. Additionally, provide an additional email address as a backup. This email will be used to receive a temporary password if you forget your primary password.
- A pop-up message will appear to let you know that Guard Encryption has been successfully enabled.
Securing Your Cloud Mail: Enabling Guard Encryption
To enable email encryption, follow these steps during the email composition process:
- Click the lock icon to protect your email with Guard Encryption.

- You'll be asked to enter your Guard Encryption password and choose how often you want to be prompted. If you forget your password, click Forgot Password to reset it in your webmail settings.
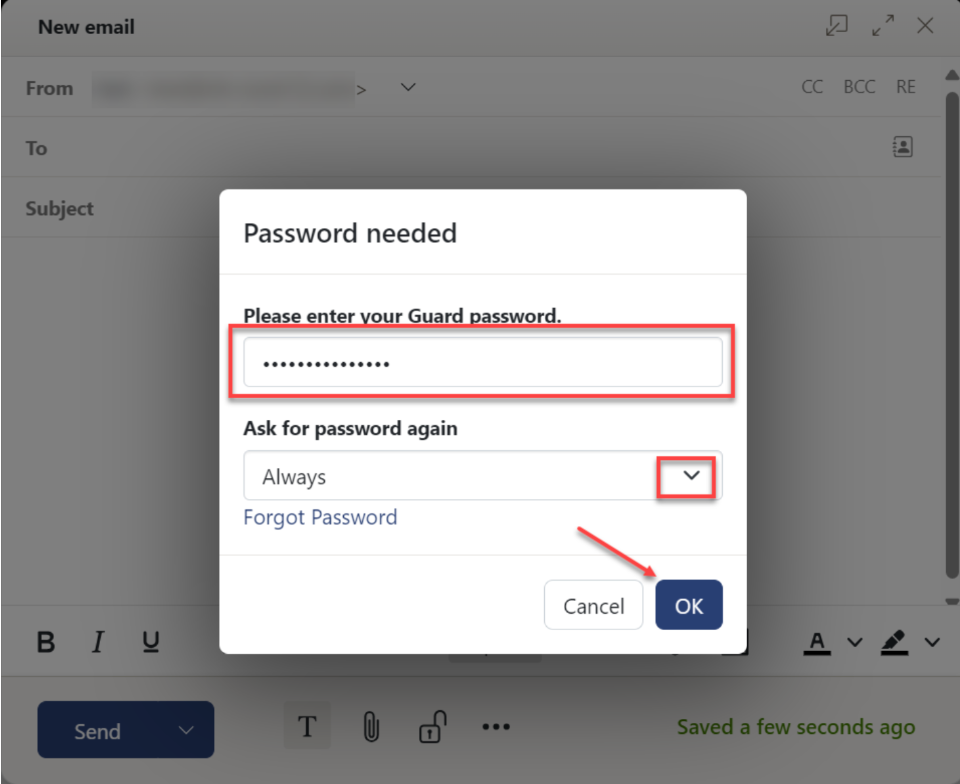
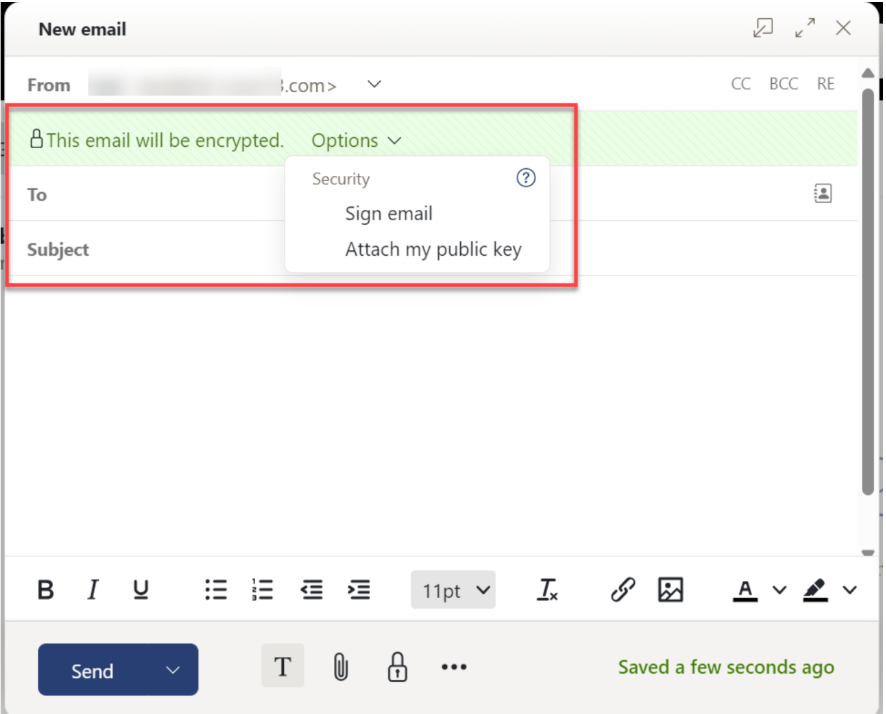
- Once you confirm your password by clicking the OK button, Guard Encryption will be activated. You'll then see two choices:
- Sign Your Emails: Add a professional touch to your emails with a personalized signature.
- Attach my public key: Send your public key to the recipient to allow them to encrypt their response to you.
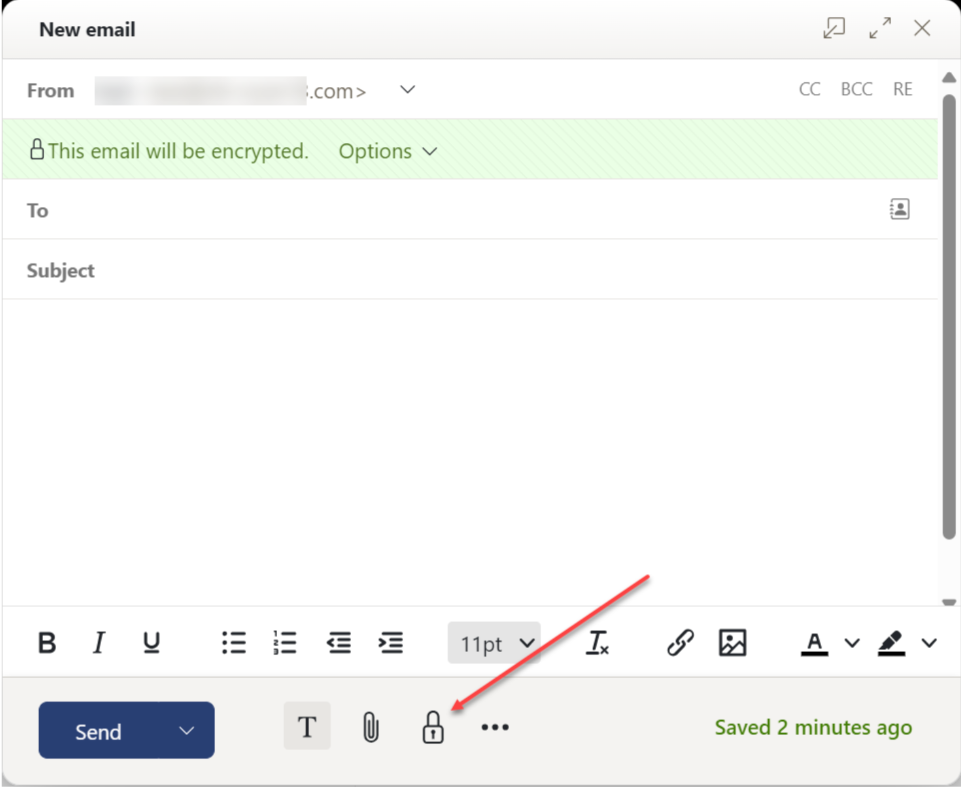
You can now send encrypted emails with Guard Encryption.
Disabling Guard Encryption
Here are some guidelines on how to disable Guard Encryption for your emails:
- Before you begin writing your email, unlock the lock icon next to the compose box.
- Next, if you've enabled the "Default to send encrypted when composing email" setting in Guard, you'll need to uncheck this option to disable Guard Encryption.
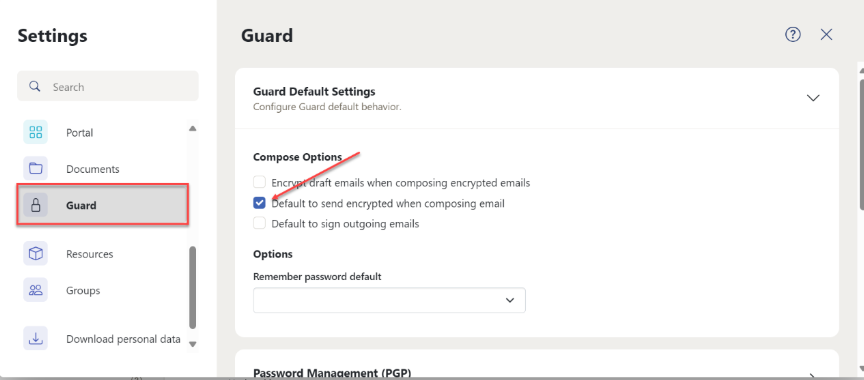
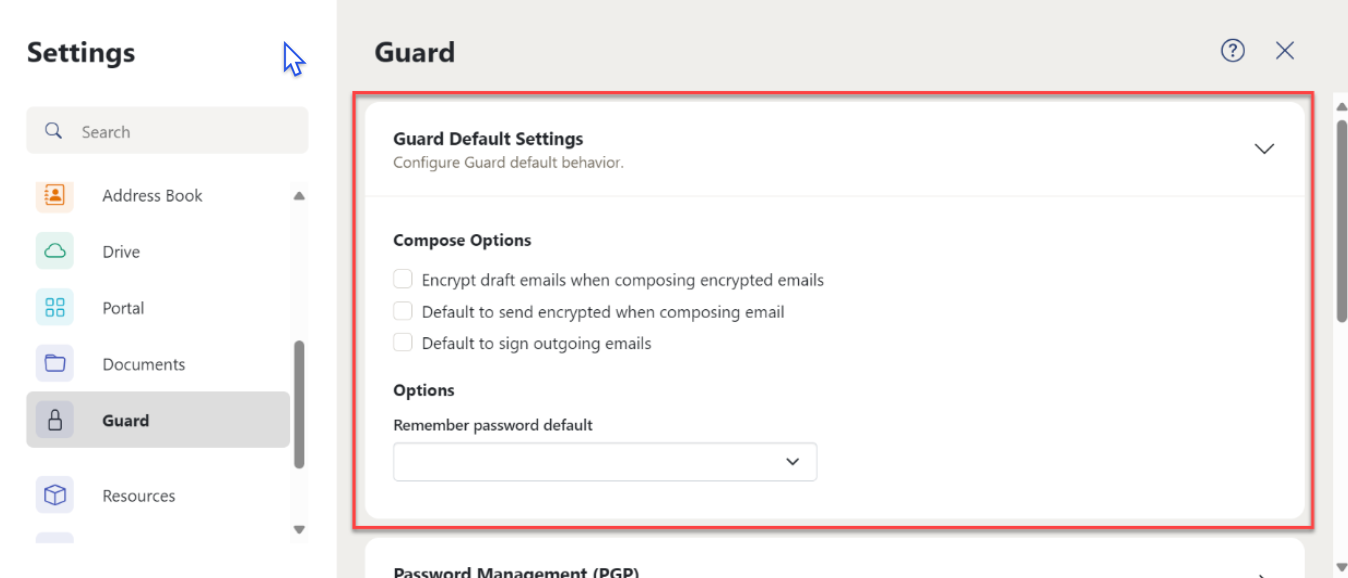
Cloud Mail Settings
If Guard Encryption is already activated, you'll see a screen like the one shown. You can use this screen to manage your encryption settings and select from the following options:
- Guard Default Settings
- Encrypt draft emails when composing encrypted emails: This setting automatically saves your encrypted email drafts, ensuring they remain secure.
- Default to send encrypted when composing email: This option allows you to send encrypted emails by default.
- Default to sign outgoing mails: This setting automatically adds your signature to all emails you send.
- Remember password default: This option allows you to specify how long Guard Encryption should store your password. You can change this setting whenever you need to.
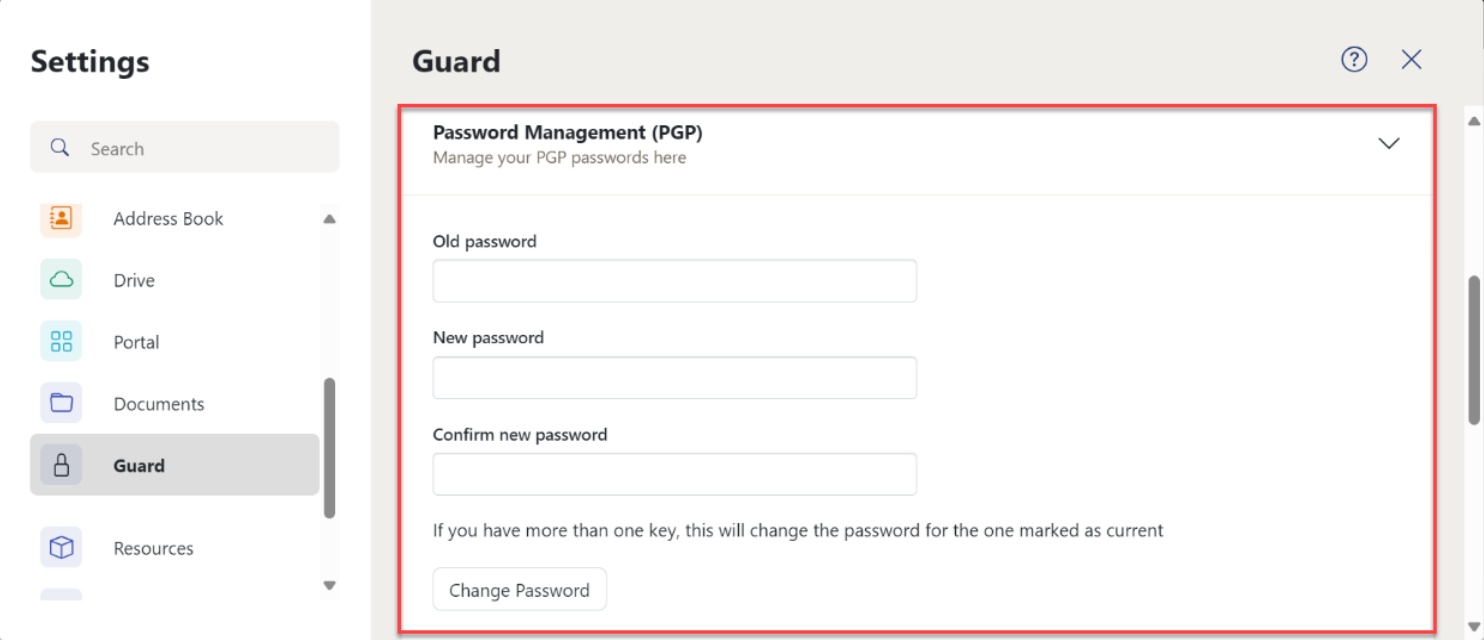
- Password Management (PGP) - You'll be provided with three options:
- Change password: To update your password, enter your current password, followed by your desired new password. Confirm the new password and click "Change" to save the changes.
- Reset password: Your Guard Encryption password will be reset, and a new password will be sent to your secondary email.
- Set email address for reset: To update your account, please enter your existing password and a new secondary email address. You'll need to confirm the new email address.
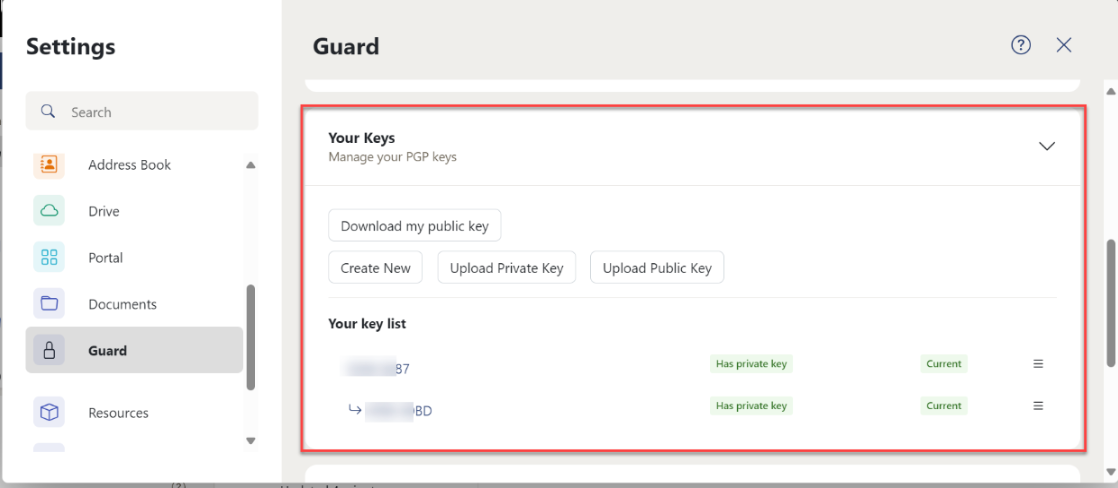
- Your Keys
You can manage keys and perform various actions, such as:- Download your public key
- Create a new key
- Upload a private or public key
- View and manage your key list
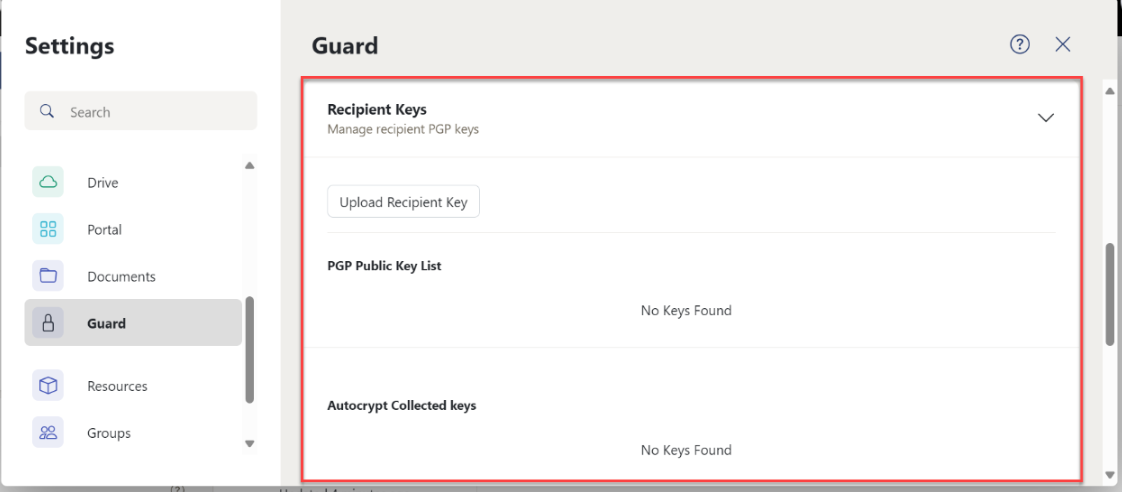
- Recipient Keys
You can manage recipient PGP keys and perform various actions, such as:- Uploading a recipient key
- Viewing or deleting public keys
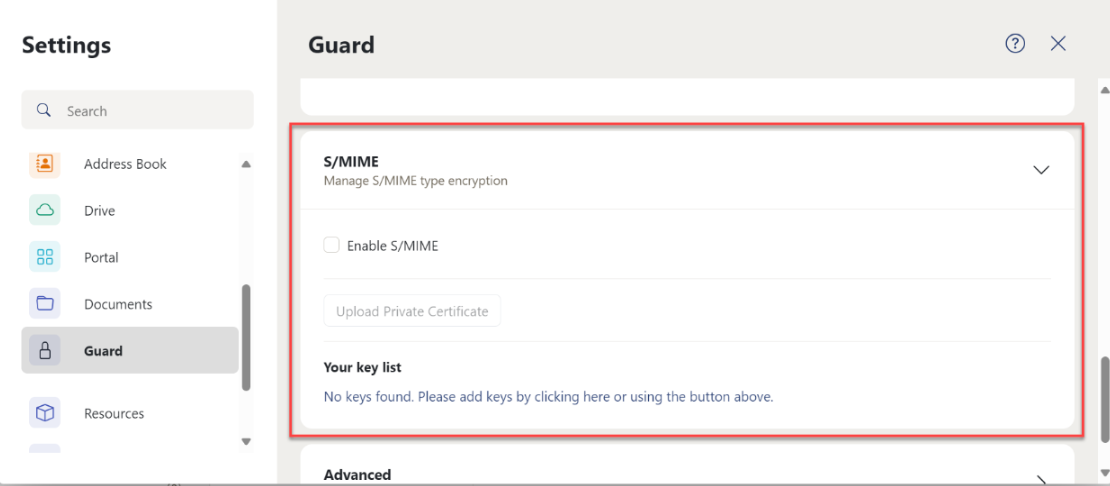
- S/MIME
- Enable S/MIME: This option allows you to send and receive emails with S/MIME encryption, which stands for Secure/Multipurpose Internet Mail Extensions. It's a standard way to secure your email communications. To use it, you'll need to upload a private certificate.
- Enable S/MIME: This option allows you to send and receive emails with S/MIME encryption, which stands for Secure/Multipurpose Internet Mail Extensions. It's a standard way to secure your email communications. To use it, you'll need to upload a private certificate.
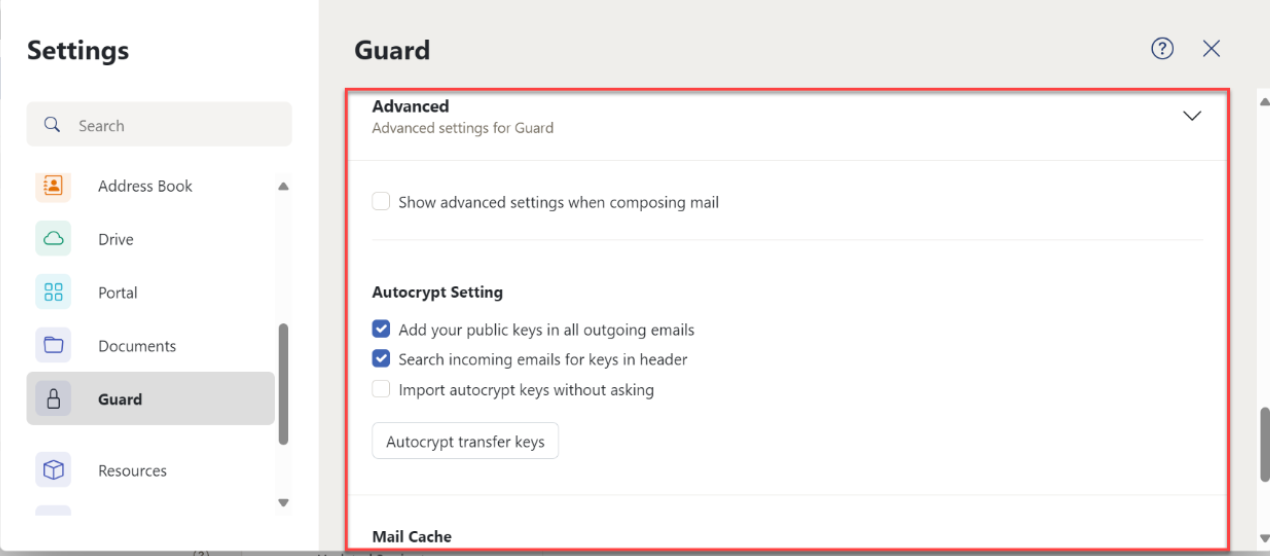
- Advanced
- Show advanced settings when composing mail: This will display advanced settings for Guard Encryption each time you compose emails.
- Autocrypt Setting: This feature enhances email security by automatically encrypting messages. You can add your public keys to all outgoing emails, search incoming emails for keys in headers, or import autocrypt keys without asking. Each email will include the sender's public key in the header, which the recipient can import manually or automatically.
- Autocrypt transfer keys: Get an email with your current private keys.
- Mail Cache: The email service provides two options for handling email decryption: Keep emails decrypted until the browser is closed, or Do not keep emails decrypted. Decryption is the process of transforming encrypted messages into their original plaintext format.
Summary
Guard Encryption is an essential tool for securing your email communications and sensitive files directly within your webmail. By setting up a strong password and recovery email, you ensure that your data remains protected and accessible. With features like customizable encryption levels, password management, and key handling, Guard offers flexibility and robust security. Whether you’re enabling encryption for outgoing emails, managing keys, or adjusting advanced settings, Guard makes it simple to maintain privacy and control over your information. Start using Guard Encryption today to safeguard your digital communications against potential threats.
If you need further assistance, Bluehost Chat Support is available 24 hours a day, 7days a week while Bluehost Phone Support is available 7 days a week from 7 am-12 midnight EST.
- Chat Support - While on our website, you should see a CHAT bubble in the bottom right-hand corner of the page. Click anywhere on the bubble to begin a chat session.
- Phone Support -
- US: 888-401-4678
- International: +1 801-765-9400
You may also refer to our Knowledge Base articles to help answer common questions and guide you through various setup, configuration, and troubleshooting steps.