Adding Sites to Your WordPress Multisite Network
When your WordPress Multisite installation is set up on Bluehost Cloud, your network is provisioned and ready to use. You can begin building out your main site immediately, or start adding new sites to your network.
The steps for adding a new site depend on your network type. Use the sections below that match your setup.
- Bluehost Cloud Multisite supports new installations and professionally migrated installations only. Converting an existing single-site WordPress install to Multisite is not recommended and is not supported.
- Staging is disabled on Multisite installations. New staging sites cannot be created, and existing staging sites cannot be promoted once Multisite is active on an installation.
Adding a Path-Based Site (Subdirectory)
In a subdirectory network, each site lives under a subfolder of your primary domain, such as example.com/siteone. Adding a new site requires only steps inside WordPress — no DNS or domain changes are needed.
Prerequisites
- An active Bluehost Cloud WordPress Multisite installation (subdirectory type)
- Super Admin access to your WordPress network
Steps:
- Log in to your Bluehost Portal.
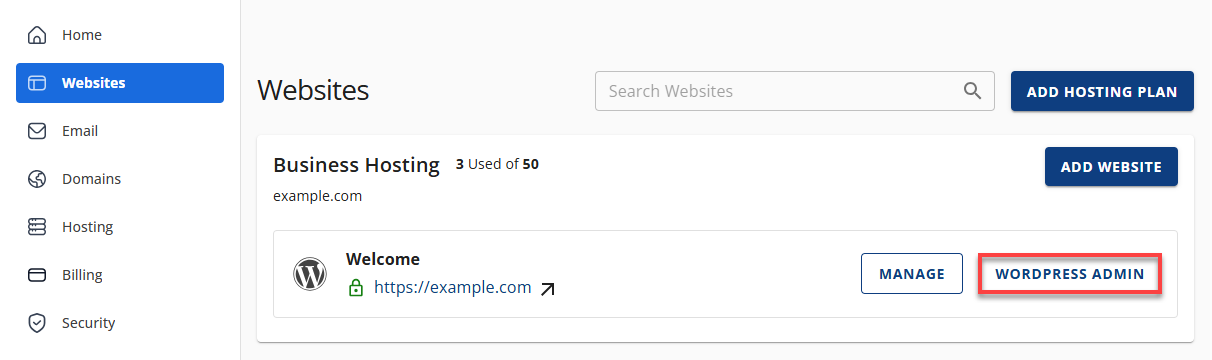
- In the left-hand menu, click Websites.
- Click the WordPress Admin button located next to the website you want to manage.
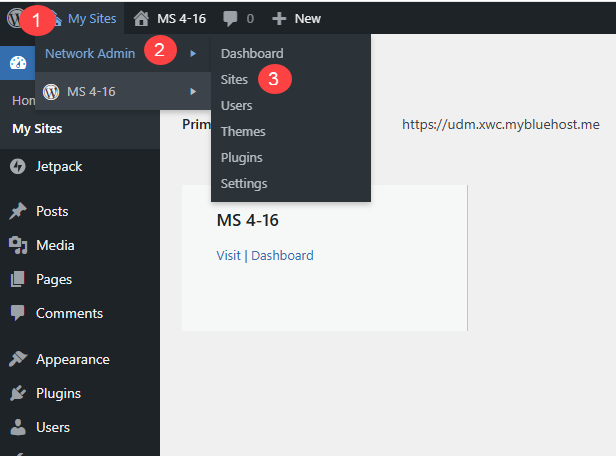
- Once logged in to your WordPress Dashboard, navigate to My Sites → Network Admin → Sites.
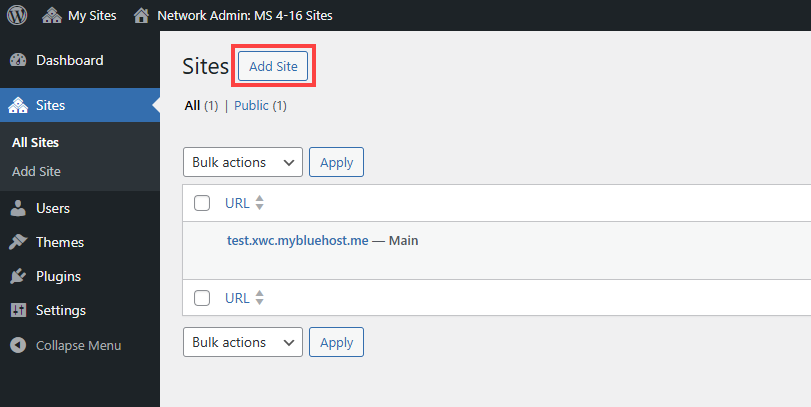
- Click Add Site.
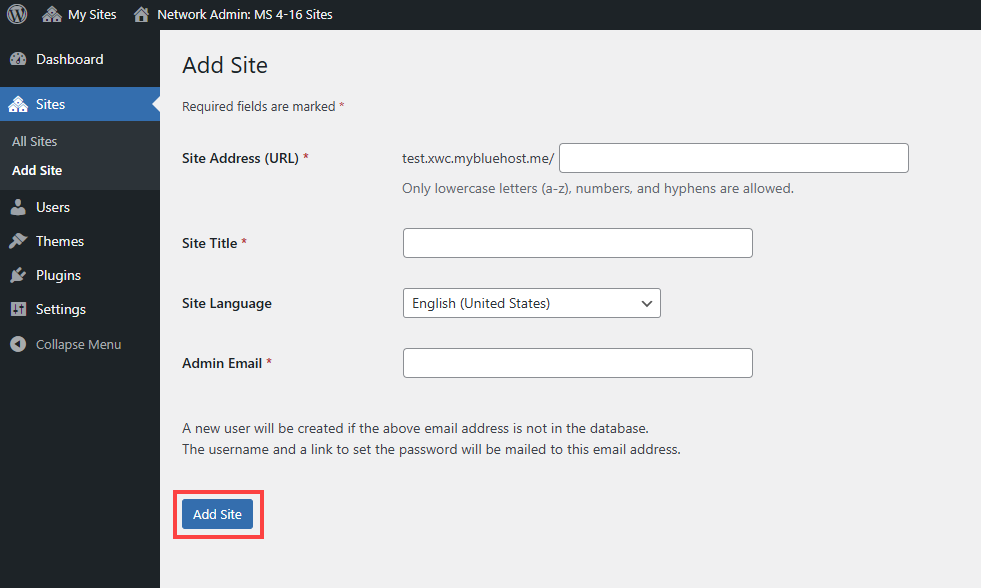
- Fill in the following fields:
Site Address (URL): Enter the path for the new site (e.g., siteone). This will become example.com/siteone.
Site Title: Enter the display name for the site.
Admin Email: Enter the email address for the site administrator.
- Click Add Site.
The new site is immediately available at example.com/siteone. You can access its dashboard from My Sites in the WordPress toolbar.
Adding a Subdomain Site
In a subdomain network, each site runs on its own subdomain, such as siteone.example.com. Adding a new subdomain site requires steps in both the Bluehost Portal and WordPress.
Prerequisites
- An active Bluehost Cloud WordPress Multisite installation (subdomain type).
- Super Admin access to your WordPress network.
- Access to your Bluehost Portal.
- Access to your domain's DNS settings at your registrar.
Step 1: Point the subdomain's DNS to Bluehost Cloud
At your registrar (or Bluehost DNS if registered here), add A records for the specific subdomain you are adding. Wildcard DNS (*.example.com) is not supported — each subdomain must be configured individually.
|
Record Type |
Host |
Value |
|---|---|---|
| A | siteone |
5.100.156.52 |
| A | siteone |
5.100.156.214 |
Replace siteone with your subdomain prefix. Both A records are required.
Step 2: Add the subdomain in the Bluehost Portal
- Log in to your Bluehost Portal.
- In the left-hand menu, click Websites.
- Click the Manage Site button located next to the website you want to manage.

- In the Domains tab, click Add Domain.
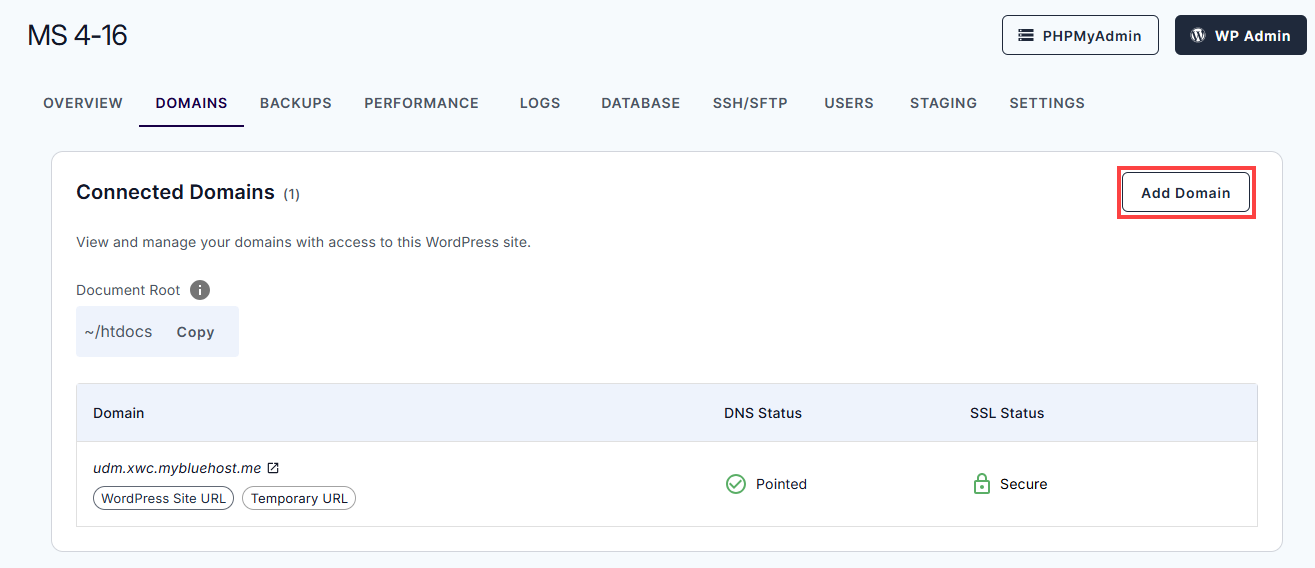
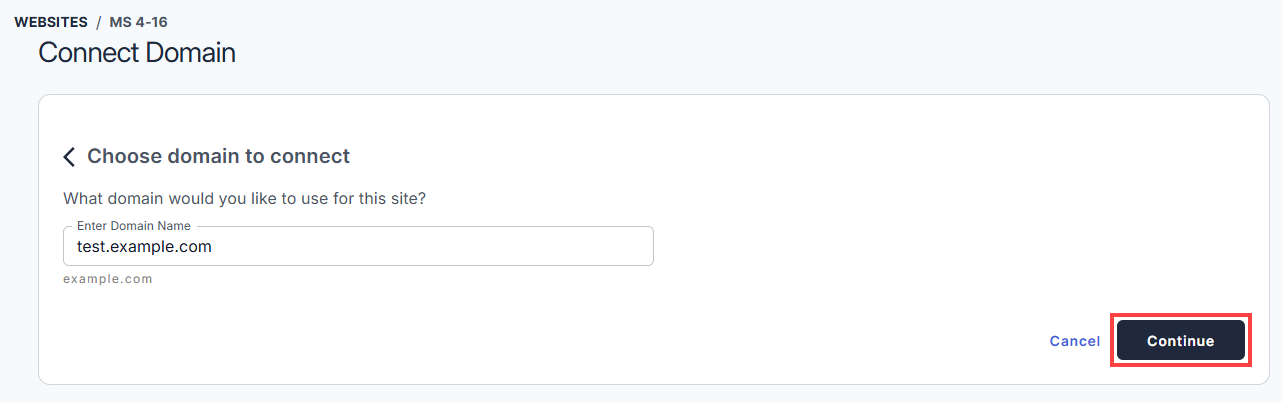
- Enter the domain you wish to connect to, and click Continue.
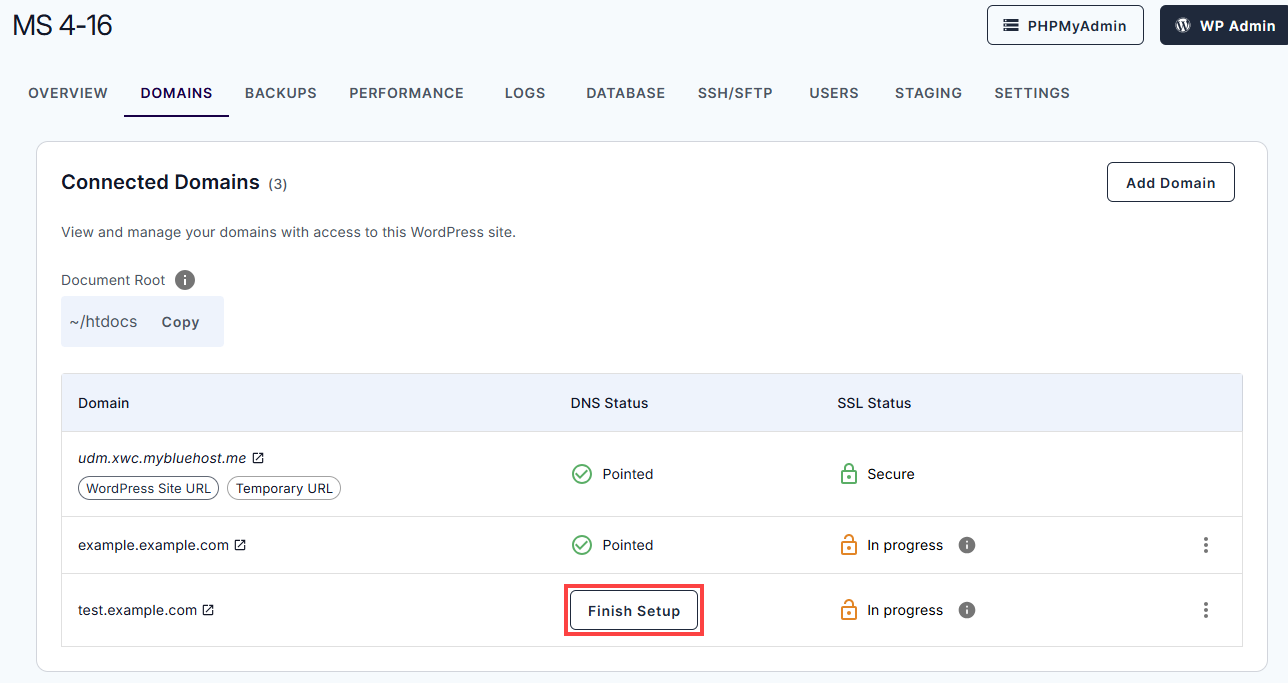
- Once the domain’s DNS is configured, the DNS Status section should display Pointed, indicating it has been successfully added. If it does not appear, click the Finish Setup button to configure the domain’s A record.
Step 3: Add the site in WordPress Network Admin
- Log in to your Bluehost Portal.
- In the left-hand menu, click Websites.
- Click the WordPress Admin button located next to the website you want to manage.
- Once logged in to your WordPress Dashboard, navigate to My Sites → Network Admin → Sites.
- Click Add Site.
- Fill in the following fields:
Site Address (URL): Enter the path for the new site (e.g., siteone). This will become example.com/siteone.
Site Title: Enter the display name for the site.
Admin Email: Enter the email address for the site administrator.
- Click Add Site.
The new site will be accessible at siteone.example.com once DNS has propagated. You can manage it from My Sites in the WordPress toolbar.
Adding a Domain-Mapped Site
In a domain-mapped network, each site uses its own top-level domain, such as example.com. This is the most complex site type to add — it requires steps in DNS, Bluehost Portal, WordPress Network Admin, and your site files.
Prerequisites
- An active Bluehost Cloud WordPress Multisite installation.
- Super Admin access to your WordPress network.
- Access to your Bluehost Portal.
- Access to your domain's DNS settings at your registrar.
- SSH or SFTP access to your hosting account (see Connecting to Bluehost Cloud with SSH Key).
Step 1: Point the domain's DNS to Bluehost Cloud
At your registrar (or Bluehost DNS if registered here), add the following A records for your domain. Both are required.
|
Record Type |
Host |
Value |
|---|---|---|
| A | siteone |
5.100.156.52 |
| A | siteone |
5.100.156.214 |
Step 2: Add the domain in the Bluehost Portal
- Log in to your Bluehost Portal.
- In the left-hand menu, click Websites.
- Click the Manage Site button located next to the website you want to manage.
- In the Domains tab, click Add Domain.
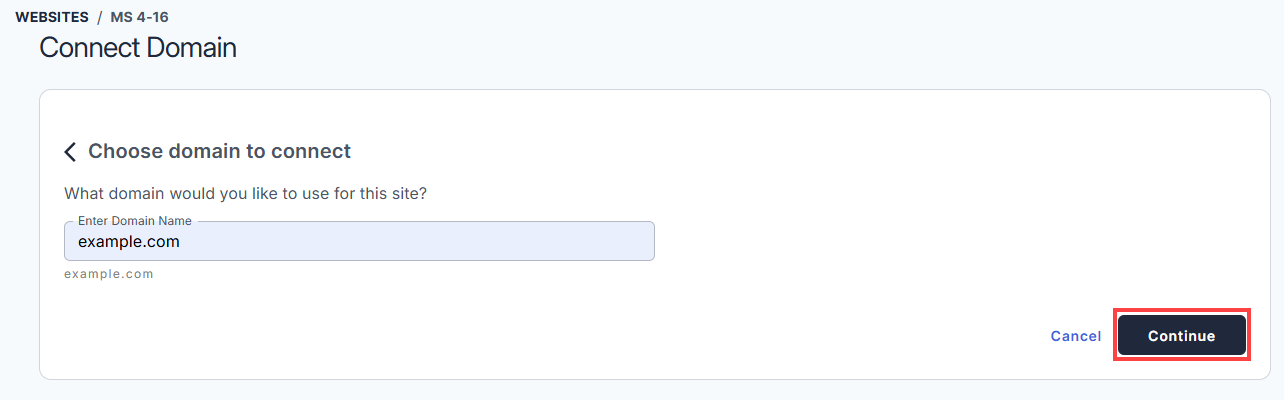
- Enter the domain you wish to connect to, then click Continue.
- Once the domain’s DNS is configured, the DNS Status section should display Pointed, indicating it has been successfully added. If it does not appear, click the Finish Setup button to configure the domain’s A record.
Step 3: Add the site in WordPress Network Admin
- Log in to your Bluehost Portal.
- In the left-hand menu, click Websites.
- Click the WordPress Admin button located next to the website you want to manage.
- Once logged in to your WordPress Dashboard, navigate to My Sites → Network Admin → Sites.
- Click Add Site.
- Fill in the following fields:
Site Address (URL): Enter the path for the new site (e.g., siteone). This will become example.com/siteone.
Site Title: Enter the display name for the site.
Admin Email: Enter the email address for the site administrator.
- Click Add Site.
Step 4: Handle www and non-www via custom-redirects.php
When using a custom domain, you need to ensure visitors always land on the correct version of the URL — either www.example.com or example.com — regardless of which they type. This is handled using custom-redirects.php.
Connect to your site via SSH or SFTP and navigate to /htdocs. Create or edit the file custom-redirects.php.
Choose one of the following based on your preferred canonical URL:
Option A — Redirect www to non-www (visitors to www.example.com are sent to example.com)
<?php
if ( $_SERVER['HTTP_HOST'] == 'www.example.com' ) {
    header('HTTP/1.1 301 Moved Permanently');
    header('Location: https://example.com' . $_SERVER['REQUEST_URI']);
    exit;
}
?>
Option B — Redirect non-www to www (visitors to example.com are sent to www.example.com)
<?php
if ( $_SERVER['HTTP_HOST'] == 'example.com' ) {
    header('HTTP/1.1 301 Moved Permanently');
    header('Location: https://www.example.com' . $_SERVER['REQUEST_URI']);
    exit;
}
?>
Replace example.com with your actual domain. If your network includes multiple domain-mapped sites, add a block for each domain in the same file.
Related Articles
Summary
Bluehost Cloud WordPress Multisite allows you to add new sites as subdirectories, subdomains, or domain-mapped domains. Subdirectory sites are the easiest to set up (WordPress only), while subdomain and domain-mapped sites require additional DNS and Bluehost configuration. Domain-mapped sites also need a redirect setup for www or non-www. Multisite supports only new or migrated installs, and staging is not available.
If you need further assistance, Bluehost Chat Support is available 24 hours a day, 7days a week while Bluehost Phone Support is available 7 days a week from 7 am-12 midnight EST.
- Chat Support - While on our website, you should see a CHAT bubble in the bottom right-hand corner of the page. Click anywhere on the bubble to begin a chat session.
- Phone Support -
- US: 888-401-4678
- International: +1 801-765-9400
You may also refer to our Knowledge Base articles to help answer common questions and guide you through various setup, configuration, and troubleshooting steps.