Unlocking WordPress: A Guide to the Bluehost Plugin
The Bluehost plugin connects your Bluehost account to your WordPress site, allowing you to manage hosting settings, performance, and tools directly from your WordPress dashboard. It provides one central place to access site management features, install plugins, and optimize your site’s functionality.
In this article, we will discuss the following topics:
Managing the Bluehost Plugin from the Bluehost Portal
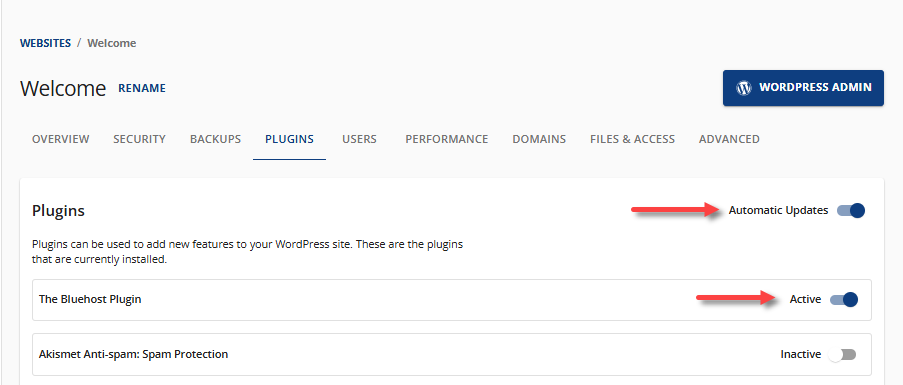
In the Bluehost Portal, you can perform the following actions in managing your WordPress plugins, including the Bluehost plugin:
- Set up automatic updates
- Enable or disable the plugin
Additional functionalities are accessible through the WordPress dashboard.
- Log in to your Bluehost Portal.
- In the left-hand menu, click Websites.
- Click the Manage Site button located next to the website you want to manage.

- On the website management page, click the PLUGINS tab.
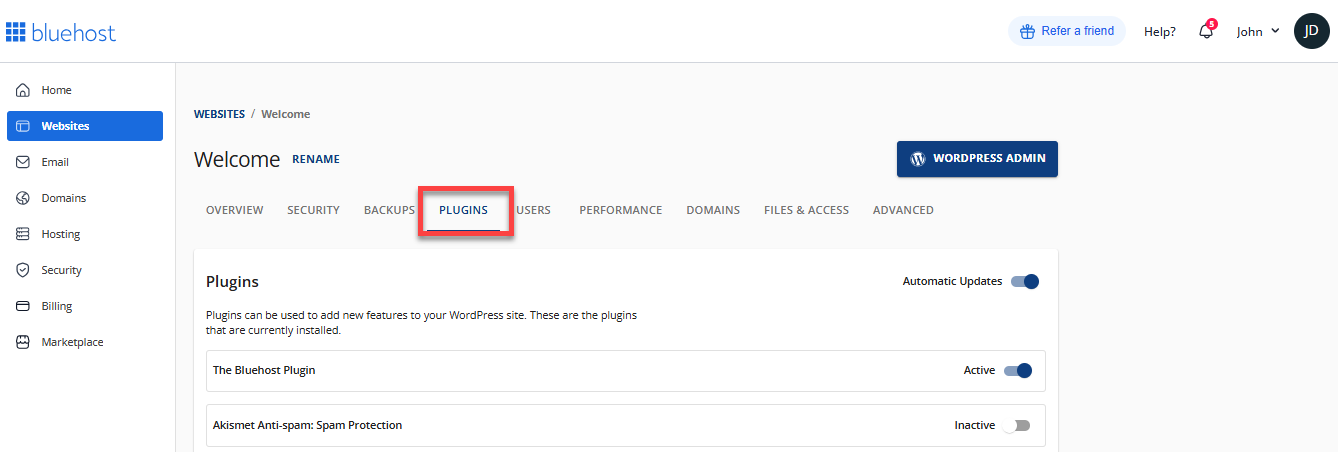
- In the Plugins tab, you can enable or disable automatic updates for all plugins and manage their status, including the Bluehost plugin.
Manual Installation of the Bluehost Plugin in WordPress
The Bluehost plugin is usually installed automatically when you set up WordPress through Bluehost. However, if your WordPress website was previously installed and hosted on another platform and you want to manage it using your WordPress dashboard here at Bluehost, you can install the Bluehost plugin manually.
There are several ways to manually install the Bluehost plugin.
Option 1: Install via the WordPress Dashboard
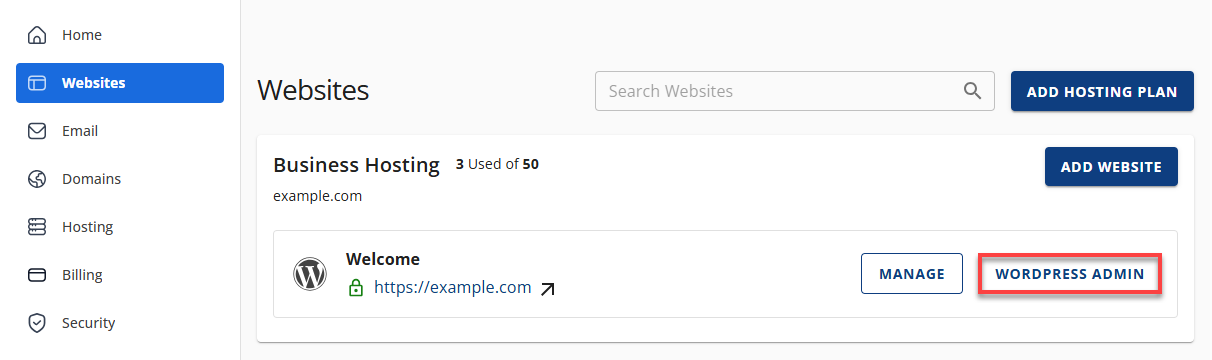
- Log in to your Bluehost Portal.
- In the left-hand menu, click Websites.
- Click the WordPress Admin button located next to the website you want to manage.
- Click Plugins in the left menu, then select Add Plugin.
- Use the search function to look for the "Bluehost Plugin."
- Click Install Now, then Activate.
Once activated, the plugin will automatically connect to your Bluehost account if your site is hosted with Bluehost.
Option 2: Install via FTP
- Download the .zip file for the Bluehost plugin.
- Extract the plugin folder.
- Connect to your site's document root via FTP.
- Upload the .zip file of the Bluehost plugin to the /wp-content/plugins/ directory.
- Once uploaded, log in to your WordPress dashboard and go to the Installed Plugins section.
- Look for the Bluehost Plugin, then click Activate.
- Once active, you will need to connect your WordPress dashboard to your Bluehost hosting account.
For the detailed instructions, refer to the How to Install a Plugin article.
Connecting your Bluehost Hosting Account to WordPress
After manually installing the Bluehost plugin, you need to connect your Bluehost hosting account to your WordPress dashboard.
- Navigate to the Installed Plugins section in your WordPress Dashboard and look for the Bluehost Plugin.
- Click on Connect Bluehost Account.
- Sign in using your Bluehost account credentials.
- Once you have successfully connected, you will see the Bluehost tab in your dashboard.
Features of the Bluehost Plugin within the WordPress Dashboard
The Bluehost plugin in the WordPress dashboard includes the following tabs:
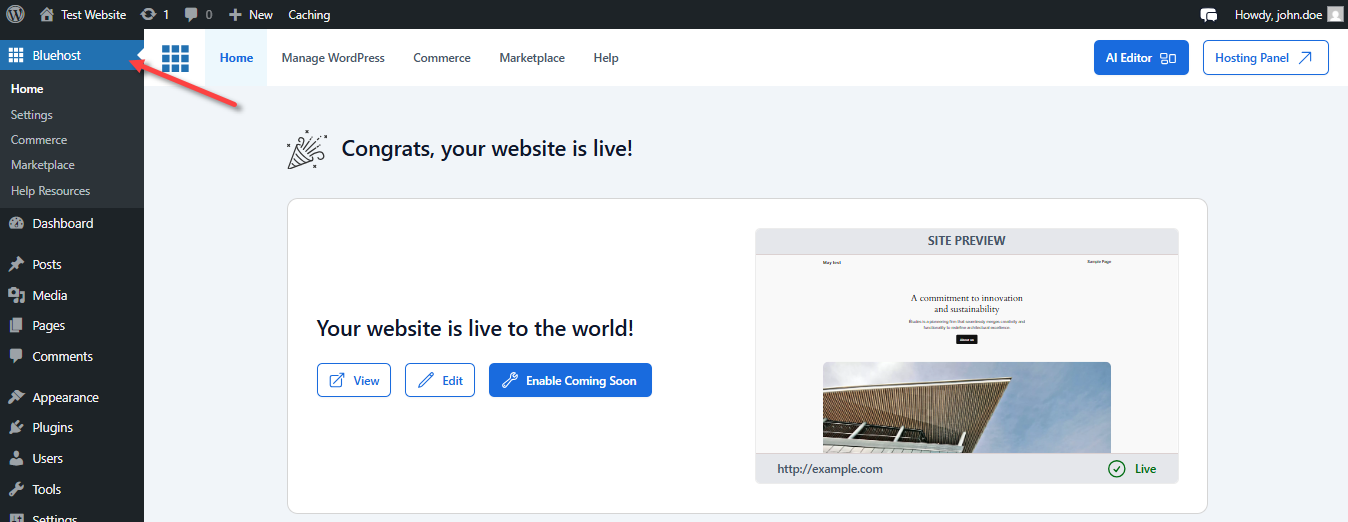
Home
The Home tab displays the status and preview of your WordPress Site. It gives you the option to view, edit, and enable the "Coming Soon" page.
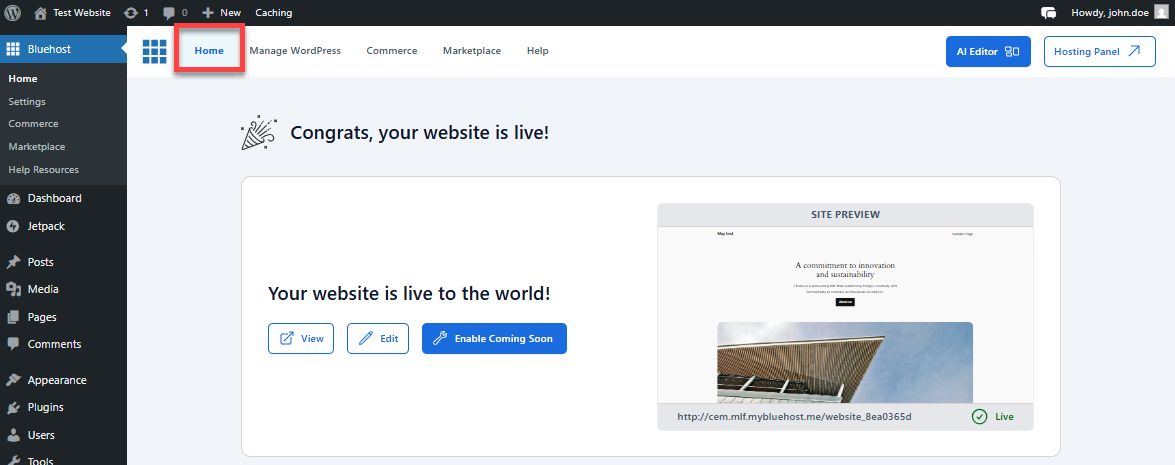
It also enables you to perform the following actions:
- Basic setup for your blog

- Set up your brand
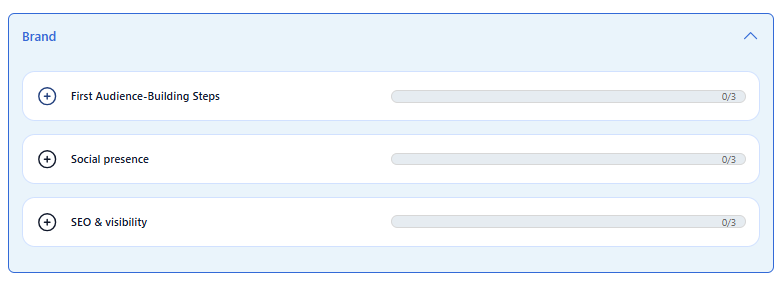
- Grow your brand

Simply click the functionality you need, and it will direct you to the specific setup page within the dashboard to help you get started. This section also serves as your checklist for setting up your website!
Manage WordPress
The Manage WordPress tab enables you to enhance your website by adjusting performance settings, general settings, and creating a staging site.
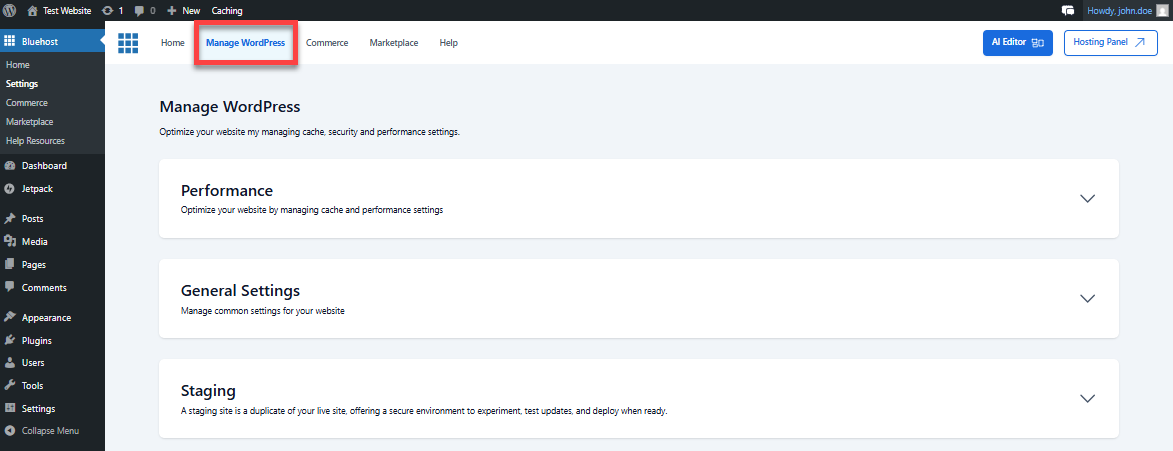
- Performance - In this section, you can optimize your website by managing cache and performance settings.
- General Settings - You can manage your site's common settings, such as automatic updates, comments, and the Coming Soon page.
- Staging - You can set up your staging site here for safe testing.
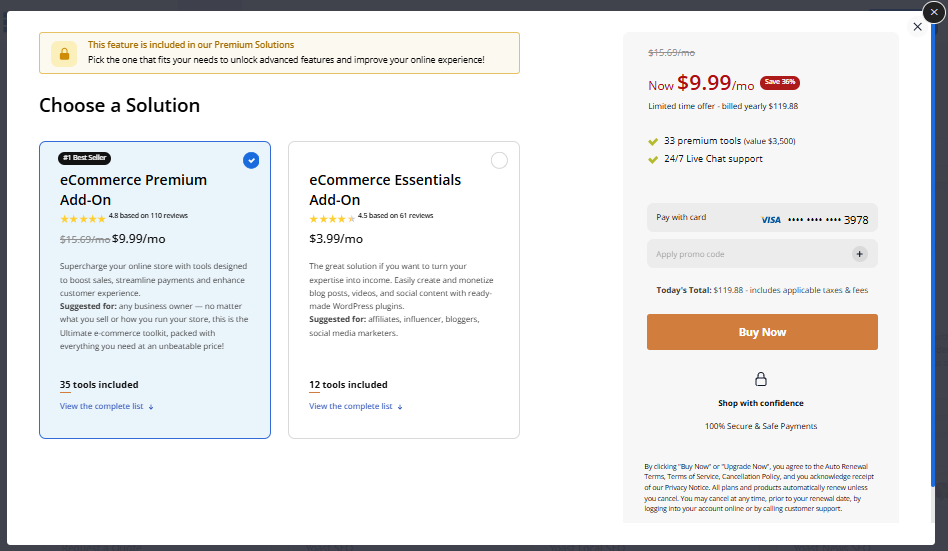
Commerce
The Commerce tab allows you to purchase eCommerce Add-Ons, offering exclusive features designed to enhance value and improve the online experience..
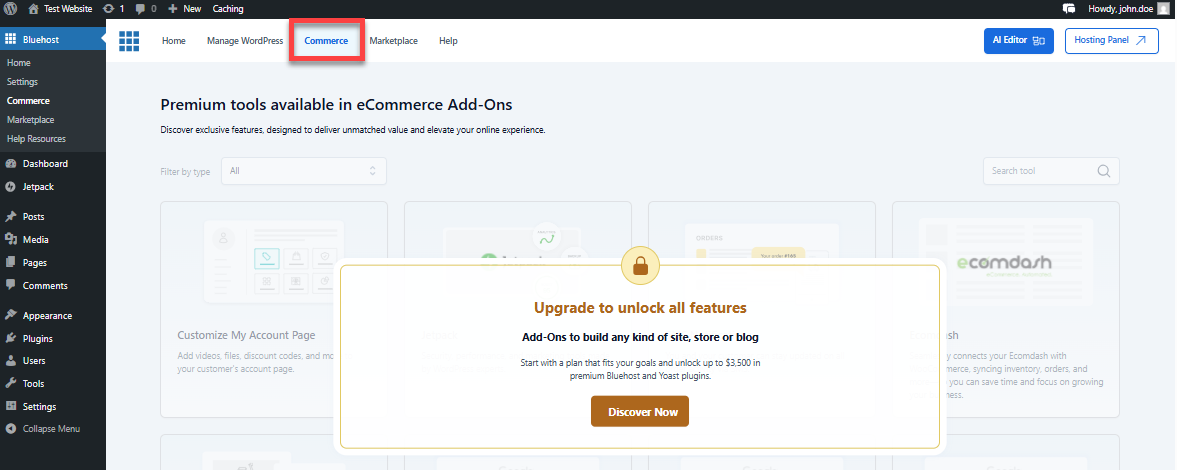
When you click the Discover Now button, you'll have the option to purchase the eCommerce Essentials Add-On or the eCommerce Premium Add-On.
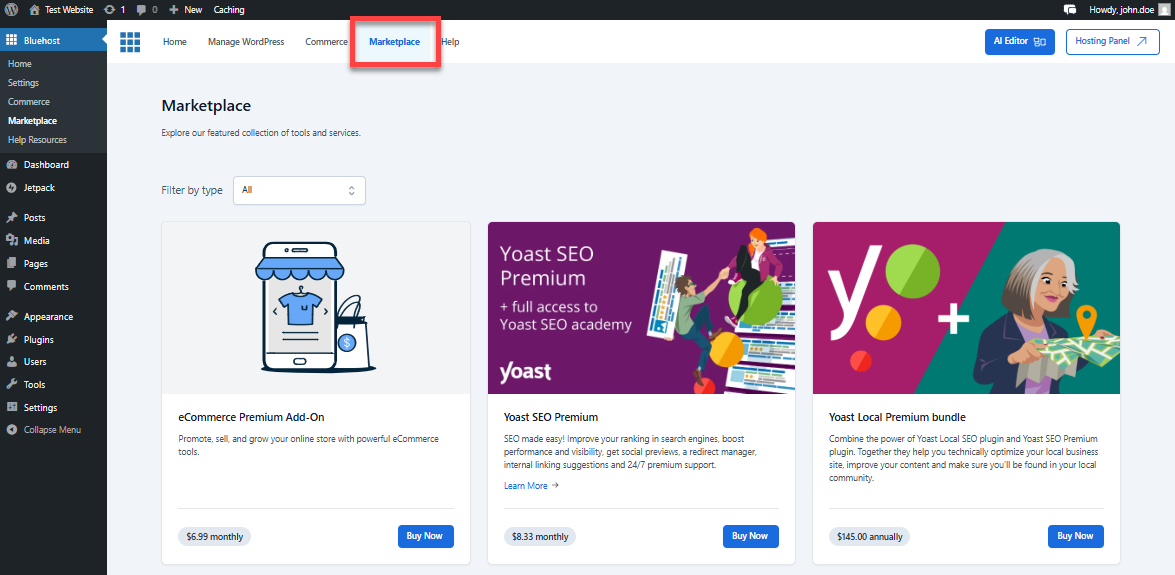
Marketplace
The Marketplace tab features a collection of premium plugins and themes for purchase.
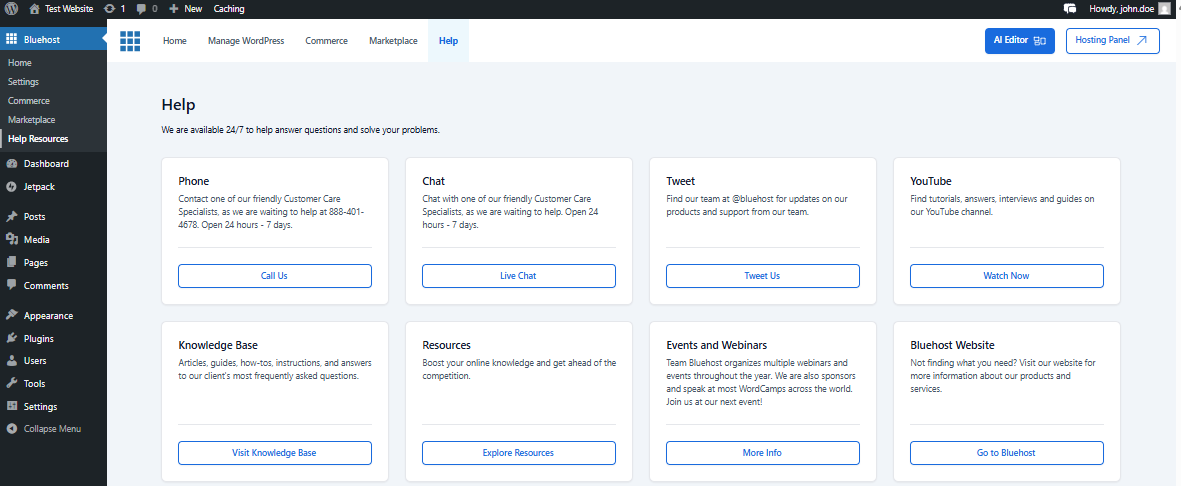
Help
The Help tab offers support options and solutions to help you with your hosting journey.
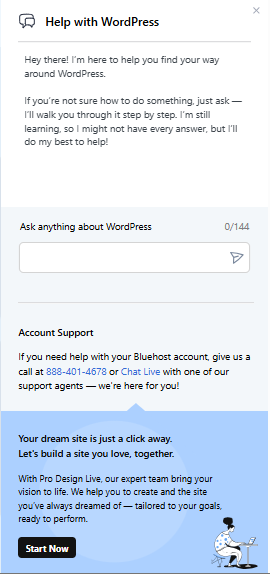
When you click the Help tab, the "Help with WordPress" window will appear in the right pane, where you can ask anything about WordPress and contact Support if you need help with your Bluehost hosting account.
Summary
The Bluehost plugin acts like a bridge between your Bluehost hosting account and your WordPress dashboard. It is a tool that seamlessly integrates your Bluehost hosting account with your WordPress website, which makes centralized management possible within the WordPress dashboard. This article guides you on how to manage the Bluehost plugin with your Bluehost Portal, manually install through your WordPress dashboard, or via FTP, and connect your Bluehost hosting account to WordPress. It also discusses the key features of the plugin, including performance optimization, staging site setup, purchasing eCommerce Add-Ons, accessing themes and plugins, and built-in support options, all of which are designed to streamline your WordPress experience.
If you need further assistance, Bluehost Chat Support is available 24 hours a day, 7days a week while Bluehost Phone Support is available 7 days a week from 7 am-12 midnight EST.
- Chat Support - While on our website, you should see a CHAT bubble in the bottom right-hand corner of the page. Click anywhere on the bubble to begin a chat session.
- Phone Support -
- US: 888-401-4678
- International: +1 801-765-9400
You may also refer to our Knowledge Base articles to help answer common questions and guide you through various setup, configuration, and troubleshooting steps.