How to Set Up Professional Email Branding Feature
Enhance your Professional Email experience with Bluehost by incorporating your company's logo and colors to create a consistent and professional branding identity across all your mailboxes.
This article will guide you in setting up your Professional Email account's Branding feature with your company's logo and colors.
Setting up Professional Email's Branding Feature
Please note that Admin access is required to use the Branding feature of Professional Email, and any customizations will apply automatically to all mailboxes.
- Log in to your Bluehost Portal.
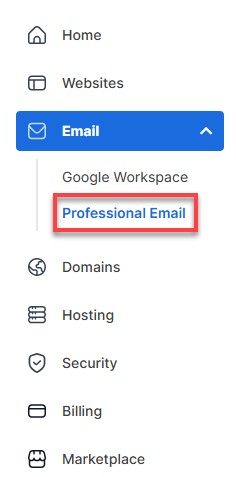
- From the left-hand navigation menu, click on the Email tab.
- Select Professional Email from the available options.
- You’ll be automatically redirected to the Email Management page, where you can manage your email settings and subscriptions.
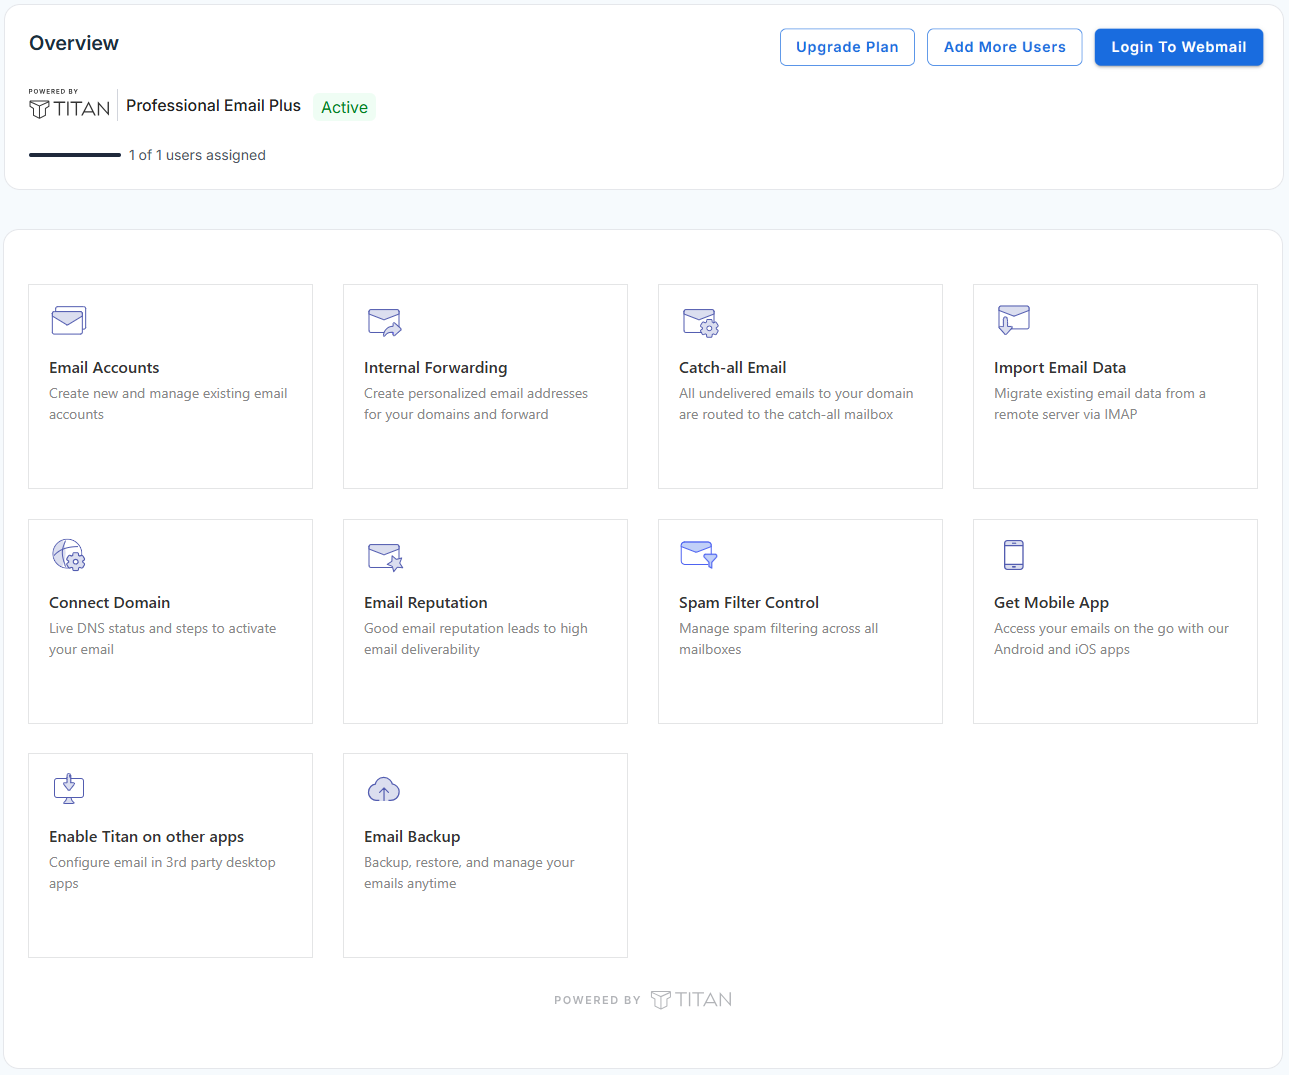
- Click the Login to Webmail button.

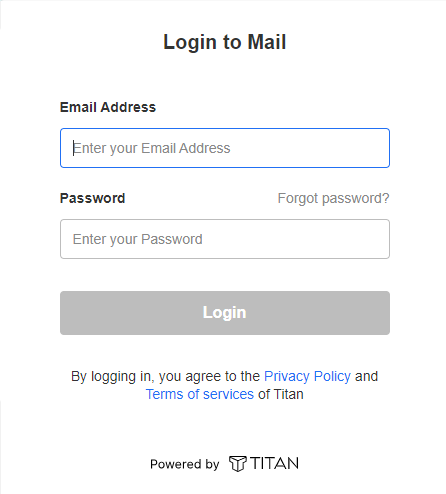
- Log in using your Professional Email credentials.
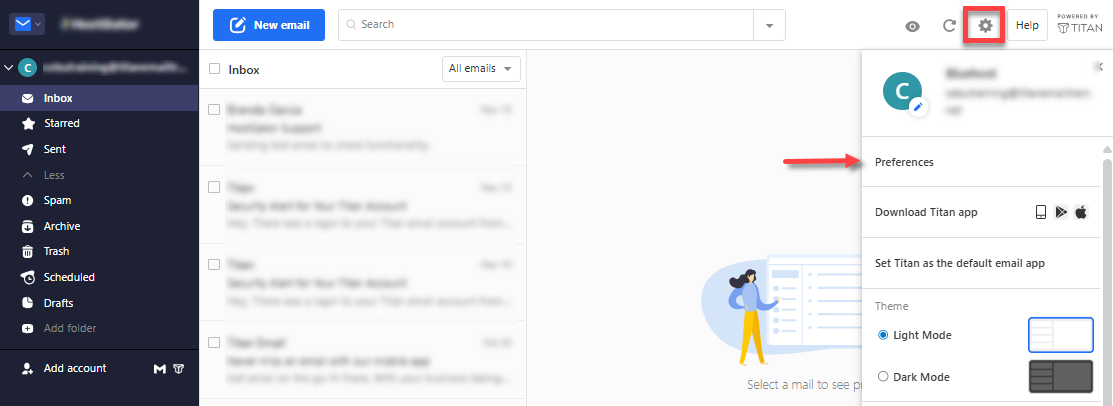
- In the dashboard, click the Settings (gear) icon in the top-right corner, then select Preferences.
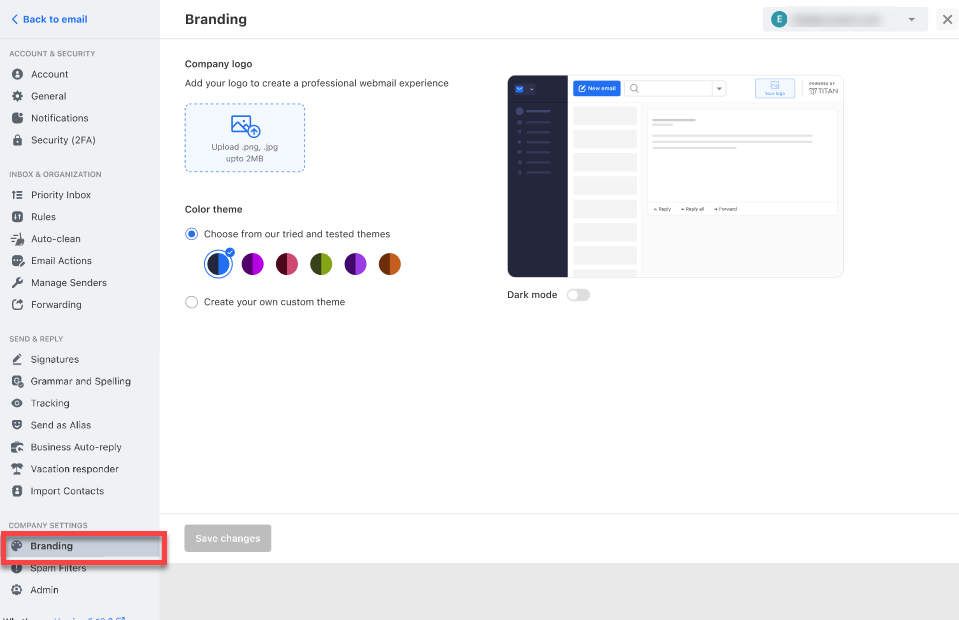
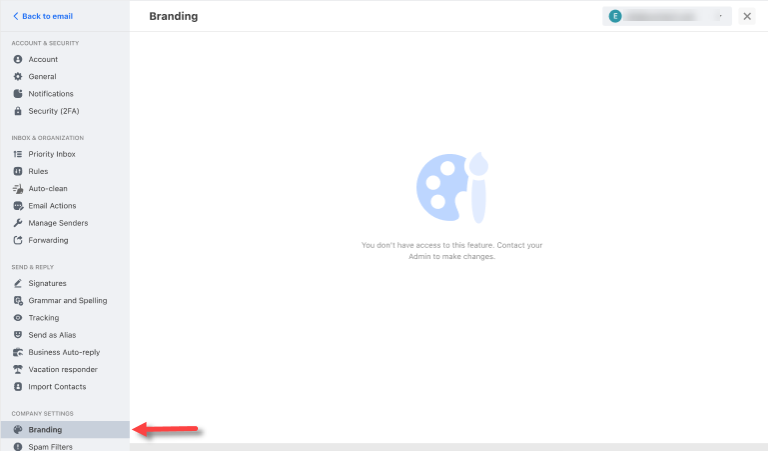
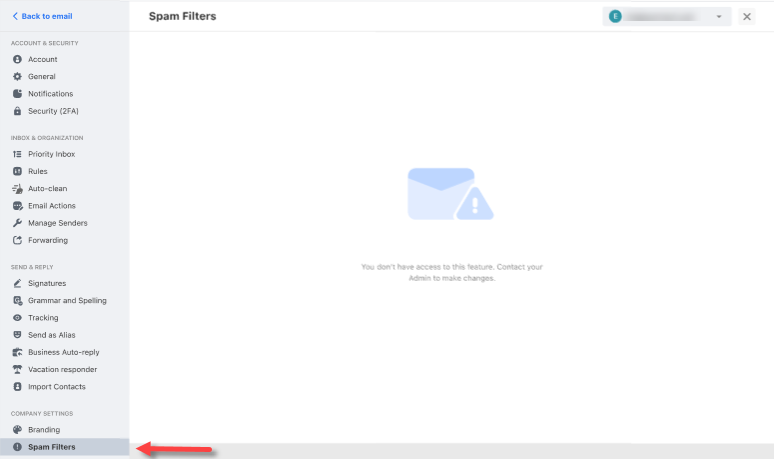
- On the Settings page, click Branding under Company Settings in the left menu.
- If you're on a non-Admin role, the Company Settings sections—Branding and Spam Filters—will appear empty.
Branding:
Spam Filters:
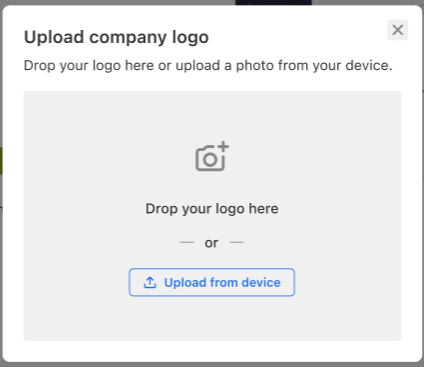
To upload your company logo:
- Under the Company logo section, click the link that says "Upload .png .jpg up to 2MB."
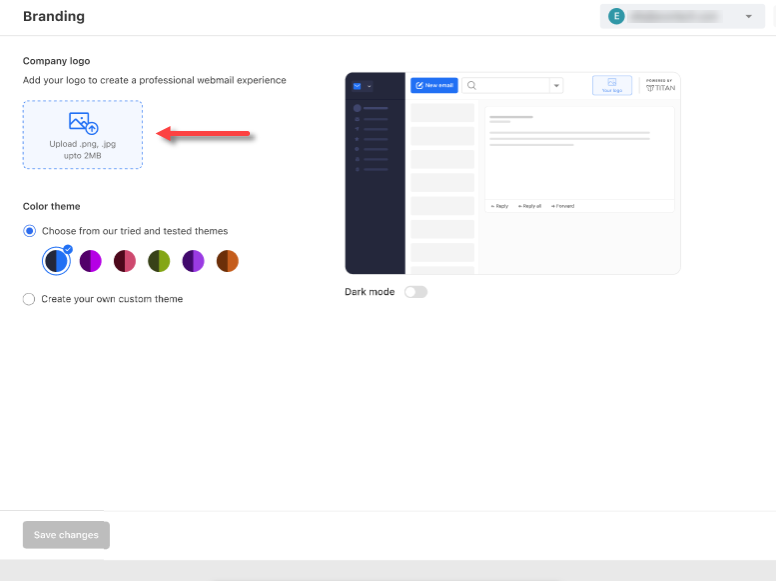
- Drop or upload your company logo from your device.
- Make adjustments to your logo. The visible area of the image will be kept as your logo. Adjust by panning or zooming in and out.
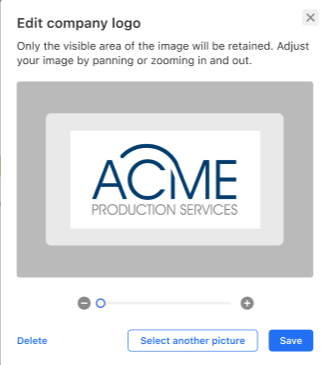
- Click Save.
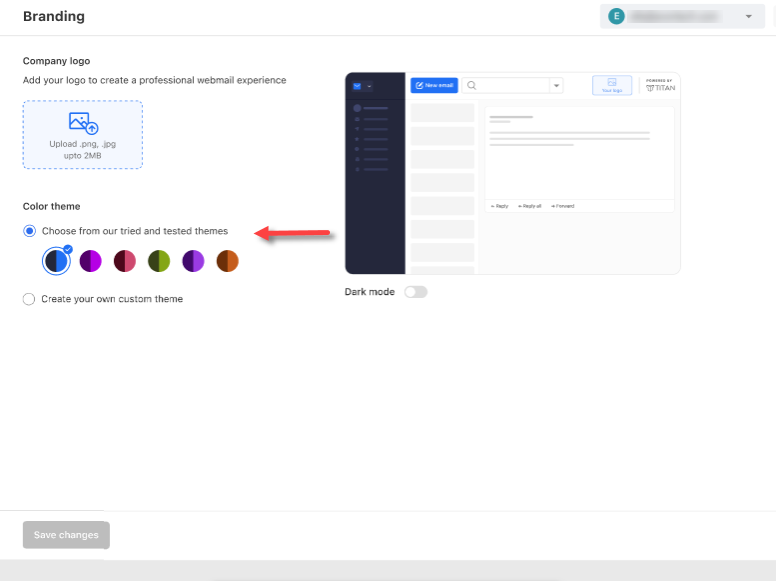
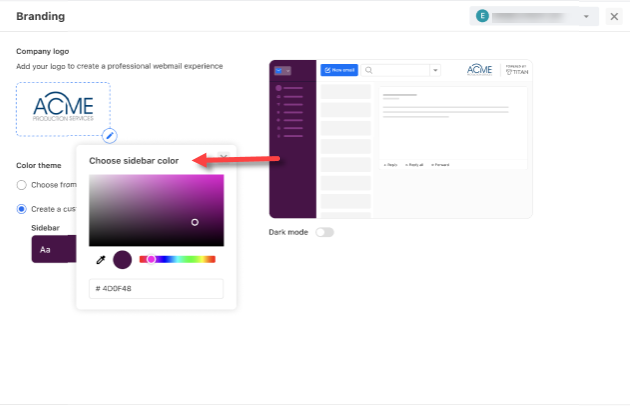
To set up the color theme:
- Under the Color theme section, you can do the following
- Select your company's color from the preset (default) themes.
- Choose to create your own custom theme by selecting the "Create a custom theme" option.
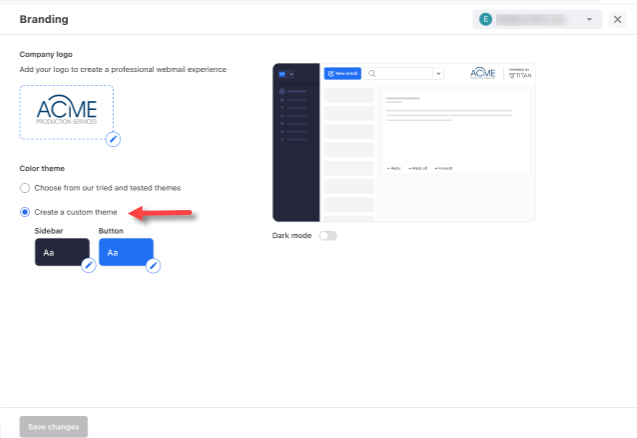
- Click the Sidebar eye drop icon.

- Select your preferred Sidebar color.
- Next, choose your preferred color for the Button.

- The system will analyze the selected colors. If it lacks contrast with the sidebar or button text, it will prompt you to change it for better legibility.
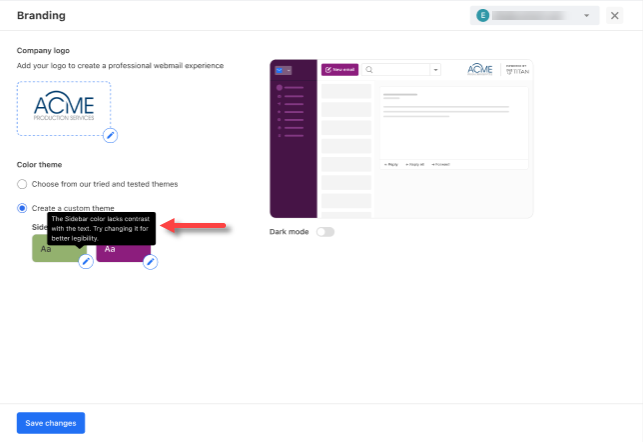
- Click the Sidebar eye drop icon.
- You can also choose the Dark mode on the right.
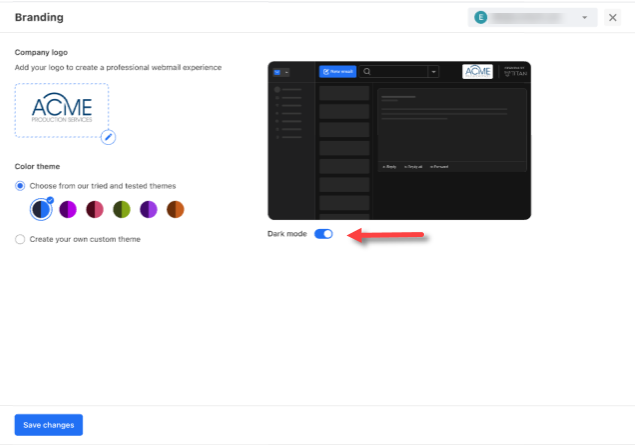
- Select your company's color from the preset (default) themes.
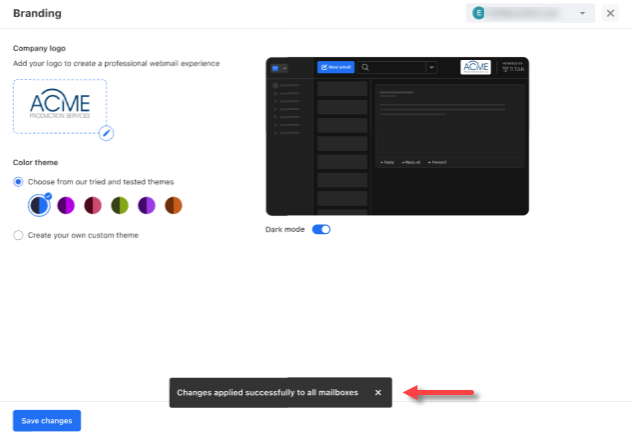
- In the pop-up, click on Save changes.

- A notification will appear, indicating that the changes will apply to all mailboxes.
Summary
Learn how to customize your Professional Email account to establish your branding identity. This article guides "Admin" users through the steps in uploading a logo, choosing preset or custom color themes, and applying these changes across all mailboxes. This feature is ideal for businesses seeking to maintain a consistent, polished, and professional image across all communications.
If you need further assistance, Bluehost Chat Support is available 24 hours a day, 7days a week while Bluehost Phone Support is available 7 days a week from 7 am-12 midnight EST.
- Chat Support - While on our website, you should see a CHAT bubble in the bottom right-hand corner of the page. Click anywhere on the bubble to begin a chat session.
- Phone Support -
- US: 888-401-4678
- International: +1 801-765-9400
You may also refer to our Knowledge Base articles to help answer common questions and guide you through various setup, configuration, and troubleshooting steps.