How to Set Up and Manage BoxTrapper Filter
BoxTrapper is a powerful, user-managed spam filter that requires email senders not on your approved list to respond to a verification email before their message reaches your inbox. This article will walk you through setting up BoxTrapper, managing whitelists, blacklists, and logs to maintain a spam-free inbox.
What is BoxTrapper?
BoxTrapper is a user-managed filter that limits who can send you mail by requiring any sender that has not been added to your approved list of addresses ('whitelist') to reply to a verification email before you can receive their mail. BoxTrapper returns a confirmation email to senders, who must reply before their email is delivered to your email address. A verified address is added to your whitelist.
Alternatively, any email address you send to is automatically added to your whitelist.
Enabling BoxTrapper
BoxTrapper can be accessed by following the steps below:
- Log in to your Bluehost Portal.
- Click Hosting in the left-hand menu.
- In the hosting details page, click the cPanel button.
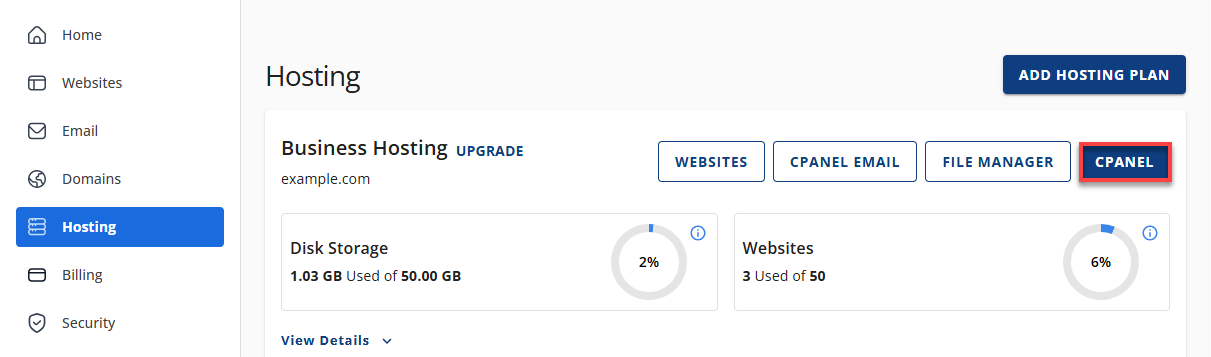
- Your cPanel will open in a new tab.
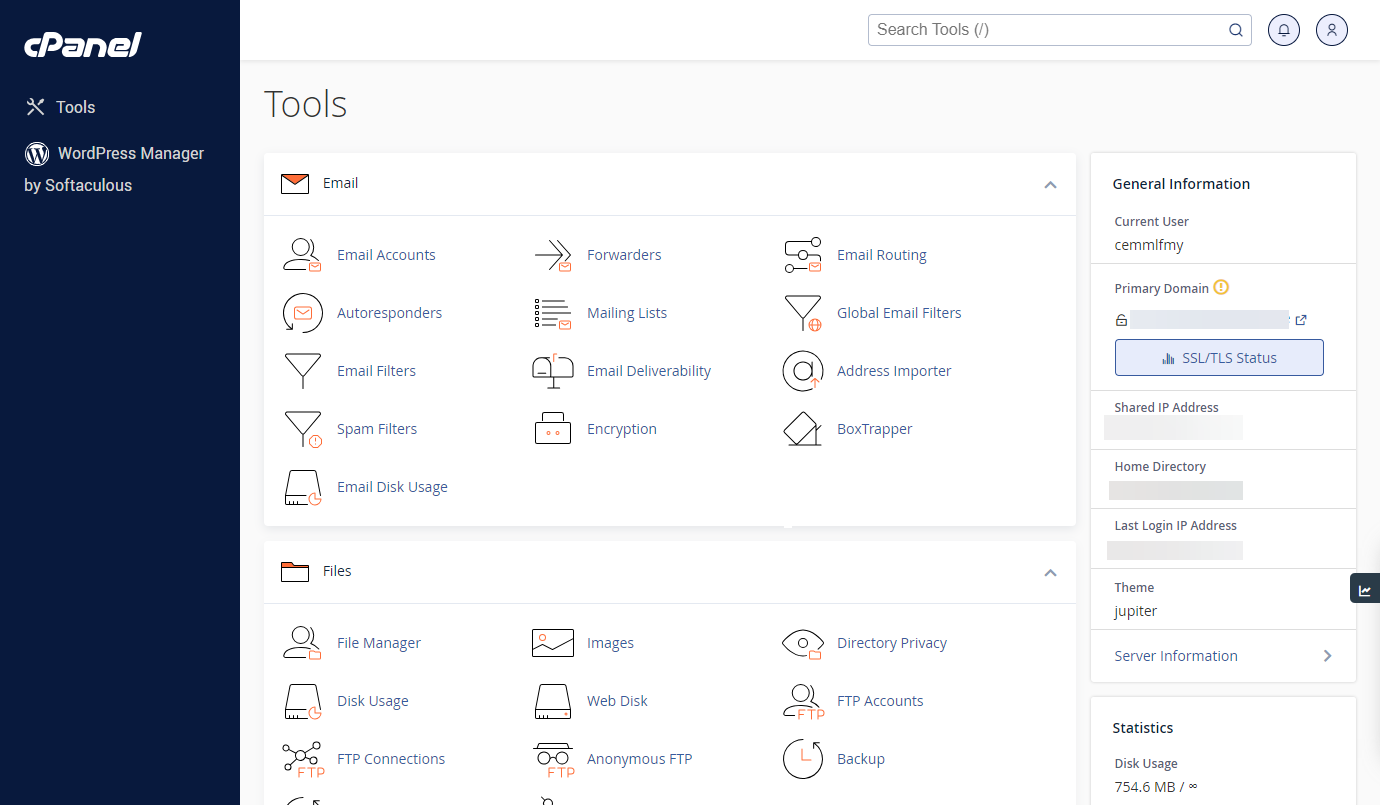
- In cPanel, click the BoxTrapper link under the Email section.
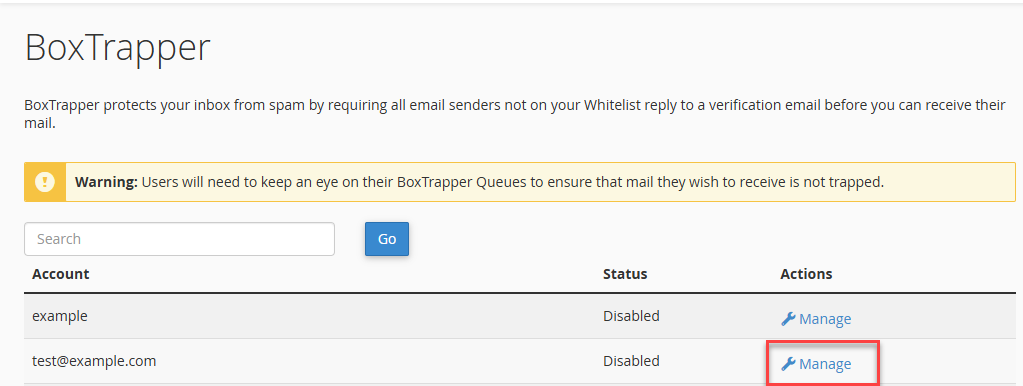
When accessing BoxTrapper from your cPanel, you will be presented with a list of each manageable email account: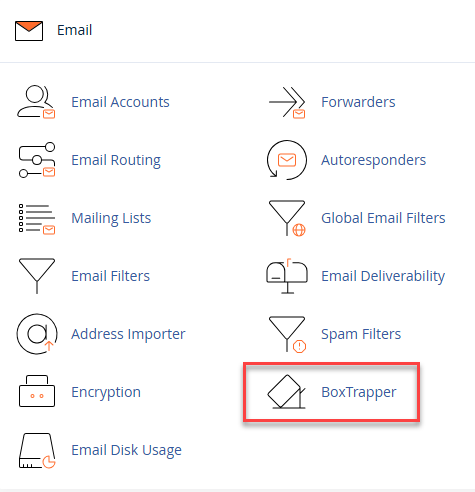
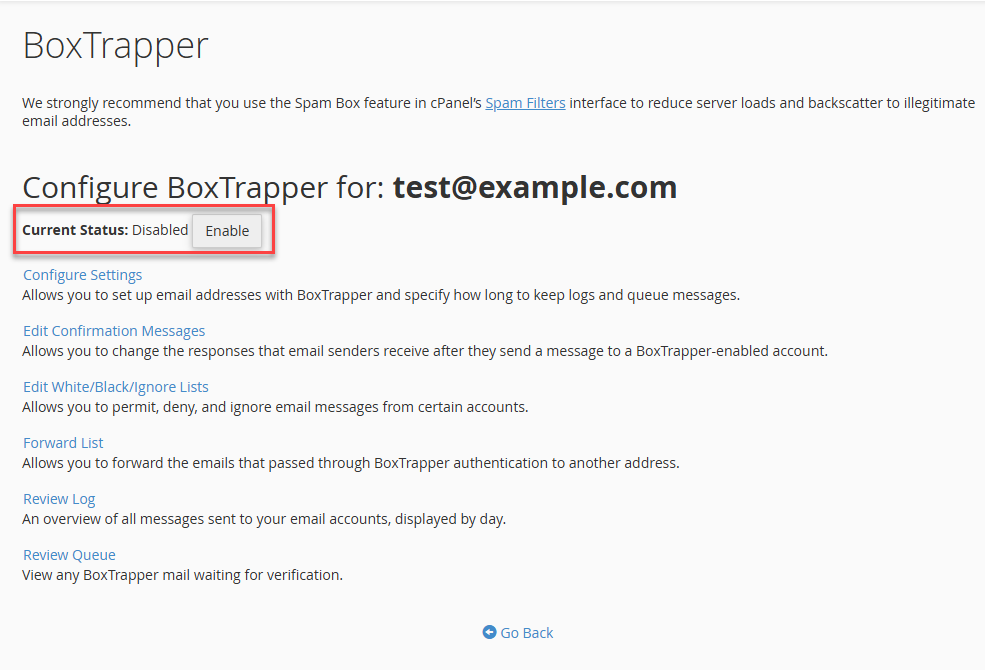
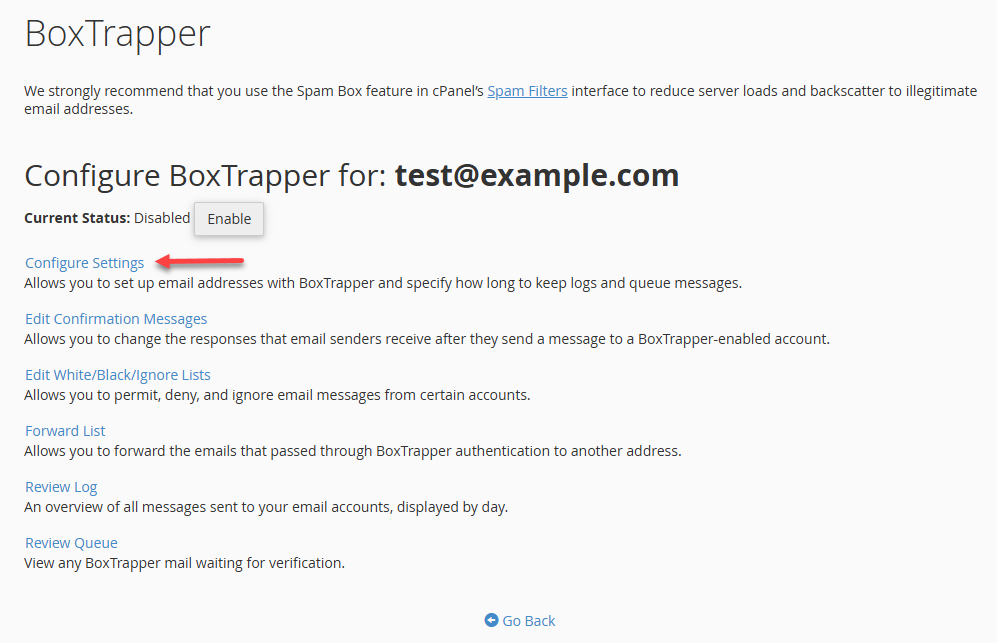
- Manage to enable/disable the trapper
- Edit the whitelist
- Ignore list and blacklist settings
- Customize your verification and blacklist messages
- Set up forward lists
- Review the mail logs to see what emails are not being delivered
Whitelists, Blacklists, Ignore Lists
The whitelist is a list of content that will be allowed into your inbox after the address has been confirmed.
The ignore list is a list of users or subjects whose emails you do not wish to receive. (These messages will not receive any notification or reply.)
The blacklist is a list of content you do not wish to receive in your email. The sender of blacklisted content will also receive a warning message of your choice.
Adjusting BoxTrapper Logs
BoxTrapper logs can quickly grow to a considerable size, depending on the amount of traffic your email account is receiving. You can help address this by setting how many days BoxTrapper will keep the mail logs on the server:
- Click on Boxtrapper under Email Management.
- Click Manage next to the email address you want to adjust.
- Click Configure Settings.
- Type a new number into the third text field, "The number of days that you wish to keep logs and messages in the queue:" and click Save.
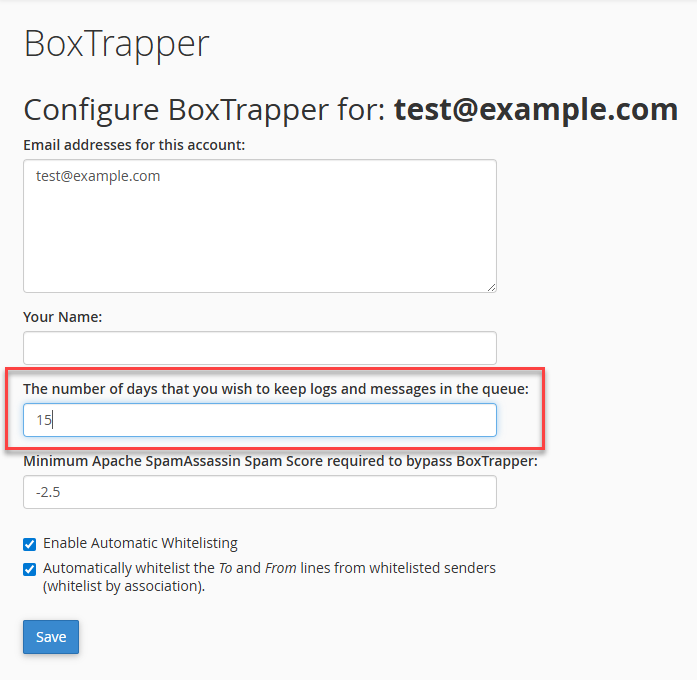
This must be done for each user, as each user's settings are independently managed.
Summary
BoxTrapper filter helps keep your inbox clean by allowing only verified senders. By managing whitelists, blacklists, and logs, you can maintain a secure and spam-free email environment. Enable BoxTrapper in Bluehost’s cPanel to start managing your email filters more effectively.
If you need further assistance, Bluehost Chat Support is available 24 hours a day, 7days a week while Bluehost Phone Support is available 7 days a week from 7 am-12 midnight EST.
- Chat Support - While on our website, you should see a CHAT bubble in the bottom right-hand corner of the page. Click anywhere on the bubble to begin a chat session.
- Phone Support -
- US: 888-401-4678
- International: +1 801-765-9400
You may also refer to our Knowledge Base articles to help answer common questions and guide you through various setup, configuration, and troubleshooting steps.