Troubleshooting OX Mail
When using OX Mail, you may face issues and be looking for solutions. Whether it is issues with email access, spam filters, missing emails, etc., these problems can affect your work. This article will address common issues you may encounter and OX Mail troubleshooting.
OX Mail is a legacy email service and is no longer offered to new customers, but existing users can continue to use it.
Can't Access OX Mail Account
You must clear your cache and attempt to log in using a different browser and device. Click the Forgot Password? link if you have configured a password recovery email. Enter the code that was provided to your recovery email after clicking the link on the login page.
The Bluehost Portal allows your account administrator to change your password if you haven't configured a password recovery email. If the problem continues, use the chat feature to contact customer service.
Restore Messages That I Deleted
You can retrieve a deleted email from the Trash folder. Simply go to your Trash folder and look for the email you want to recover, then click on the Move icon.
However, use the chat feature to contact customer service if you didn't delete the email and are unable to locate the deleted items in your Trash or any other folders.
I Cannot Receive Emails Being Sent to Me
If OX Mail is not receiving any emails sent to you, make sure to check your spam folder if you are aware that emails are being sent to you but haven't received them in your inbox. Additionally, you can look into other folders that might filter specific domain names or email addresses. Ask the sender to resend the emails after adding them to your allowlist if the emails are still missing. Follow the steps below to whitelist an email address:
- In your browser address bar, type mail.<your domain name>.<your domain extension>.
- For example, if your domain is example and your domain extension is .com, you should type mail.example.com in the address bar.
- Enter your login credentials on the login page, then click the Sign In button.
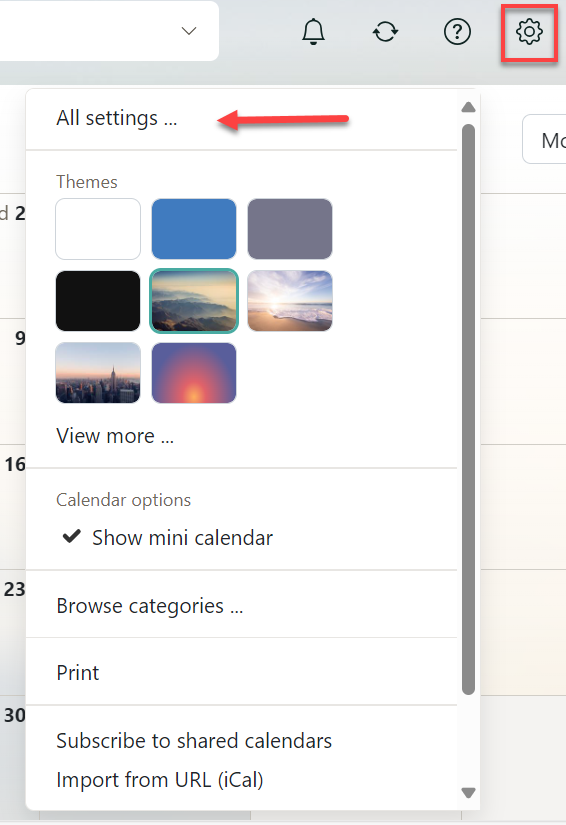
- Look for the gear icon beside your user profile and click on it, then select All Settings.
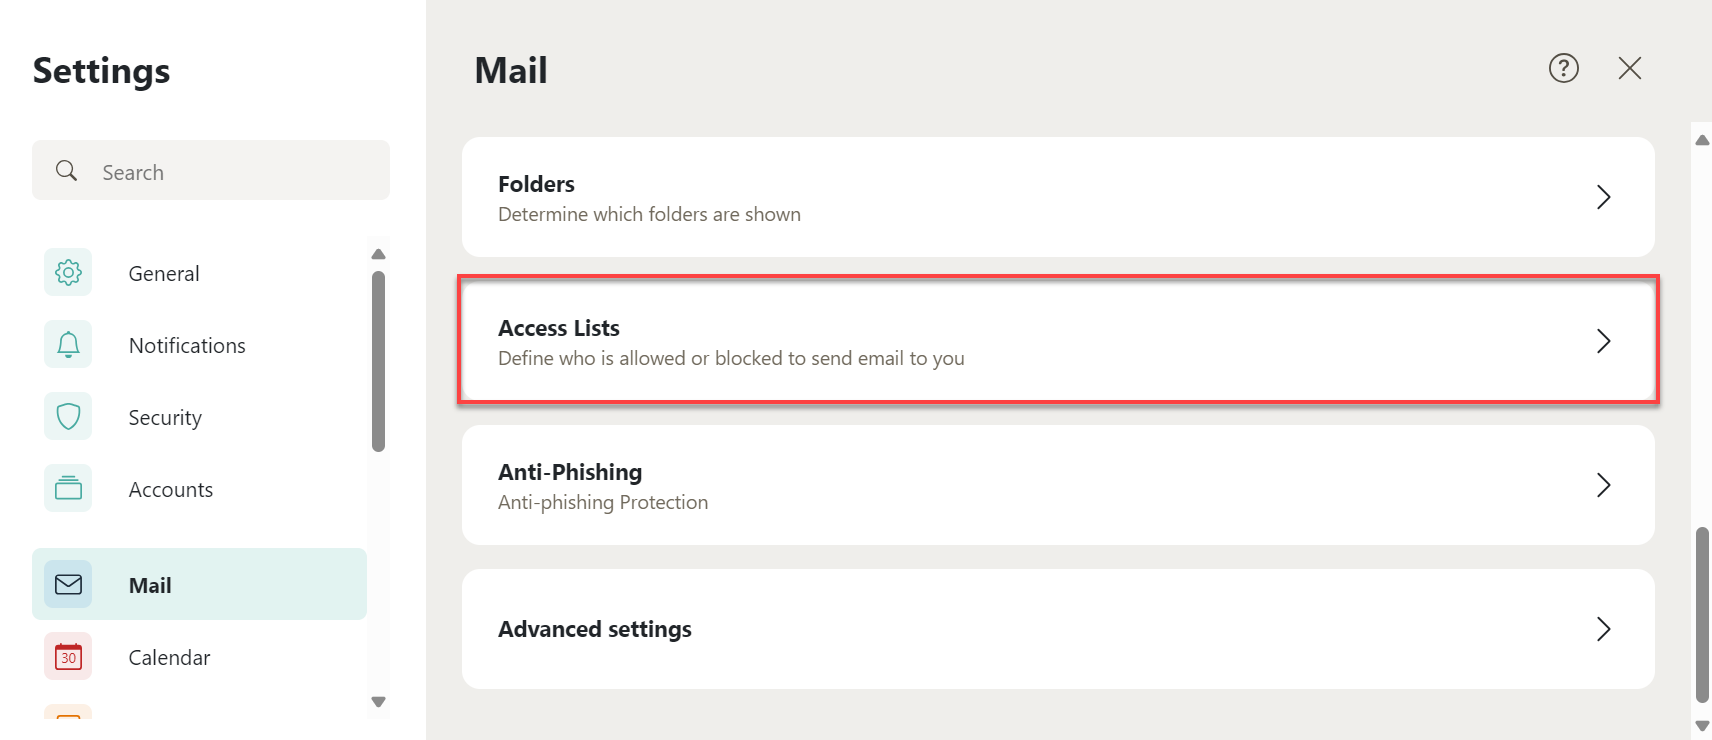
- Click Mail on the left menu, then click the Access Lists tab.
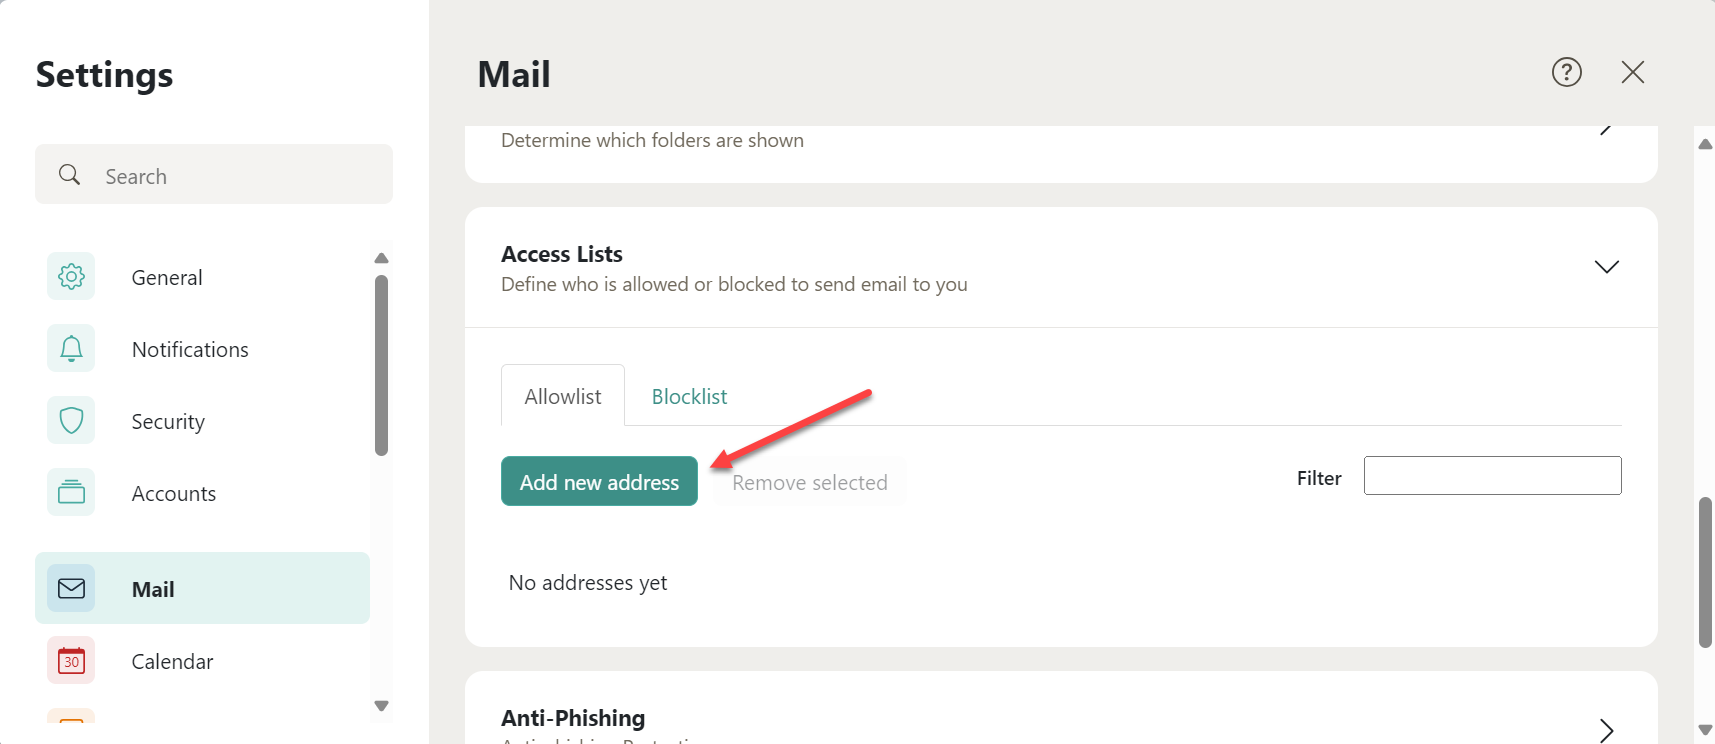
- In the Allowlist tab, click on the Add new address button.
- Enter the new address, then click the Add button.
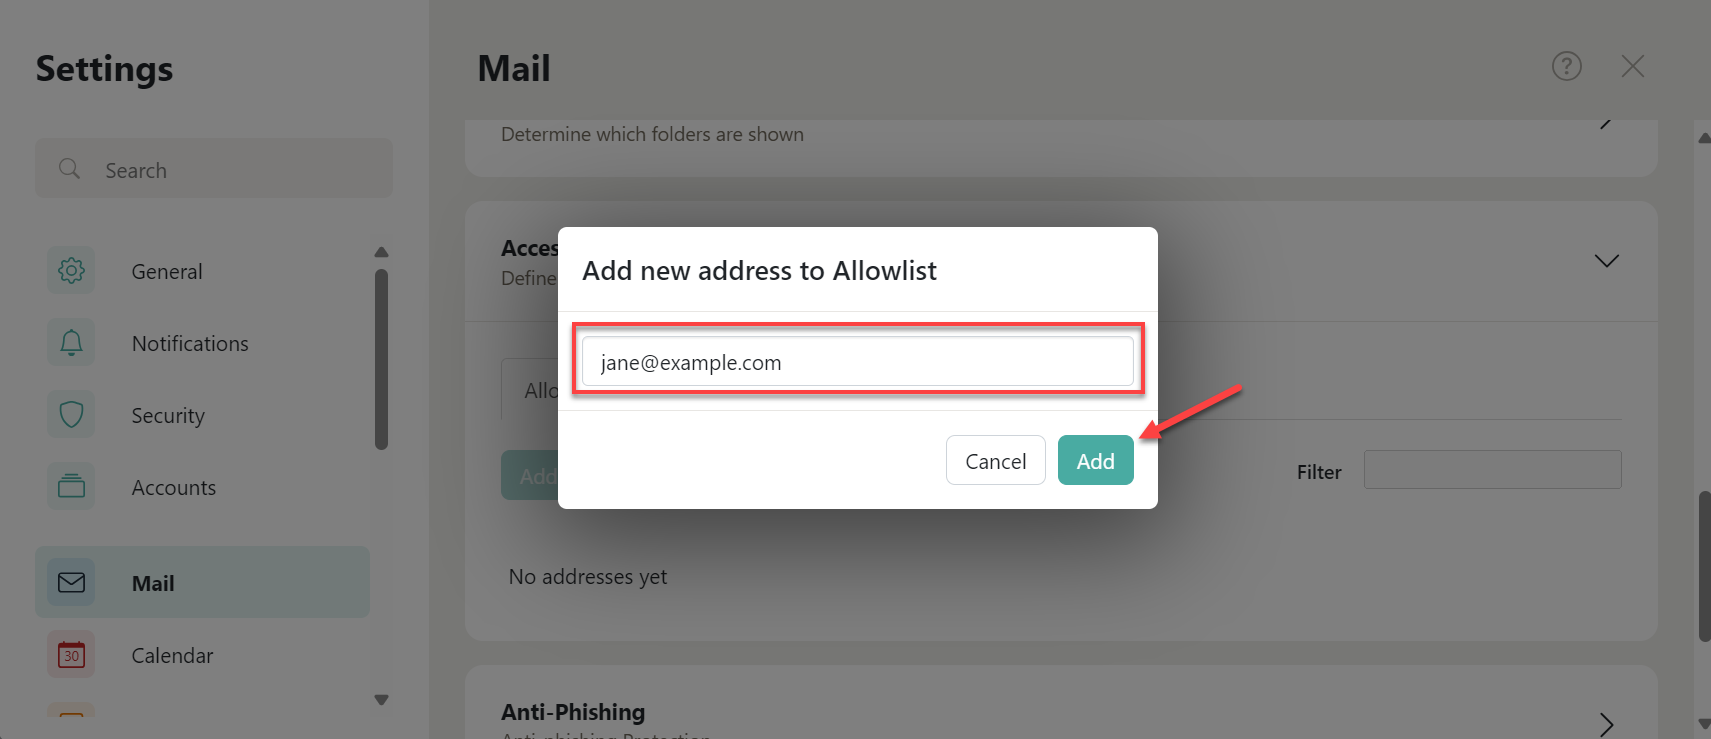
You have added a new address to your whitelist.
Email Not Forwarding
Make sure auto-forwarding is configured correctly if you are experiencing problems forwarding your emails to a different email account. Below are the steps to set up auto-forwarding:
- In your browser address bar, type mail.<your domain name>.<your domain extension>.
- For example, if your domain is example and your domain extension is .com, you should type mail.example.com in the address bar.
- Enter your login credentials, then click Sign In.
- Look for the gear icon beside your user profile and click on it, then select All Settings.
- Click Mail on the left menu, then click on the Rules tab. Click the Auto forward button.
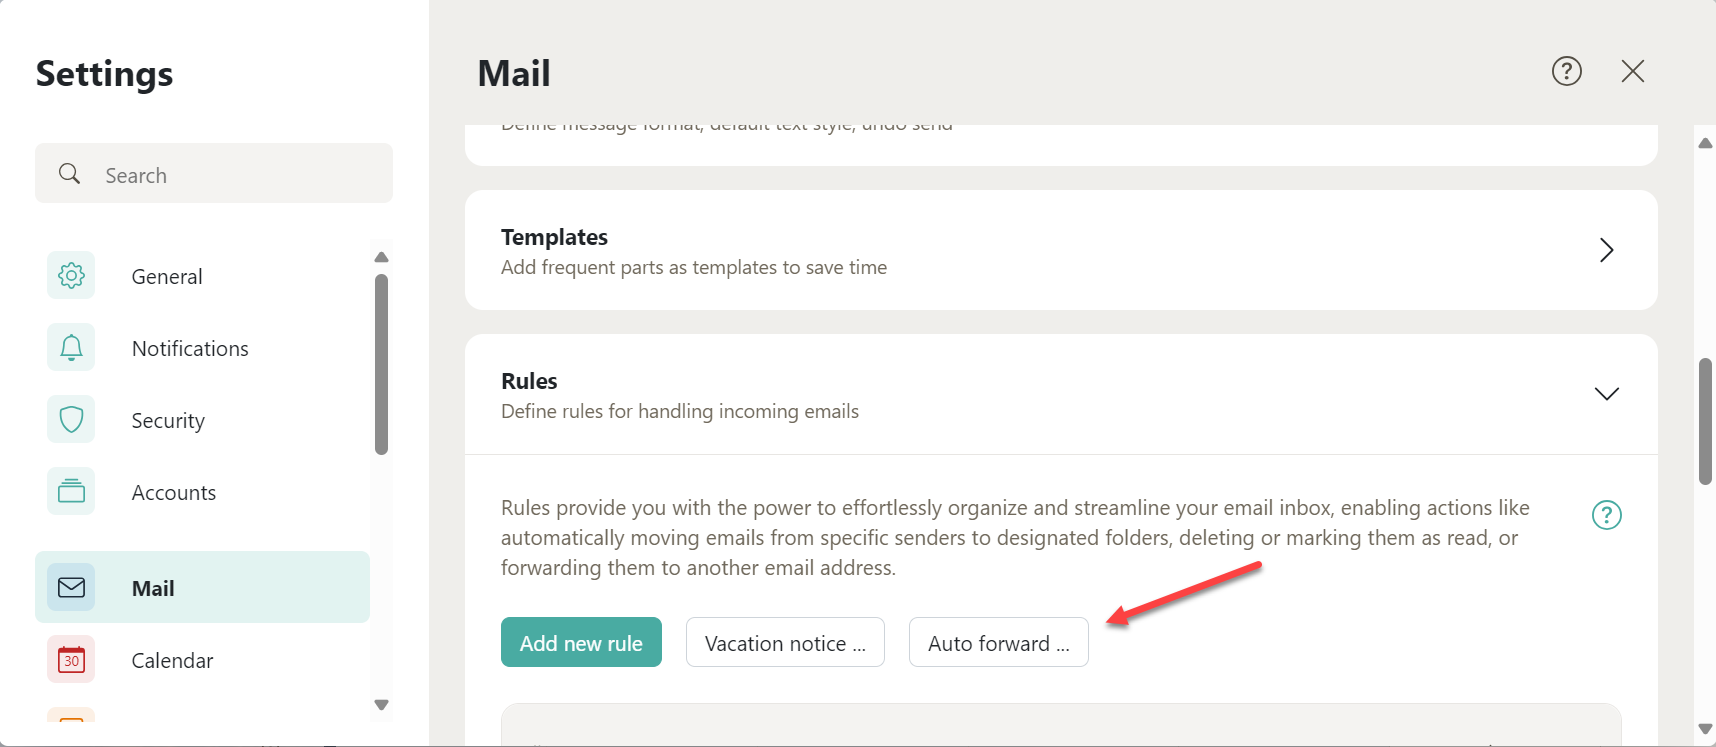
- A pop-up will open. Below are your options:
- Auto Forward toggle - Enable this to automatically forward your emails.
- Blank field - Type the email address to which you want to auto-forward emails.
- Keep a copy of the message checkbox - Select this option to store a copy of the mail.
- Process subsequent rules checkbos - We will add auto-forwarding as an email filter. Enable this to apply additional filter rules after the auto-forwarding. Moreover, you can modify auto-forwarding in your email filter settings.
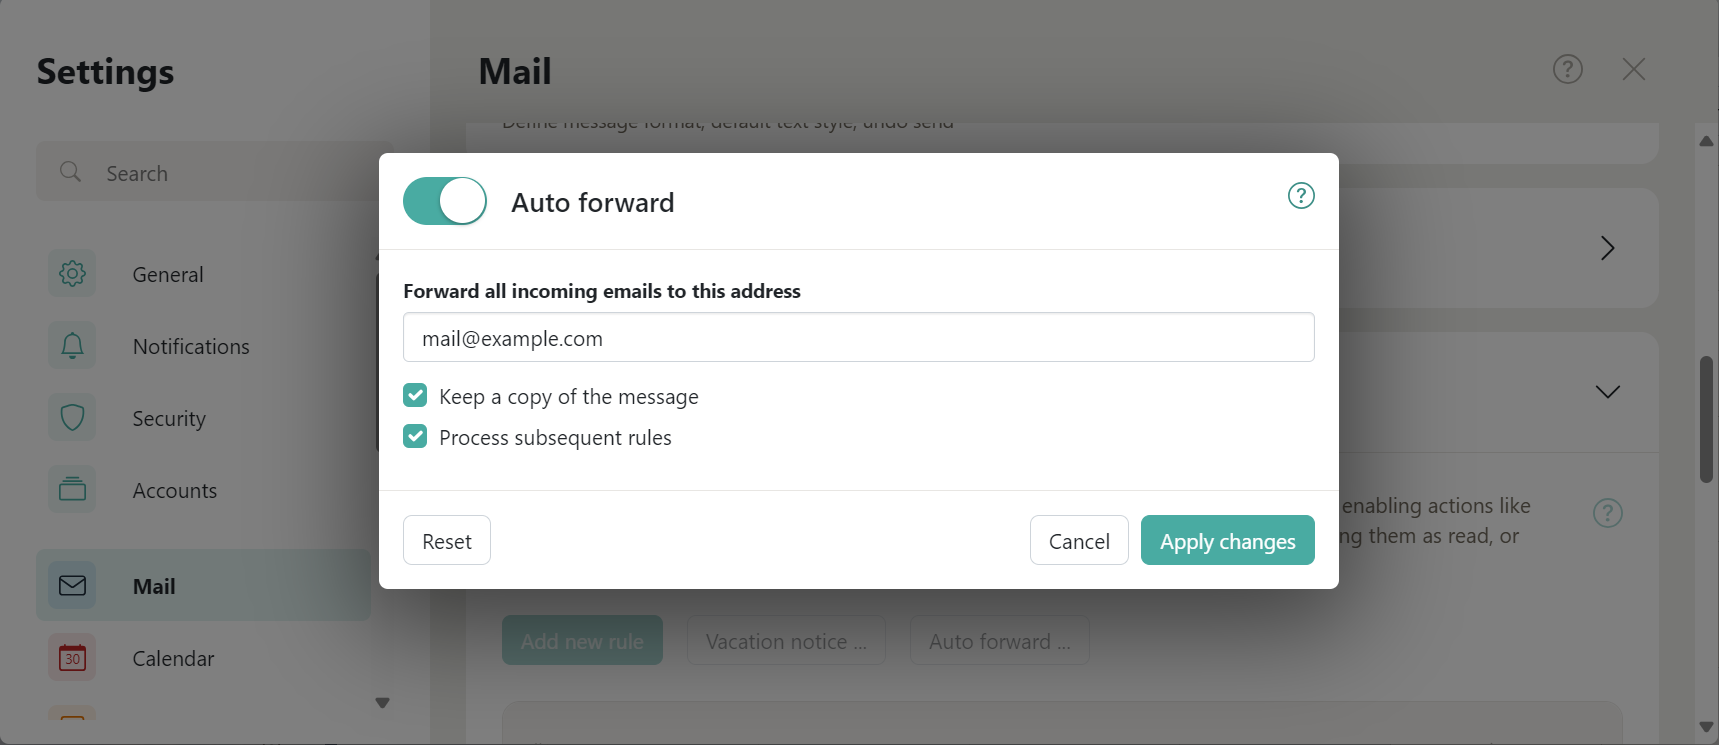
- Click the Apply changes button.
You will notice that the toggle switch for Auto forwarding has been turned on in your email settings.
Account is Not Loading/Account is Very Slow
In case OX Mail is slow, not loading, or is loading slowly, please refer to the troubleshooting steps provided below.
- After you clear your cache, access your email.
- Try using a different browser if the email is still not loading. The private surfing mode on your browser is another option.
- Use the chat feature to contact support if the problem continues.
The Spam Filter is Not Strong Enough
You can do the following:
Mark Email as Spam
To mark an email as spam, follow these steps:
- In your browser address bar, type mail.<your domain name>.<your domain extension>.
- For example, if your domain is example and your domain extension is .com, you should type mail.example.com in the address bar.
- Enter your login credentials, then click Sign In.
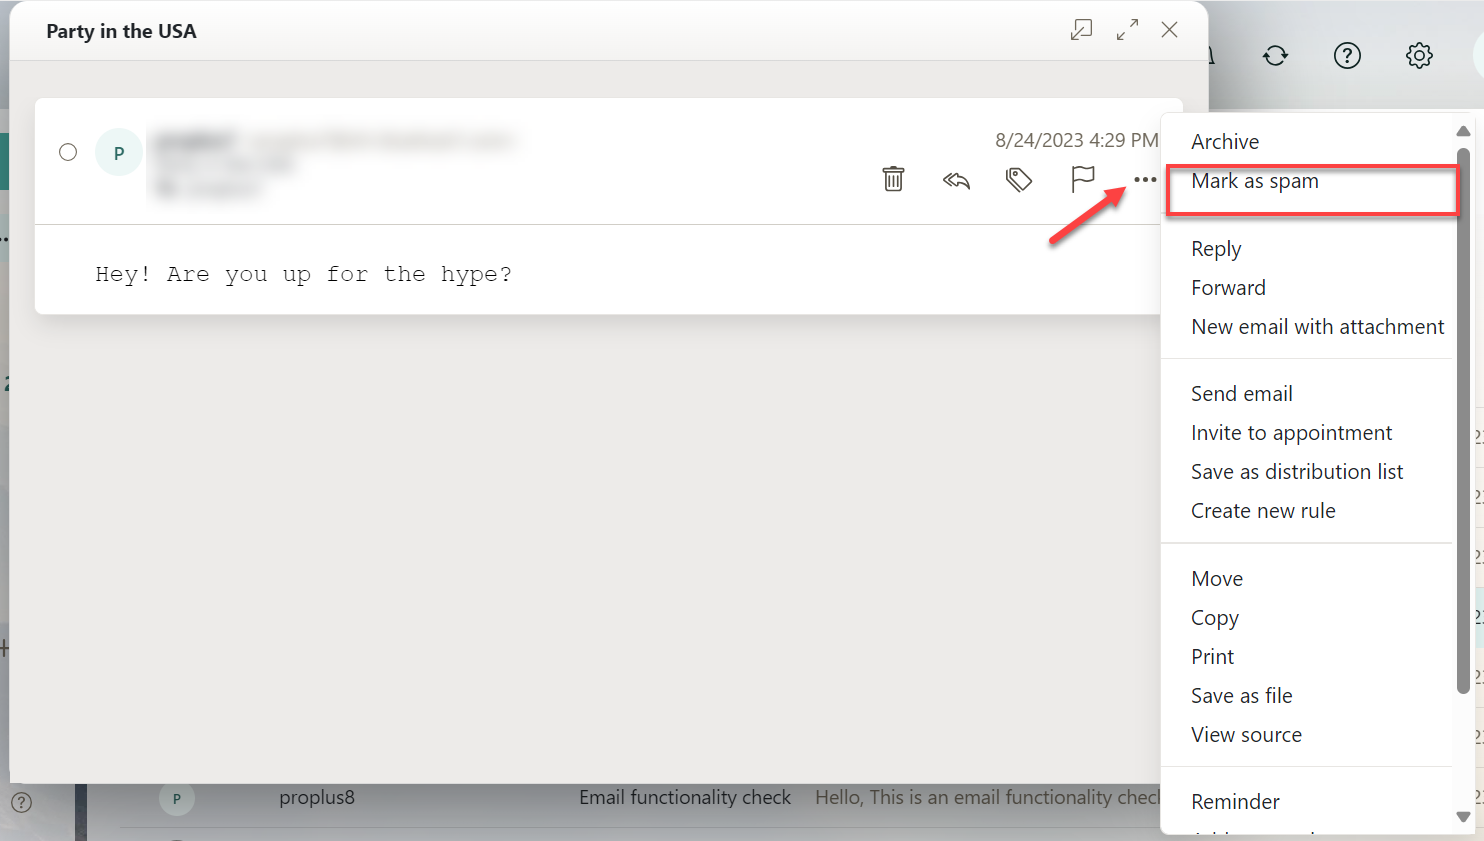
- Go to your inbox, then double-click on a spam message. Look for the More actions icon, then select Mark as Spam.
Add or Modify a Spam Filter Rule
- In your browser address bar, type mail.<your domain name>.<your domain extension>.
- For example, if your domain is example and your domain extension is .com, you should type mail.example.com in the address bar.
- Enter your login credentials, then click Sign In.
- Look for the gear icon beside your user profile and click on it, then select All Settings.
- Click Mail on the left menu, then click on the Rules tab. Click Add new rule.
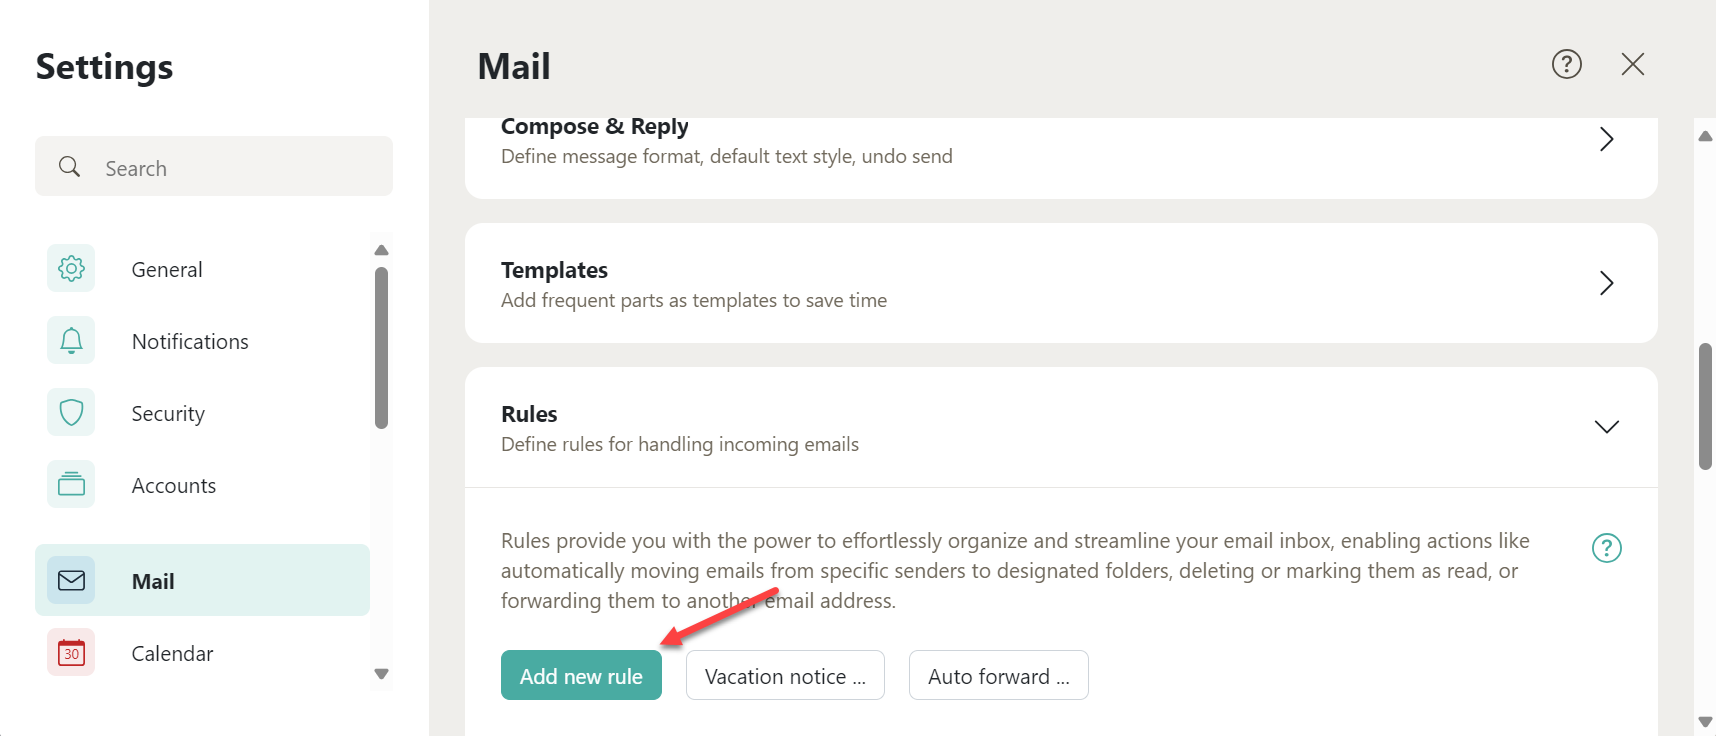
- Enter the name of the rule.

- Click Add condition, then choose a condition from the drop-down.
Be specific when creating conditions, as this will apply to all messages.
- Enter an argument, then choose a criterion from the drop-down.
- For example, if you get spam messages from a certain person, you want to get rid of them. The argument will contain the sender's email address.
- You have added a condition. Next, click on Add action, then select an action from the drop-down.
- Additional buttons and input boxes are presented based on the action. Use these functions to complete the action.
- You have added an action. Finally, click Save to apply the rule to future incoming emails.
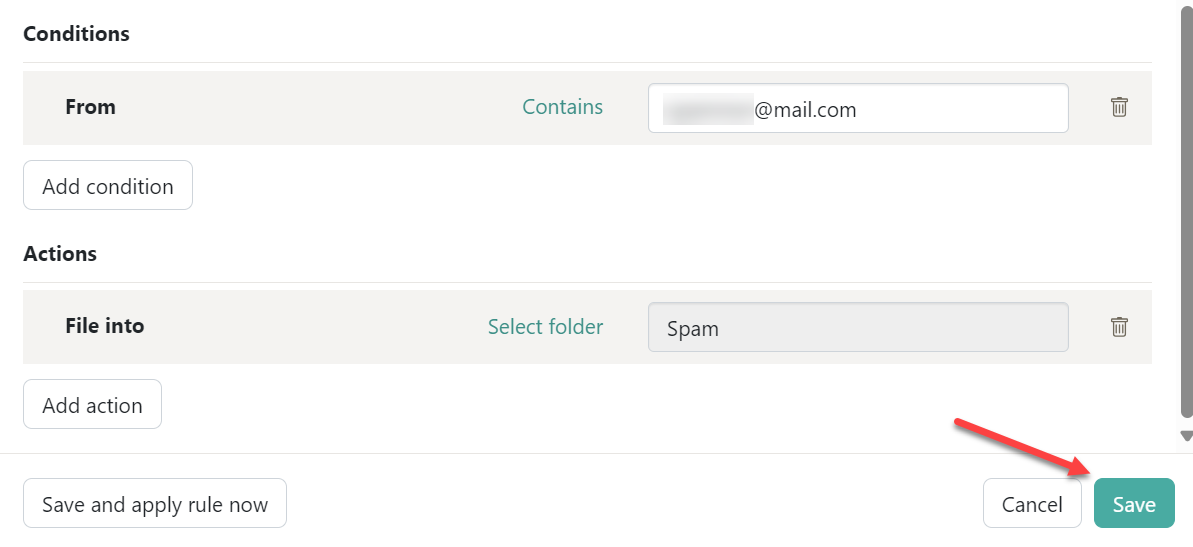
- Click Apply to apply the new rule to future incoming emails and existing emails.
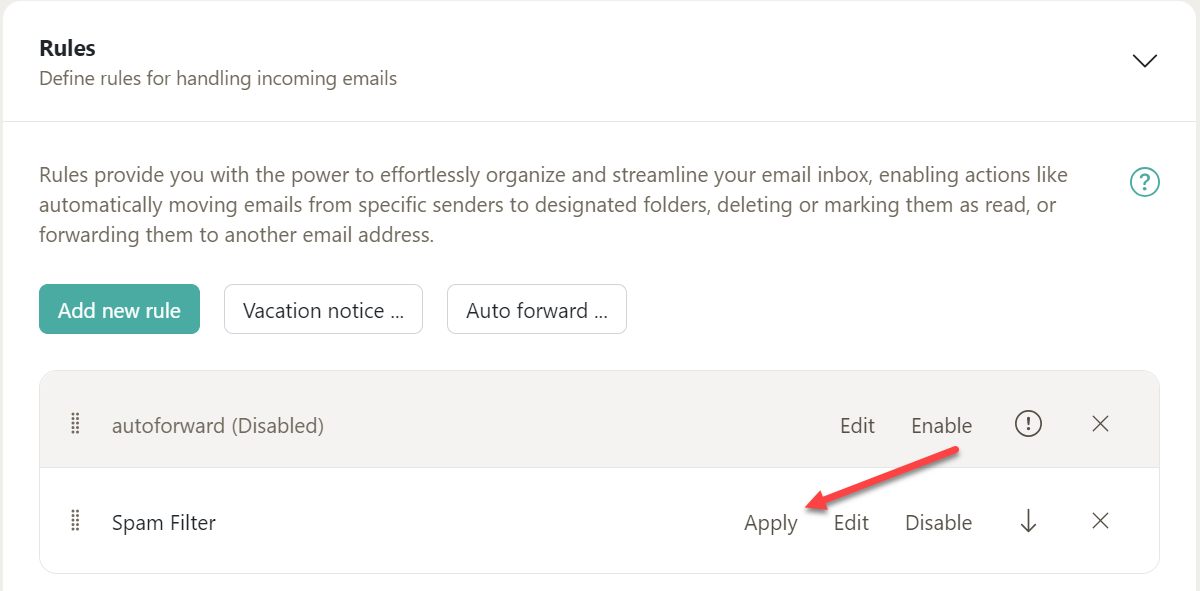
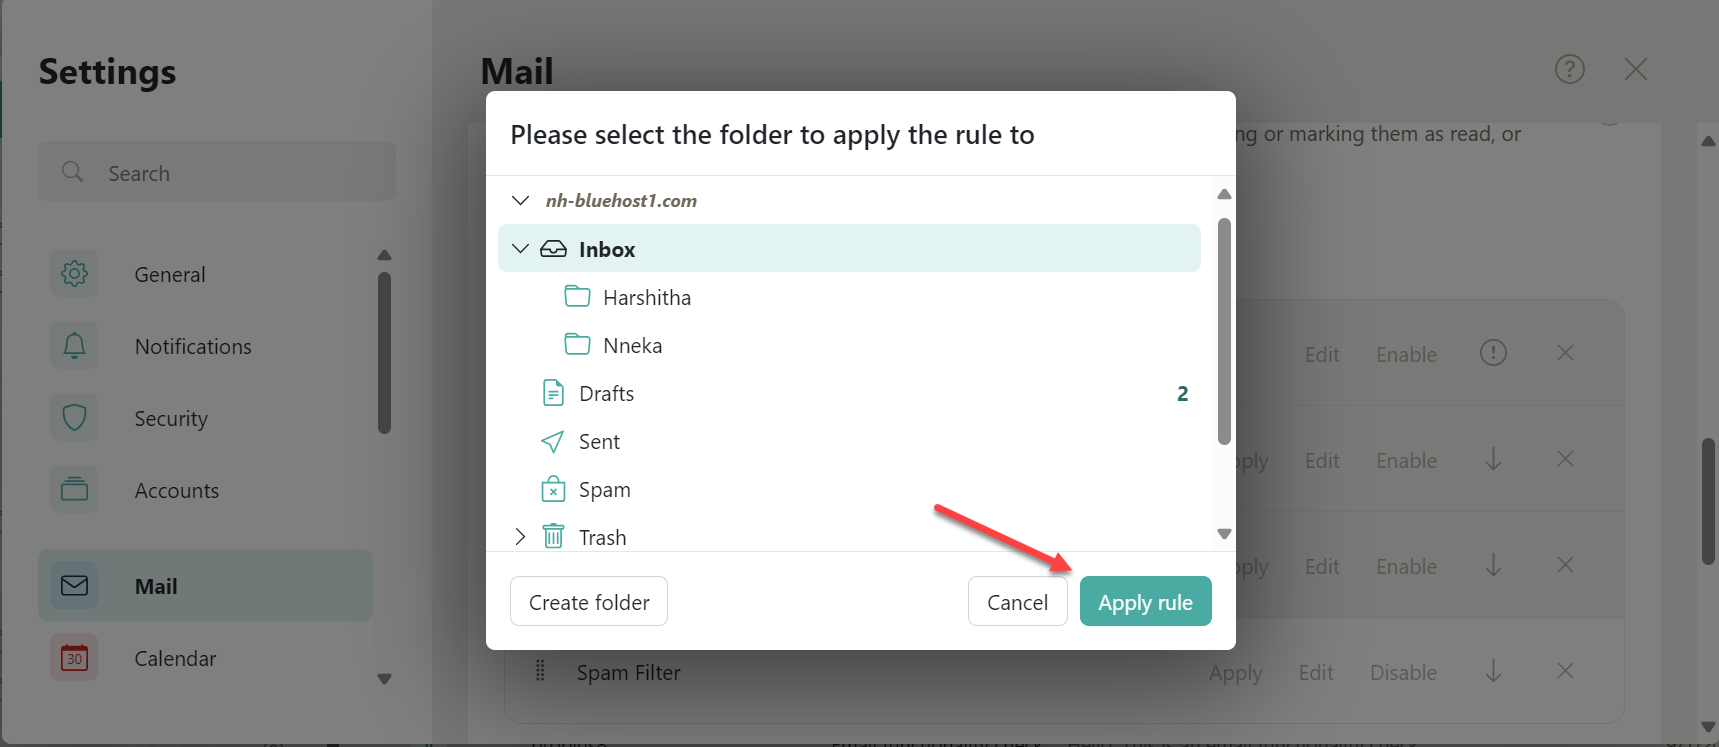
You also have the option to edit an existing rule. Click on the Edit link instead of Apply, then make the necessary changes to your rule. - Specify the email folder to be filtered, then click the Apply rule button.
Add Email Address to Blocklist
- In your browser address bar, type mail.<your domain name>.<your domain extension>.
- For example, if your domain is example and your domain extension is .com, you should type mail.example.com in the address bar.
- Enter your login credentials, then click Sign In.
- Look for the gear icon beside your user profile and click on it, then select All Settings.
- Click Mail on the left menu, then click the Access Lists tab.
- In the Blocklist tab, click on the Add new address button.
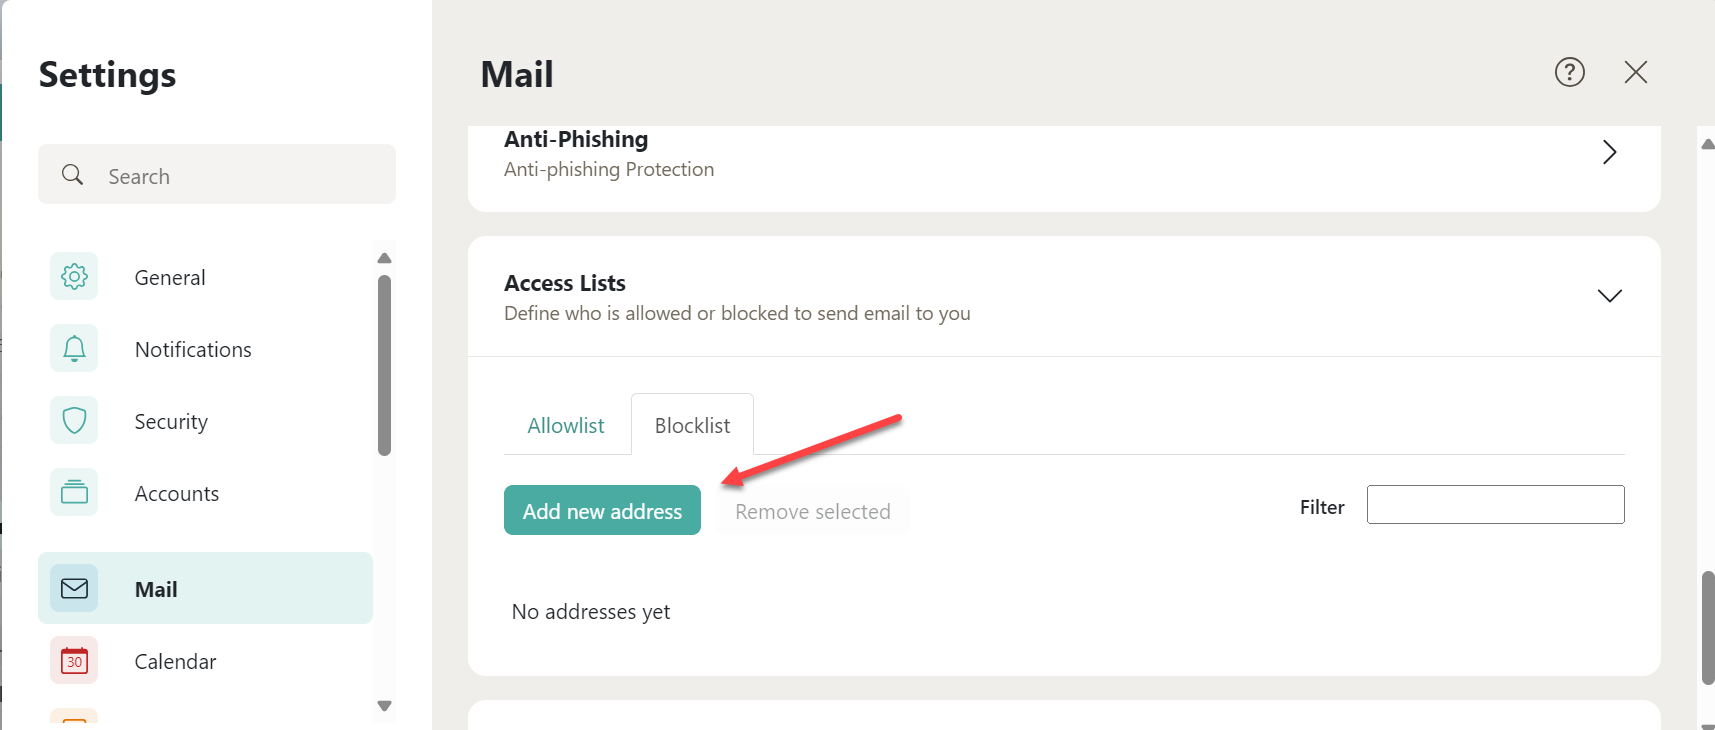
- Enter the new address, then click the Add button.
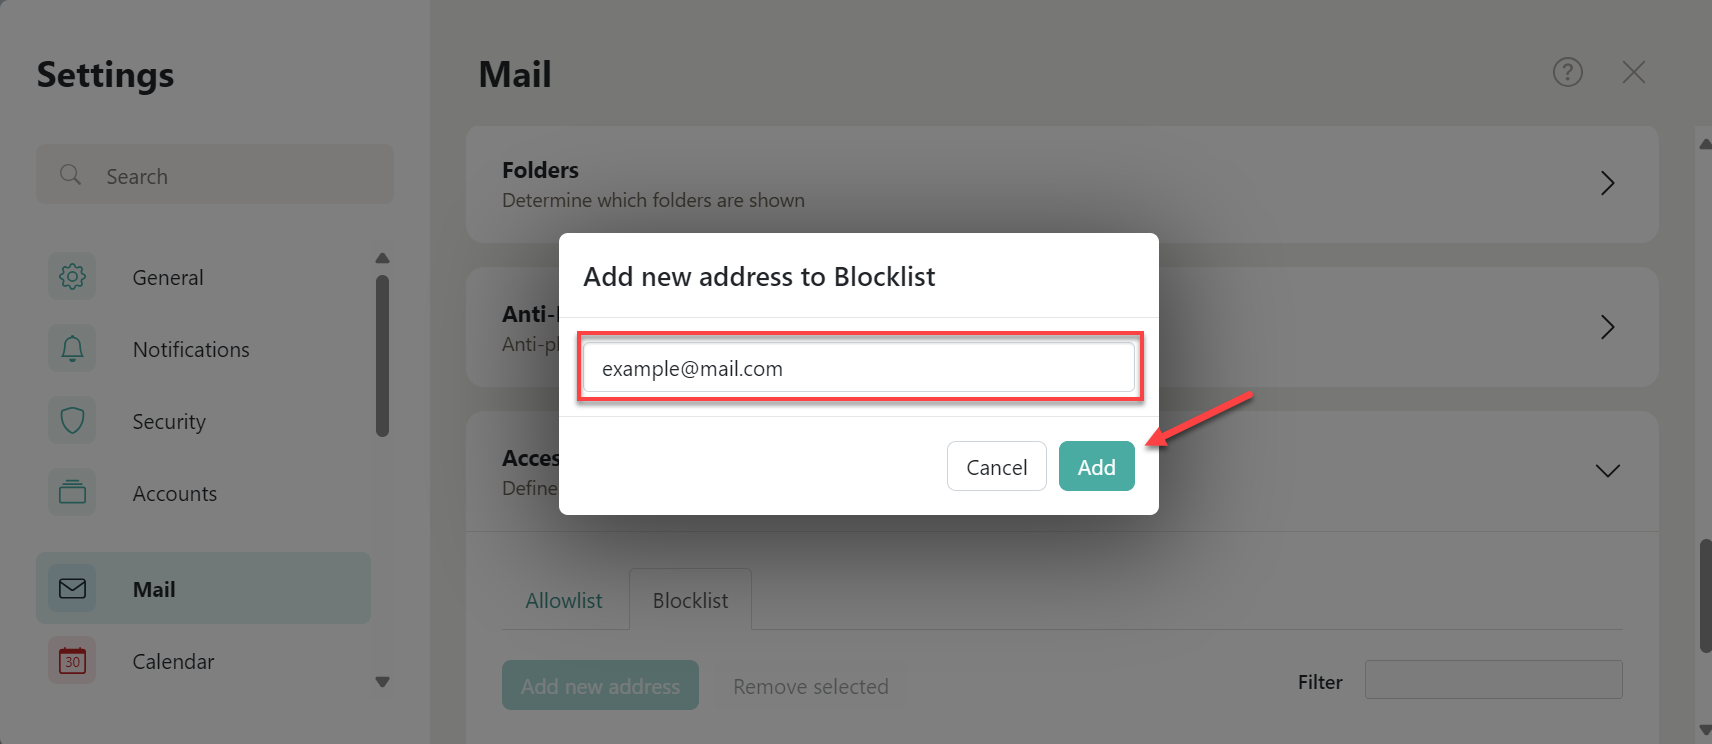
You have added a new address to your blocklist.
Use Anti-Phishing Protection
- In your browser address bar, type mail.<your domain name>.<your domain extension>.
- For example, if your domain is example and your domain extension is .com, you should type mail.example.com in the address bar.
- Enter your login credentials, then click Sign In.
- Look for the gear icon beside your user profile and click on it, then select All Settings.
- Click Mail on the left menu, then click the Anti-phishing tab.
- Select the level of protection you want to set for your email. To turn on anti-phishing protection, choose the following options:
- Only scan links in emails I receive within Bluehost.
- Scan all links in emails I receive within Bluehost and on third-party and mobile devices.
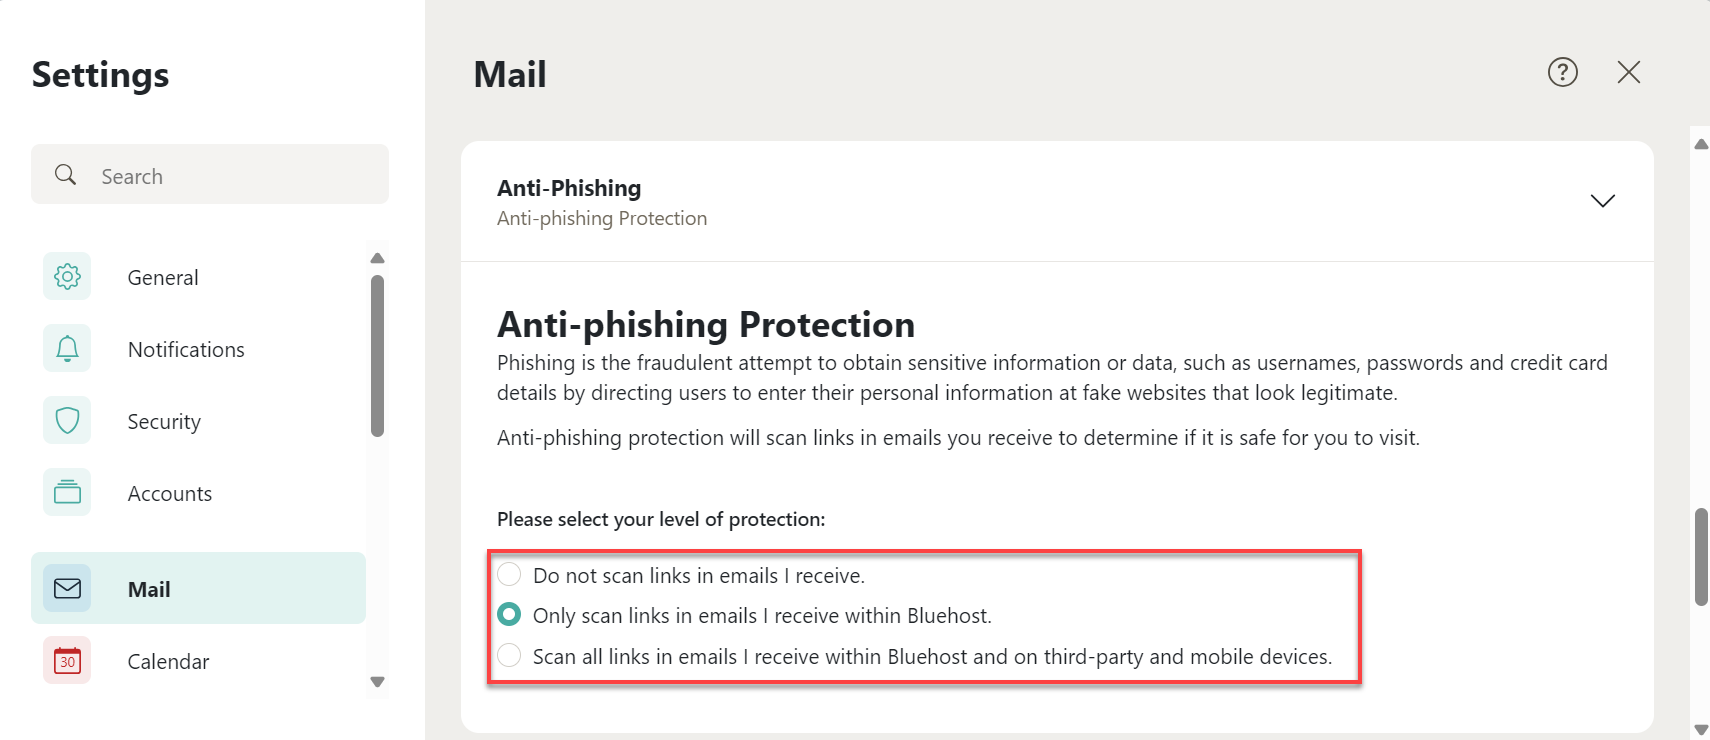
You have set up anti-phishing protection.
Spam Filter too Strong or Incoming Addresses are Blocklisted
You can add the sender's email address to your allowlist or set up a filter rule to make sure that their emails appear in your inbox or the folder of your choice, if you are missing important emails and discover them sitting in your spam folder. In order to have it moved automatically to your inbox, you can also manually flag it as Not Spam.
Summary
Learn how to troubleshoot common OX Mail problems, such as the following:
- Access issues
- Deleted messages that need to be restored
- Not receiving emails
- Forwarding problems
- Account not loading
- Spam filter issues
This guide will provide you with the steps you need for OX Mail troubleshooting.
If you need further assistance, Bluehost Chat Support is available 24 hours a day, 7days a week while Bluehost Phone Support is available 7 days a week from 7 am-12 midnight EST.
- Chat Support - While on our website, you should see a CHAT bubble in the bottom right-hand corner of the page. Click anywhere on the bubble to begin a chat session.
- Phone Support -
- US: 888-401-4678
- International: +1 801-765-9400
You may also refer to our Knowledge Base articles to help answer common questions and guide you through various setup, configuration, and troubleshooting steps.