OX Mail Quick Launch Icons
Icons serve as visual cues for functions, making it effortless for users to identify and swiftly access various applications. Quick launch icons, specifically designed for frequently used apps, provide a convenient way to streamline your Cloud Mail experience. In this article, we'll delve into the significance of Quick Launch Icons and guide you on how to set them up according to your preferences.
Quick Launch Icons
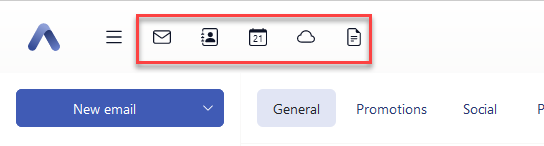
Quick Launch Icons are the gateway to efficiency on your Cloud Mail platform. Here's a breakdown of the diverse icons you'll encounter on the menu bar:
![]()
| # | Icon | Symbol | Function |
|---|---|---|---|
| 1 | All Application | Opens a menu with icons for launching various apps. | |
| 2 | Notifications | Notifies you of new notifications, and clicking the icon opens the notification area. | |
| 3 | Refresh | Reloads objects from the server, ensuring constant updates at regular intervals. | |
| 4 | Help | Opens a menu offering various functions:
|
|
| 5 | Settings | Opens a menu with additional functions, the nature of which depends on the current app. | |
| 6 | My Account | - | Utilizes your profile picture, or if the mailbox is newly created, it displays the initial letter of your email within a circle icon (e.g., J for [email protected]). Upon clicking, a menu presents the following options:
|
Setting Up Quick Launch Icons
Customize your Cloud Mail experience by setting up Quick Launch Icons tailored to your needs once logged in. Follow these straightforward steps to configure your preferred icons:
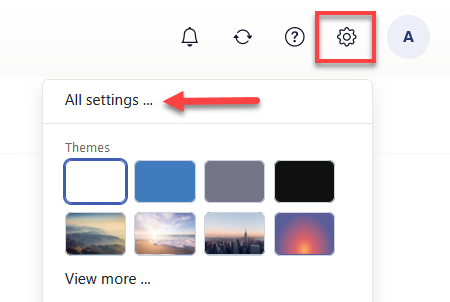
- Launch Settings Pop-up
- Click the Settings (gear) icon.
- Choose the All Settings... drop-down option.
- Navigate to Quick Launch Icons
- Click the General (with a gear icon) tab.
- Scroll down and click Startapp & Quick launch bar or the > icon.
- Click the Configure quick launch bar... button, initiating the Change quick launch bar pop-up.
- Customize Icon Display
- In the Change quick launch bar pop-up, select icons to display by clicking each drop-down box.
- Lastly, click the Save changes button.

Your applications will now be organized according to your Quick Launch Icon preferences, as shown in the screenshot below, optimizing your workflow.
Summary
Quick Launch Icons are more than just shortcuts—they’re powerful tools that enhance productivity and simplify navigation within Cloud Mail. By customizing these icons to fit your workflow, you gain instant access to essential applications, reduce time spent searching, and create a personalized experience that works for you. Take advantage of this feature today to make your Cloud Mail usage faster, smarter, and more efficient.
If you need further assistance, Bluehost Chat Support is available 24 hours a day, 7days a week while Bluehost Phone Support is available 7 days a week from 7 am-12 midnight EST.
- Chat Support - While on our website, you should see a CHAT bubble in the bottom right-hand corner of the page. Click anywhere on the bubble to begin a chat session.
- Phone Support -
- US: 888-401-4678
- International: +1 801-765-9400
You may also refer to our Knowledge Base articles to help answer common questions and guide you through various setup, configuration, and troubleshooting steps.