Guide to the DNS Tab in the Bluehost Portal
With the recent changes within the Bluehost Portal, each domain name in your account will now have its DNS tab. Let us walk you through where to find the DNS tab. Please click any links below to jump into a topic.
What is DNS?
The Domain Name System (DNS) acts as the Internet's phonebook. It translates human-readable domain names (like example.com) into machine-readable IP addresses (like 192.0.2.1), which computers use to communicate. Without DNS, users must remember the IP addresses to access websites and other online services.
Where to Find the DNS Tab?
You can easily manage your DNS records by accessing the DNS panel under the Domains tab in the Bluehost Portal. There’s no need to navigate to the Hosting or Websites tab, and you don’t need to go through cPanel either. To sum up, all navigation should be conducted only within the Bluehost Portal for a streamlined experience!
- Log in to your Bluehost Portal.
- In the left-hand menu, click Domains.
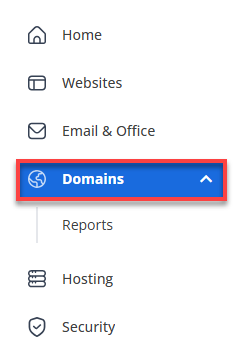
- If you have one domain in your account, you will be taken directly to the domain management panel.

- If you have multiple domains in your account, click the domain you wish to manage to access the domain management panel.
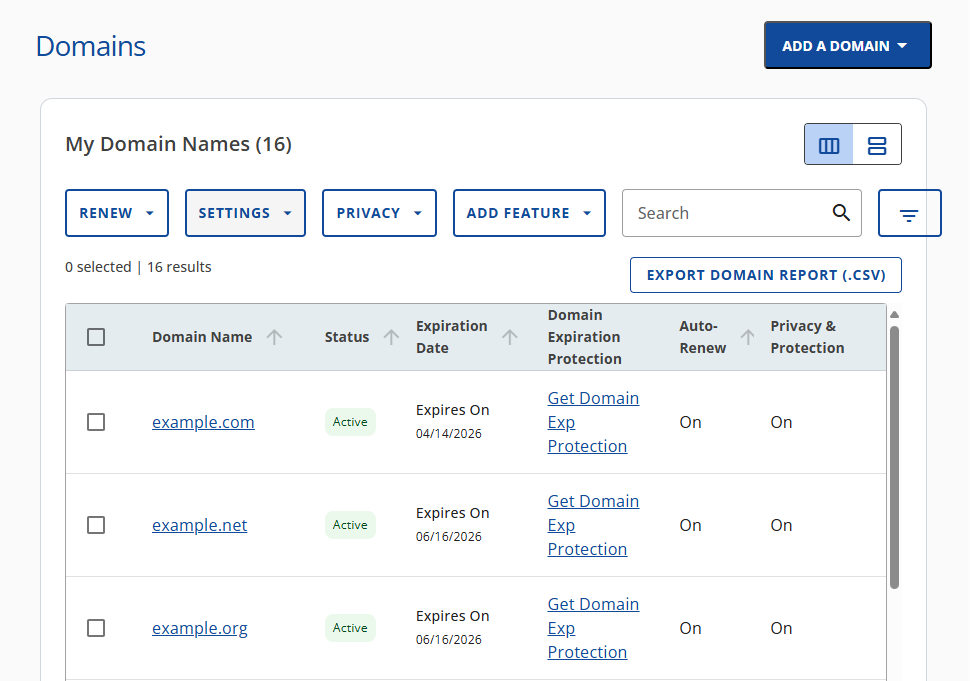
- If you have one domain in your account, you will be taken directly to the domain management panel.
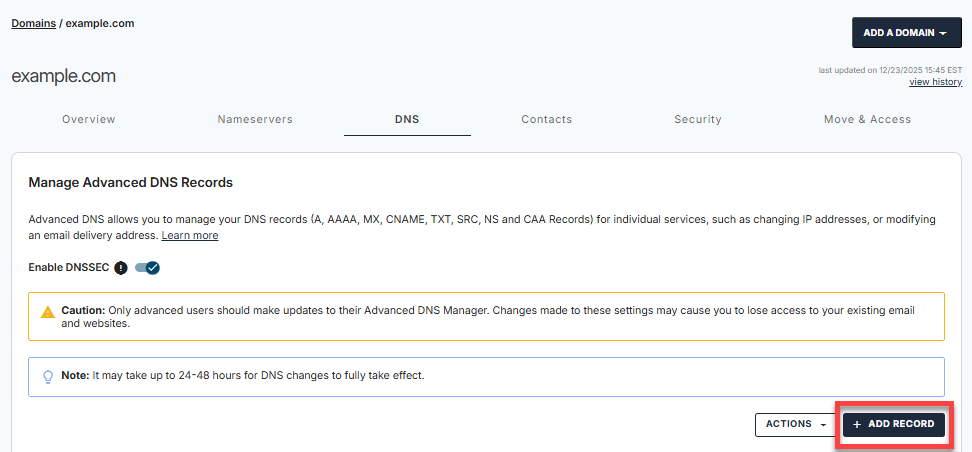
- Click the DNS tab.

You'll be redirected to the Manage Advanced DNS Records section.
How to Manage DNS Records
In the Manage Advanced DNS Records section, you can perform the following actions:
Add a DNS Record
- In the Manage Advanced DNS Records section, click the + Add record button on the right.
- You can either add Single or Multiple records.
- Single record:
- Select the record type and enter its values.
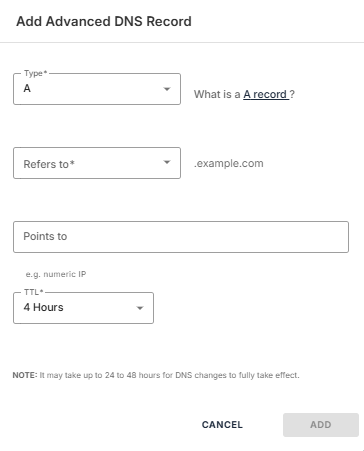
- Click Add to save the new DNS record.
- Select the record type and enter its values.
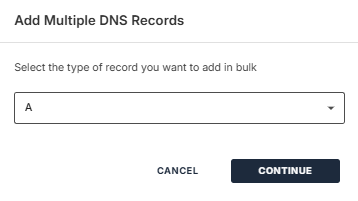
- Multiple records:
- Select the record type from the dropdown, then click on Continue.
- Click the + Add more records button to add more DNS records.
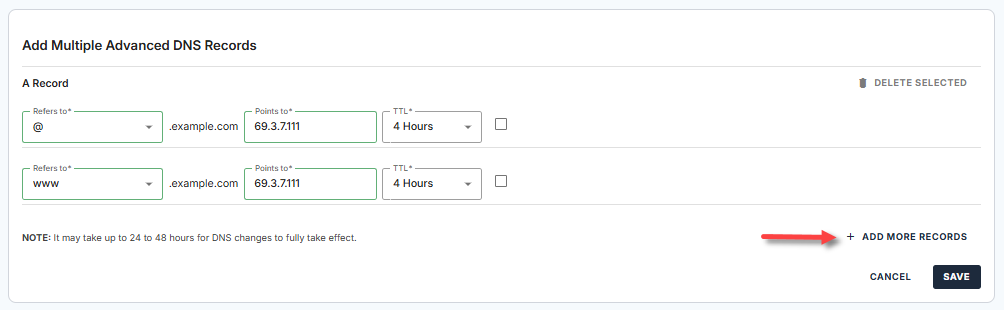
- Click Save.
- Select the record type from the dropdown, then click on Continue.
- Single record:
Edit a DNS Record
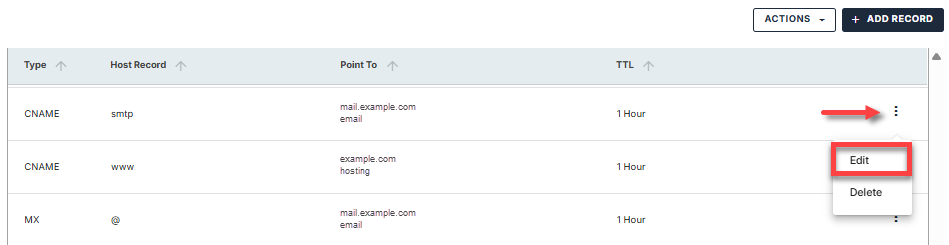
- Under the DNS tab, look for the domain you need to edit, click its vertical ellipsis icon on the right, then select Edit.
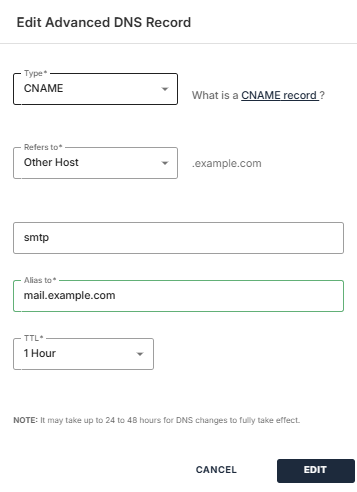
- Make the necessary changes to the record, then click the Edit button to save.
Delete a DNS Record
- Under the DNS tab, look for the domain you want to remove, click its vertical ellipsis icon on the right, then select Delete.
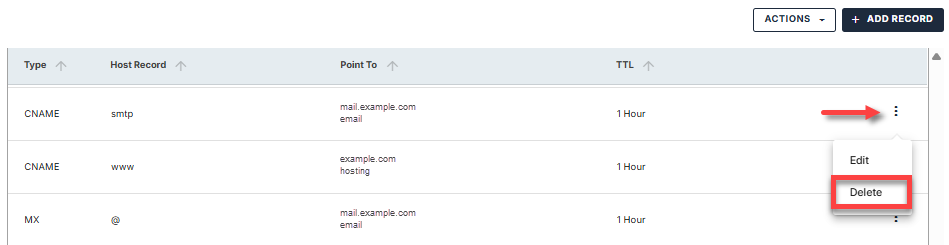
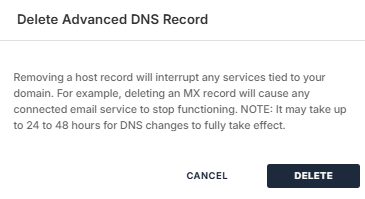
- In the pop-up, click the Delete button to remove the DNS record.
Import the DNS Zone
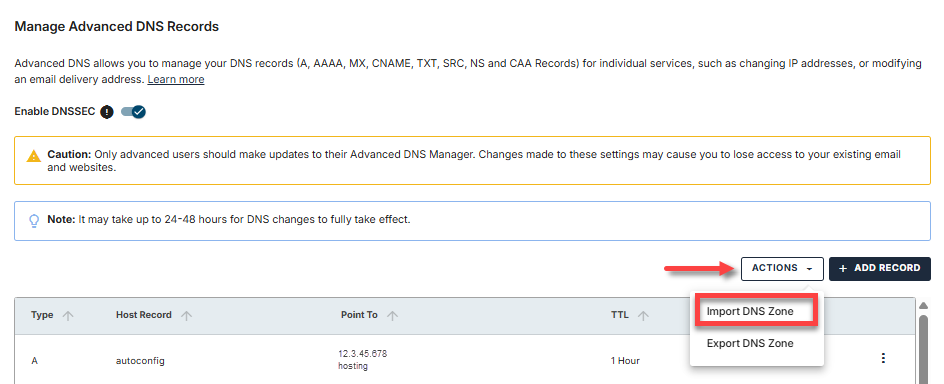
- Under the DNS tab, click the Actions dropdown.
- Select Import DNS zone.
- In the pop-up, select your DNS zone file.
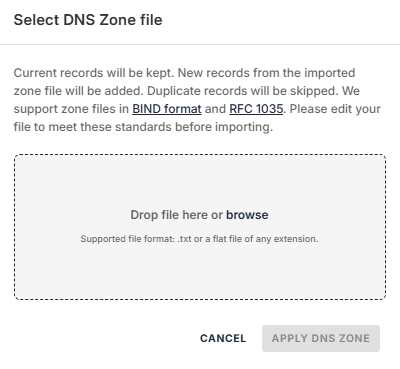
- Click Apply DNS zone.
Export the DNS Zone
- Under the DNS tab, click the Actions menu.
- Select Export DNS zone.
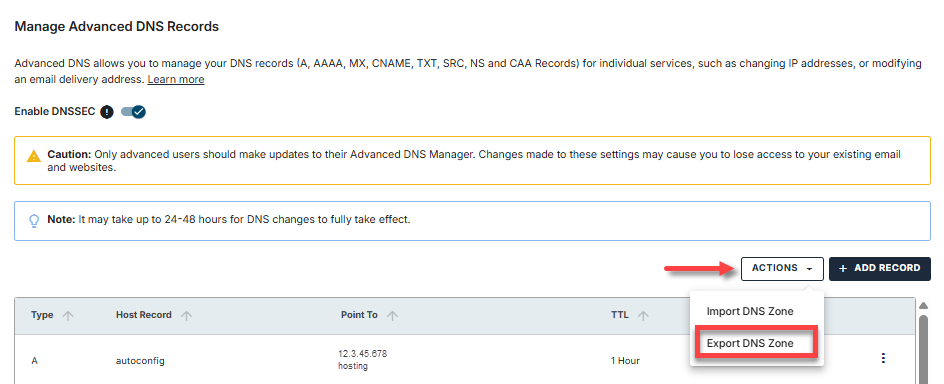
- In the pop-up, click Download DNS zone.
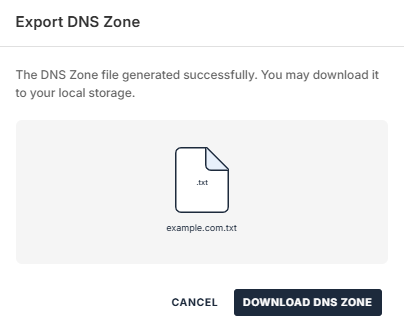
- A .txt file containing the DNS zone for your domain will be downloaded to your local storage.
Summary
Learning how to use the DNS tab in the Bluehost Bluehost Portal is important for managing and adding DNS records. This article guides you through the various functionalities available for managing your domain's DNS, ensuring that your hosting and email services are operating smoothly.
If you need further assistance, Bluehost Chat Support is available 24 hours a day, 7days a week while Bluehost Phone Support is available 7 days a week from 7 am-12 midnight EST.
- Chat Support - While on our website, you should see a CHAT bubble in the bottom right-hand corner of the page. Click anywhere on the bubble to begin a chat session.
- Phone Support -
- US: 888-401-4678
- International: +1 801-765-9400
You may also refer to our Knowledge Base articles to help answer common questions and guide you through various setup, configuration, and troubleshooting steps.