How to Manage Email Accounts in cPanel: Create, Delete, and Update
With Bluehost’s latest interface update, managing your email accounts is easier and more intuitive. This guide walks you through everything you need to know—from creating new ones and changing passwords to adjusting mailbox storage and removing unused addresses.
Whether you’re organizing personal inboxes or managing business communications, these step-by-step instructions will help you keep your email system secure, flexible, and easy to manage.
Access Email Accounts
The steps to manage email accounts depend on the type of email service associated with your Bluehost account.
Professional Email or Google Workspace
For advanced features and enhanced functionality, Bluehost offers Professional Email and Google Workspace solutions.
Refer to the following articles to learn how to purchase, set up, and manage these services:
cPanel Email
Follow these steps to manage cPanel-based email accounts:
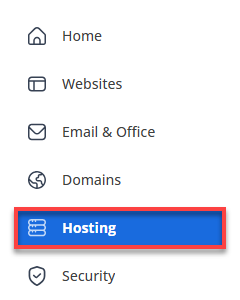
- Log in to your Bluehost Portal.
- Click Hosting in the left-hand menu.
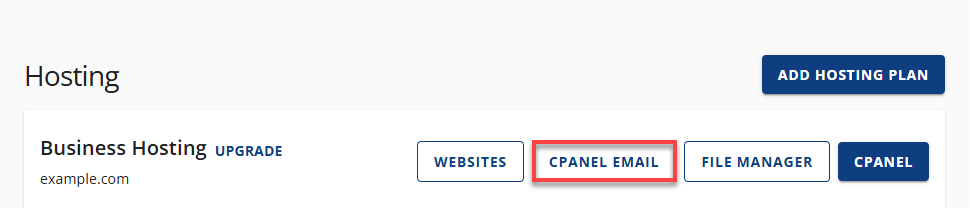
- On the right, click the cPanel Email button.
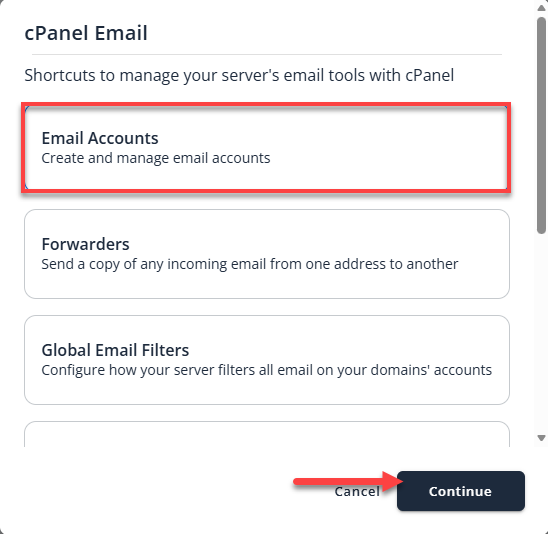
- In the cPanel Email pop-up, click the Email Accounts link and Continue.
Within cPanel's Email Accounts section, you can perform the following actions to manage your email accounts.
- Create New Email Accounts
- View Existing Email Accounts
- Access Webmail
- Change Mailbox Quota
- Change Email Password
- Delete an Email Account
Create New Email Accounts
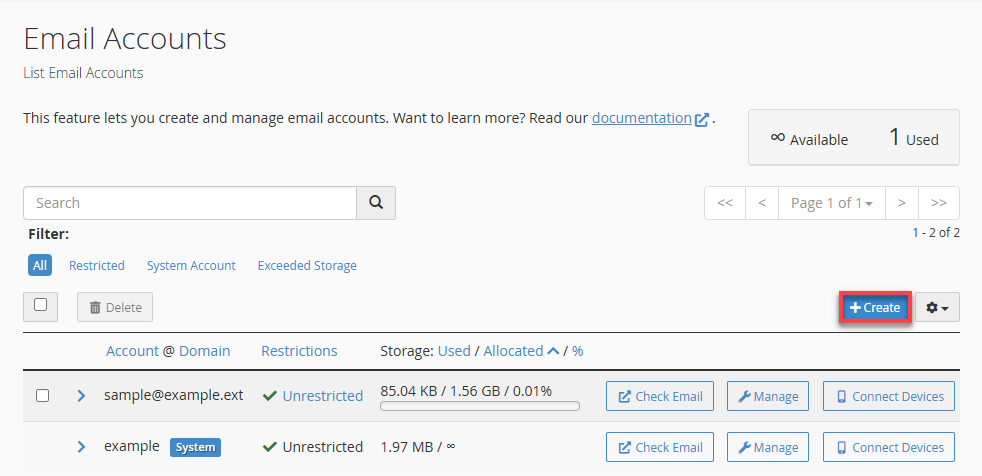
- In Email Accounts, click + Create (top-right).
- Complete the required fields:
- Domain: Select the domain for the email address.
- Username: Enter the email name (for example, jsmith).
- Password: Create a strong password or use the password generator.
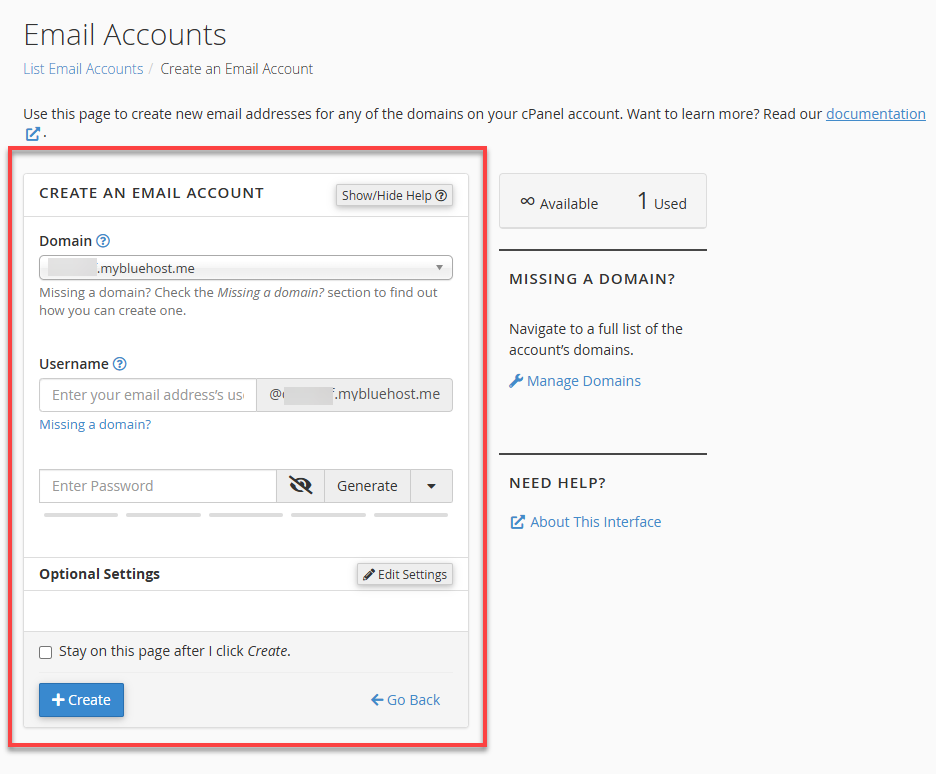
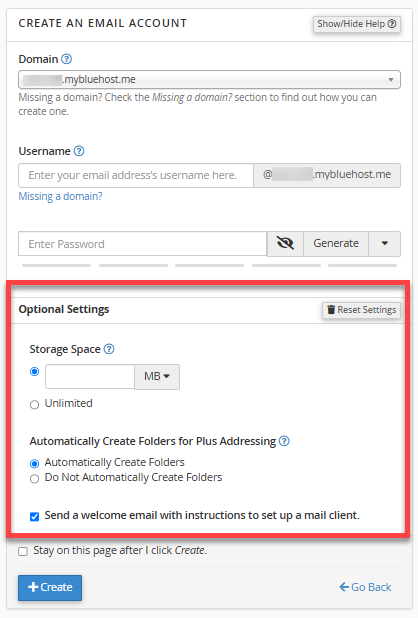
- (Optional) Click Edit Settings to configure storage space:
- Default storage is 500 MB
- Adjust within your hosting plan’s limits
- Click +Create to finish setting up the account.
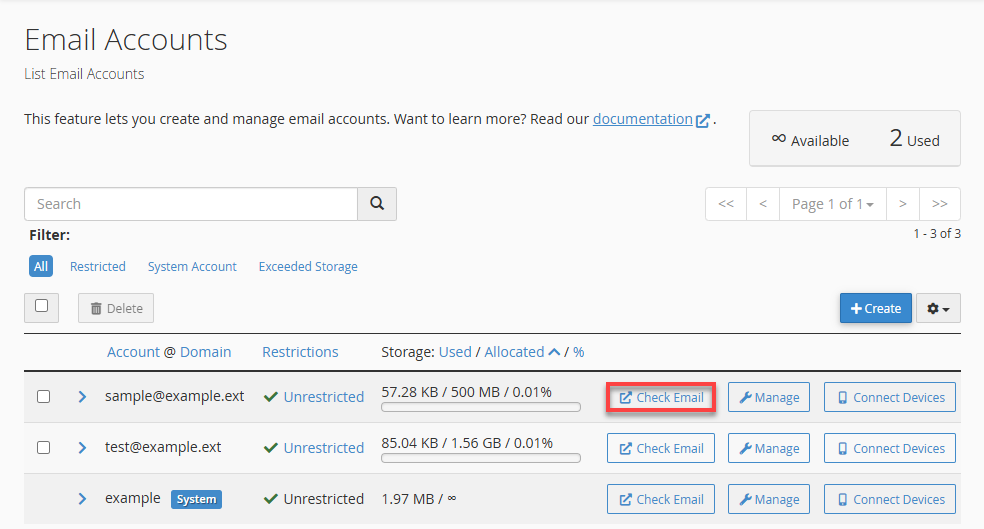
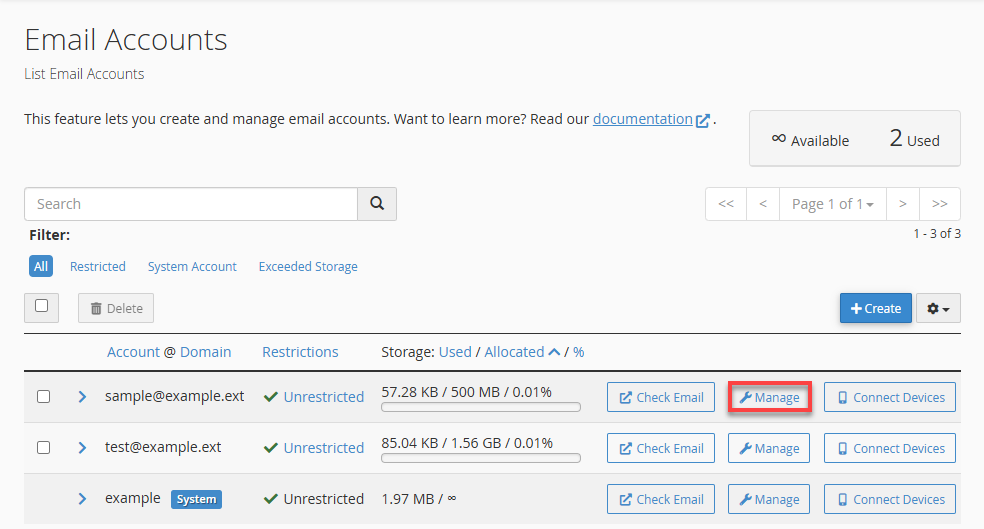
Manage Existing Email Accounts
On the Email Accounts page, you will see your existing email accounts. Use the search functionality to find email accounts by email address, username, or domain name.
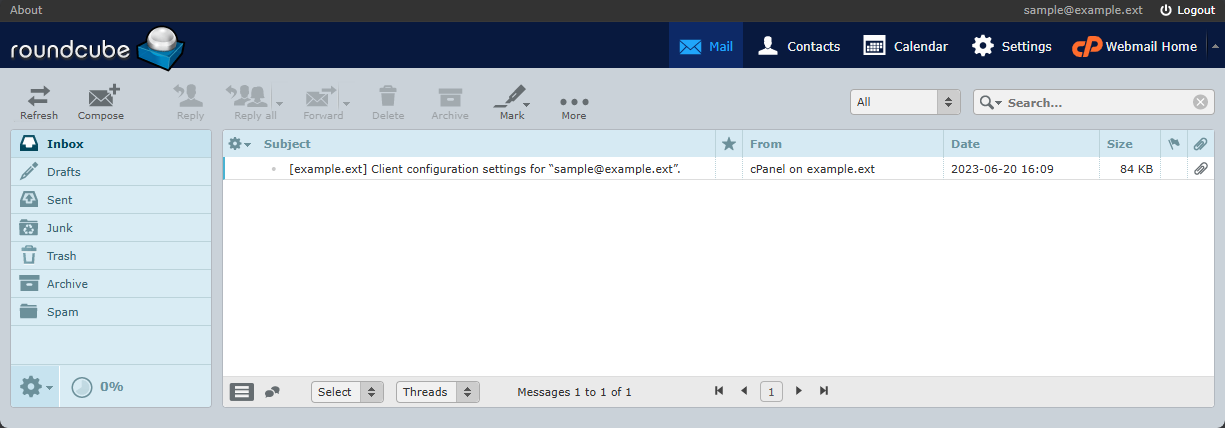
Access Webmail
- Click Check Email beside the email account.
- Click Open in the Open your inbox page.
- Optional: Check Open my inbox when I log in to skip future prompts.
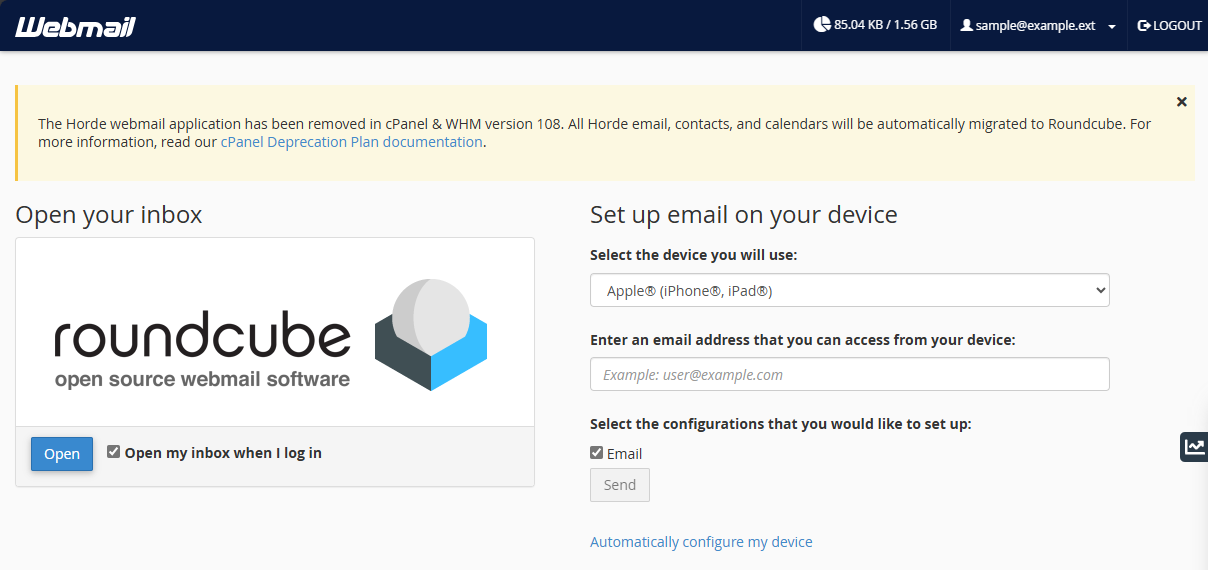
You’ll be redirected to the Roundcube dashboard, where you can send, receive, and manage emails.
Change Mailbox Quota
- Click Manage next to the email account.
- Under Storage, enter a storage amount (in MB) or select Unlimited (if available).
- Click Update Email Settings.
Update Email Password
- Click Manage next to the email account.
- In the Security section:
- Enter a new password, or
- Click Generate for a strong password
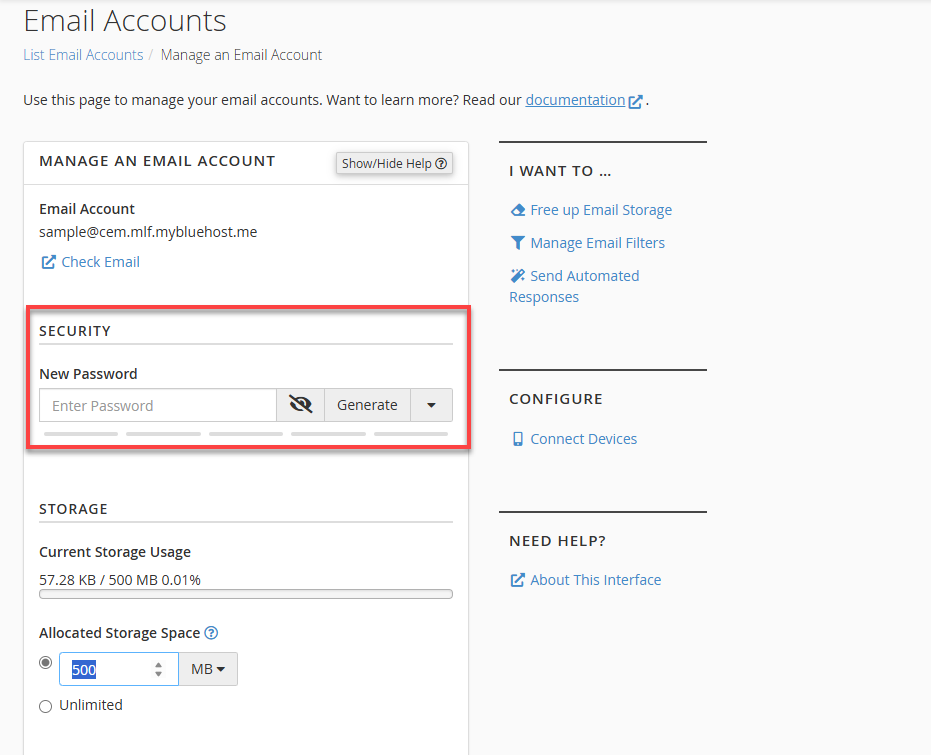
- Click Update Email Settings.
Delete Email Account
- Click Manage next to the email account.
- Scroll down and select Delete Email Account.
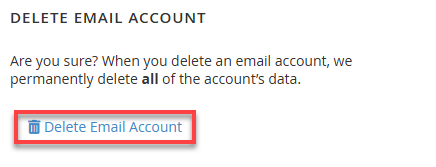
- Confirm the action.
Frequently Asked Questions (FAQs)
Q: Can I increase my email storage beyond 500 MB?
A: Yes. Storage limits can be adjusted within cPanel based on your hosting plan. Starter/Basic plans are capped at 100 MB, while higher tiers allow more storage or an unlimited option.
Q: Can I recover a deleted email account?
A: No. Deleted email accounts cannot be restored. Always ensure your data is backed up.
Q: Can I use third‑party email clients like Outlook or Apple Mail?
A: Yes. You can configure your email using IMAP/POP settings available in the Email Accounts section of cPanel.
Q: What’s the difference between cPanel Email and Professional Email?
A:
- cPanel Email: Included with legacy hosting plans and basic email needs.
- Professional Email / Google Workspace: Offers advanced features, higher security, and better collaboration tools for new and existing customers.
Summary
Bluehost makes email management straightforward and flexible. This guide covered how to:
- Create and manage email accounts
- Access webmail via Roundcube
- Change passwords and storage limits
- Safely delete unused email addresses
Whether you’re using cPanel Email or premium solutions like Professional Email or Google Workspace, Bluehost provides tools to keep your email communication organized, secure, and tailored to your needs.
If you need further assistance, Bluehost Chat Support is available 24 hours a day, 7days a week while Bluehost Phone Support is available 7 days a week from 7 am-12 midnight EST.
- Chat Support - While on our website, you should see a CHAT bubble in the bottom right-hand corner of the page. Click anywhere on the bubble to begin a chat session.
- Phone Support -
- US: 888-401-4678
- International: +1 801-765-9400
You may also refer to our Knowledge Base articles to help answer common questions and guide you through various setup, configuration, and troubleshooting steps.