How to Create an FTP Account
FTP stands for File Transfer Protocol—a standard network protocol used to transfer files between computers over the internet or a local network. Think of it as a digital courier service that moves files from one machine to another.
Here is a short video on how to create an FTP account.
Creating an FTP Account
An FTP account is a set of credentials that allows someone to access an FTP server. These accounts are created by server administrators to control who can upload, download, or manage files on the server.
Here's how:
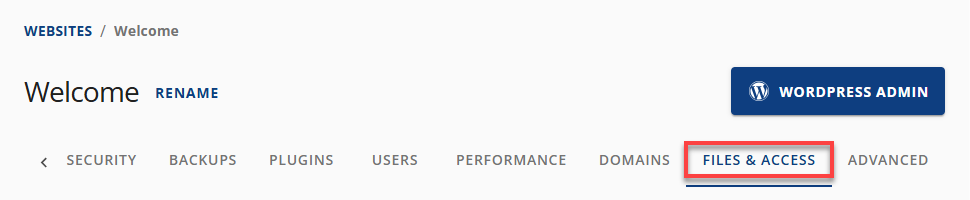
Via the Websites tab
- Log in to your Bluehost Portal.
- In the left-hand menu, click Websites.
- Click the Manage Site button located next to the website you want to manage.

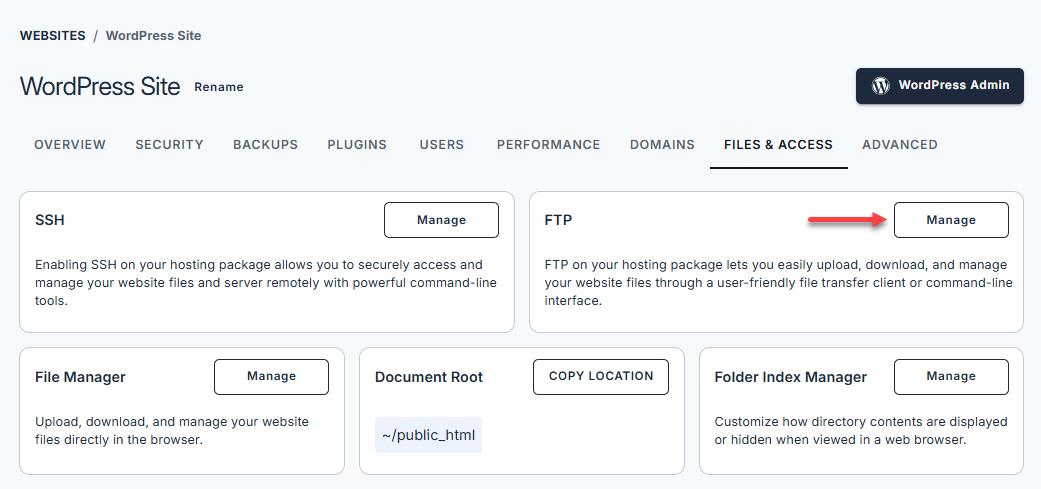
- From the horizontal menu, select the Files & Access tab.
- Navigate to the FTP section.
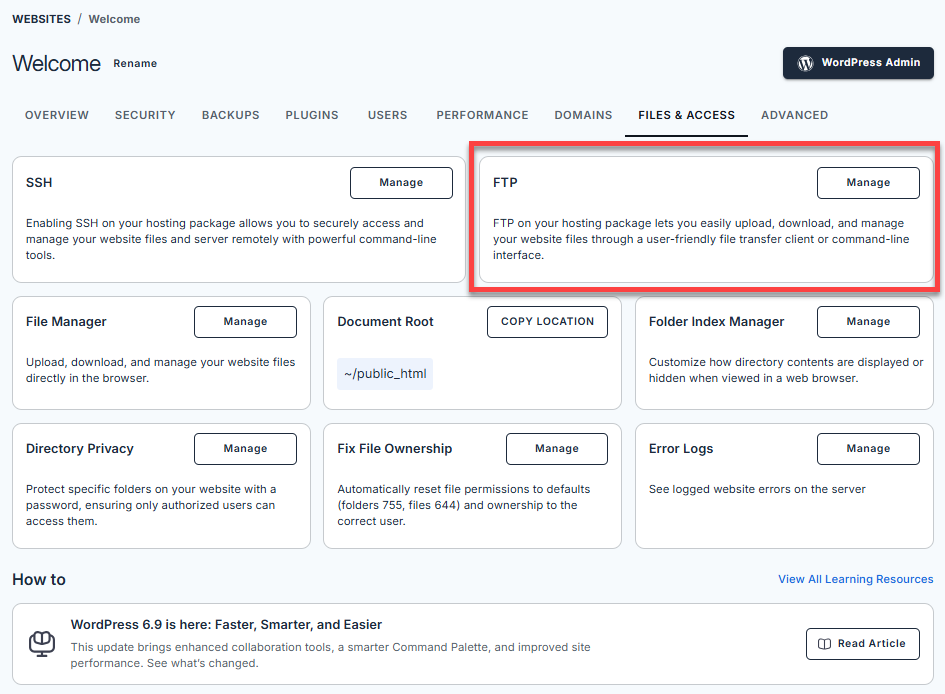
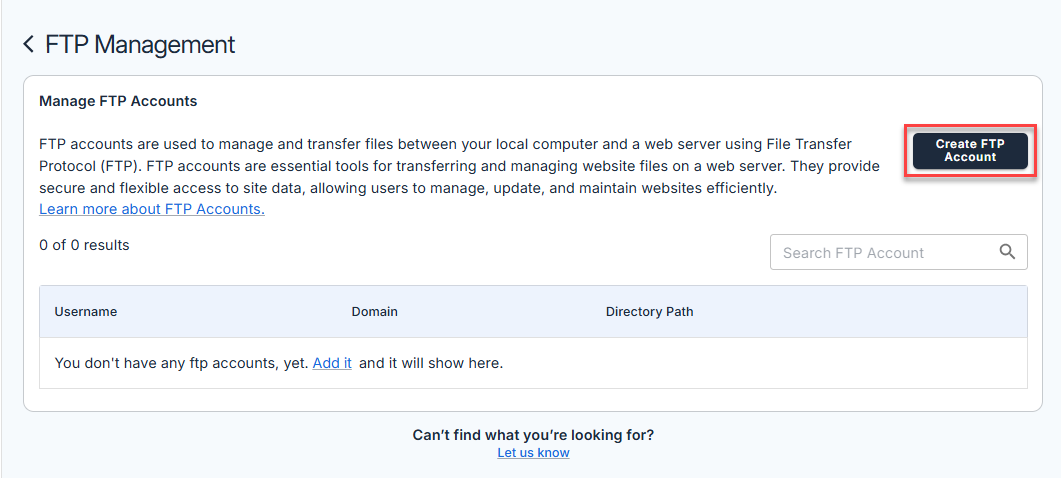
- Click the Manage button. You’ll be redirected to the FTP Management page, where you can view existing FTP users, associated domains, and directory details.
- Click the Create FTP Account button located at the top right.
- Fill out the FTP account details:

- Create your Username
- Choose your domain name from the dropdown
- Create or generate a secure password.
- Choose the directory path to which the FTP user should have access.
- Then, finally, click the Create button.
A confirmation message will appear at the top of your screen indicating that the account has been successfully created. The new FTP account will now appear on the FTP Management page.
Via the Hosting tab
- Log in to your Bluehost Portal.
- Click Hosting in the left-hand menu.
- In the hosting details page, click the cPanel button.
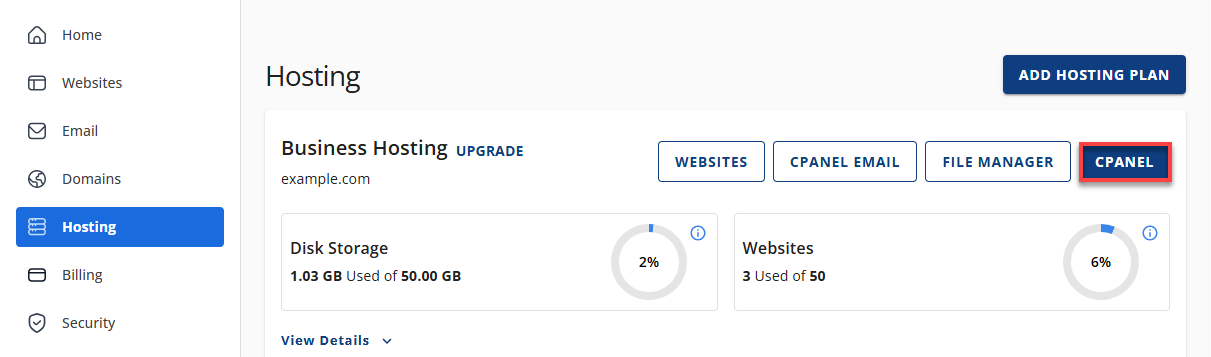
- Your cPanel will open in a new tab.
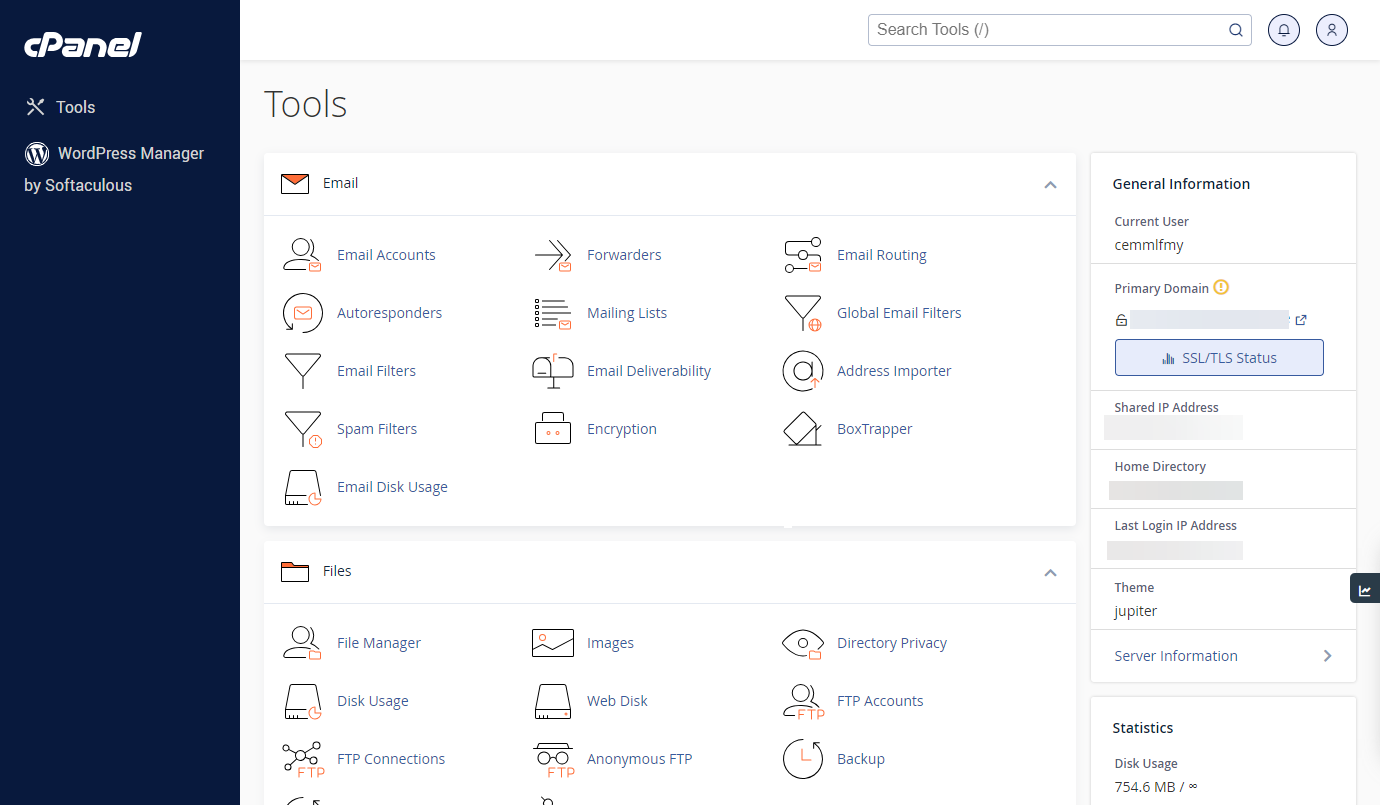
- Scroll down to the Files section, and click the FTP Accounts option.
- Go to the Add FTP Account section and select the domain name you want to use.
- Enter your username in the login field:
The username will automatically have your domain added to the end. To select another domain name from your list, make sure to click the small dropdown arrow in the domain field. Example: [email protected]
- Enter your desired password in both the Password and Confirm Password fields.
Please ensure that the password strength indicator displays a score of 20 or higher before submitting your password. Alternatively, you can use the password generator to generate a strong password, but be sure to take note of it before moving on to the next step.
- Select the folder to which you want to grant access to the FTP account.
- This will be filled in automatically with the username you entered.
- This will correspond to a directory on your account.
- If the directory doesn't exist, it will be created.
- When this FTP account connects, they will be taken to this directory.
- The FTP account will not be able to access anything outside this directory.
- Entering "/" will give this FTP account full access to your files.
- Select a Quota: choose unlimited or set a maximum size for the FTP account.
- Once you have entered all the necessary information, please click the Create FTP Account button to complete the process.
- Select the folder to which you want to grant access to the FTP account.
- Enter your username in the login field:
To learn more about connecting an FTP Client, please see General FTP Settings.
Summary
Now that you understand how to create and manage FTP accounts in Bluehost, you are ready to take full control of your file sharing and website management. Whether you are setting access permissions or organizing your server directories, FTP provides a secure and flexible way to streamline your workflow.
If you need further assistance, Bluehost Chat Support is available 24 hours a day, 7days a week while Bluehost Phone Support is available 7 days a week from 7 am-12 midnight EST.
- Chat Support - While on our website, you should see a CHAT bubble in the bottom right-hand corner of the page. Click anywhere on the bubble to begin a chat session.
- Phone Support -
- US: 888-401-4678
- International: +1 801-765-9400
You may also refer to our Knowledge Base articles to help answer common questions and guide you through various setup, configuration, and troubleshooting steps.