FTP - General FTP Settings
The File Transfer Protocol (FTP) is a standardized network protocol used to transfer files between a client and a server over a computer network. FTP acts as a secure bridge, allowing you to connect to remote servers and seamlessly upload, download, organize, and manage website files on your Bluehost hosting account.
FTP is a reliable method for managing your website’s files, including your public_html directory, themes, plugins, and media uploads.
In this article, we’ll guide you through locating your FTP accounts, finding your FTP credentials, and configuring your FTP client to access your hosting server. We’ll use public_html as an example of your primary document root or site directory.
General FTP Information
To successfully connect using an FTP client, you’ll need the following FTP account details:
- Domain Name or IP Address – Enter this in the Server/Host/Hostname field
- Username – Matches your cPanel or custom FTP account
- Password – Associated with your cPanel or FTP username
- Port – Use 21 (standard FTP port)
- Path / Directory – Usually left blank*
* Leave this blank unless you want to automatically load a specific directory, such as public_html, upon connection.
How to Locate Your FTP Credentials
You can find your FTP credentials using either the Bluehost Portal or cPanel.
Bluehost Portal
Bluehost makes FTP account management easy through the FTP Management section in your Bluehost Portal.
- Log in to your Bluehost Portal.
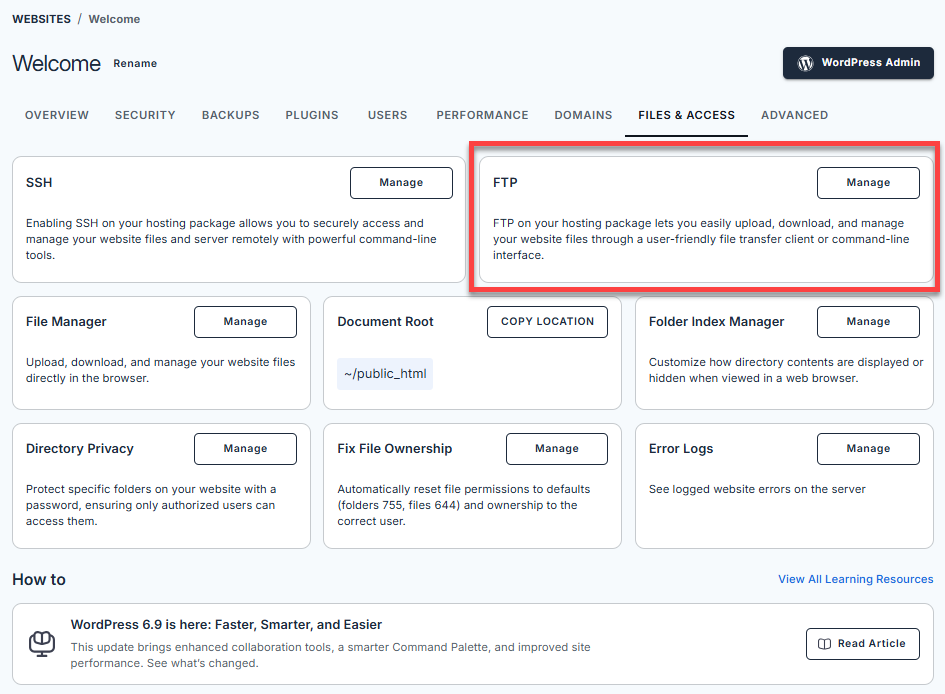
- In the left-hand menu, click Websites.
- Click the Manage Site button located next to the website you want to manage.

- Click Files & Access.

- Select Manage under the FTP card.
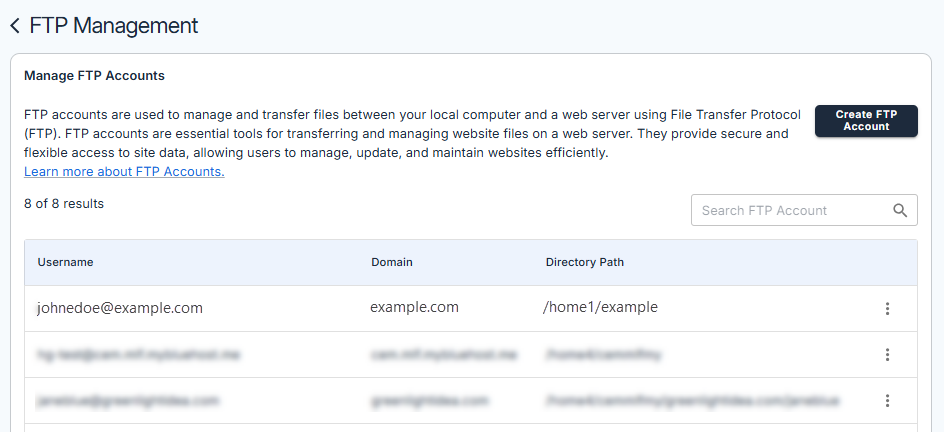
- You will be taken to the FTP Management panel, where you can view all existing FTP accounts.
- Click the More Options (vertical ellipsis) icon on the right, then click View.
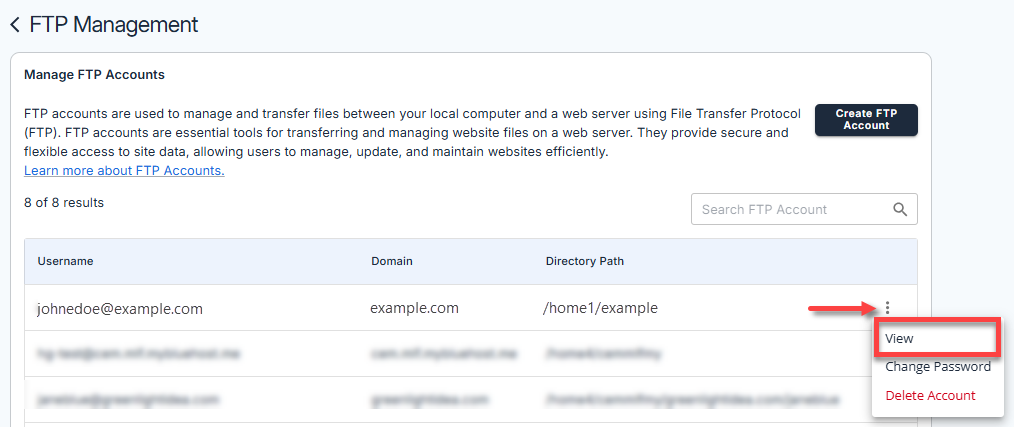
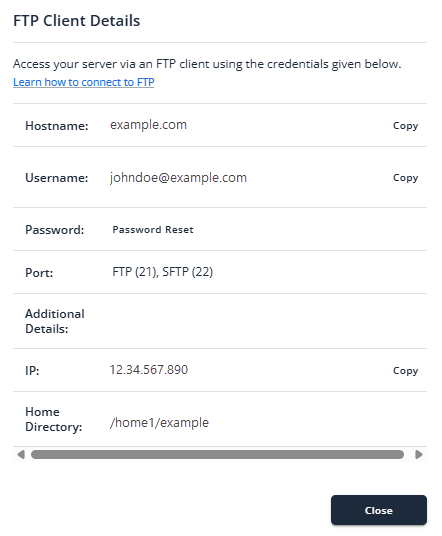
- FTP Client Details will show your FTP account information.
cPanel
- Log in to your Bluehost Portal.
- Click Hosting in the left-hand menu.
- In the hosting details page, click the cPanel button.
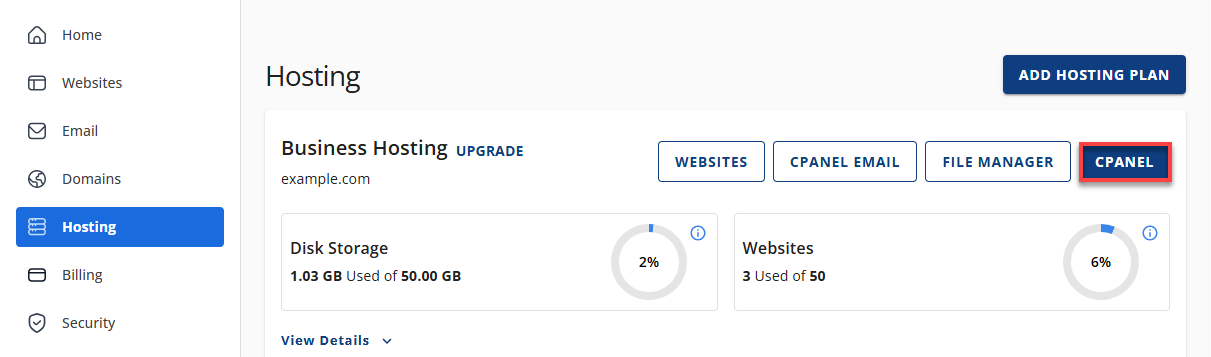
- Your cPanel will open in a new tab.
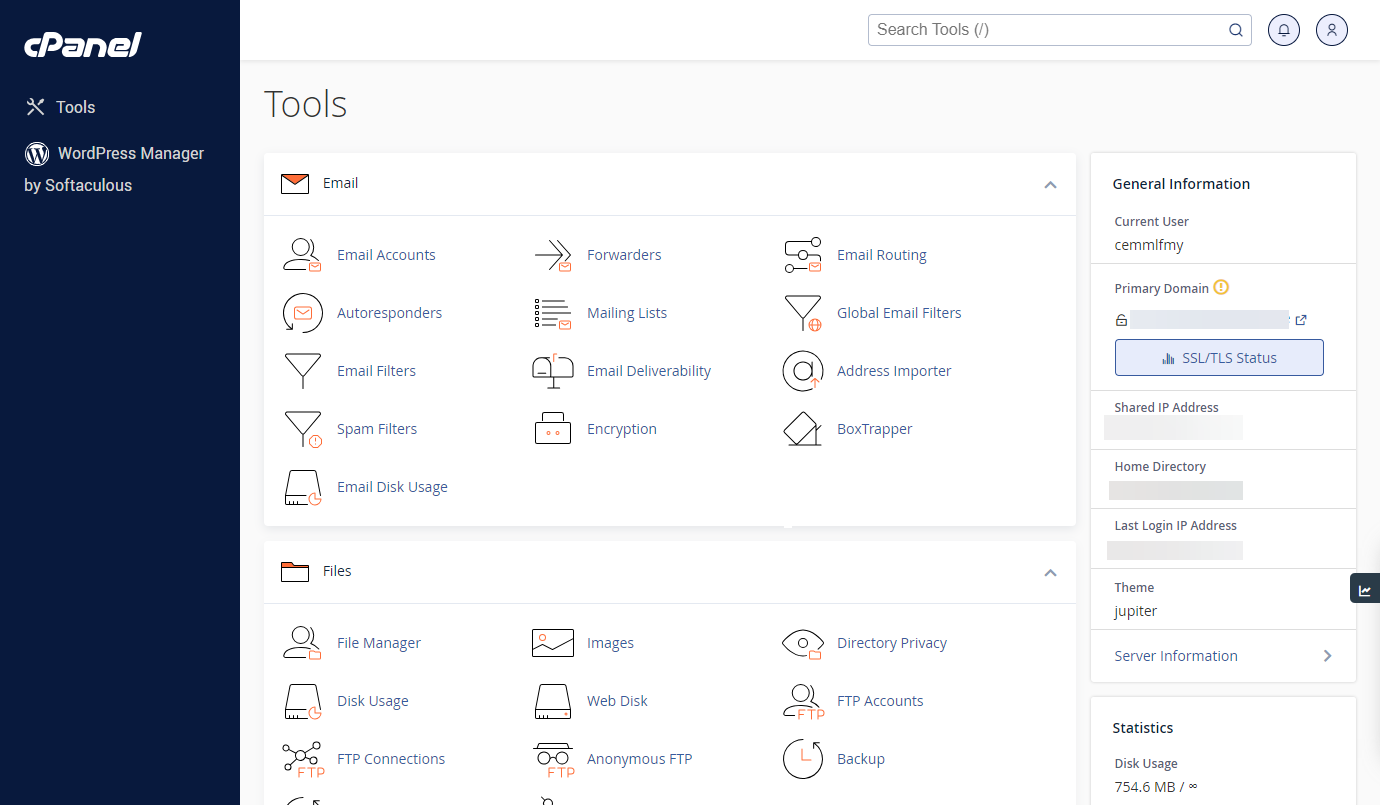
- Within cPanel, go to the Files section and click on FTP Accounts.
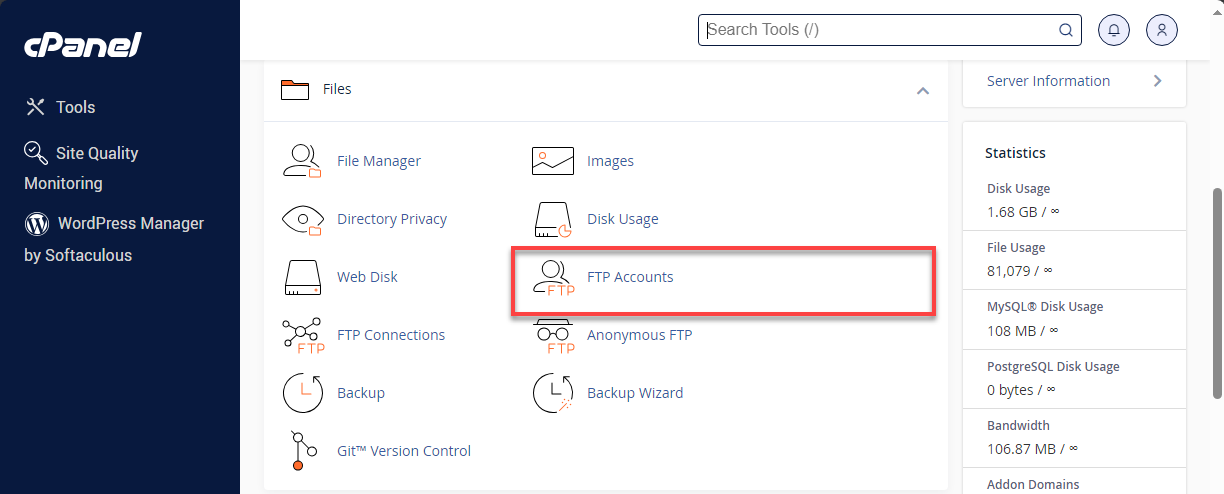
- From here you can:
- Add a new FTP account
- View existing FTP account details
- Download FTP configuration files
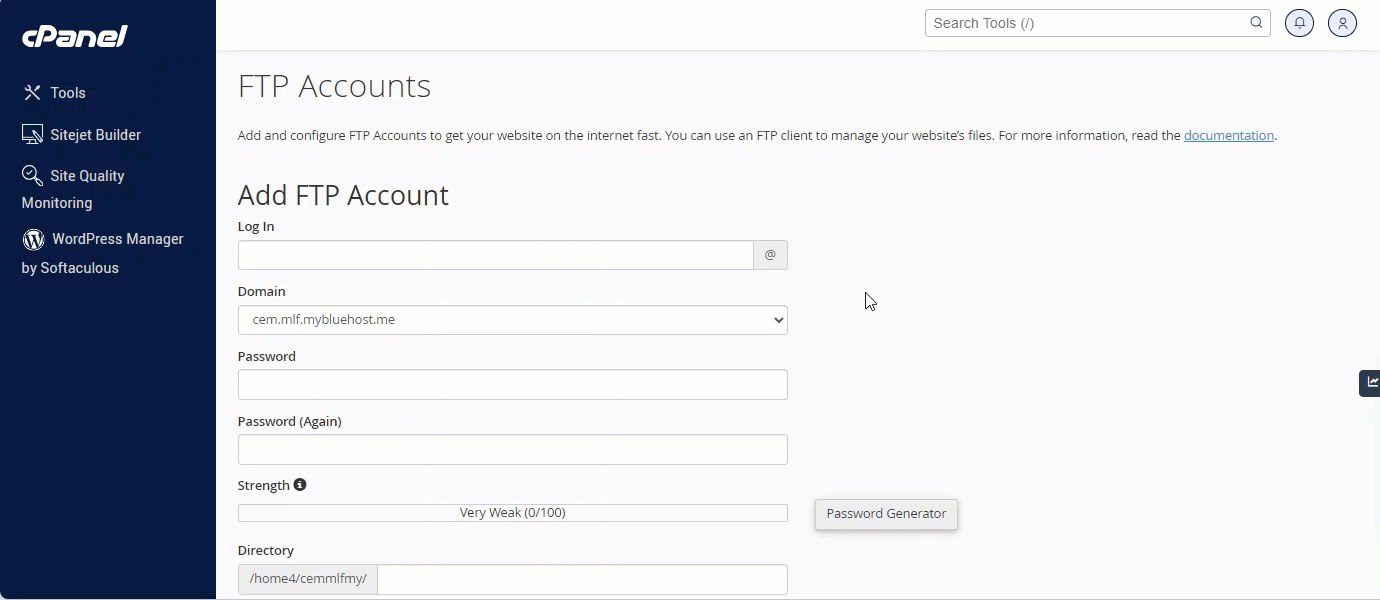
- In the FTP Accounts section, click Configure FTP Client to view your FTP information.

- You'll see your FTP account's details.

- You can also download the configuration file for your preferred FTP client to automatically set up your FTP connection.
- Click on the Configure FTP Client link for your preferred FTP account to download the configuration.
- Click the FTP Configuration File button for your preferred client (CoreFTP for Windows or Cyberduck for Mac).

- Your FTP configuration file is being downloaded. You can import this into your FTP client to set up the connection automatically. See instructions below:
- Click on the Configure FTP Client link for your preferred FTP account to download the configuration.
Here is a quick video of the steps above.
How to Connect Your FTP Client
To connect your FTP to your Bluehost hosting account, you can use either the manual settings or the configuration file from your cPanel.
Among the various free FTP programs available to download on the internet for Mac OS X, Windows, or Linux, Bluehost recommends FileZilla. It can be downloaded free of charge from http://www.filezilla-project.org.
Connect Manually to FileZilla
To establish multiple connections in FileZilla, follow these steps:
Gather Your FTP Credentials
You will need to collect the following information to establish a connection using FileZilla FTP:
- FTP Host/Address: (Your IP address or server hostname, which you can see within your Customer Portal and cPanel.)
- FTP Username: (Your cPanel / complete FTP username*)
- FTP Password: (Your cPanel / FTP password)
- Port: 21, or you can leave it blank**
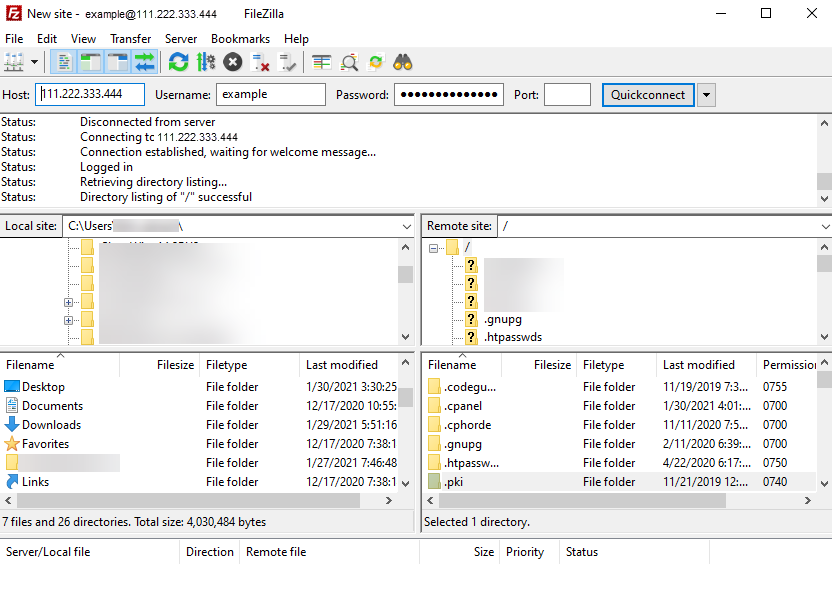
- Open FileZilla.
- Enter your FTP credentials into the appropriate fields.

Host: Your Site IP or your server hostname
Username: Your cPanel username/FTP account username
Password: Your cPanel password /FTP account password
Port: 21, or just leave it blank
- Click the Quickconnect button. In the window below, the results of the connection will be shown. A successful connection will end in "Directory listing successful."
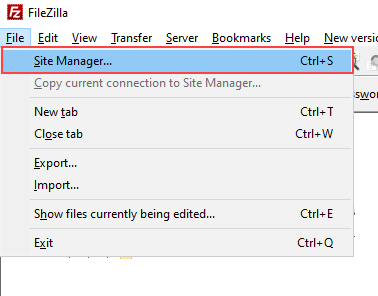
- Click File and open the Site Manager.
- Click the New Site button.
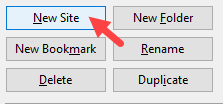
- Enter a name for the new site.
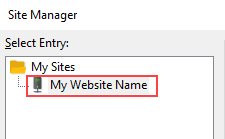
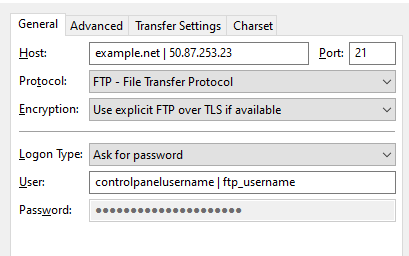
- Enter the following settings:
- Host: Your domain name or server IP address.
- Port: 21
- Protocol: FTP - File Transfer Protocol
- Encryption: Use plain FTP
- Logon Type: Ask for Password
- User: Your cPanel or FTP account username
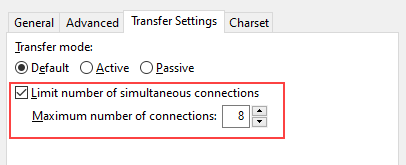
- Click the Transfer Settings tab, then select the Limit number of simultaneous connections checkbox and set the limit to 8.
- Click the Connect button.
- You will be prompted for your password. Enter your password and click OK.
- Once you click the Connect button, your FTP client should establish a connection to the server. You can then download and upload files by dragging and dropping them between your local and remote site sections.
Connect Using the Configuration File
With the configuration file you downloaded from cPanel, you can connect to your hosting server using an FTP client.
For CoreFTP (Windows):
- From your CoreFTP client, click Sites, then choose Site Manager.
- Next, from the main window, click Import, then choose Core FTP.
- Upload the configuration file you saved.
For Cyberduck (Mac):
- Locate and double-click on the configuration file you saved.
- Cyberduck should automatically open and log into your FTP account.
For more information on FTP Clients, please see Recommended FTP Applications. Also, to set up your FTP account, please read How to Create an FTP Account to learn more.
Summary
Learn how to manage your website using FTP (File Transfer Protocol). This article will help you locate your FTP accounts, find your FTP credentials, and set up your preferred FTP client for secure file transfers. You will also discover essential FTP settings, including the domain, username, password, port, and directory, to efficiently transfer and organize your files.
If you need further assistance, Bluehost Chat Support is available 24 hours a day, 7days a week while Bluehost Phone Support is available 7 days a week from 7 am-12 midnight EST.
- Chat Support - While on our website, you should see a CHAT bubble in the bottom right-hand corner of the page. Click anywhere on the bubble to begin a chat session.
- Phone Support -
- US: 888-401-4678
- International: +1 801-765-9400
You may also refer to our Knowledge Base articles to help answer common questions and guide you through various setup, configuration, and troubleshooting steps.