How to Manage Tabs in OX Mail
Discover how the Tabs feature in OX Mail can revolutionize the way you organize your emails, providing a clutter-free Inbox and efficient email management. Learn how to enable, assign, and disable Tabs to streamline your email workflow.
Stay connected seamlessly across devices by following these easy installation and configuration steps provided in this article.
Click the topics below to learn about the OX Mail Tabs and how to manage them:
Enabling OX Mail Tabs
Tabs in OX Mail can transform your email experience. Follow the steps below to enable Tabs and keep your Inbox organized.
- Open your internet browser.
- In the address bar, enter https://webmail.oxcs.bluehost.com/.
- Log in to your email.
- Enter your email address.
- Input your password associated with the email address you want to log in to.
- Click the Sign in button.
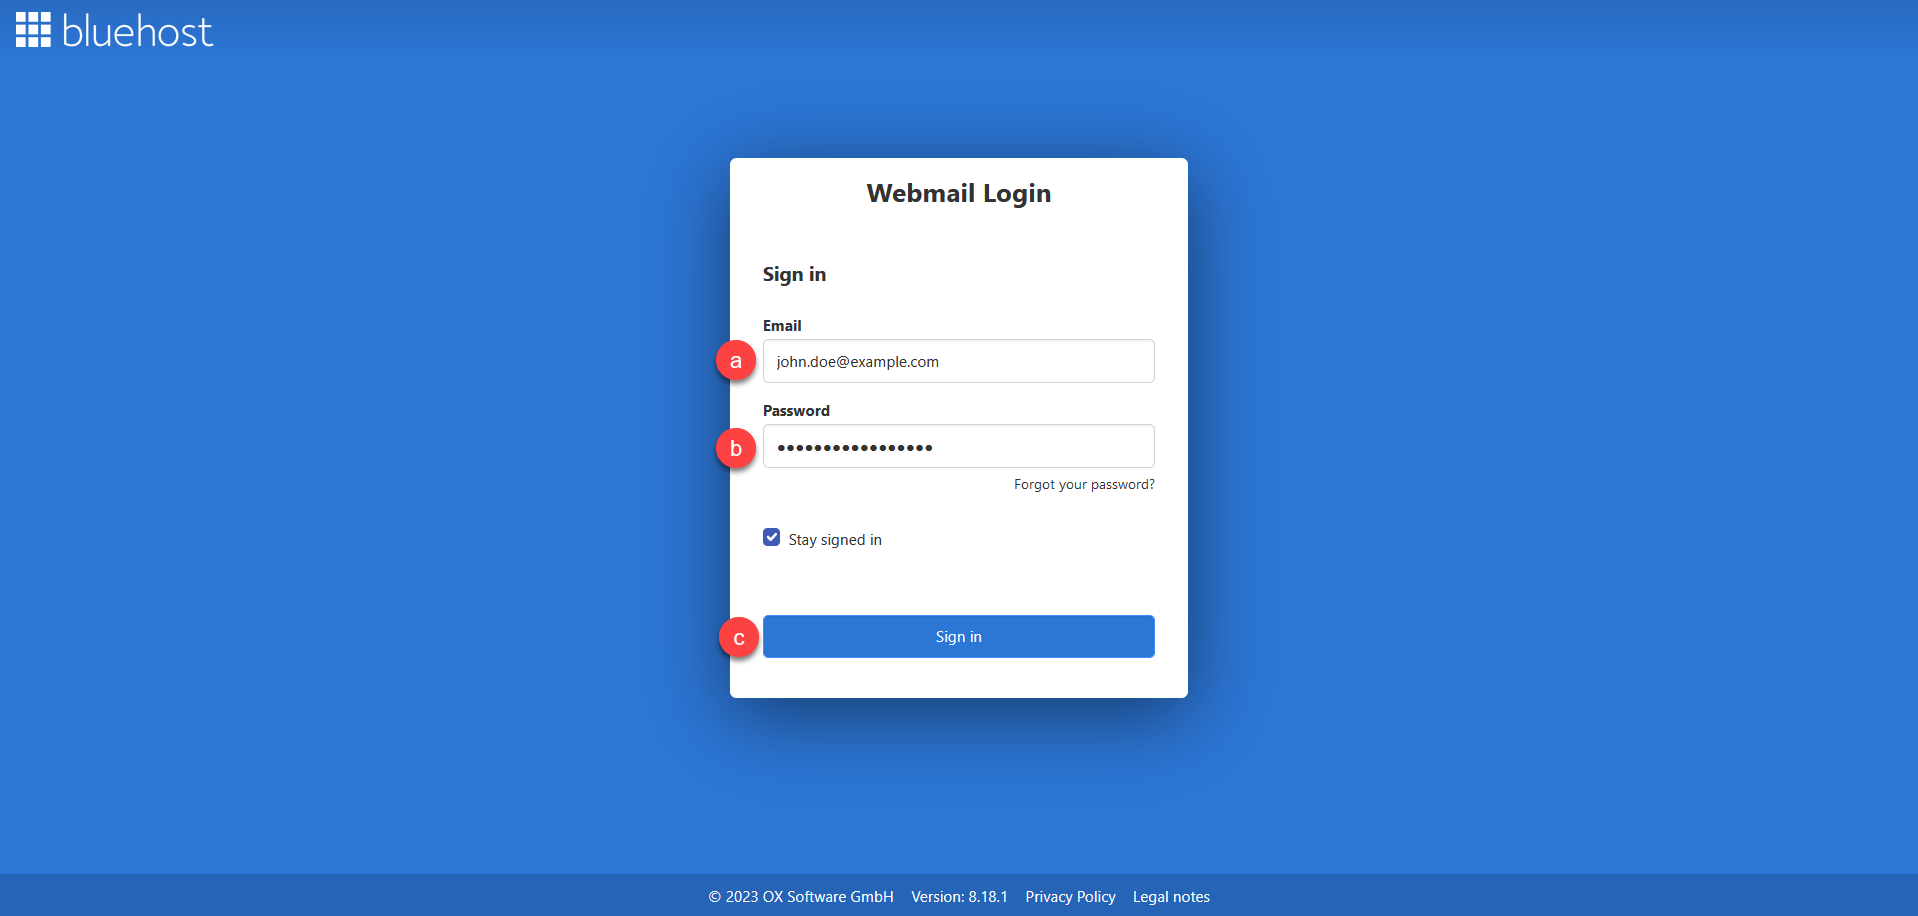
Enable the Stay signed in option by ticking the box to ensure your session remains active, preventing automatic logouts and the need to log in repeatedly.
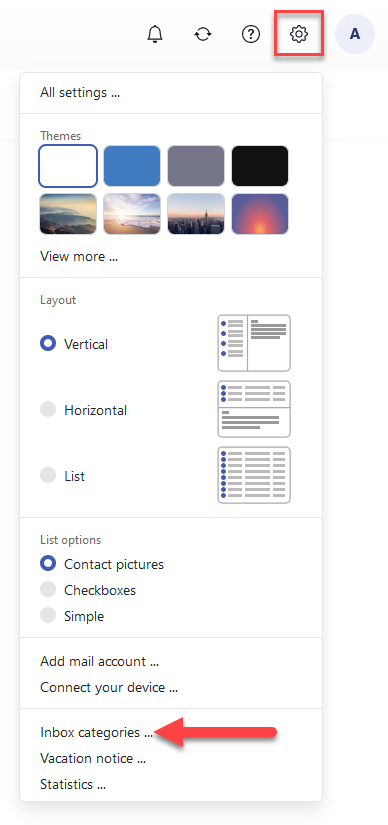
- Launch the Configure categories pop-up by following the steps below:
- Click the Settings (gear) icon.
- Click the Inbox categories… drop-down option.
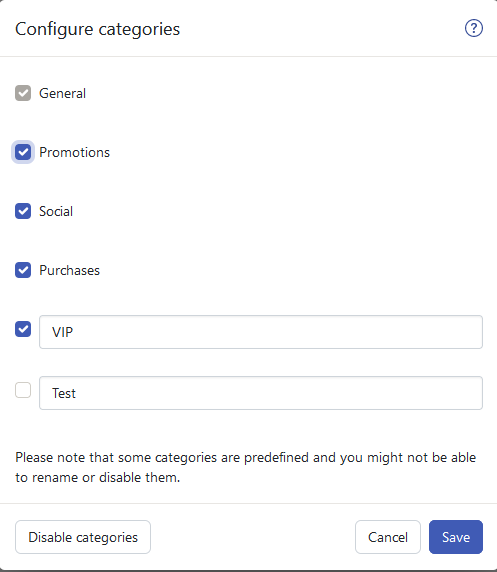
- In the Configure categories pop-up, you can either follow the steps below:
- Choose the available predefined inbox categories by ticking the box that corresponds to a certain inbox category from the list.
- Rename the last two inbox categories by changing the name in the Name input field.
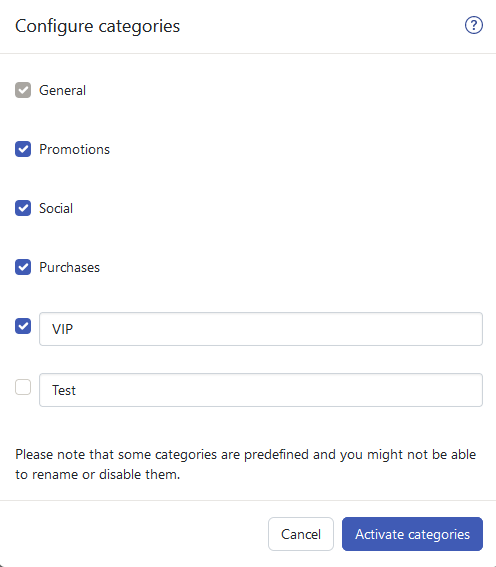
Some categories are predefined, and you might not be able to rename or disable them.
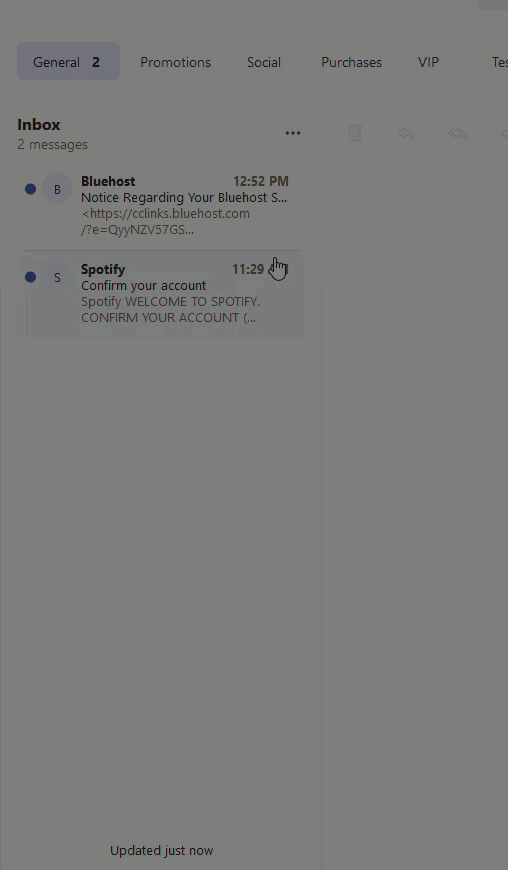
- Lastly, click the Activate categories button. You will see the Inbox Category bar, which displays the tabs located on the right side below the menu bar, as shown in the screenshot below.

Disabling OX Mail Tabs
Tabs in OX Mail can transform your email experience. Follow the steps below to enable Tabs and keep your Inbox organized.
- Open your internet browser.
- In the address bar, enter https://webmail.oxcs.bluehost.com/.
- Log in to your email.
- Enter your email address.
- Input your password associated with the email address you want to log in to.
- Click the Sign in button.
Enable the Stay signed in option by ticking the box to ensure your session remains active, preventing automatic logouts and the need to log in repeatedly.
- Launch the Configure categories pop-up by following the steps below:
- Click the Settings (gear) icon.
- Click the Inbox categories… drop-down option.
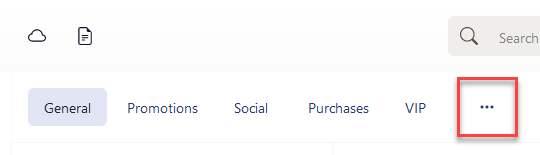
- Click the Configure categories
 button located on the Inbox Categories Tabs bar.
- Choose the available inbox categories by ticking the box that corresponds to a certain inbox category from the list that you want to disable.
- Finally, click the Disable categories button.
Assigning Incoming Email from the Inbox to OX Mail Tabs
Tabs in OX Mail can transform your email experience. Follow the steps below to enable Tabs and keep your Inbox organized.
- Open your internet browser.
- In the address bar, enter https://webmail.oxcs.bluehost.com/.
- Log in to your email.
- Enter your email address.
- Input your password associated with the email address you want to log in to.
- Click the Sign in button.
Enable the Stay signed in option by ticking the box to ensure your session remains active, preventing automatic logouts and the need to log in repeatedly.
- Click the Inbox folder on the left side panel of your screen.

Emails not yet assigned to an inbox category are displayed in the General tab. - Drag an email from the list view to a tab in the Inbox Categories Tabs bar and drop it there.
Alternatively, you can assign the email to an inbox category tab by following the steps below:- Click an email you want to assign.
- Click the Set category
 button in the toolbar.
 - Lastly, click the category from the drop-down menu where you want to assign the email.
- To complete the process, choose one of the following:
- To move only the selected email to the tab, close the pop-up window by clicking the X button on the pop-up.
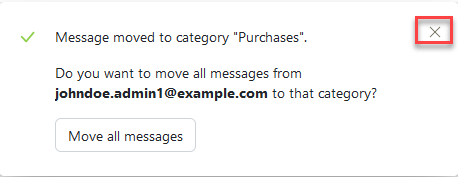
- To move all existing and future incoming emails from this sender to the selected tab, click the Move all messages button.
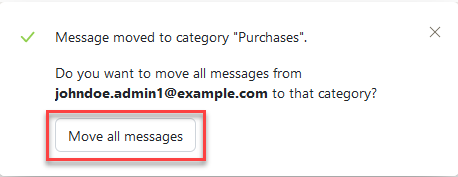
- To move only the selected email to the tab, close the pop-up window by clicking the X button on the pop-up.
Summary
OX Mail Tabs simplify email management by organizing messages into categorized tabs, reducing inbox clutter, and improving workflow efficiency. This guide explains how to enable, disable, and assign emails to tabs, ensuring a seamless experience across devices.
If you need further assistance, Bluehost Chat Support is available 24 hours a day, 7days a week while Bluehost Phone Support is available 7 days a week from 7 am-12 midnight EST.
- Chat Support - While on our website, you should see a CHAT bubble in the bottom right-hand corner of the page. Click anywhere on the bubble to begin a chat session.
- Phone Support -
- US: 888-401-4678
- International: +1 801-765-9400
You may also refer to our Knowledge Base articles to help answer common questions and guide you through various setup, configuration, and troubleshooting steps.