 ChatGPT,
  Claude,
  Gemini,
  Grok — all four for
 Jetpack Security Suite for Agency: Backup & Malware
Agency Hosting offers the Jetpack Security Suite as part of the package for all WordPress sites at no additional cost. This suite includes several powerful tools to keep your website secure, backed up, and spam-free. The features available to Bluehost Agency Hosting customers include:
- VaultPress Backup (10GB): Real-time backups with one-click restore functionality.
- Jetpack Scan (Jetpack Protect): Website firewall (WAF) and automated malware scanning, including one-click fixes for identified threats.
- Akismet Anti-spam: Protection against comment and form spam.
- Backup Frequency: VaultPress will automatically back up your website after any changes, but manual backups are also available as an extra precaution.
- Backup Access: All backups are stored off-site in the Jetpack Cloud, ensuring your website data is secure and accessible even if something happens to your server.
- Backup Management: For the most up-to-date backup status, managing and monitoring your backups via the WordPress Dashboard or your WordPress.com account is best.
Setting Up Jetpack Security Suite
Jetpack Security is automatically provisioned for your Agency website as it's installed. Sign in or set up a WordPress.com account to use the Jetpack plugins. Once connected, you can access all of the Jetpack Security features.
VaultPress Backup: Real-Time Website Backups
VaultPress provides a seamless backup solution for your website. It ensures that your website's data is regularly backed up in real time, meaning any changes made—activating a plugin, installing a theme, editing a post, or deleting a plugin—will trigger a backup.
Key Features of VaultPress Backup:
- Automatic Real-Time Backups: Your website is backed up immediately after any change.
- Manual Backups: You can initiate a backup anytime to capture a particular moment.
- One-Click Restore: You can restore your website to a specific backup point with a single click.
- Remote Access: VaultPress backups can be accessed and restored directly from your WordPress.com account.
Setting Up VaultPress Backup
Before VaultPress can automatically back up your website, you must connect your site to a WordPress.com account via Jetpack. Without this connection, VaultPress backups will not be activated.
When connecting your WordPress site to WordPress.com, ensure that you are logged into the same WordPress.com account that was previously used to connect the site. If you are logged into a different account, you must remove the site from that account before proceeding with the connection.
Bluehost Portal
- Log in to your Bluehost Portal.
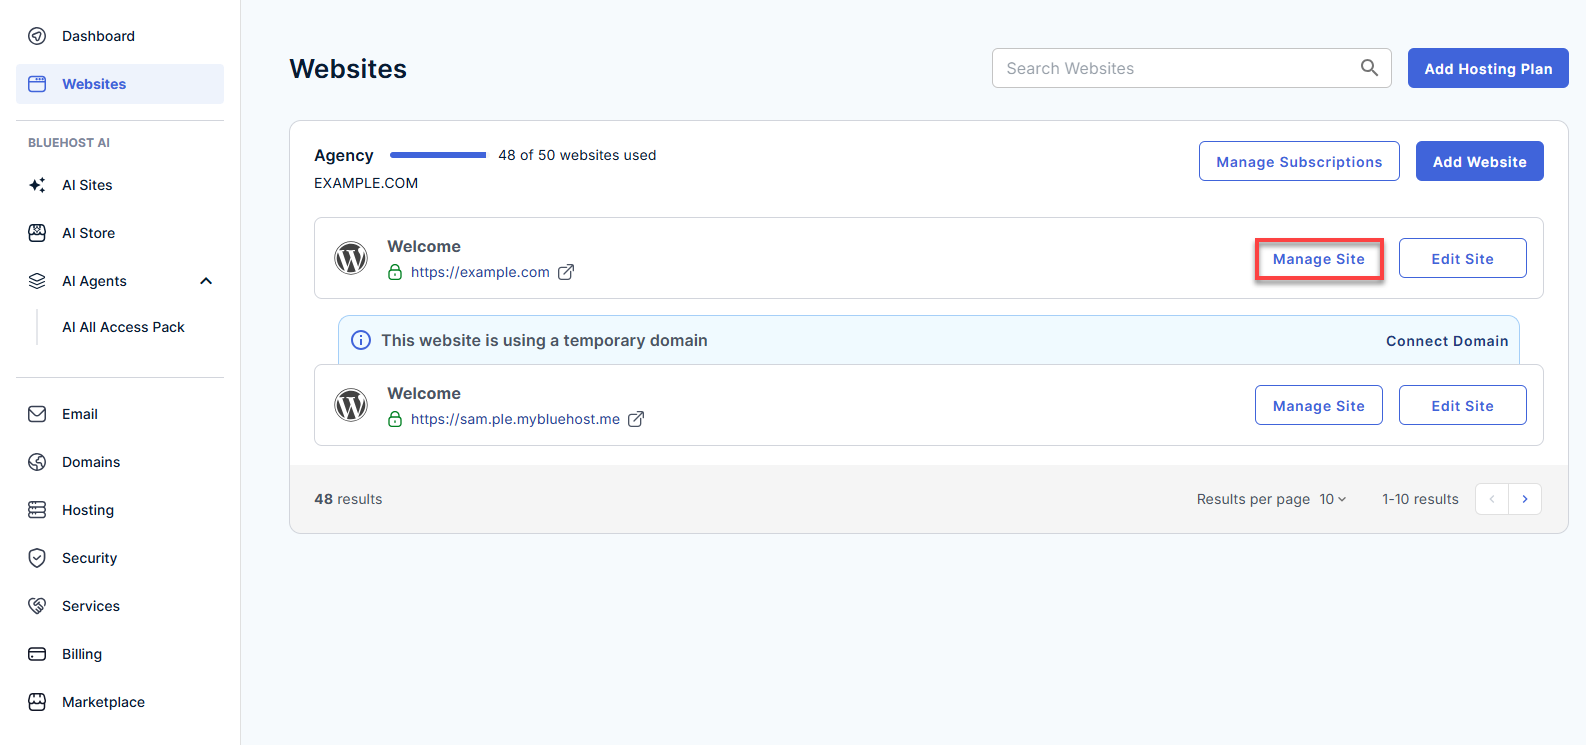
- In the left-hand menu, click Websites.
- Click the Manage Site button located next to the website you want to manage.
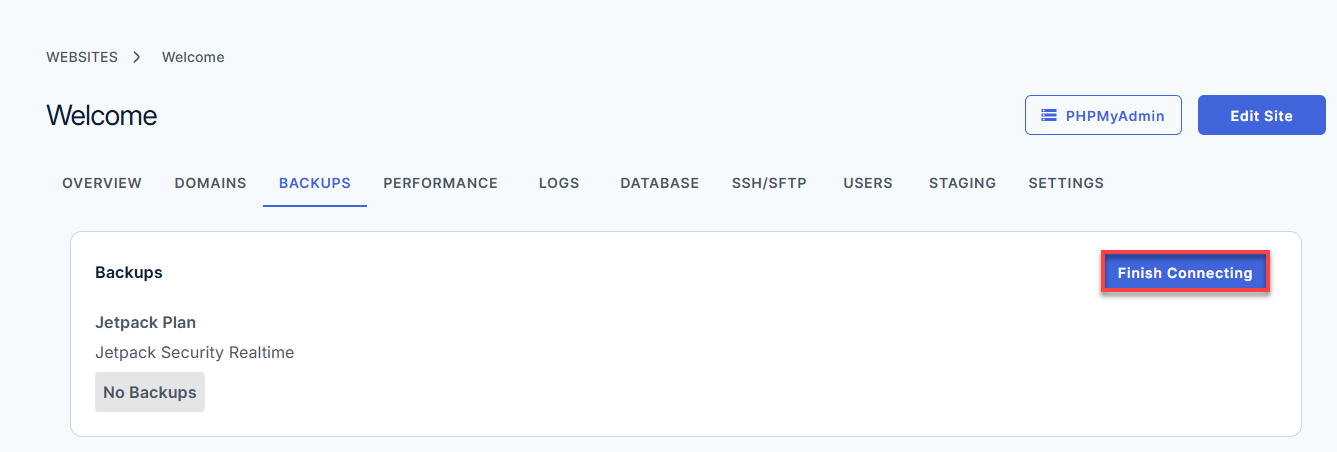
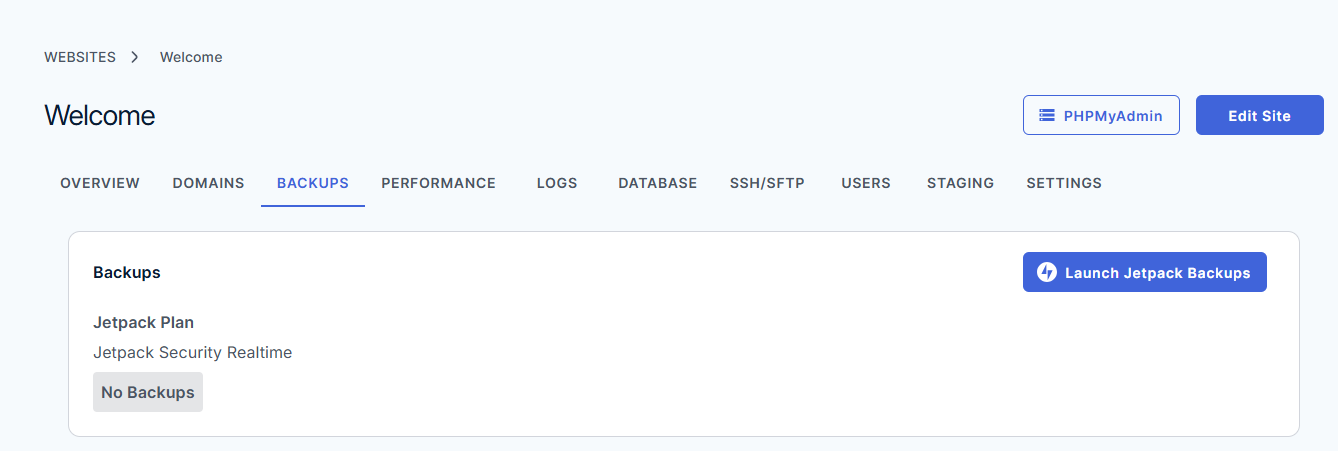
- Go to the Backups section; if VaultPress is not connected, you will see a Finish Connecting button.
- Click the Finish Connecting button to get redirected to WordPress.com for you to sign in if you haven't already.
- In the Email address or username field, enter the email address or WordPress.com username associated with your Jetpack account.
Alternatively, sign in using Google, Apple, GitHub, or request a login code by selecting Email me a login code.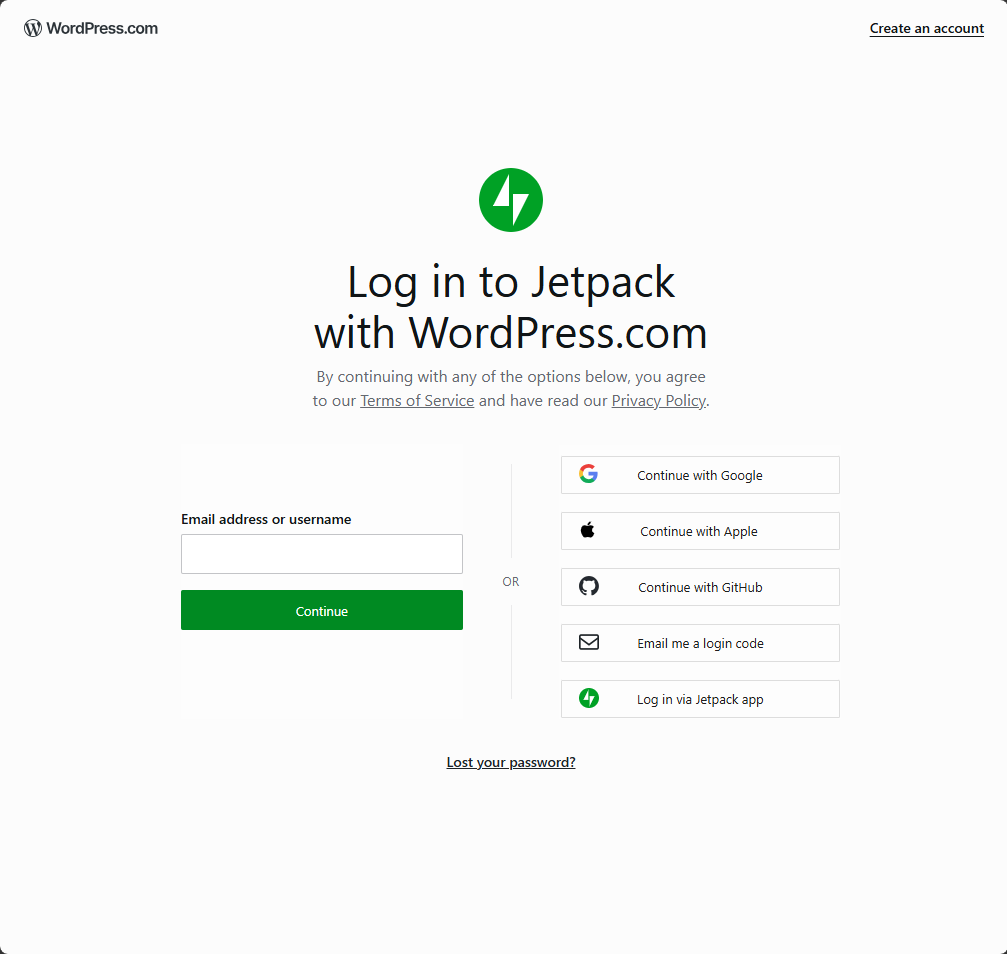
- Click the Continue button.
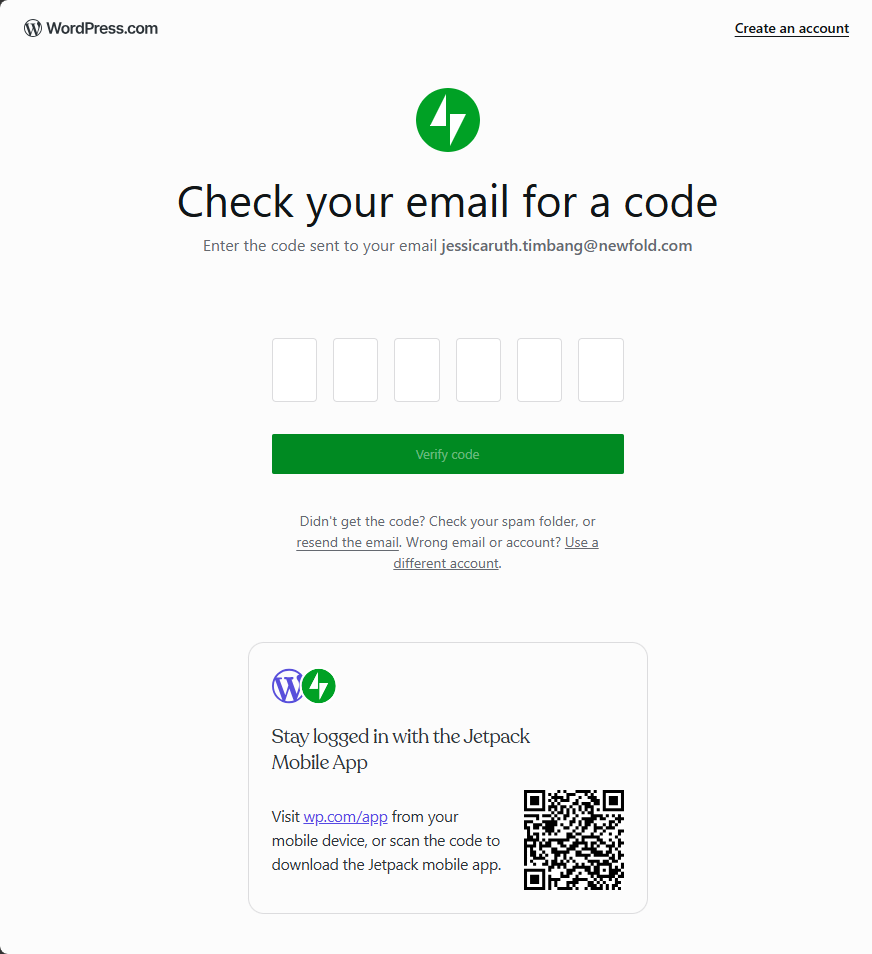
- Check your email inbox for the verification code.
- Enter the 6-digit code in the provided fields and click Verify code.
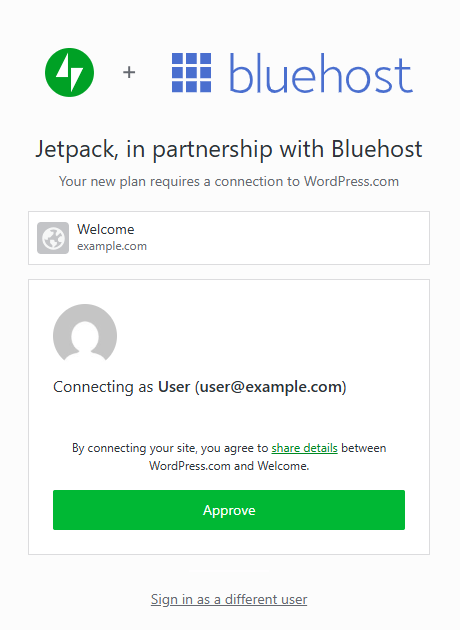
- To connect your site to your WordPress.com account, click the Approve button.
-
Once connected, backups will be activated and visible in your Bluehost Portal.
Via the WordPress Dashboard
- Log in to your WordPress Dashboard.
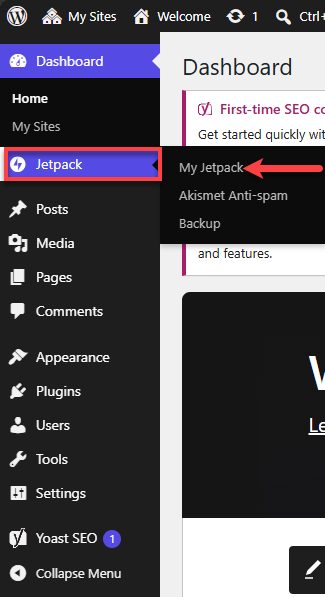
- Go to the Jetpack tab and select My Jetpack.
- Click Supercharge my site to connect Jetpack and activate its free features.
- Review the account information, then click Connect account to link your WordPress.com account with Jetpack.
- Once the connection is successful, your Jetpack Security plan will be displayed.
Managing VaultPress Backups
Backups will be taken automatically once VaultPress is connected to your WordPress.com account. However, for the most up-to-date information, it is recommended that you manage your backups directly from your WordPress Dashboard.
View and Manage Backups
- From the WordPress Dashboard, navigate to Jetpack and select Backup.
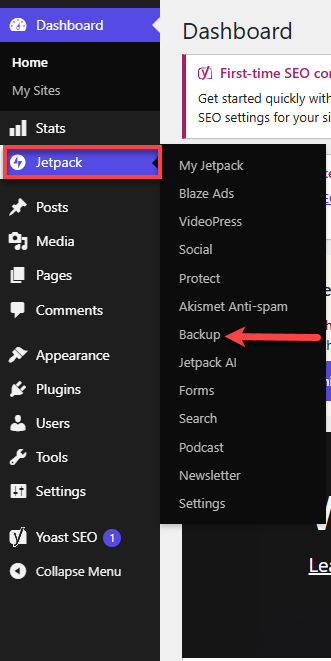
- Here, you will see:
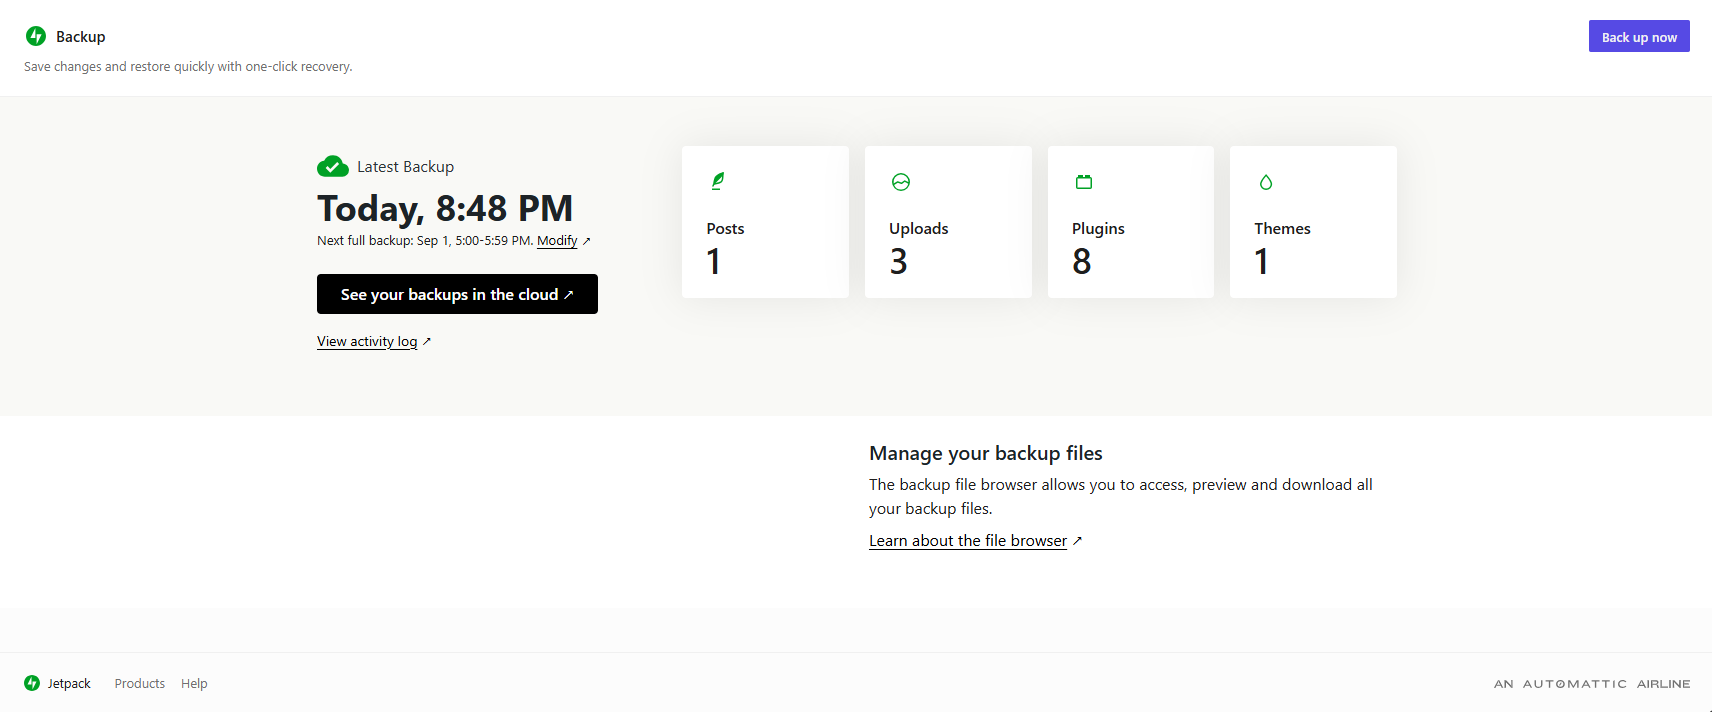
- Your Latest Backup: View the most recent backup of your site.
- Back Up Now: Initiate a manual backup at any time.
- Manage Your Backups in Jetpack Cloud: View your backups stored in Jetpack Cloud.
Restoring Backups
Restoring your website from a backup is a simple process with VaultPress.
Via the WordPress Dashboard
- In your WordPress Dashboard, go to Jetpack and select Backup.
- Click the See your backups in the cloud button.

- A new tab will open, showing the backups stored in your WordPress.com account.
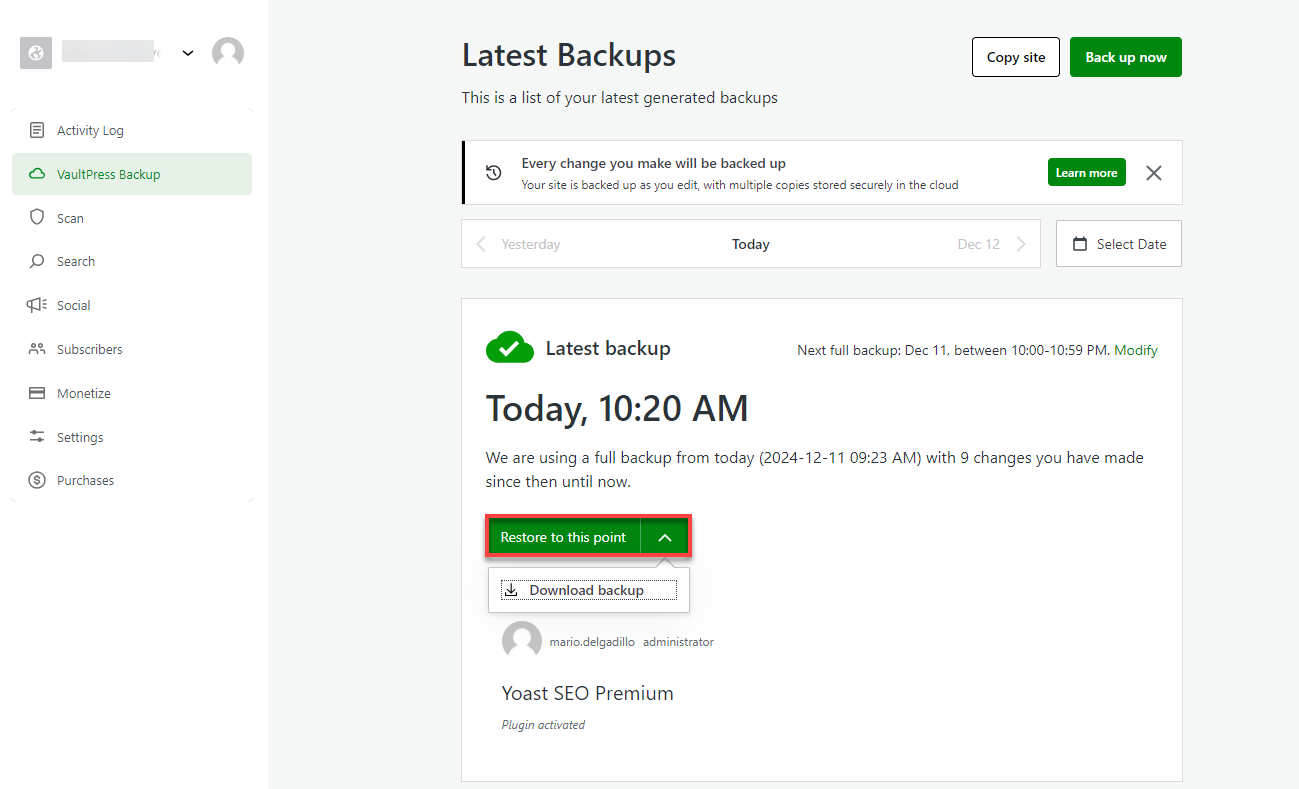
- Choose a backup date from the available backups.
- Click the Restore to this point button to restore your site to that specific backup point.
Via WordPress.com
If your website goes down after making changes, you can restore it remotely using your WordPress.com account.
- Sign in to your WordPress.com account.
- Navigate to the VaultPress Backup section.
- Select the backup you want to restore and click the Restore to this point button.
Summary
With the Jetpack Security Suite and VaultPress Backup included in your Agency Hosting package, you have everything you need to safeguard, back up, and manage your WordPress site. Setting up a WordPress.com account and linking it to your website will ensure that it is automatically backed up and protected from malware, spam, and other security risks, giving you peace of mind.
If you need further assistance, Bluehost Chat Support is available 24 hours a day, 7days a week while Bluehost Phone Support is available 7 days a week from 7 am-12 midnight EST.
- Chat Support - While on our website, you should see a CHAT bubble in the bottom right-hand corner of the page. Click anywhere on the bubble to begin a chat session.
- Phone Support -
- US: 888-401-4678
- International: +1 801-765-9400
You may also refer to our Knowledge Base articles to help answer common questions and guide you through various setup, configuration, and troubleshooting steps.