Purchase a Self-Managed VPS with HestiaCP Installation
Running your own server doesn't have to be complicated. With HestiaCP, a free and open-source control panel, you get a beautiful, intuitive interface to manage your websites, email, databases, and more—all without needing to be a command-line expert. Whether you're launching a personal project or managing business sites for clients, HestiaCP gives you the perfect balance of simplicity and total control over your VPS.
Why Use HestiaCP?
Managing a VPS usually means spending hours on manual configurations and wrestling with complex Linux commands. HestiaCP changes all of that. By bringing your websites, emails, databases, DNS, SSL certificates, backups, and user accounts into one easy-to-use dashboard, it takes the heavy lifting out of server administration. Paired with your Bluehost Self-Managed VPS, HestiaCP frees up your time—so you can stop worrying about server settings and get back to building amazing websites and applications.
Uses of HestiaCP
HestiaCP supports a wide range of hosting and server management tasks, including:
- Host Multiple Websites: Manage one or several websites from a centralized control panel.
- Built-In Email Hosting: Make and manage your own custom email addresses with ease. You can also automatically pass messages to another inbox, send emails to groups of people, and keep annoying junk mail out.
- Database Management: Easily create and manage MySQL and PostgreSQL databases for your applications.
- Domain and DNS Management: Configure domains, subdomains, and DNS records from a single interface.
- Free SSL Certificates: Secure your websites with Let's Encrypt SSL certificates and automatic renewals.
- Automated Backups: Schedule and restore server, website, database, and email backups with ease.
- User and Package Management: Create multiple user accounts with customizable hosting packages and resource limits.
- Server Monitoring: View resource usage and monitor server performance through an intuitive dashboard.
How to Purchase a Self-Managed VPS with HestiaCP Installation
To set up and operate HestiaCP effectively, start by getting a Self-Managed VPS Hosting plan from Bluehost, then proceed with the following steps:
 New to VPS or not sure where to start? No worries! At the top of the Self-Managed VPS purchase page, you’ll see the Pre-configured Setup section. This handy feature is perfect if you’re feeling a bit unsure—just pick the type of project you want, like WordPress Site, AI Agent/Claude Code, Dev/Staging, or eCommerce Store. We’ll take care of the rest by automatically filling in the best plan, operating system, and template for you.
- Super simple for beginners or anyone who just wants a quick setup
- Instantly get the recommended settings for your project
- Skip the guesswork and save time
- You can still customize things later if you want
- In your browser, go to https://www.bluehost.com/vps-hosting.
- Click the Choose Plan button under your preferred VPS hosting plan.
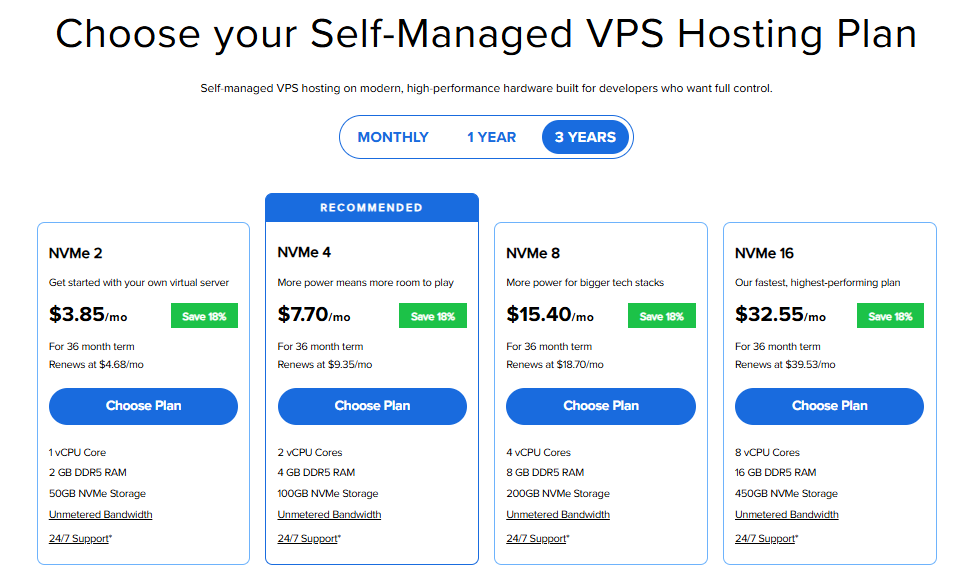
Important: Pricing is subject to change—please visit https://www.bluehost.com/vps-hosting for the current introductory/sign-up offer for Bluehost VPS Hosting. For the most up-to-date renewal pricing, visit your Bluehost Portal Renewal Center.
- Select your preferred Data Center location.

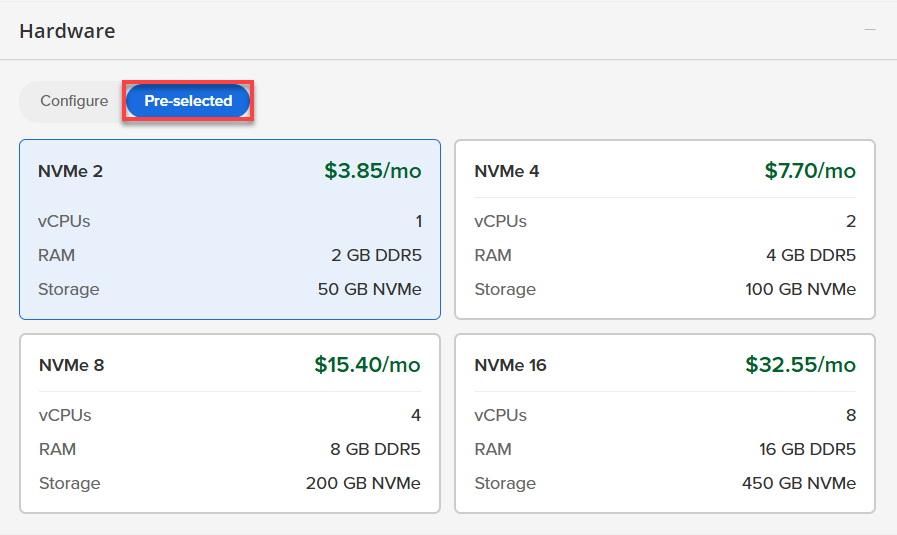
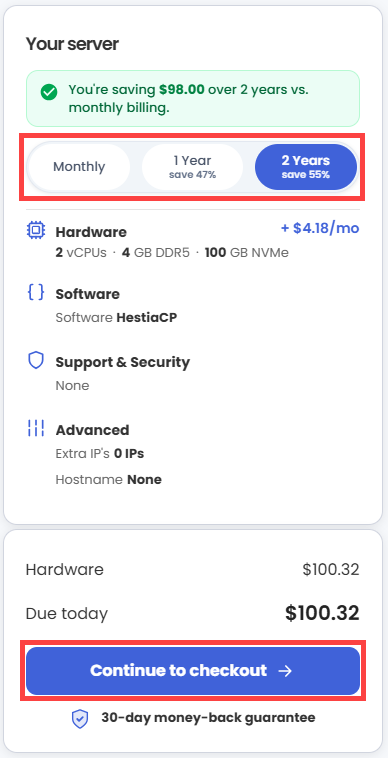
- On the Cart page, you can configure your server to fit your needs in the following section:
- Hardware:
- Pre-selected:
You can select a different Self-Managed VPS plan in this section.
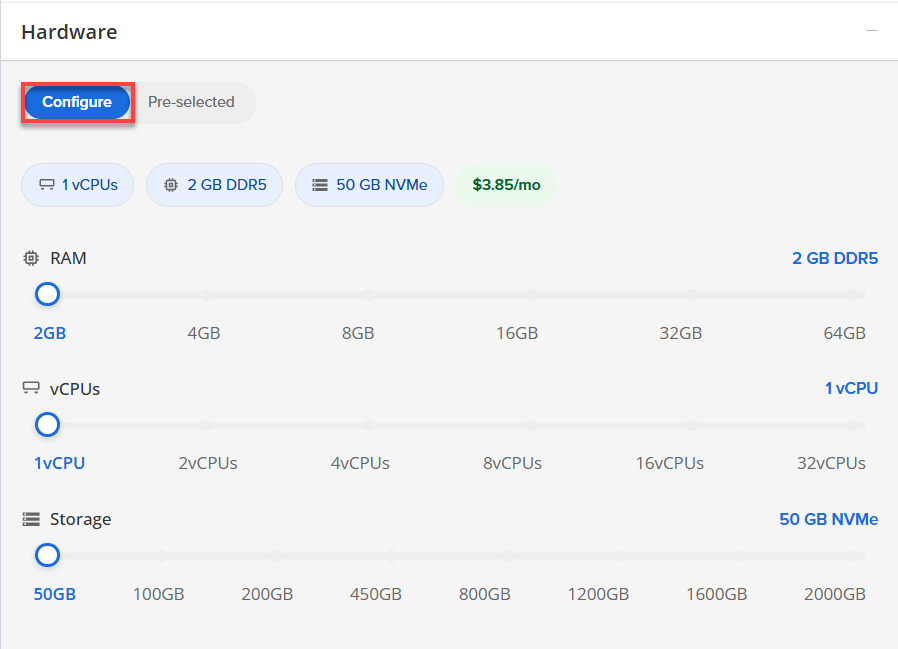
- Configure:
Click Configure to customize your package.
Note that your changes help customize your plan, and the overall cost will adjust accordingly to fit your needs.
- Pre-selected:
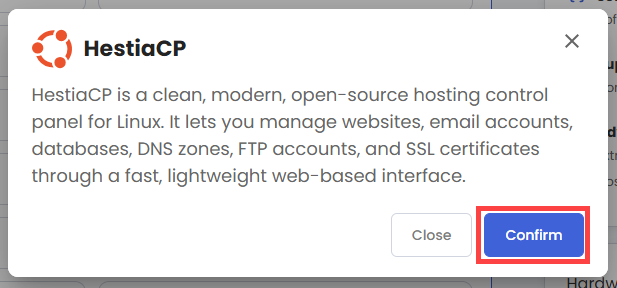
- Software:
- Click the Application tab.
- Select HestiaCP.
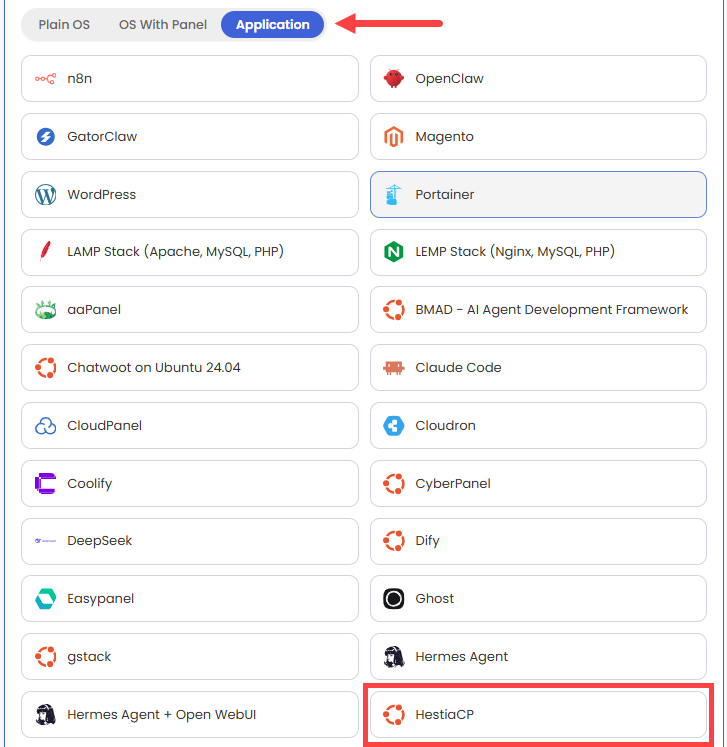
- In the pop-up, click Confirm.
- Hardware:
- Add-Ons: You can add Premium Support here, which gives you priority access to expert assistance and faster response times.

- In the Advanced options:
- Extra IP's: You can add extra IP addresses for an additional fee.
Pricing changes based on how many IPs you add. - Hostname: Assign a custom hostname to easily identify your server. This is optional.
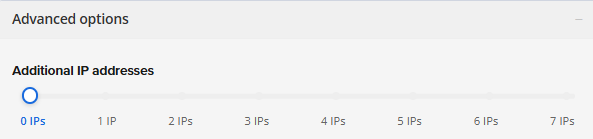
- Extra IP's: You can add extra IP addresses for an additional fee.
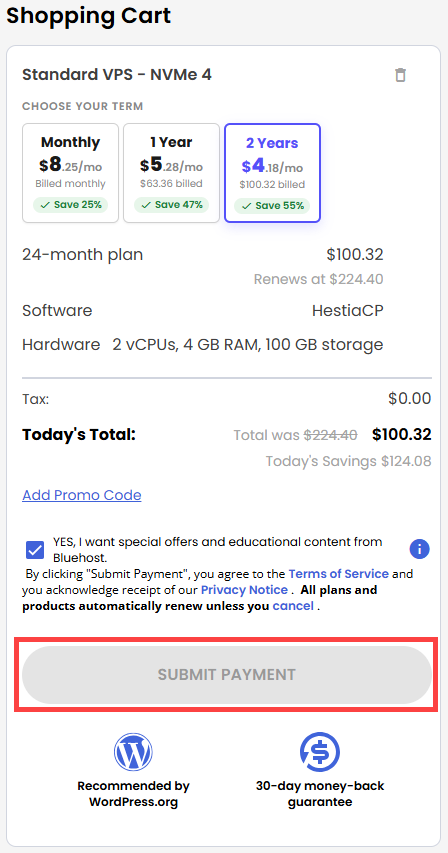
- Next, select your preferred billing term and review your Order Summary, then click Continue to Checkout.
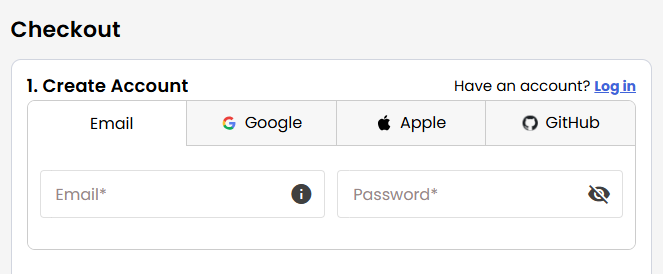
- Do the following on the Checkout page:
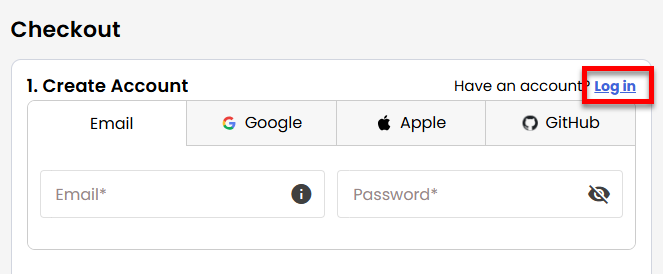
If you're new with Bluehost:
- Create your Bluehost account by using your email address or by connecting with your Google, Apple, or GitHub account — whichever you prefer!
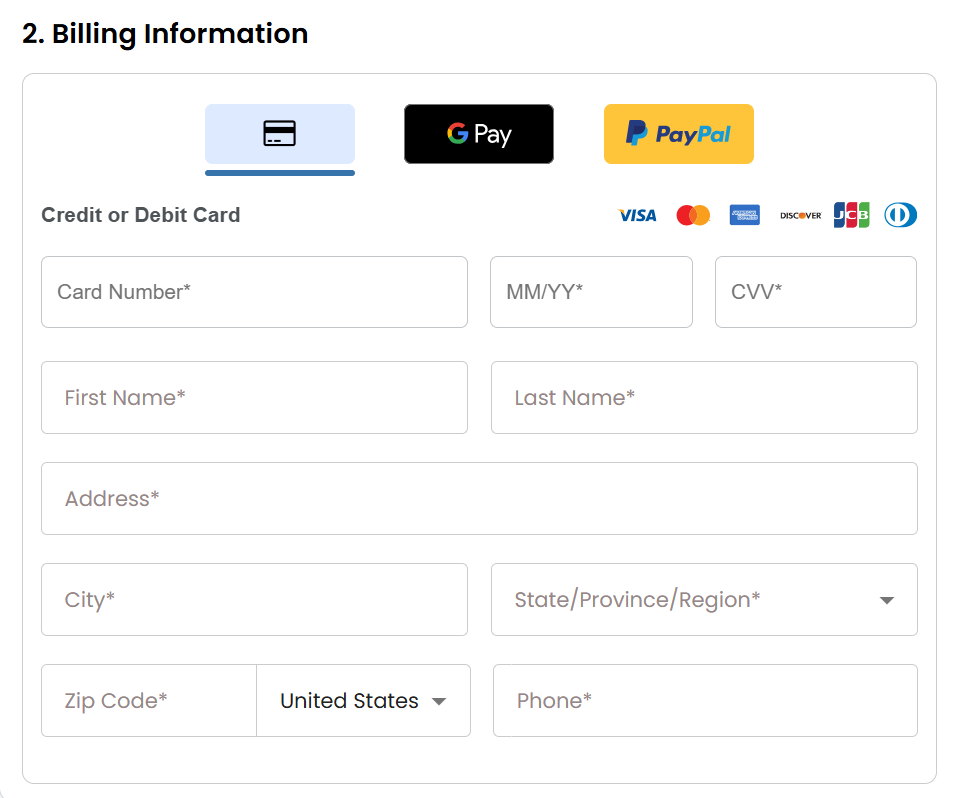
- Select your preferred payment method: credit card, Google Pay, or PayPal. Enter your billing information.
If you have an account with us, you will see your Bluehost login details when you are logged into your Bluehost Portal. If you are not logged in, please click the Log In link.
- Create your Bluehost account by using your email address or by connecting with your Google, Apple, or GitHub account — whichever you prefer!
- In the Shopping Cart section, you can still adjust your billing term if needed.
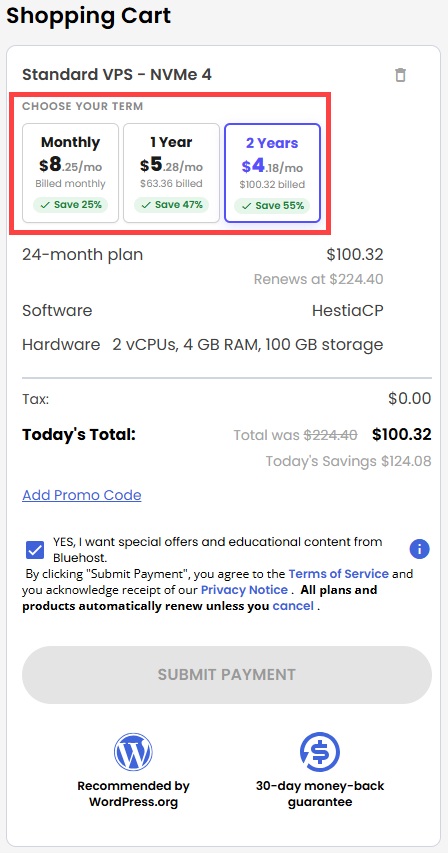
- Review the items in your cart, add a Promo Code if you have one, and then click Submit Payment to complete the purchase.
After checkout, your Self-Managed VPS will begin setting up. Once it’s ready, you can find it under the Hosting tab in your Bluehost Portal.
Summary
HestiaCP makes it easy to run your websites, emails, and web addresses from one simple screen. When you use it with a Bluehost server, you get full control without the tricky tech headaches. Whether you have one website or many, HestiaCP makes managing your server simple and helps you grow.