How to Subscribe to IMAP Folders
When you subscribe to IMAP folders, you can select folders to display in your email client. Note that when setting up your email account, all folders in your account will show. However, there may be various scenarios where displaying all your folders may not be desirable.
IMAP allows messages to be visible to multiple users in a shared network. In a company setting, for example, certain departments may have their own folder where their emails get routed. All department members can subscribe to that folder while choosing not to view messages related to other departments.
If your IMAP folders are not showing in your email client (for example, Sent, Trash, Drafts, Junk, and other IMAP folders), you can subscribe to them again, and they will appear.
How to Subscribe to IMAP Folders in Roundcube
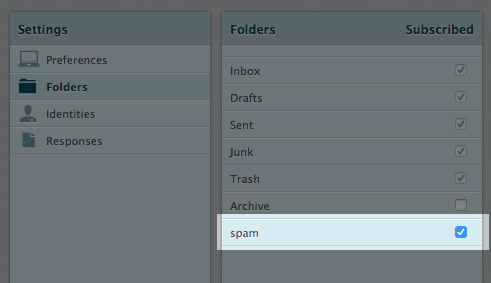
Below is a step-by-step guide to subscribing to IMAP folders in Roundcube:
- Go to Settings

- Click Folders
- Re-subscribe to each folder by clicking on the check box next to each one.
How to Subscribe to IMAP Folders in Outlook
Below is a step-by-step guide to subscribing to IMAP folders in Outlook:
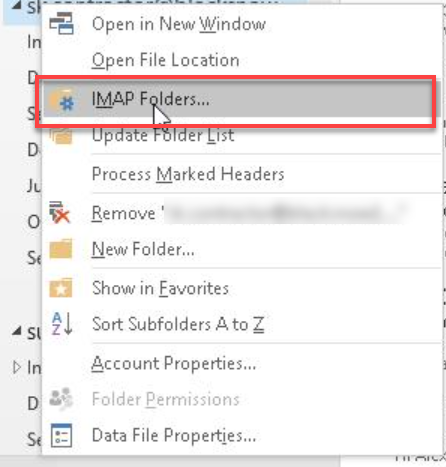
- Open Mail and right-click on the top folder in your Navigation pane.
- Select IMAP Folders from the options.
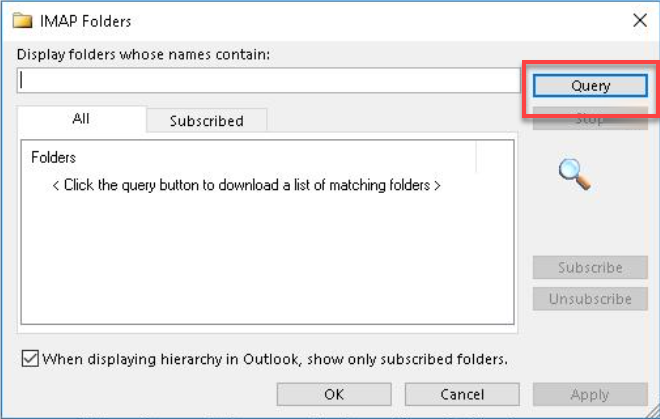
- Next, click Query.
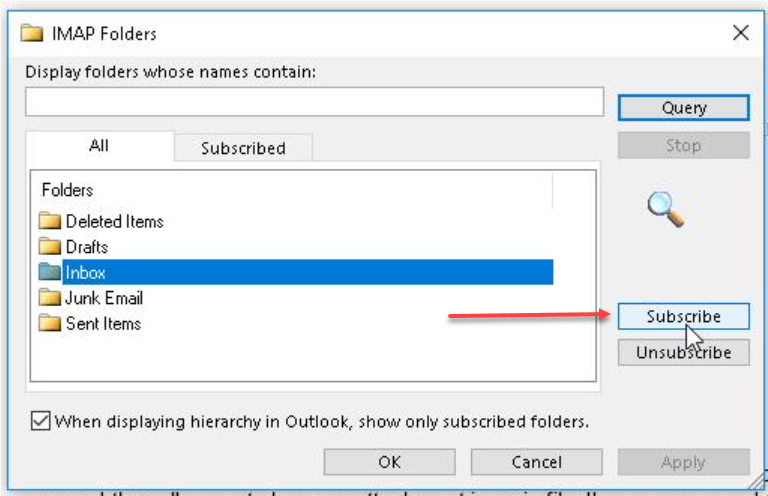
- Select a folder, then click the Subscribe button.
- To select more than one folder, press and hold the CTRL button while clicking on folder names.
- To select more than one folder, press and hold the CTRL button while clicking on folder names.
How to Subscribe to IMAP Folders on Your iPhone or iPad
If you sync IMAP mail account settings from your computer to your iPhone or iPad, the IMAP folders may show under your Inbox folder. In this case, you need to specify the IMAP path prefix.
- In Settings, choose Mail.
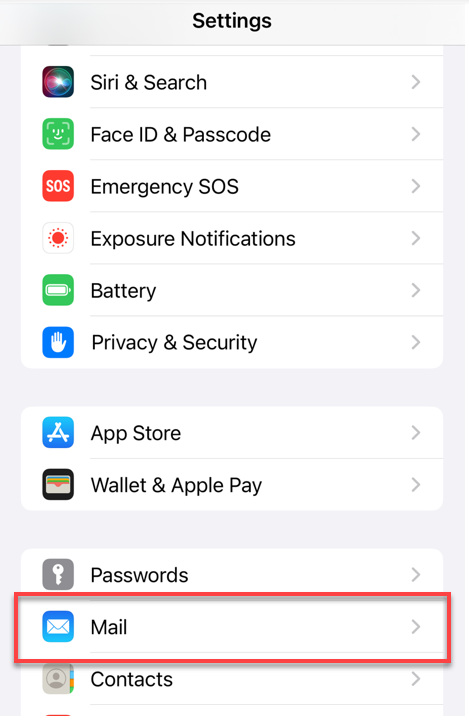
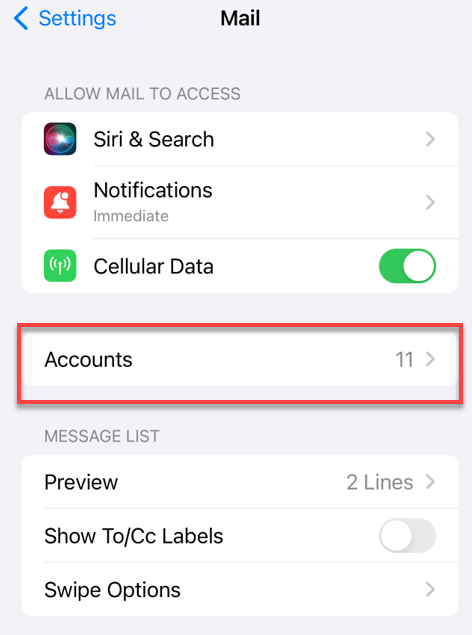
- Click Accounts.
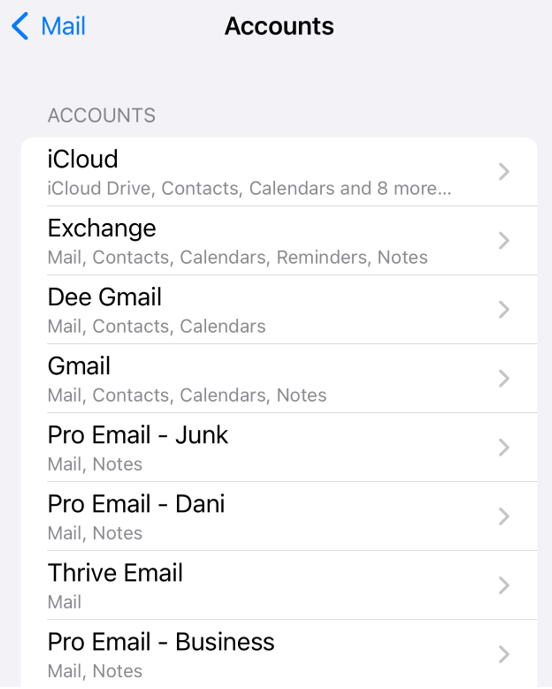
- Choose an email account.
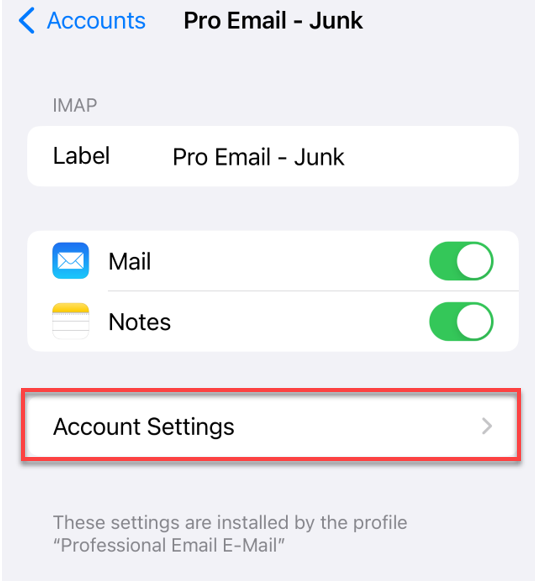
- Click Account Settings.
- Click Advanced.
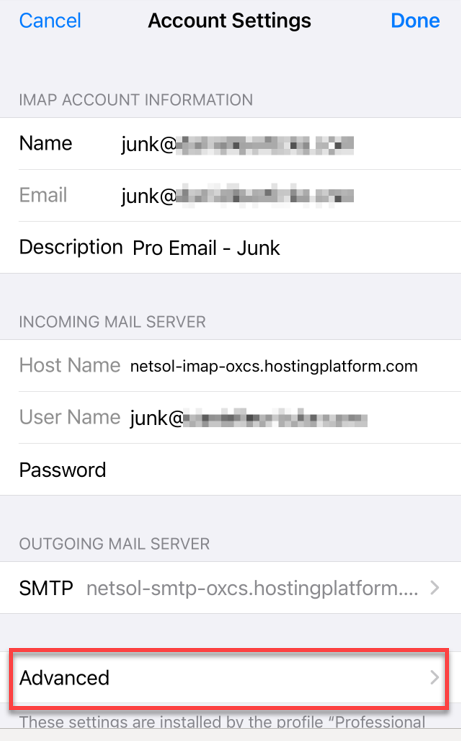
- The IMAP Path Prefix field is in the INCOMING SETTINGS section.
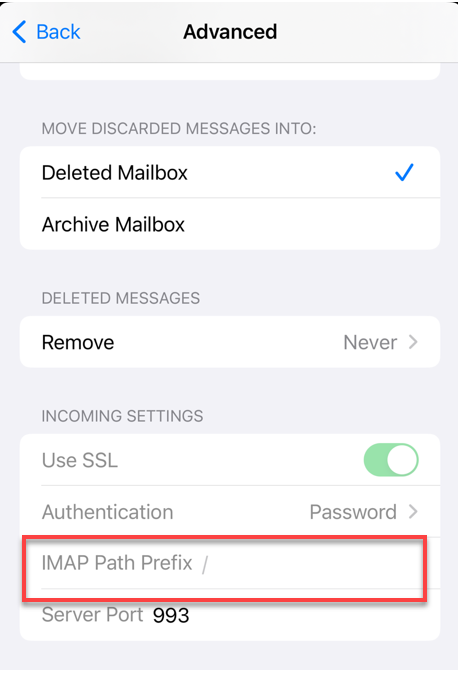
- Enter the word INBOX (all caps) and save the setting. Now, your folders should appear as expected.
How to Subscribe to IMAP Folders in Thunderbird
Below is a step-by-step guide to subscribing to IMAP folders in Thunderbird:
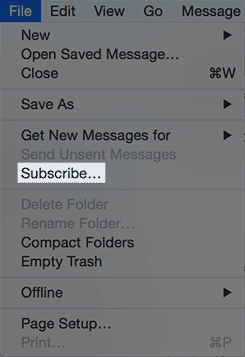
- Go to File and click Subscribe
- Select the folders you want to subscribe to, then click Subscribe.
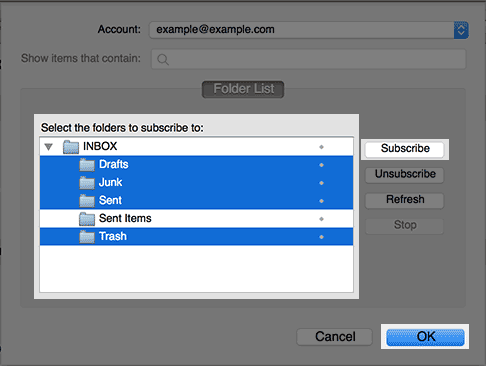
- Click OK.
New folders can now be accessed from the Folders list on the left side.
How to Subscribe to IMAP Folders on Mac OS X Mail (Mac Mail)
Below is a step-by-step guide to subscribing to IMAP folders in Mac Mail:
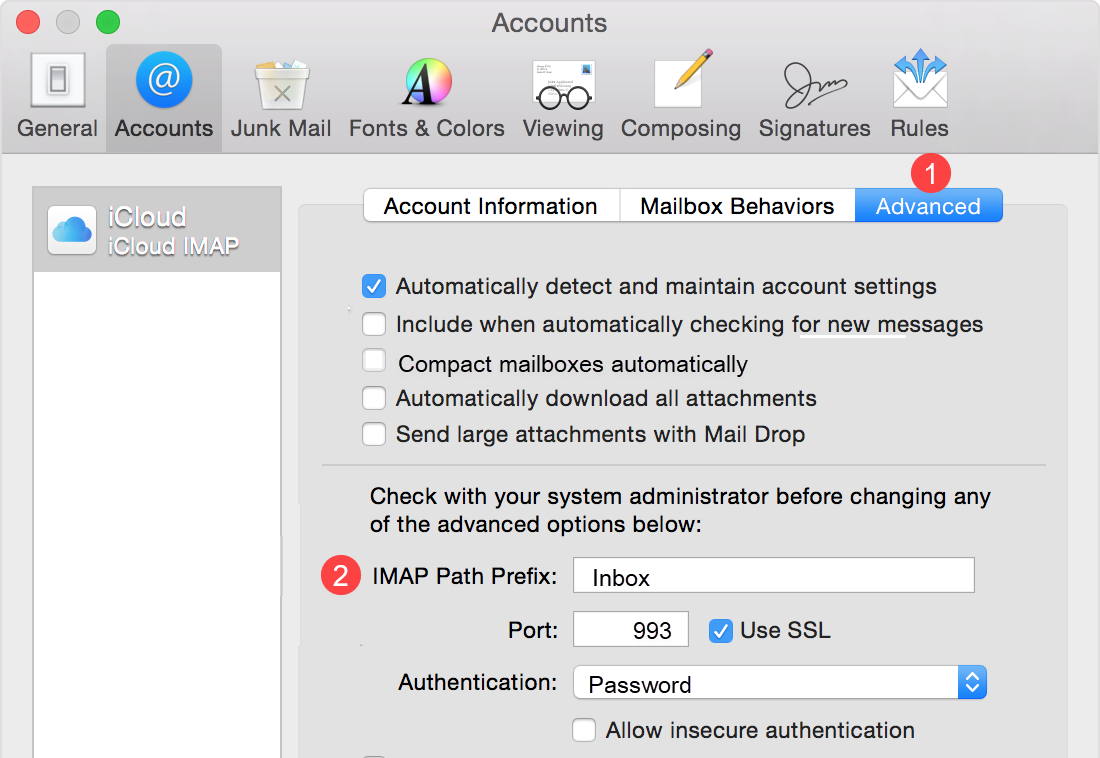
- Go to Mail > Preferences > Accounts.
In Mac OS X Mail, subscribing to folders is a two-step process.
Enter the IMAP Path Prefix
- Click the Advanced tab.
- Enter INBOX as the IMAP Path Prefix.
Use IMAP folders for Sent, Drafts, Junk, and Trash
- Click the IMAP folder you like to use as one of the Mailboxes.

- Click the Mailbox menu.
- Under Use This Mailbox For, choose the corresponding mailbox.
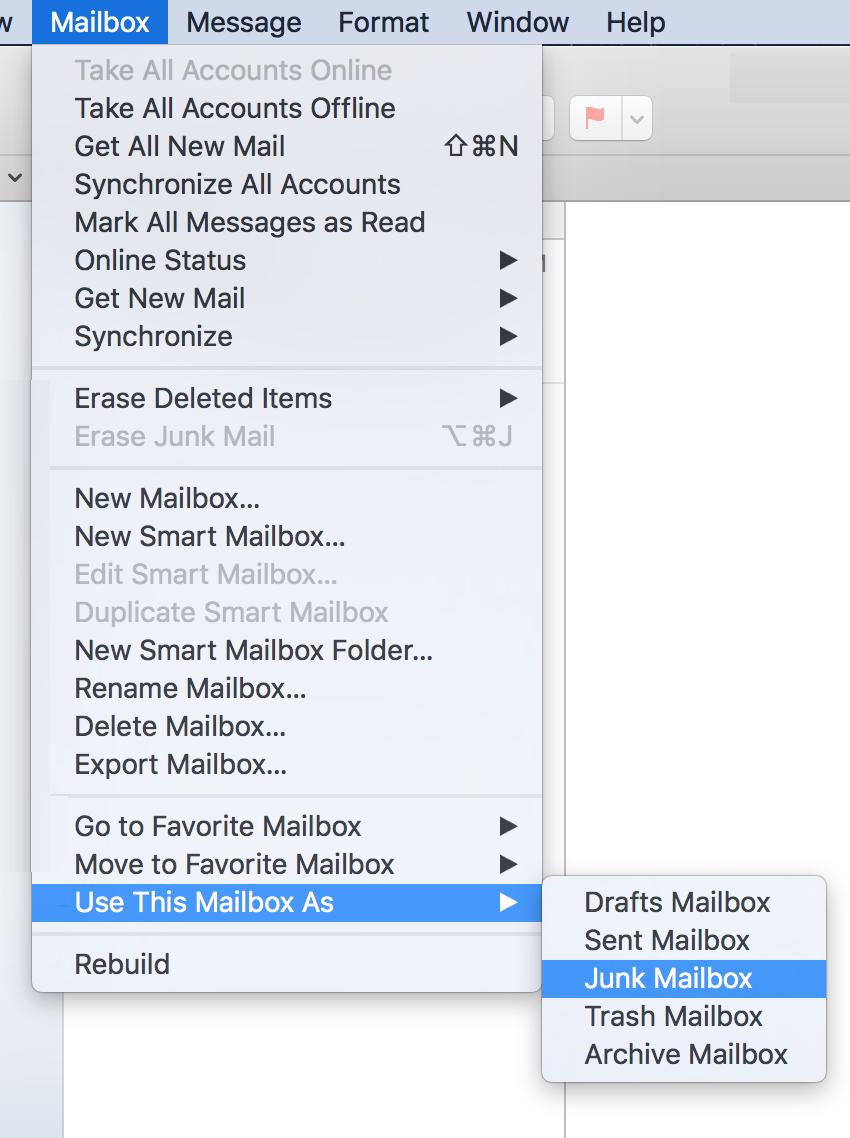
- Repeat the same steps for any other folders you wish to store on the server.
Summary
This article covers subscribing to IMAP folders and provides helpful information on why it can be beneficial. We also offer step-by-step guides on subscribing to IMAP folders in popular email clients, such as Roundcube, Outlook, Thunderbird, and Mac OS X Mail. In addition, we learn how to subscribe to IMAP folders on iPhones or iPads and what to do if IMAP folders are not showing up in your email client.
If you need further assistance, feel free to contact us via Chat or Phone:
- Chat Support - While on our website, you should see a CHAT bubble in the bottom right-hand corner of the page. Click anywhere on the bubble to begin a chat session.
- Phone Support -
- US: 888-401-4678
- International: +1 801-765-9400
You may also refer to our Knowledge Base articles to help answer common questions and guide you through various setup, configuration, and troubleshooting steps.