VPS & Dedicated Hosting: How to Install ClamAV
Want to keep your VPS or Dedicated server safe from viruses and malware? ClamAV is a great way to do it. In this article, we'll walk you through the steps to install ClamAV on your server. It's easier than you might think!
ClamAV is an open-source program for detecting viruses, malware, and other malicious code/files. It is a plugin for the cPanel and can be installed and enabled for all users on the VPS or Dedicated server.
How to Install ClamAV
To install ClamAV, you will need to be logged in to WHM.
- Log in to your Bluehost Portal.
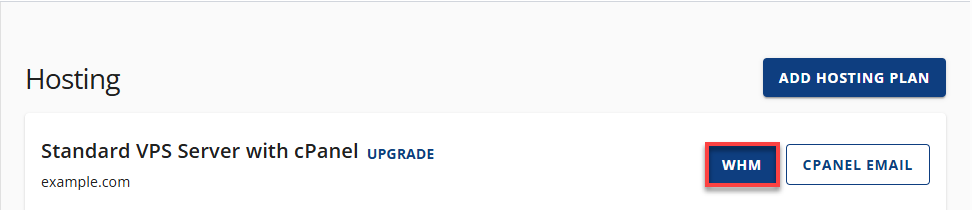
- Click Hosting in the left-hand menu.
- In the hosting details page, click the WHM button.
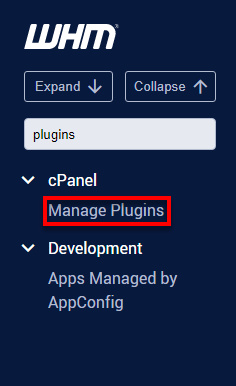
- From the search box in the top left corner of WHM, search for plugins.
- Choose Manage Plugins.
- Click on the Install ClamAV for cPanel.
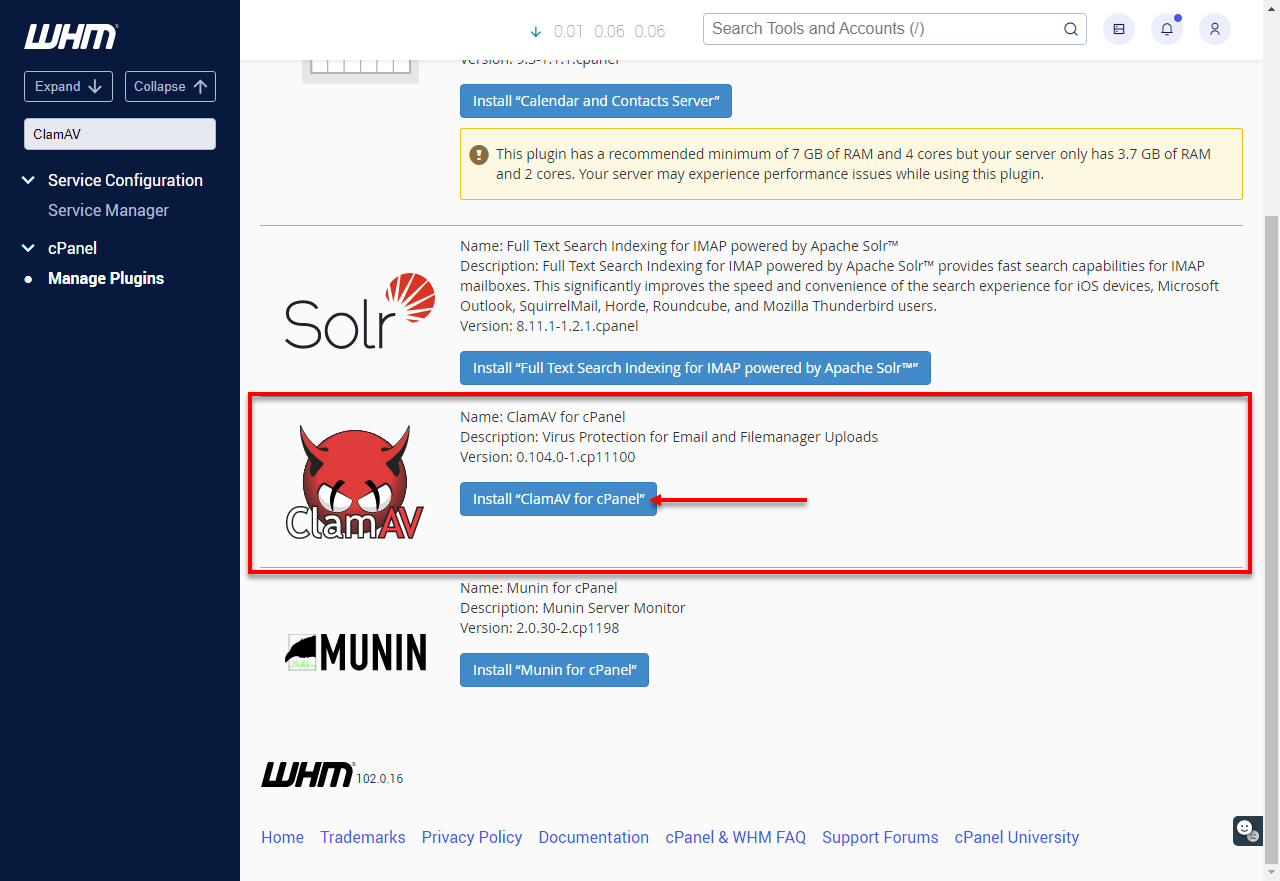
- Once the installation is complete, you will see the ClamAV for cPanel is now installed message.
How to Enable ClamAV
Once installed, you will need to enable ClamAV in your Feature List. This can easily be done using the Feature Manager.
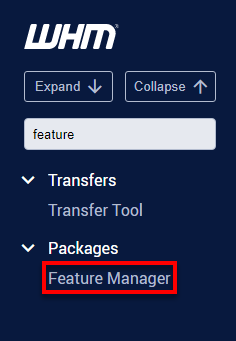
- Search for the feature from the search box in the top left corner of WHM.
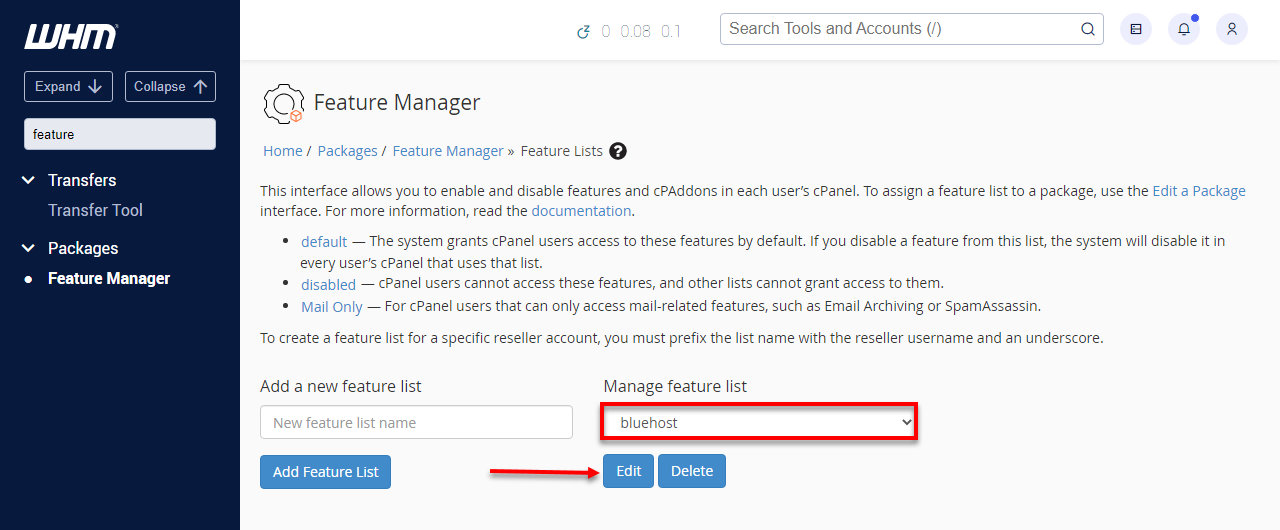
- Open the Feature Manager.
- Choose the Feature List from the drop-down menu under Edit a Feature List you would like to edit. Then click the Edit button.
- Check the box next to Virus Scanning to enable the ClamAV tool in this Feature List.
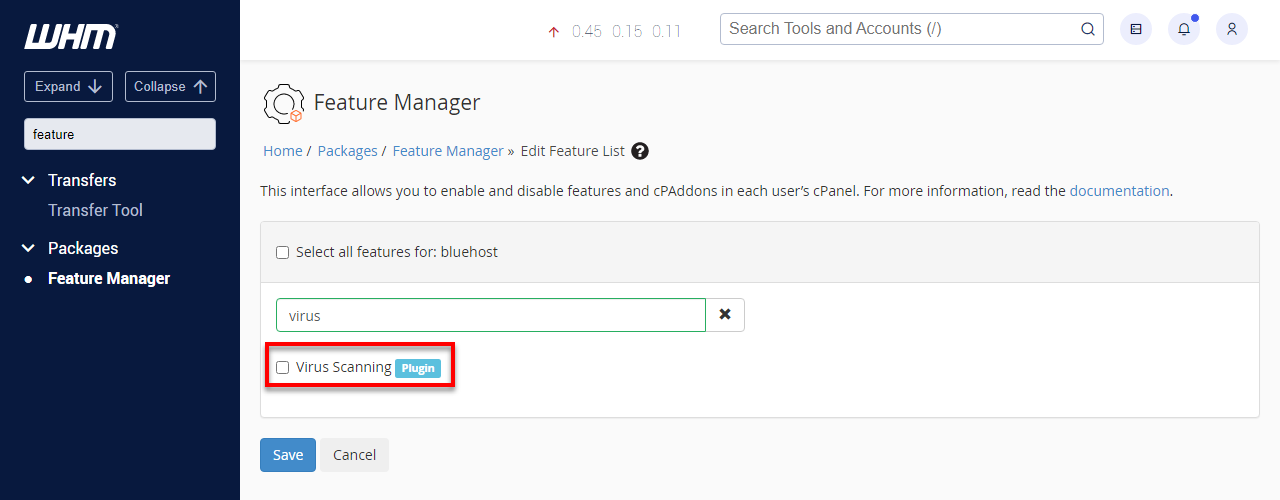
- Click the Save button to save these changes.
To run ClamAV, use the Virus Scanner tool located in the Advanced section of your cPanel.
To learn more about ClamAV and what it can do, go to ClamAV.net.
Configure ClamAV via WHM
Once ClamAV is installed on your server, you can choose which files and directories are included in the daily virus scan. You also have the option to set custom scan rules for individual users or specific groups.
By default, ClamAV scans everything once per day.
To configure which items are scanned for all accounts during the daily scan:
- Log in to WHM as root.
- Open Configure ClamAV Scanner from the menu.
- Under Scans Allowed Globally, check the items you want included in the daily scan:
- Scan Entire Home Directory: Scans each user’s full home directory.
- Scan Mail: Ensures all mail folders are included.
- Scan Public FTP Space: Includes each user’s public_ftp directory.
- Scan Public Web Space: Scans the public_html and www directories.
- Click Save to apply your changes
To set custom scan rules for a selected group of users:
- Log in to WHM as root.
- Open Configure ClamAV Scanner from the menu.
- Click User Configuration in the ClamAV Scanner User Configuration section.
- Choose a user you want to configure separately and click. Add.
- Repeat for each user who should have their own scan settings.
- Choose the preferred default scan options, then select Save Defaults., then select Save Defaults.
- You may click the [ Go Back ] link to return to the previous menu.
To update settings for a specific single user:
- Log in to WHM as root.
- Open Configure ClamAV Scanner.
- Click User Configuration in the ClamAV Scanner User Configuration section.
- Enter the username in the Configure User field.
- Click Configure.
- Select the scan options you want for that user and click Save Defaults.
- You may click the [ Go Back ] link to return to the previous menu.
Running ClamAV on a Cron Job
If your server has limited resources, you can still make use of ClamAV by scheduling it to run through a cron job. This allows you to control exactly when scans occur and how often they run, reducing the load on your system during peak usage times.
The article below explains how to set up and manage cron jobs in cPanel, which you can use to control when ClamAV runs on your server.
Resolving Issues Identified by ClamAV
If ClamAV detects a potential threat, it could be a sign that your server has been compromised. The article below outlines different steps you can take to remove malicious software and restore your system’s security.
Summary
That's it! You have now successfully installed ClamAV on your VPS or Dedicated server. With ClamAV, you can rest assured that your server is protected from the latest threats. Remember to run regular scans and keep ClamAV up-to-date for optimal security.
If you need further assistance, Bluehost Chat Support is available 24 hours a day, 7days a week while Bluehost Phone Support is available 7 days a week from 7 am-12 midnight EST.
- Chat Support - While on our website, you should see a CHAT bubble in the bottom right-hand corner of the page. Click anywhere on the bubble to begin a chat session.
- Phone Support -
- US: 888-401-4678
- International: +1 801-765-9400
You may also refer to our Knowledge Base articles to help answer common questions and guide you through various setup, configuration, and troubleshooting steps.