VPS & Dedicated Hosting: Default Sender Address
When you host a VPS or Dedicated Server from Bluehost, it is probably important that you know how automated messages are handled. By default, automated messages originate with a generic address, [email protected]. Here, you will learn how to customize the default sender address so that your communications are brandable and professional.
By default, your server’s automated messages will be sent from [email protected].
To customize your default sender address:
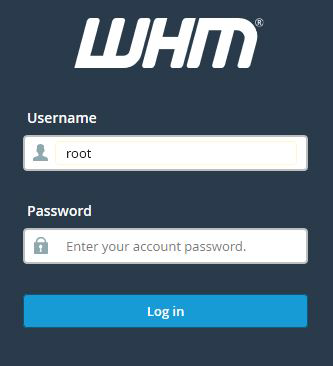
- Log in to the WHM.
- Once you get to the login page, enter your username and password.
- The username will be root.
- The password will be the root password for your server.
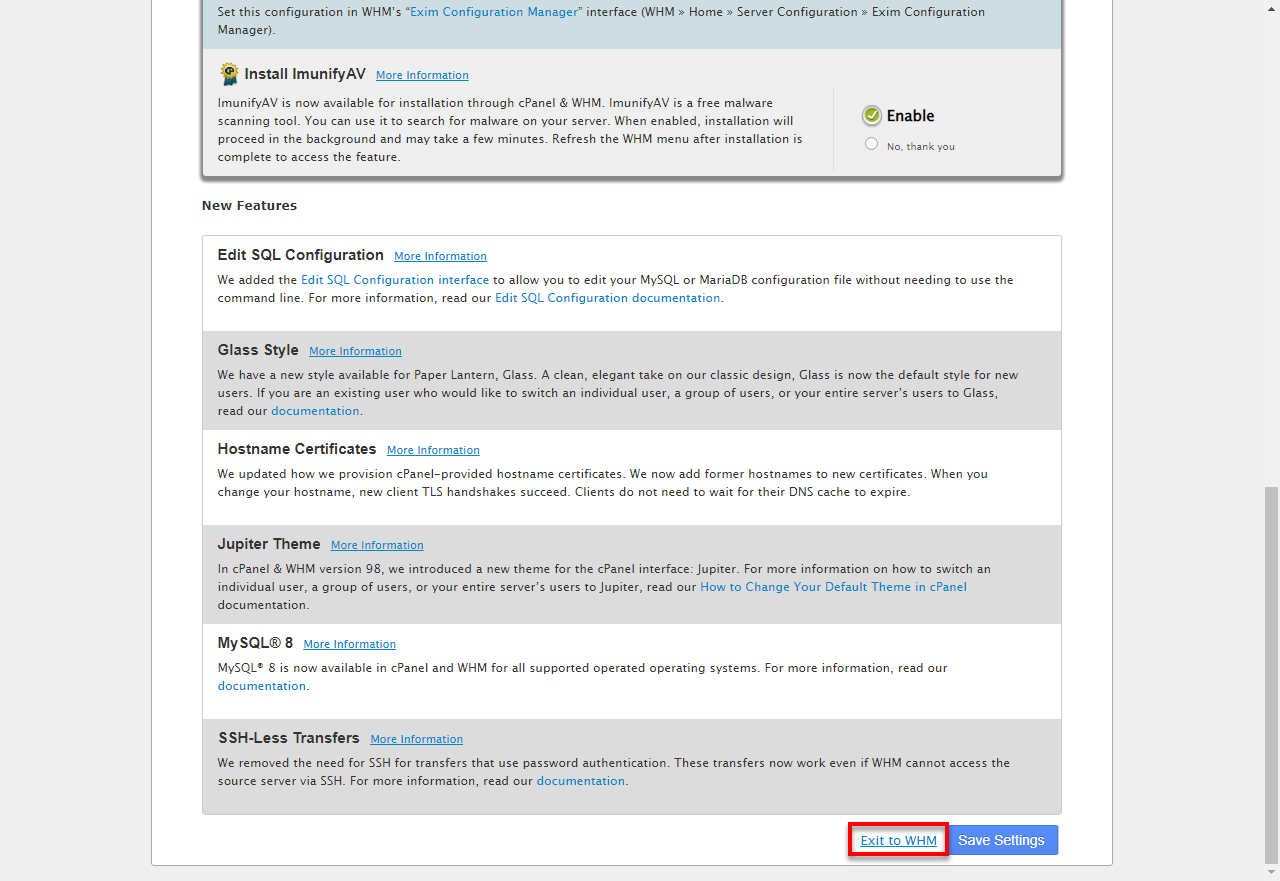
- If you see the Feature Showcase page, scroll to the bottom and click the Exit to WHM button.
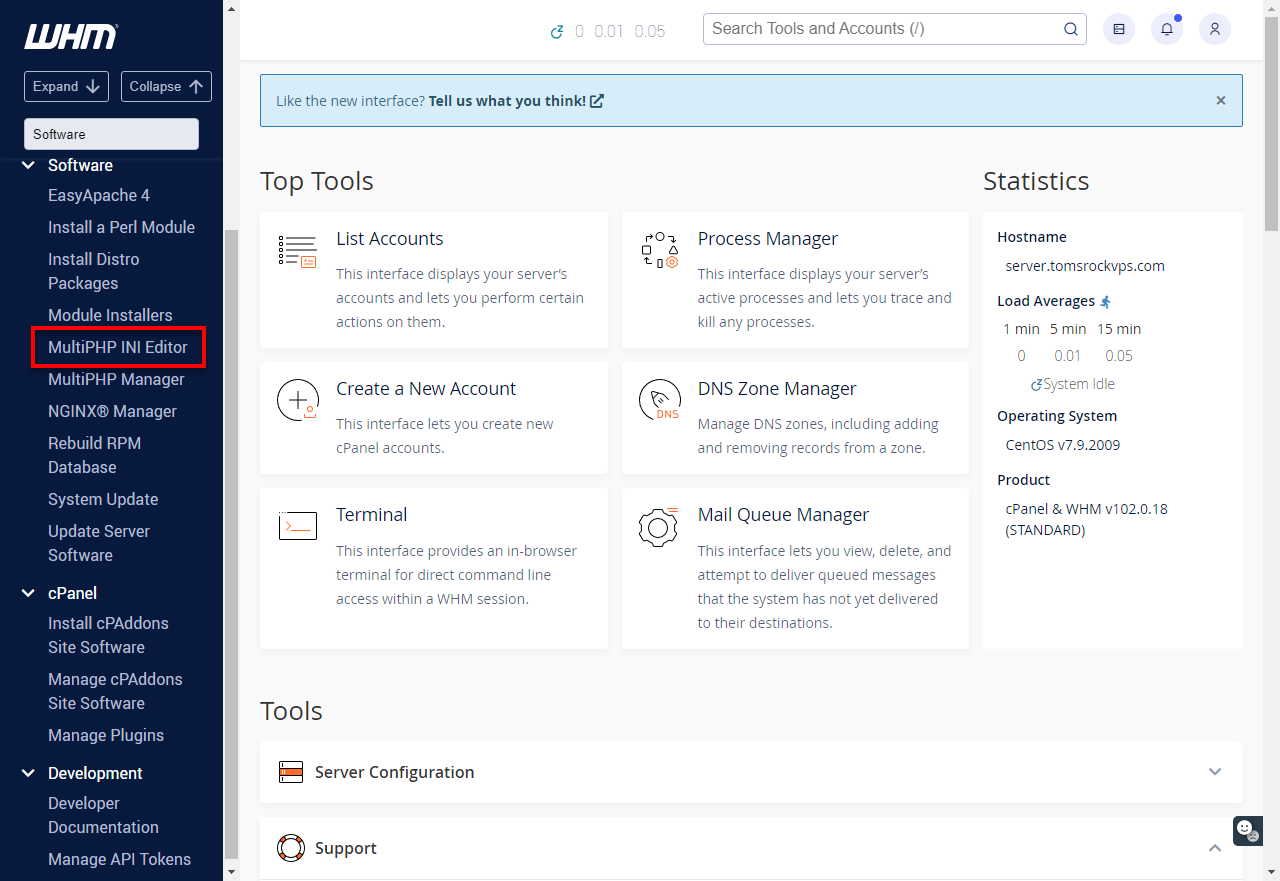
- Once in the WHM, look for the Software section and select MultiPHP INI Editor from the list.;
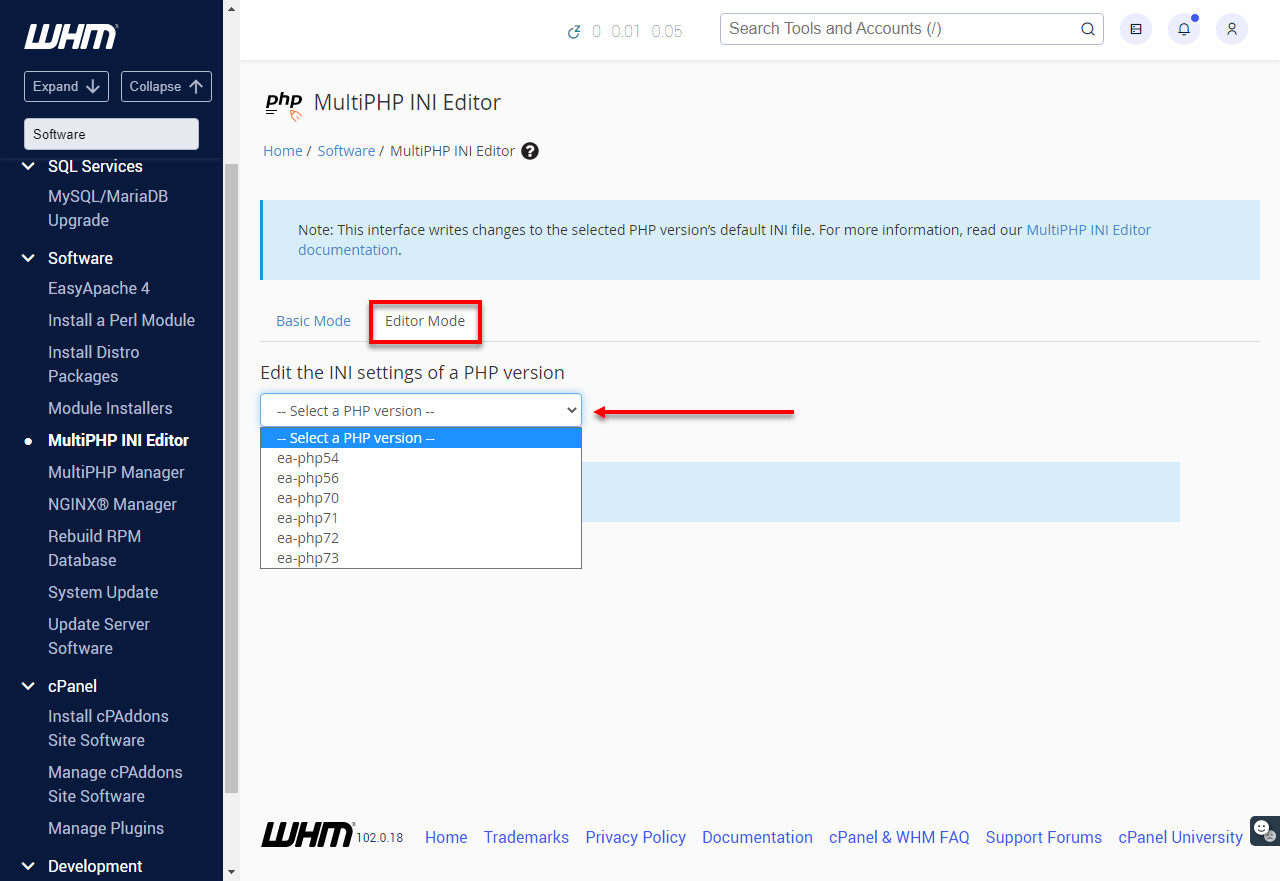
- On the MultiPHP INI Editor page, navigate to Editor Mode and select a PHP version from the drop-down.
- In the editor, modify the sendmail_path value.
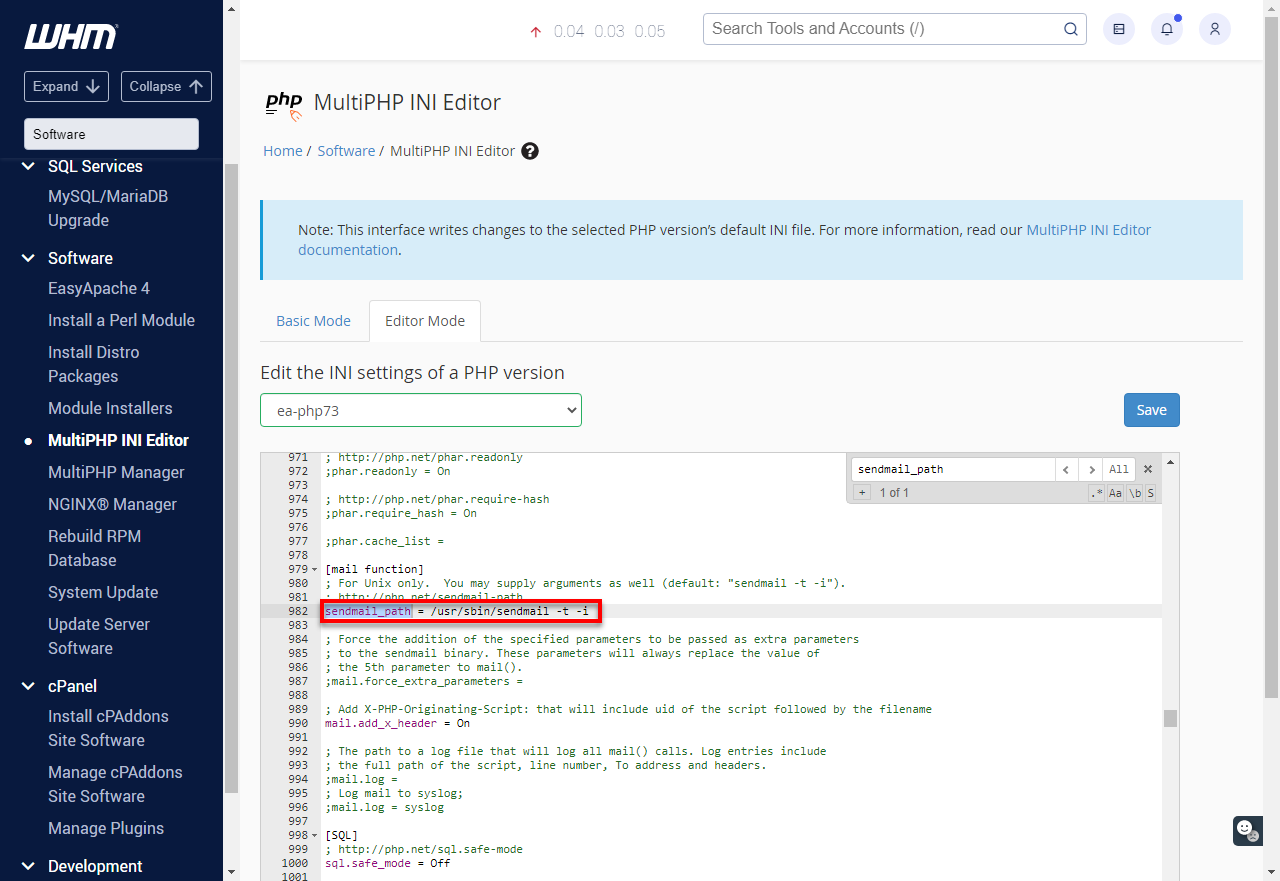
For example, if you want your default sender address to be [email protected], modify the value to be:
/usr/sbin/sendmail –t –I –f’[email protected]’ - Click Save.
Summary
Customizing the default sender address of your VPS or Dedicated Server at Bluehost is very simple yet increases the quality of communication made through email. This will ensure that all the automated messages from you will show your brand, making your responses to the clients and users better in professionalism and trustworthiness.
If you need further assistance, Bluehost Chat Support is available 24 hours a day, 7days a week while Bluehost Phone Support is available 7 days a week from 7 am-12 midnight EST.
- Chat Support - While on our website, you should see a CHAT bubble in the bottom right-hand corner of the page. Click anywhere on the bubble to begin a chat session.
- Phone Support -
- US: 888-401-4678
- International: +1 801-765-9400
You may also refer to our Knowledge Base articles to help answer common questions and guide you through various setup, configuration, and troubleshooting steps.