How to Create, Delete, and Edit a Page in WordPress
If you're new to WordPress and wondering how to create, delete, and edit a page in WordPress, this guide will walk you through everything you need to know. From adding new content to updating existing pages or removing outdated ones, you'll learn how to manage your site directly from the WordPress Dashboard. We’ll also cover visibility settings and publishing options so you can control what your visitors see and when they see it.
Posts are like blog entries that appear on a page, while pages are distinct information sections on your site, such as About or Contact Information.
How to Create a New Page in WordPress
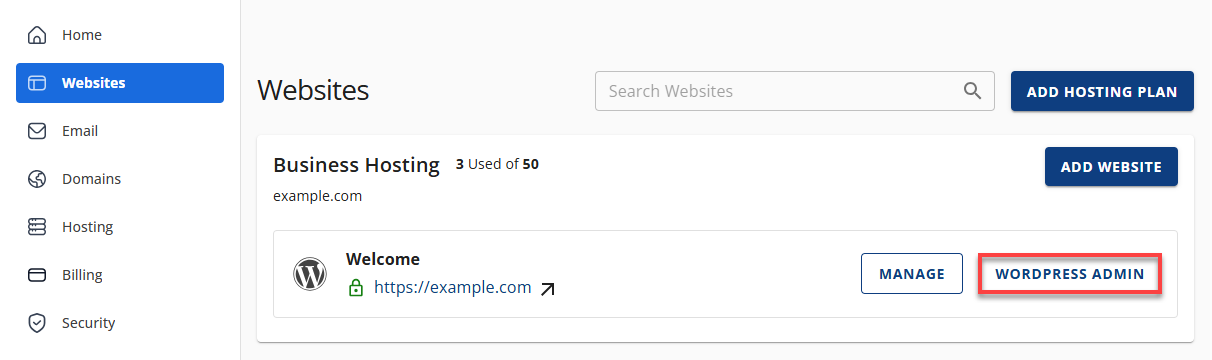
- Log in to your Bluehost Portal.
- In the left-hand menu, click Websites.
- Click the WordPress Admin button located next to the website you want to manage.
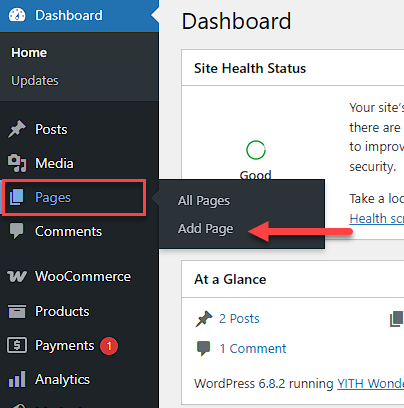
- On the main menu, hover over Pages and then click Add Page.
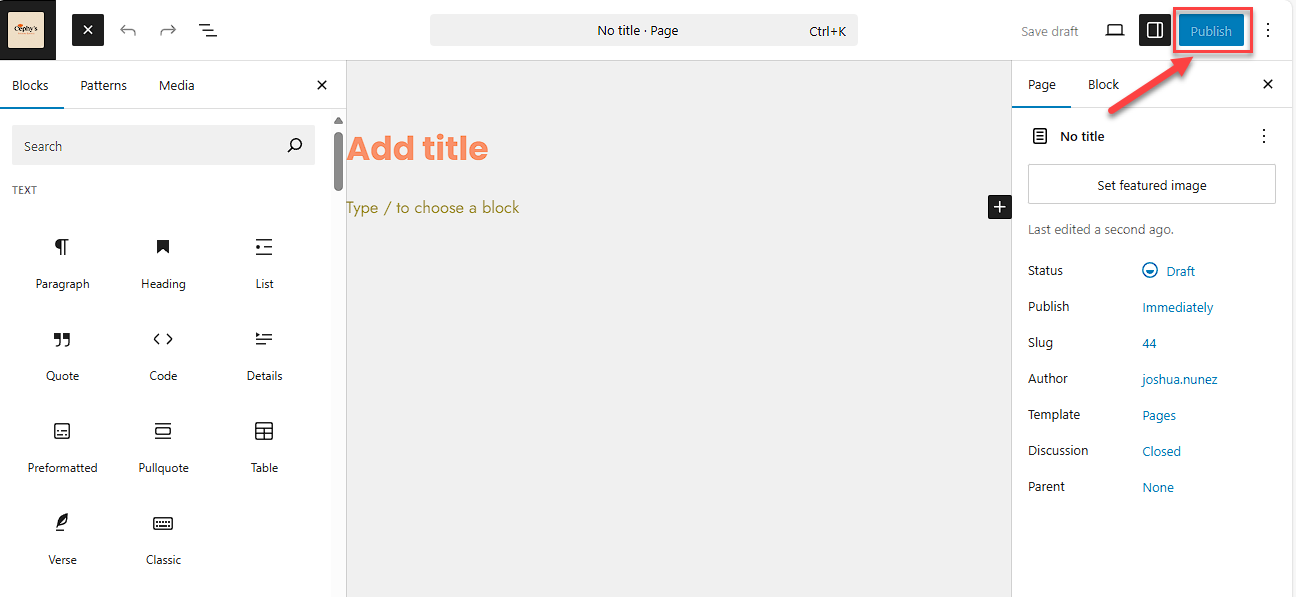
- This will bring you to the page editor. First, you will need to create a title for your page.
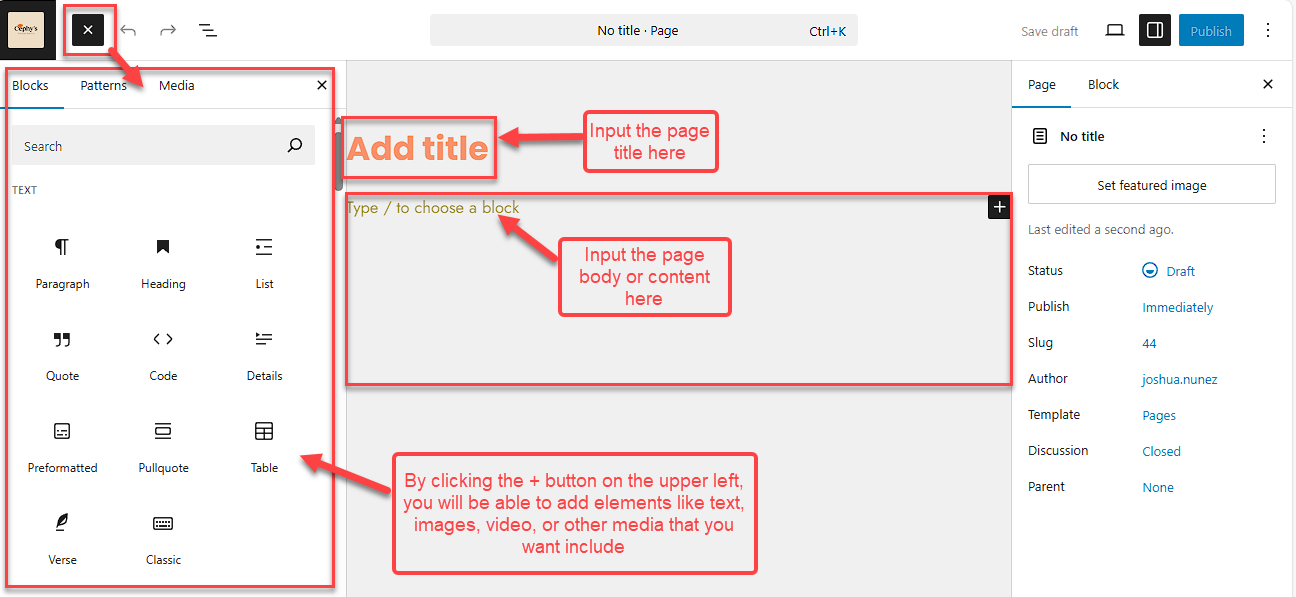
- Next, you can add the content to your page. In the text editor, add any text, images, video, or other media that you want to be included.
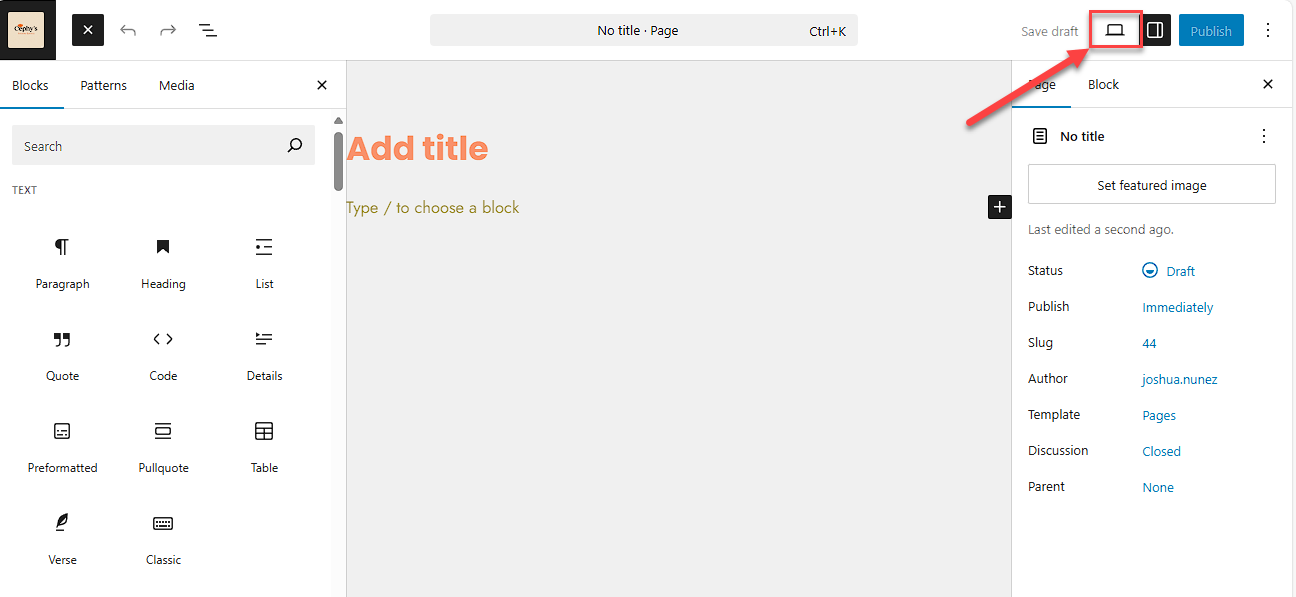
- You can always preview how your page looks by clicking the Preview button in the upper-right-hand corner.
- Once you have finished editing your page, click on the Publish button. This will immediately create your page, and you can view it live on your site.
How to Edit a Page in WordPress
You have made a post and need to edit it to make it more relevant, or you have found a mistake in the content and need to fix it. Editing the page will save your life.
- On the WordPress Dashboard, click All Pages. This will list all the pages that have been made, whether published or drafts.
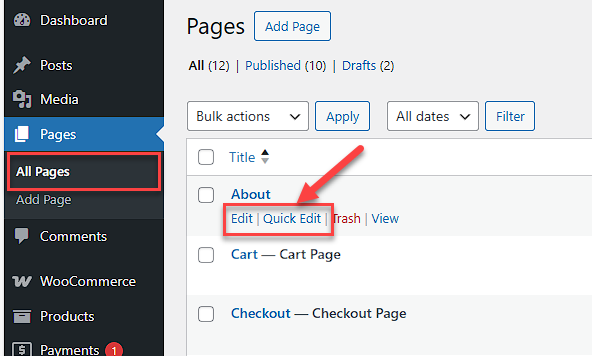
- In the search field at the top right-hand corner, you can type in the page name you would like to remove, or you can scroll through the list one by one.
- Hover your mouse pointer over the post that you need to edit and click the word Edit when it appears. This will open the post editor.
- Once done with editing, click Publish.
How to Remove a Page in WordPress
Sometimes a page is too old or no longer needed. You will need to remove the post.
- On the WordPress Dashboard, click All Pages. This will list all the pages you have, whether published or drafts.
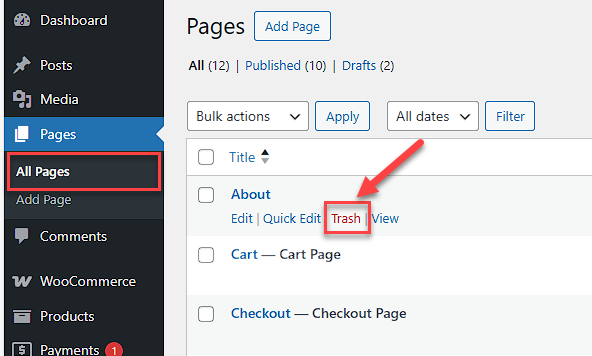
- In the search field at the top right-hand corner, you can type in the page name you would like to remove, or you can scroll through the list one by one.
- Please hover your mouse pointer over the post you want to delete, then click the word Trash.
Page Status & Visibility Settings in WordPress
If you are not ready for a page on your website to be live and visible to the public just yet, or are not sure if you are ready to delete a page in WordPress, using the WordPress Status & Visibility on a page is a great alternative until you are ready.
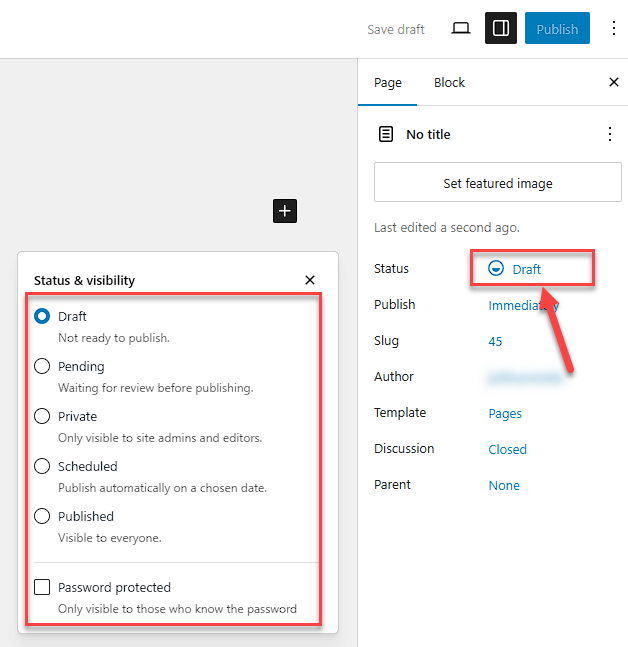
The publish page or post Status & Visibility feature has three options. You can go to a specific page and change the setting at any time in the WordPress Dashboard.
Remember to click Publish after you complete modifying the setting you desire for that page or post each time you modify the Status & Visibility setting.
- Public: The default is viewable to all.
- Password Protected: Clicking this radio button followed by “OK” causes a text box to appear, prompting you to enter a password.
- Private: This option hides the content from the public entirely. The page is only visible to you.
Summary
To ensure each page or post for your WordPress website is set up as you need, you may want to modify a page. This guide will show you how to create, edit, or remove a page. This process involves accessing your WordPress Dashboard and using the options available on each page. Alternative options, such as Status & Visibility settings, are also available. Other settings and options you might find helpful in your homepage can be viewed in our Bluehost blog article: How to Use WordPress Homepage Settings.
If you're still planning to create your own WordPress site, you can immediately set up your site with Bluehost's WordPress Website Builder. Turn your ideas into reality with our suite of powerful tools.
If you need further assistance, Bluehost Chat Support is available 24 hours a day, 7days a week while Bluehost Phone Support is available 7 days a week from 7 am-12 midnight EST.
- Chat Support - While on our website, you should see a CHAT bubble in the bottom right-hand corner of the page. Click anywhere on the bubble to begin a chat session.
- Phone Support -
- US: 888-401-4678
- International: +1 801-765-9400
You may also refer to our Knowledge Base articles to help answer common questions and guide you through various setup, configuration, and troubleshooting steps.