Bluehost WooCommerce AJAX Product Filter
Finding the right products can overwhelm customers if you run a WooCommerce store with a large inventory. Without effective filtering, users may leave without making a purchase. The Bluehost WooCommerce AJAX Product Filter enhances your store's search functionality, allowing users to refine results instantly without reloading the page. This leads to better user experience, higher engagement, and increased conversions.
Key Features of Bluehost WooCommerce AJAX Product Filter
- Live AJAX Filtering – Updates results immediately without refreshing.
- Multiple Filter Types – Offers support for color swatches, checkboxes, radio buttons, and dropdowns.
- Customizable Styling – Synchronizes with your store's theme.
- Mobile-Optimized – Functions perfectly on all devices.
- Premium Features – Improve filtering options, such as modal windows and adaptive filtering.
How to Set Up Bluehost WooCommerce AJAX Product Filter
Step 1: Install and Activate the Plugin
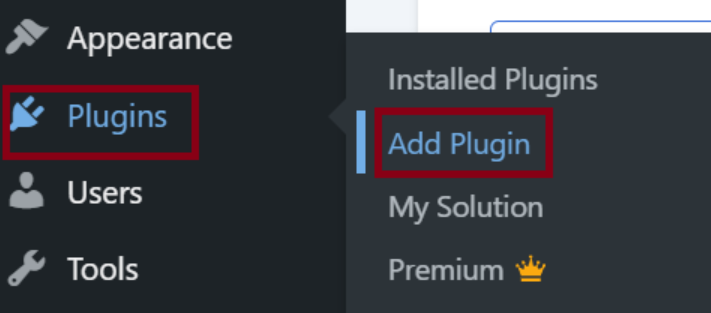
- Log in to your WordPress dashboard.
- In the left-hand menu, select Plugins, and then click Add Plugin.
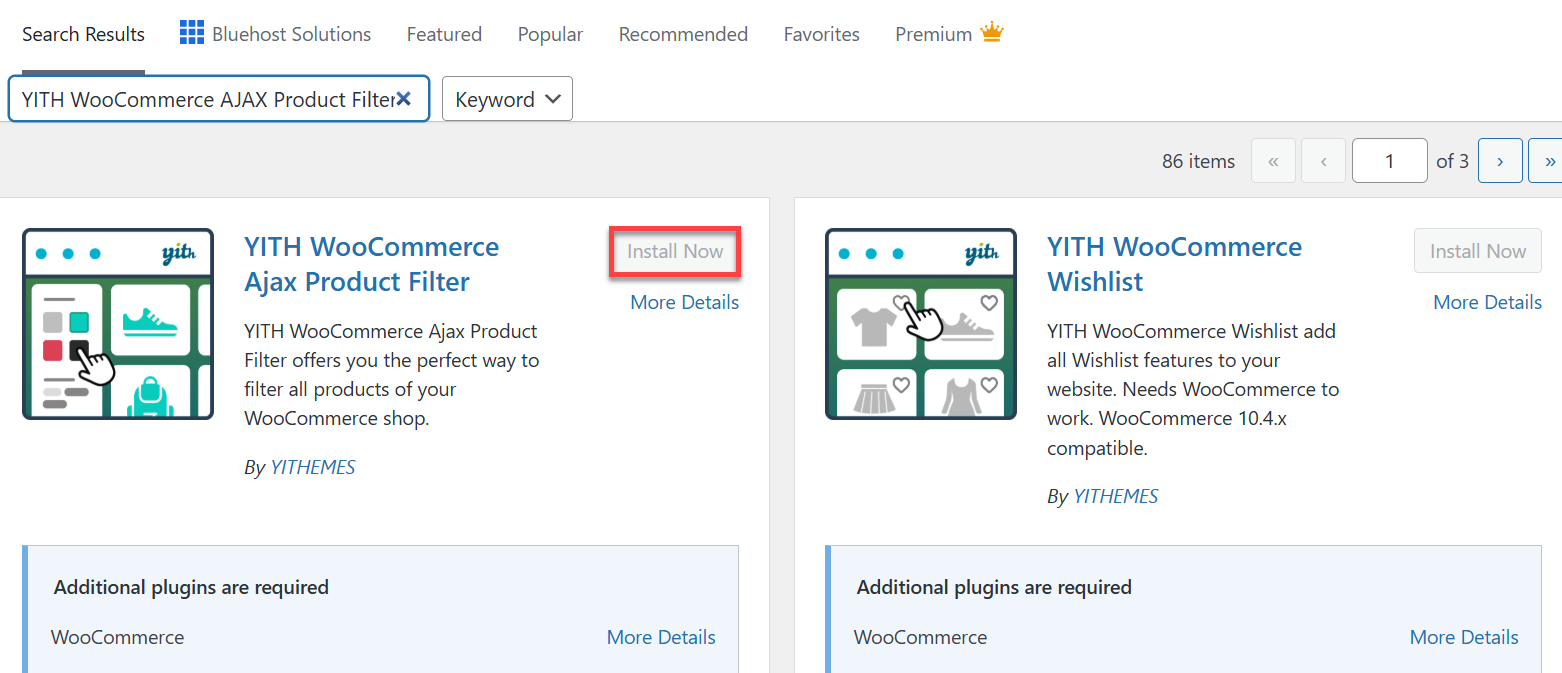
- In the search bar, type YITH WooCommerce AJAX Product Filter.
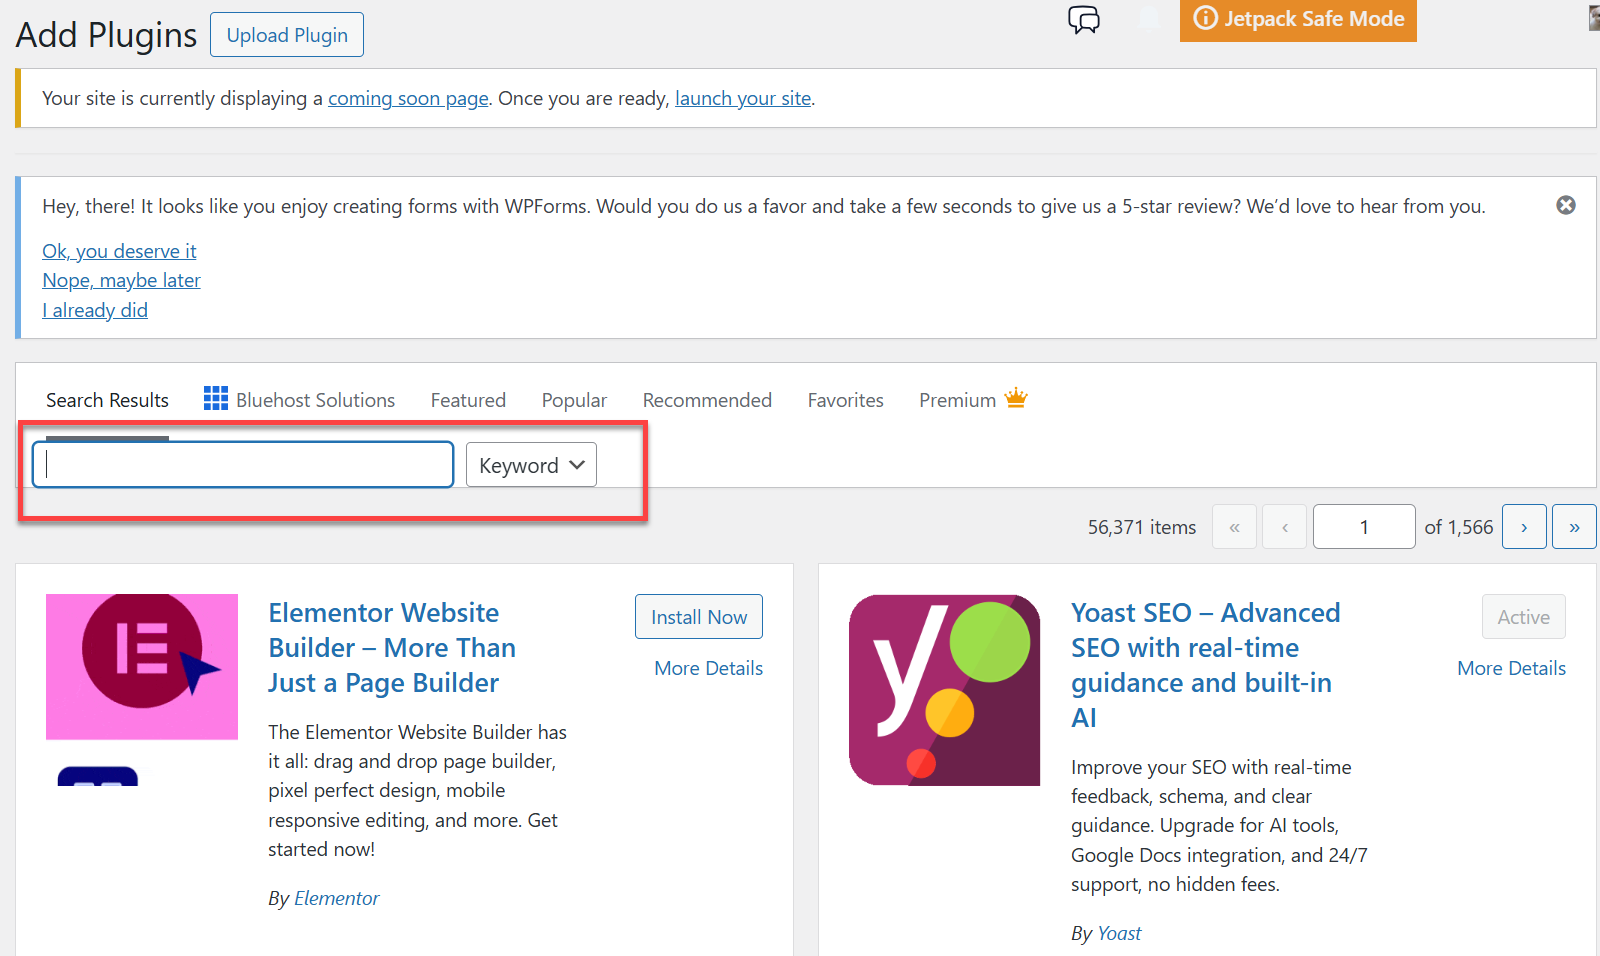
- When the plugin appears in the results, click the Install Now button.
- Once installation is complete, click the Activate button to enable the plugin.
Step 2: Configure Basic Settings
- From your WordPress dashboard menu, select YITH and then choose AJAX Product Filter.
- Open the Plugin Settings Page.
- Enable AJAX Filters.
- Choose how the filters will operate:
- Auto-refresh – Products update instantly when a filter is selected.
- Button-based – Users must click an apply button to load filtered results.
Step 3: Create a Filter Preset
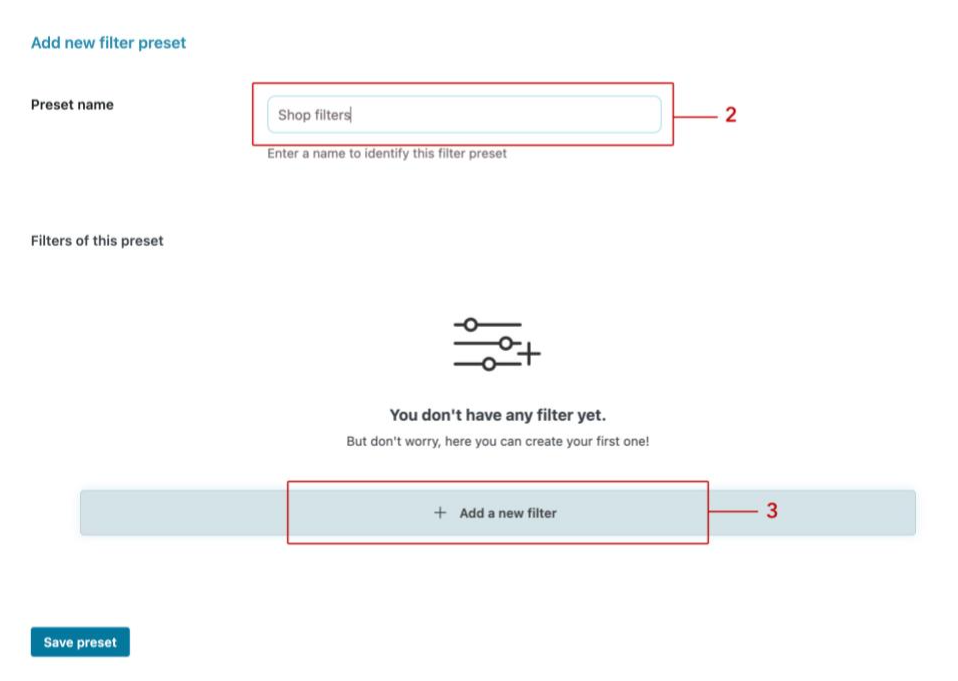
- Navigate to Filter Presets and click Add Preset.

- Enter a Preset Name (e.g., "Shop Filters").
- Click Add a New Filter and choose the type (e.g., color, size, category).
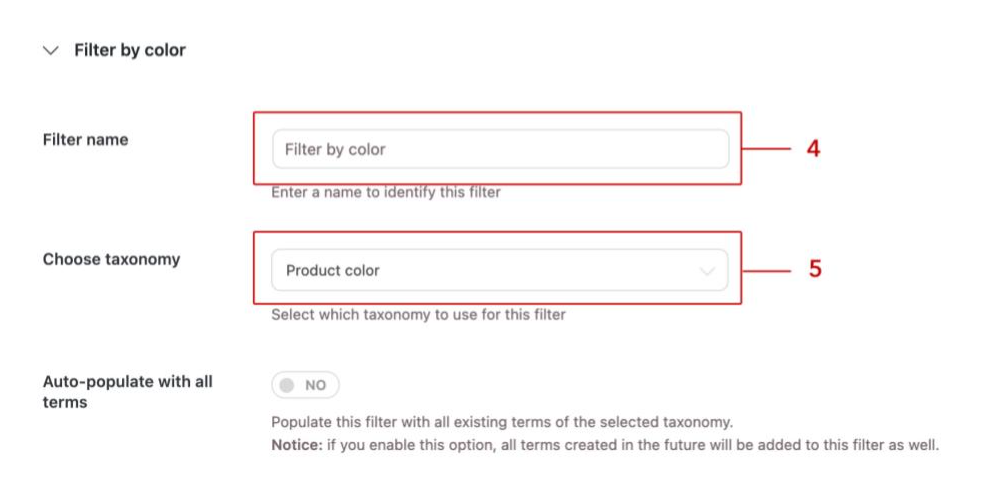
- Enter a name to identify the filter. For example: "Filter by color".
- Choose the taxonomy to use for filters.
If you don't have custom attributes created, you will only see Product categories and Product tags to select. To filter by color, size, material, etc., you must first make these attributes in Products > Attributes. Then, you will also see those attributes in the select list.
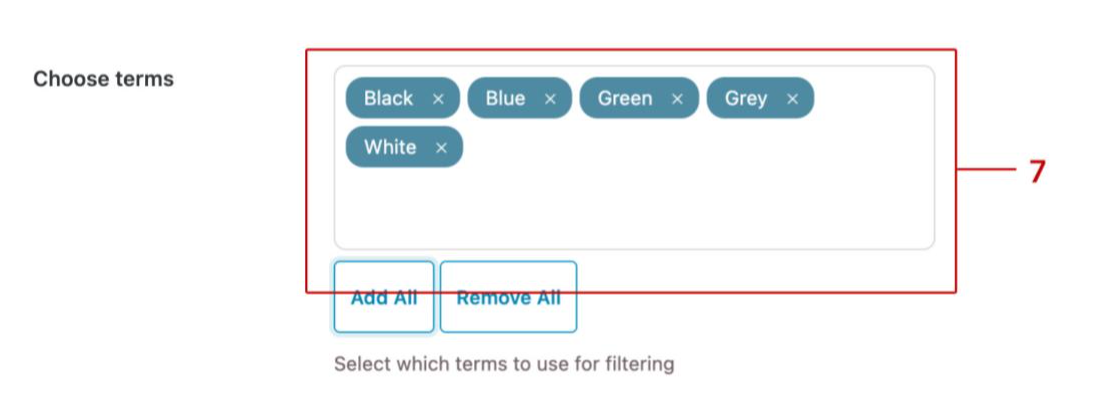
- Choose if you want to populate the filters with all the terms automatically. In this way, if you create 10 different colors as attributes, all 10 colors will be automatically shown in the filter. This option allows you to update the filters with terms added later on automatically, so if you add another color attribute after two weeks, it will be automatically added to the filter.

- If you don't enable the automatic populate options, you have to choose the attributes to show in the filter. You can select all colors or just some of them.
- Choose the filter type - You can choose between checkboxes and radio buttons and select plain text, color swatches, or labels. To create a "Filter by color," we can use the "color swatches" type.

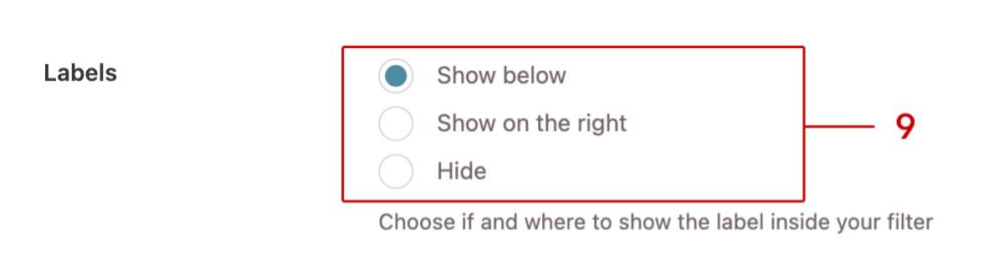
- Choose the label position - you can hide the color label and only show the color swatches, or set the position of the text.
- Choose how many columns to show per row - If you have 8 colors and want to show 4 color swatches per row, enter "4".

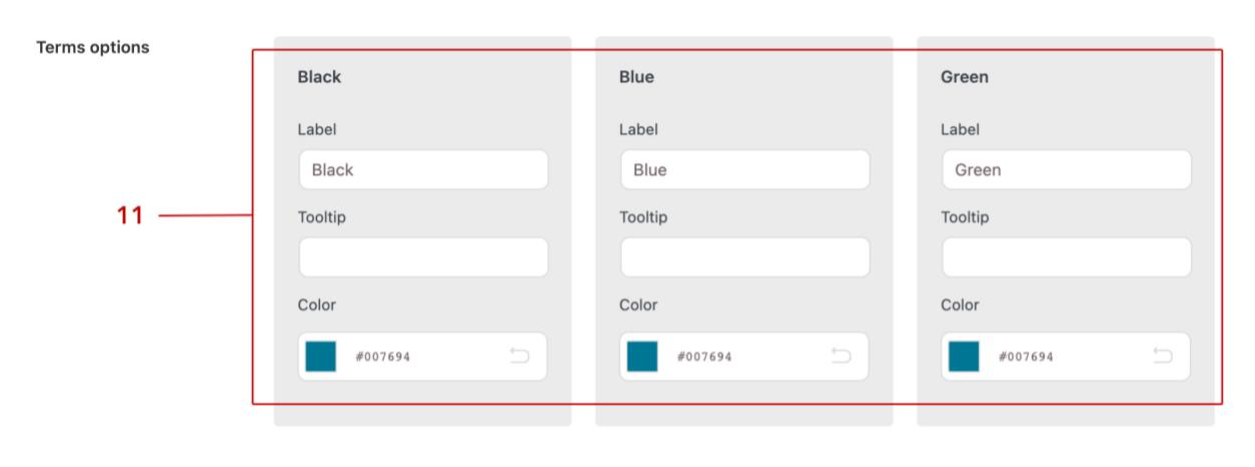
- Customize the terms to show - You can customize the label, set a tooltip, and use the color picker to set the color to show in the color swatch.
- Choose if you want to allow users to select multiple options or not - If enabled, the user can choose two colors—for example, "red" and "black." If disabled, when the user clicks on the second color swatch to select it, the first color will be deselected.
- If the multiple selection option is enabled, you can choose how to use the filter.
AND: the plugin will show only products with both colors set as attributes (for example, a T-shirt with both red and black colors as attributes will be shown, but a T-shirt with only the black attribute will not).
OR: the plugin will show all the products that have red OR black as attributes.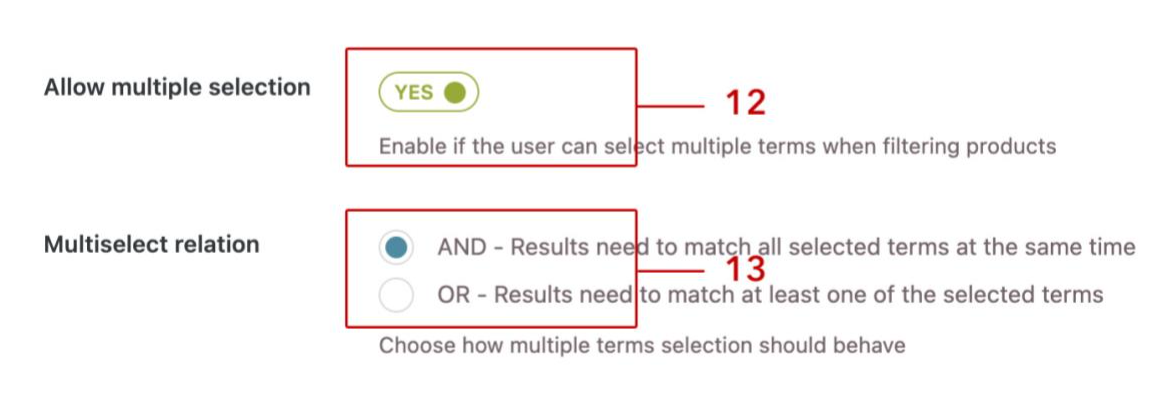
- Save the filter and then save the preset. - The first preset filter is ready! You can now add other filters following the same steps.
Step 4: Insert Filters on Your Shop Page
You can add filters using two methods:
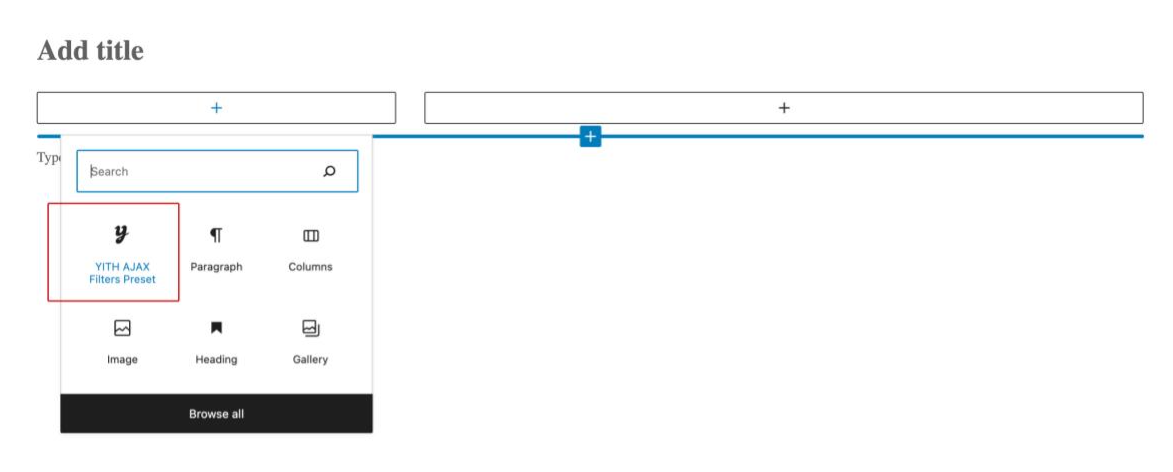
- Gutenberg Block Method – Open the Shop Page, add the Bluehost AJAX Filters Preset block, and select your preset.
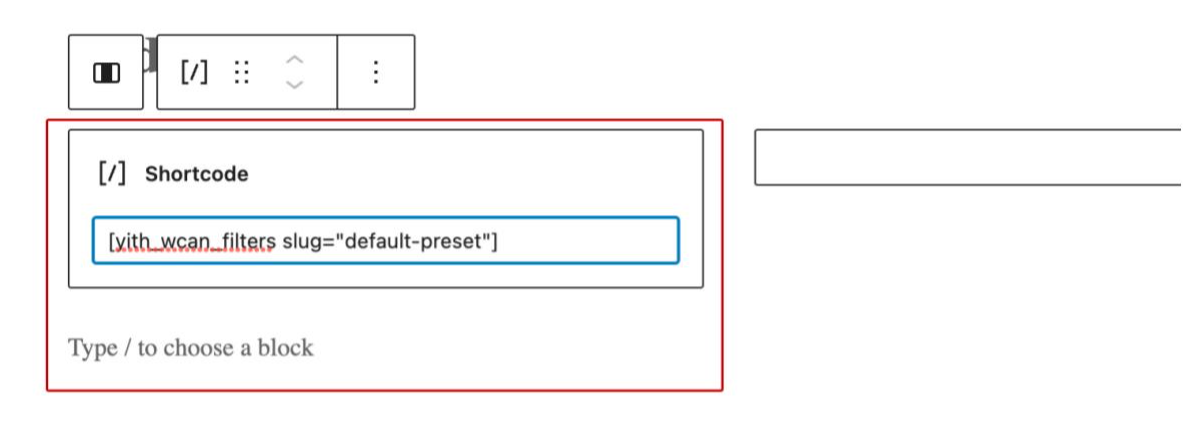
- Shortcode Method – Copy the preset shortcode and paste it where the filters appear.
Bluehost AJAX Product Filter vs. Other WooCommerce Filter Plugins
| Feature | Bluehost AJAX Product Filter | Plugin X | Plugin Y |
|---|---|---|---|
| AJAX Filtering | Yes | Yes | No |
| Multiple Filter Styles | Yes | Limited | Yes |
| Mobile-Friendly Modal Window | Yes | No | Yes |
| Price Filtering | Yes | Yes | Yes |
| Customizable Styling | Yes | No | Yes |
| Premium Features | Extensive | Limited | Some |
Why Choose Bluehost AJAX Product Filter? YITH's plugin offers a fully customizable, real-time filtering experience with superior mobile optimization and advanced features not found in many competitors.
Customization Options for a Seamless User Experience
You can fine-tune the plugin's appearance to match your store's theme:
- Adjust title colors, background colors, and accent colors.
- Enable/disable tooltips, filter counts, and reset buttons.
- Optimize filtering for desktop and mobile users.
Premium Features for Enhanced Filtering
The free version is powerful, but upgrading unlocks additional features:
- Bicolor and image support for color swatches.
- Filters optimized for mobile (modal windows instead of stacked filters).
- More filtering options: by user rating, on-sale products, and adaptive filtering.
- Horizontal layout support for improved UX.
Summary
The Bluehost WooCommerce AJAX Product Filter simplifies product discovery, making shopping faster and more enjoyable for customers. Whether running a small boutique or a large eCommerce store, this plugin can help you increase conversions and improve customer satisfaction.
Finding the right products can overwhelm customers if you run a WooCommerce store with a large inventory. Without effective filtering, users may leave without making a purchase. The Bluehost WooCommerce AJAX Product Filter enhances your store's search functionality, allowing users to refine results instantly without reloading the page. This leads to better user experience, higher engagement, and increased conversions.
If you need further assistance, Bluehost Chat Support is available 24 hours a day, 7days a week while Bluehost Phone Support is available 7 days a week from 7 am-12 midnight EST.
- Chat Support - While on our website, you should see a CHAT bubble in the bottom right-hand corner of the page. Click anywhere on the bubble to begin a chat session.
- Phone Support -
- US: 888-401-4678
- International: +1 801-765-9400
You may also refer to our Knowledge Base articles to help answer common questions and guide you through various setup, configuration, and troubleshooting steps.