How to Upload and Add Images to WordPress Posts and Pages
Are you looking for ways to make your website more engaging? To upload and add images to your WordPress posts and pages is a powerful way to enhance your website's visual appeal, increase user experience, and boost SEO performance. Images have an important role in enhancing content, connecting with audiences, and captivating their attention to maintain engagement.
This article will show you how to add images using the block editor and upload images to the WordPress Media Library.
Here are the topics discussed in this article:
Here is a video guide we created to guide you through the steps.
Uploading Images to the WordPress Media Library
You can upload one or multiple images into the Media Library so they are readily available to use on your WordPress blog post or page.
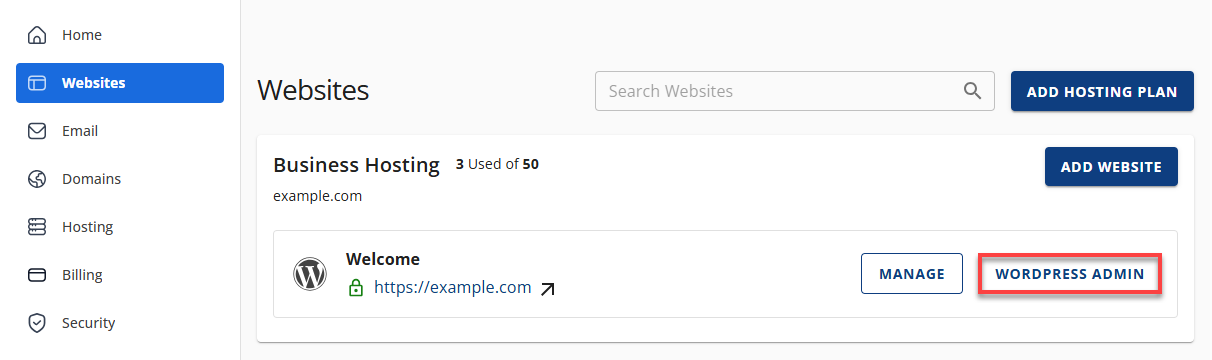
- Log in to your Bluehost Portal.
- In the left-hand menu, click Websites.
- Click the WordPress Admin button located next to the website you want to manage.
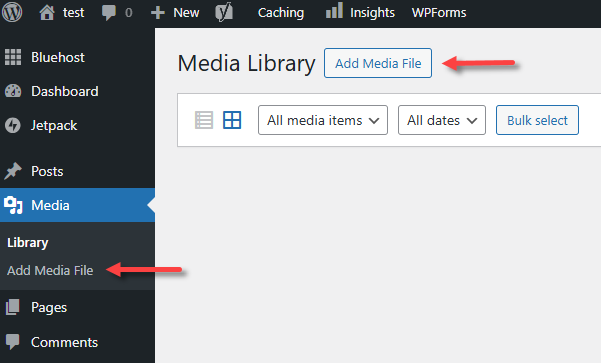
- Click Media on the left menu, then select Add Media File. You can also click the Add Media File button located at the top of the right pane.
- You can drag and drop your images ot the right pane. You can also click on the Select Files button to browse and select one or more images from your computer, then click Open.

- Wait for your images to upload. Please note that the maximum file size allowed for a single upload is 512 MB.
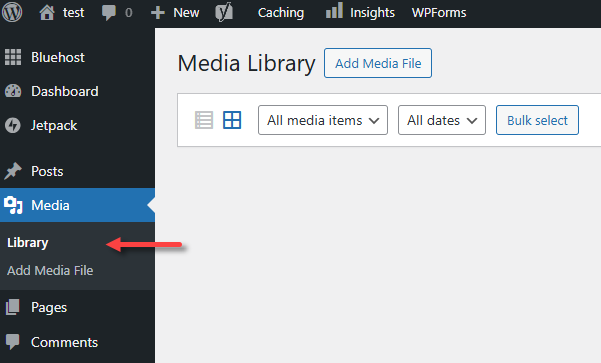
- Once uploaded, you can click on Library to view the uploaded images.
For troubleshooting WordPress images, please visit the article, Troubleshooting: Images not Displaying on Website
Adding Images to WordPress Posts or Pages
All common image file types, such as JPG, PNG, and GIF, are accepted.
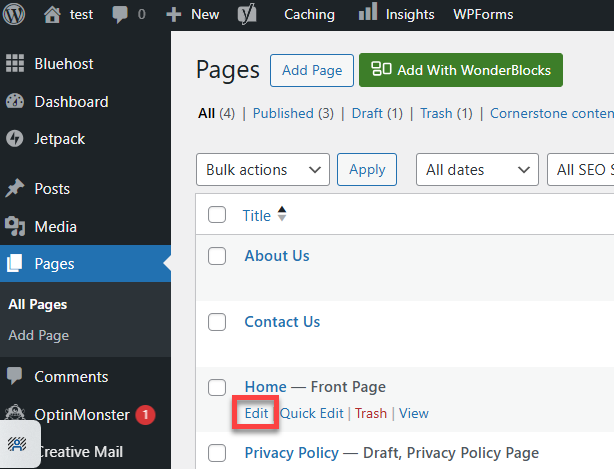
- In your WordPress dashboard, navigate to the post or page where you wish to add images.
- Click the post or page title or select the Edit option below it.
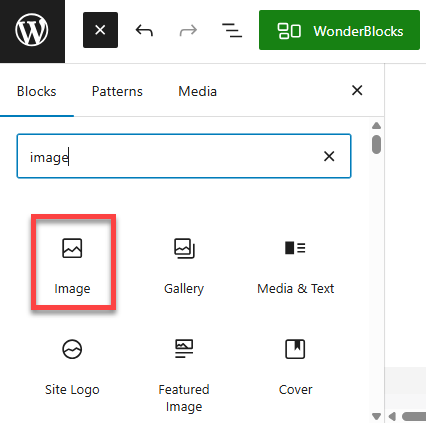
- Place your cursor on the page where you want to add the image, then click the Block Inserter or plus (+) icon in the top-right corner of your dashboard.

- In the Blocks menu, type "image" in the search box, and select the Image element. You can also scroll down to the Media section and then select Image.
To add an image, go to the post or page where you want to insert an image or picture.
- There are several ways to add an image to your post or page:
- Upload a new image from your device.
- Use an image from your Media Library.
- Link to an image using a URL.
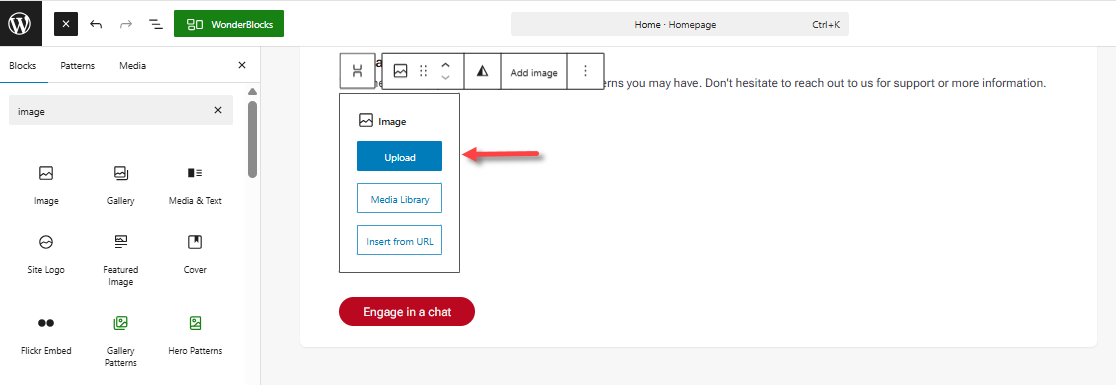
- To upload, click the Upload button, browse for your image file, then click Open.
- Once added, you can further customize your WordPress page using the available display settings, then click on Save or Publish at the top menu.
Summary
Discover how to add images to your WordPress posts and pages via the Block Editor to improve your website's visual appeal, user engagement, and SEO performance, and to upload images to your WordPress Media Library. Using images effectively is important for improving your content and engaging your audience, whether you're writing blogs or making product pages.
If you need further assistance, Bluehost Chat Support is available 24 hours a day, 7days a week while Bluehost Phone Support is available 7 days a week from 7 am-12 midnight EST.
- Chat Support - While on our website, you should see a CHAT bubble in the bottom right-hand corner of the page. Click anywhere on the bubble to begin a chat session.
- Phone Support -
- US: 888-401-4678
- International: +1 801-765-9400
You may also refer to our Knowledge Base articles to help answer common questions and guide you through various setup, configuration, and troubleshooting steps.