How to Manage SSH Keys for Secure Server Access
SSH keys (Secure Shell) provide a secure and encrypted way to authenticate and communicate with your hosting server without using passwords. In Bluehost, you can easily add and manage SSH keys through the Bluehost Portal to ensure safe remote access to your server.
Access SSH Management
Bluehost’s SSH Management panel allows you to add, view, and manage SSH keys in one place.
- Log in to your Bluehost Portal.
- In the left-hand menu, click Websites.
- Click the Manage Site button located next to the website you want to manage.

- Navigate to the Files & Access tab in the top menu.

- Locate the SSH section and click Manage.
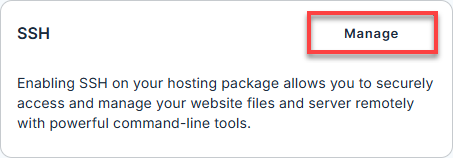
You’ll be taken to the SSH Management panel.
Add SSH Keys
Follow the steps below to add a new SSH key to your account:
Step 1: Generate Your SSH Keys
Before adding a key, generate a public and private key pair on your local machine. Refer to our support guide for detailed instructions: Generate SSH Keys: Windows & macOS/Unix (PowerShell, PuTTY).
Step 2: Add the Public Key to Bluehost
- In the SSH Management panel, locate the Manage SSH Keys section.
- Click Add SSH Key.
- In the pop-up window:
- Enter a Key Name
- Paste your generated public key.
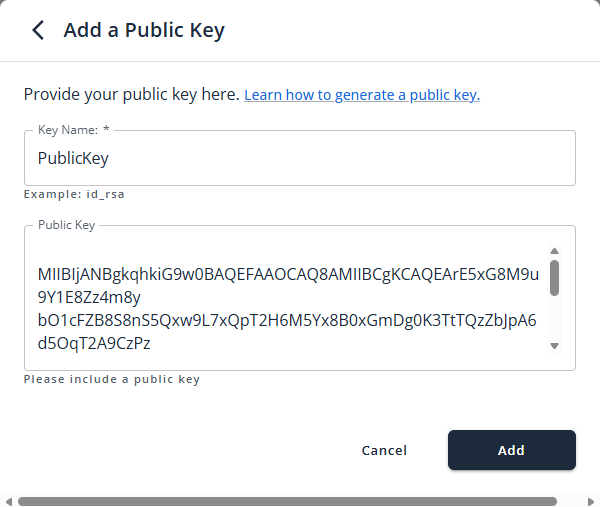
- Click the Add button.
Your new SSH key will now appear in the list.
Manage SSH Keys
From the SSH Management panel, you can perform the following actions:
Enable or Disable Shell Access
Shell access controls whether SSH connections are allowed for your account.
- In the SSH Management panel, locate the Connect over SSH section.
- Switch the toggle on or off as needed for Shell Access.
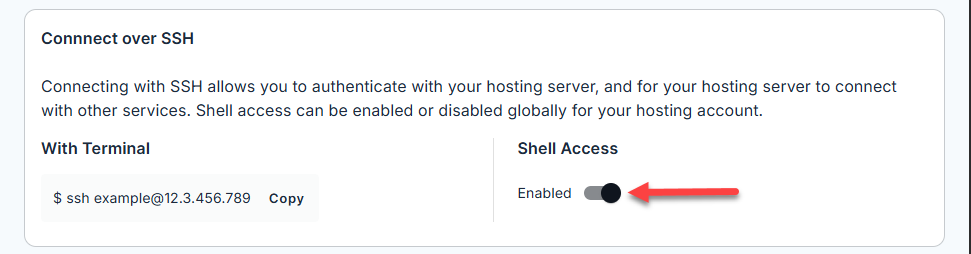
A confirmation message will appear at the top of the page indicating the current status.
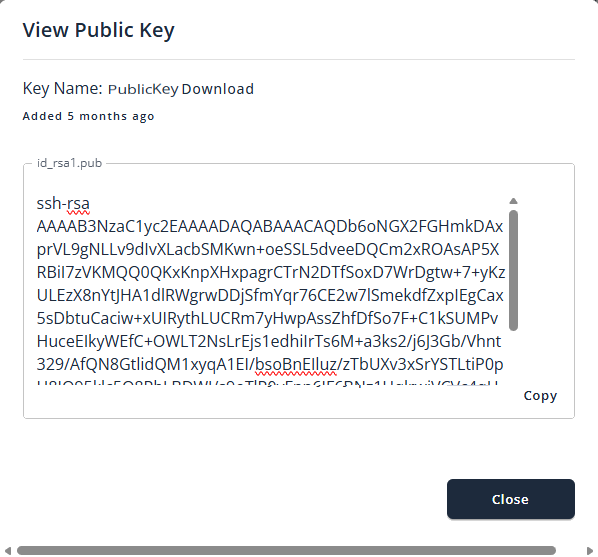
View SSH Key Details
- In the Manage SSH Keys section, find the key you want to review.
- Click the vertical ellipsis (⋮) next to the key.
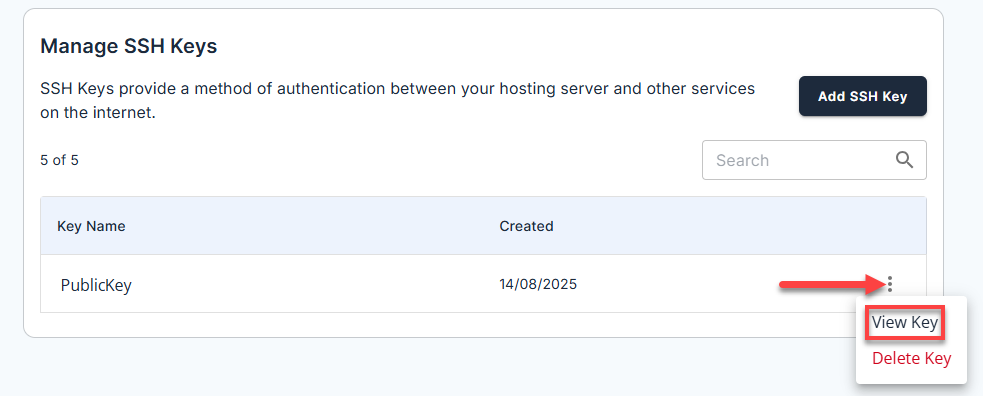
- In the right pop-up window, you can copy and download the public key using the Copy and Download option.
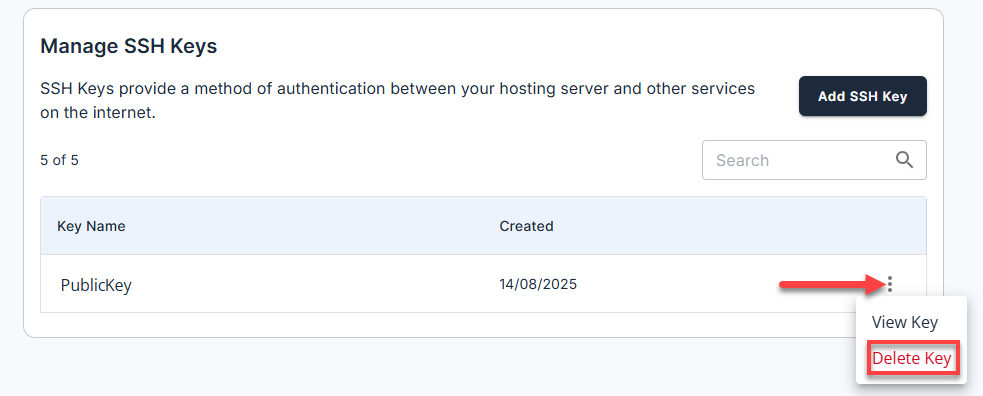
Delete an SSH Key
- Locate the SSH key you want to remove.
- Click the vertical ellipsis (⋮) next to the key.
- Select Delete Key.
- Confirm by clicking Delete in the pop-up.
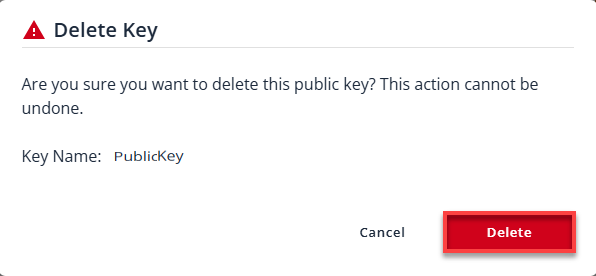
The SSH key will be immediately removed from the account.
Access Learning Resources
You can also access support guides to learn more about SSH keys, including how to use an external client, basic SSH commands, and common SSH errors.

Summary
Managing SSH Keys is essential for secure and efficient server access. With Bluehost’s SSH Management panel, you can easily generate, add, enable, and remove SSH keys—ensuring encrypted connections and reducing reliance on password-based authentication.
Using SSH keys improves both security and convenience for remote server management.
If you need further assistance, Bluehost Chat Support is available 24 hours a day, 7days a week while Bluehost Phone Support is available 7 days a week from 7 am-12 midnight EST.
- Chat Support - While on our website, you should see a CHAT bubble in the bottom right-hand corner of the page. Click anywhere on the bubble to begin a chat session.
- Phone Support -
- US: 888-401-4678
- International: +1 801-765-9400
You may also refer to our Knowledge Base articles to help answer common questions and guide you through various setup, configuration, and troubleshooting steps.