Bluehost Self-Managed VPS: Reimage Your Server for Claude Code Installation
Claude Code is an advanced coding environment you can deploy on your Bluehost Self-Managed VPS. This article discusses installing Claude Code via the Bluehost Portal, SSHing into your server, viewing the on-disk README file, and setting up your Anthropic API Key.
- Install Claude Code Using Bluehost Portal
- How to Get and Set Up Your Anthropic API Key
- Additional Information & Example Documentation Output
- Summary
Install Claude Code Using Bluehost Portal
To install Claude Code:
- You can install only one application using the one-click installer.
- To change or delete your application, follow the guide: Bluehost Self-Managed VPS: How to Change and Delete an Application. Create a backup of your existing applications or templates.
- If you want to keep your current template, install the new application manually using SSH. The system will automatically apply the recommended OS for Claude Code.
- Log in to your Bluehost Portal.
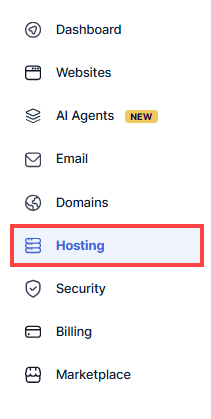
- In the left-hand menu, click Hosting.
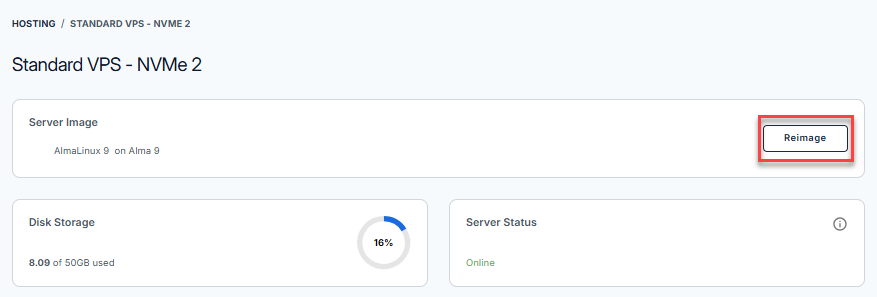
- Click the Manage button on the Self-Managed VPS package.

- Click the Reimage button.
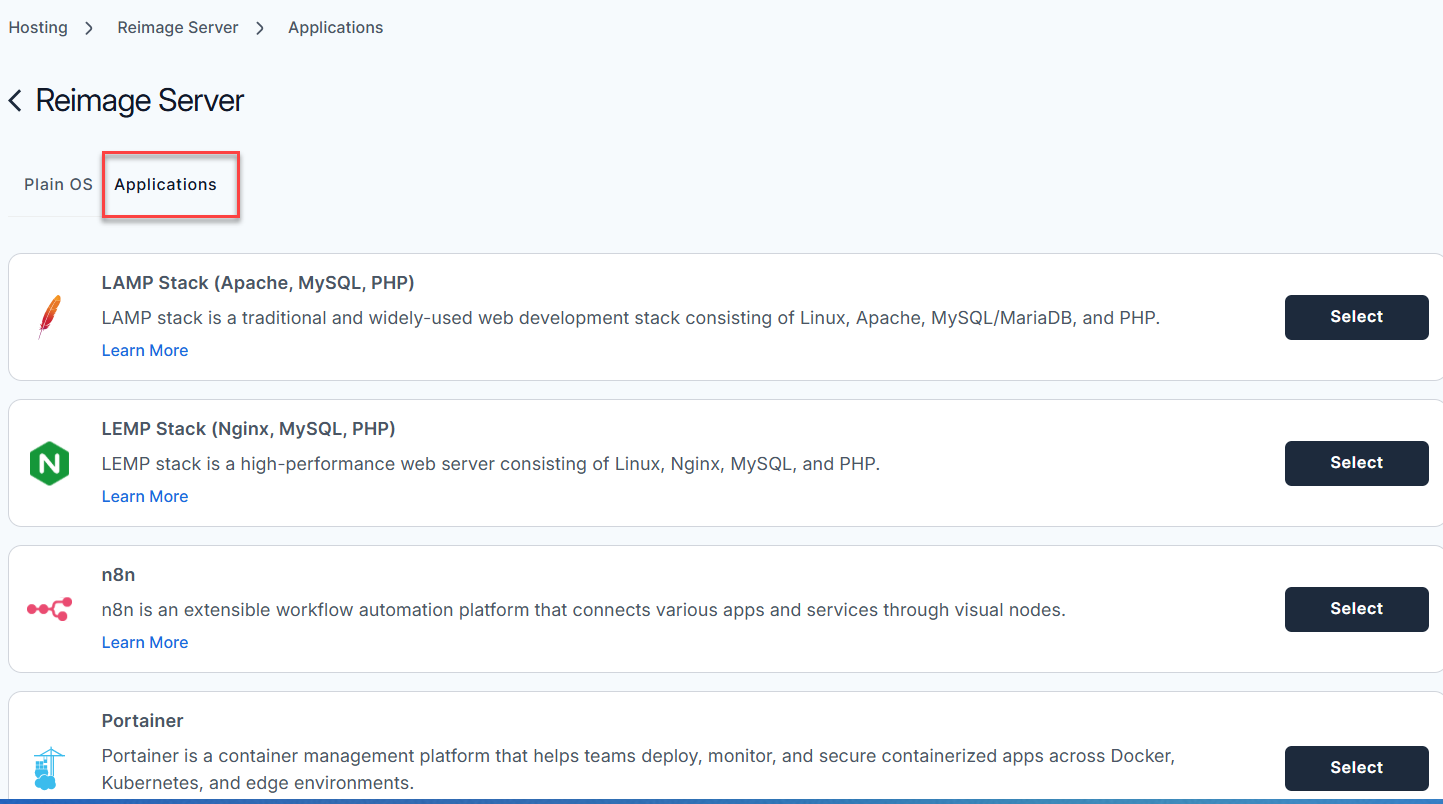
- Select the Applications tab.
- From the list, find Claude Code and click Select.
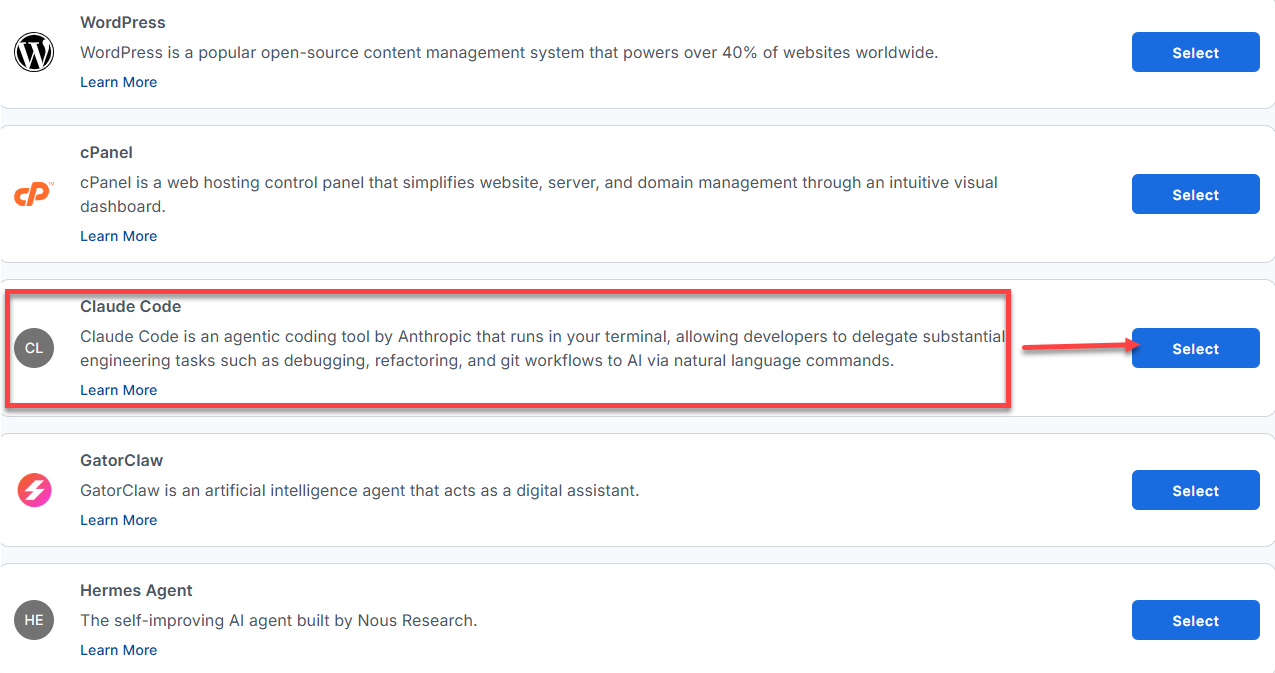
- To confirm, please type "reimage" and then click Proceed to start the process.
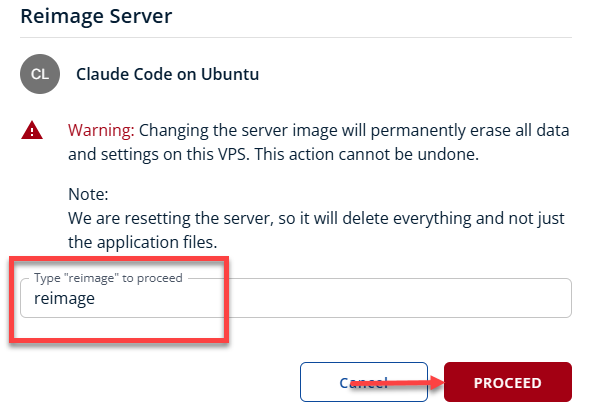
- Wait a few moments while the installation completes.

- Once completed, you will see Claude Code listed in the Server Image section.
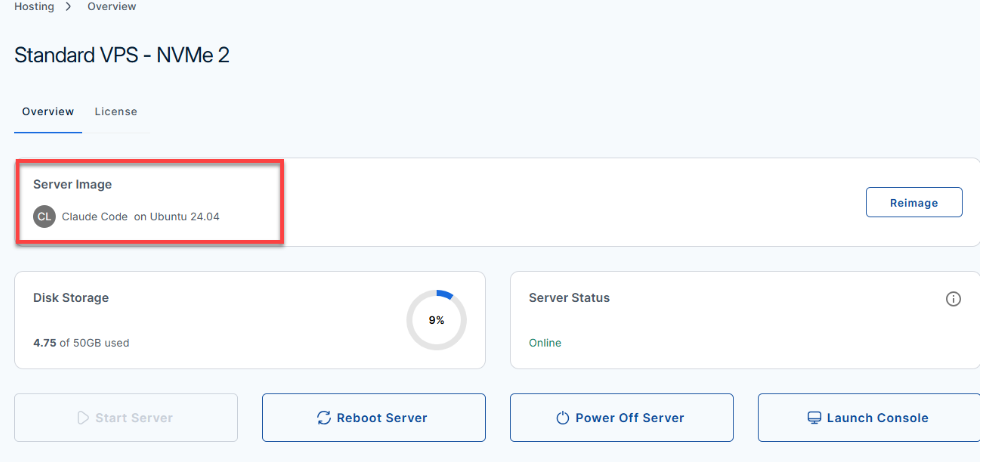
- Once completed, you will see Claude Code listed in the Server Image section.
How to Get and Set Up Your Anthropic API Key
To use Claude Code on your Bluehost Self-Managed VPS, you'll need to supply an Anthropic API Key (ANTHROPIC_API_KEY). This key allows your server to securely connect to the Claude API.
Quick Start:
When you log in to your server for the first time via SSH, you're greeted with a welcome message that includes all the essential commands and instructions for setting up your Anthropic API key right in your terminal. This message makes it easy to follow the setup process step-by-step.
For example, after connecting via SSH, you'll see:
Welcome to Ubuntu 24.04.4 LTS (GNU/Linux 6.8.0-111-generic x86_64)
********************************************************************************

Claude Code Ubuntu 24.04 image is installed and ready.

ANTHROPIC_API_KEY is not configured yet.

Set it for current shell:
  export ANTHROPIC_API_KEY="sk-ant-..."

Persist it for root:
  echo 'export ANTHROPIC_API_KEY="sk-ant-..."' >> /root/.profile
  source /root/.profile

Verify installation:
  claude --version

Start Claude Code:
  claude

Documentation:
  /root/README.md

********************************************************************************
Where to get your API key:
- Go to the Anthropic Console and sign up for an account.
- Navigate to the API Keys or Account Settings section and create a new API key.
(Your API key will look similar to:sk-ant-xxxxxxxxxxxxxxxx) - Copy this key. Keep it safe — do not share your real API key with others.
Creating an Anthropic account is free. However, generating an API key and accessing Claude typically requires entering billing information and may incur charges. Please refer to Anthropic's pricing page for current details.
How to set your API key
Once you have your key, add it to your server environment using the commands displayed in your welcome message, or use the following:
- For the current terminal session (temporary):
export ANTHROPIC_API_KEY="sk-ant-xxxxxxxxxxxxxxxx" - To persist the key (recommended):
echo 'export ANTHROPIC_API_KEY="sk-ant-xxxxxxxxxxxxxxxx"' >> /root/.profile source /root/.profile - Verify Claude Code is installed:
Expected output:claude --versionClaude Code CLI version 1.2.3 - Start Claude Code:
Expected prompt:claudeclaude>
Error: ANTHROPIC_API_KEY not set. Please export your API key and try again.For advanced usage or troubleshooting, see the local documentation on your server:
cat /root/README.md
Additional Information & Example Documentation Output
When you run the following command to check the local documentation:
cat /root/README.md
Sample output:
Last login: Wed Jun  3 14:08:04 2026 from 203.0.113.5
root@server-123456:~# cat /root/README.md
# Claude Code

## Description

Claude Code is an agentic coding tool by Anthropic that runs in your terminal, allowing developers to delegate substantial engineering tasks such as debugging, refactoring, and git workflows to AI via natural language commands.

## Services

- SSH on port 22 (protected by UFW)
- Claude Code CLI available in terminal sessions

## Links

- Claude Code Installation: https://claude.ai/install.sh
- Anthropic Claude: https://www.anthropic.com/claude
- Node.js: https://nodejs.org/

## What's Included

- Ubuntu 24.04 minimal base image
- Node.js 22.x from NodeSource repository
- Claude Code CLI installed globally
- UFW firewall configured (SSH only)
- Automated first-boot configuration check
- MOTD support via /etc/update-motd.d/99-claude-code
- Test suite for validation

## Installation Process

The build process performs the following steps:

1. Prerequisites: Installs required packages (curl, ca-certificates, gnupg, xz-utils)
2. Node.js Setup: Removes any distro-provided Node.js/npm to avoid vulnerabilities, installs Node.js 22.x from NodeSource
3. Claude Code Installation: Attempts native installer first (curl -fsSL https://claude.ai/install.sh | bash), falls back to npm (npm install -g @anthropic-ai/claude-code) if needed
4. Configuration: Sets up PATH, permissions on copied files, and writes installation notes
5. Validation: Verifies Node.js, npm, and Claude Code are working
6. Firewall: Configures UFW with SSH access only
7. Cleanup: Removes package caches and temporary files

## Configuration

### PATH Setup

The image configures the shell PATH to include common Claude Code installation locations via /etc/profile.d/claude-code.sh:

- /usr/local/bin
- ~/.local/bin
- ~/.claude/bin
- ~/.npm-global/bin

### First Boot

On first boot, the system (/var/lib/cloud/scripts/per-instance/001_onboot) checks for an Anthropic API key in:

- Environment variable ANTHROPIC_API_KEY
- /etc/environment
- /root/.profile

If found, it writes a ready-to-use message to /root/.app_passwords/claude-code-firstboot.txt. If not, it provides setup instructions in the same file.

## Usage

### Setting API Key

Before using Claude Code, you need an Anthropic API key from https://console.anthropic.com/.

For current shell only:
export ANTHROPIC_API_KEY="sk-ant-..."

Persist for root user sessions:
echo 'export ANTHROPIC_API_KEY="your_api_key_here"' >> /root/.profile
source /root/.profile

### Running Claude Code

Verify installation:
claude --version

Start Claude Code:
claude

If claude is not found after logging in, reload your shell environment:
source /etc/profile
source ~/.bashrc
claude

## Security

- UFW firewall enabled with default deny incoming
- Only SSH (port 22/tcp) allowed inbound
- All outbound traffic allowed
- Root login via SSH with key authentication only

## Testing

The image includes a test suite (/root/app_test/main.t) that validates:

- Claude Code binary is executable in expected locations
- claude --version works in shell environment with PATH loaded

Run tests:
cd /root/app_test
perl main.t
Summary
Claude Code on a Bluehost self-managed VPS brings top-notch, AI-powered coding help right to your server. This improves your workflow, security, and productivity. Setting up Claude Code is a breeze. Just follow a few simple steps, and use your Anthropic API key for secure login. It gives you an awesome, distraction-free coding environment right off the bat. Whether you're debugging code, automating tasks, or collaborating on big projects with team members, this setup has all the pro tools you need. Plus, you get scalable VPS hosting. Start now and check out how AI can make development a cinch with Claude Code and Bluehost.