Bluehost Self-Managed VPS: How to Change an Application
Managing applications on your Bluehost Self-Managed VPS is a straightforward process that allows you to keep your server environment optimized and up to date. Currently, Bluehost allows only one application to be installed on your Self-Managed VPS at a time. If you need to switch to a new application or completely remove the one currently installed, Bluehost makes the process easy through your Bluehost Portal. This guide will take you step-by-step through the process of changing or deleting applications on your VPS package, giving you full control over your server’s software setup.
Here is a video that demonstrates how to install an application on a Self-Managed VPS hosting.
How to Change an Application
- Log in to your Bluehost Portal.
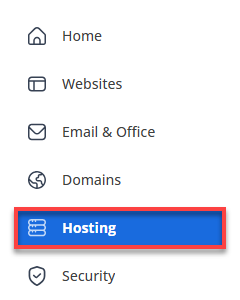
- Click Hosting in the left-hand menu.
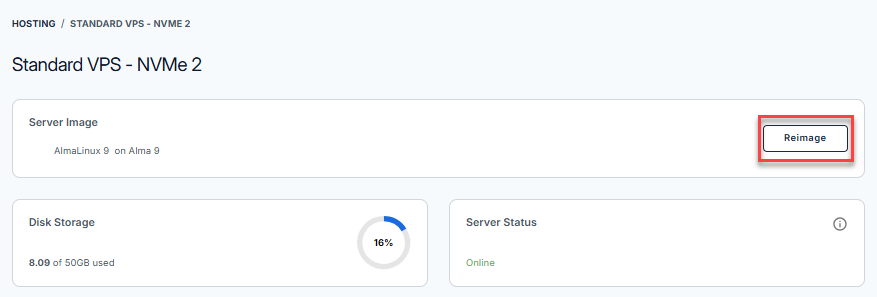
- Click the Manage button next to the Self-Managed VPS plan.

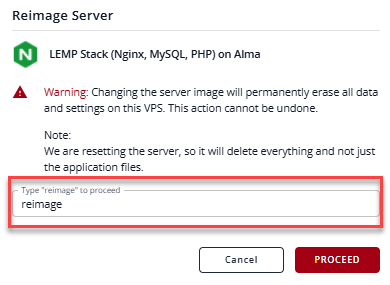
- Navigate to the Server Image section, then click the Reimage button.
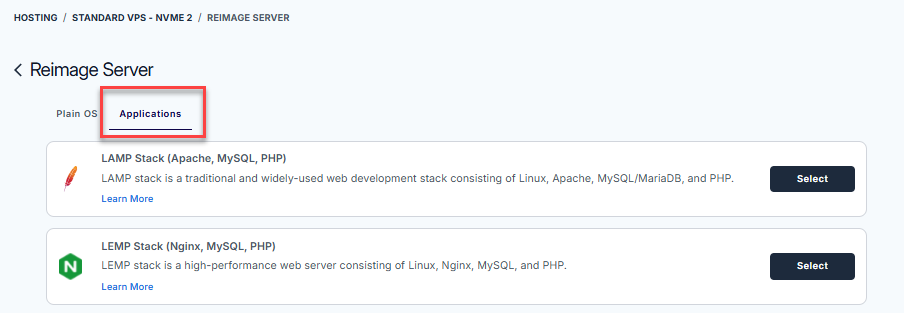
- In the Reimage Server page, select the Applications tab.
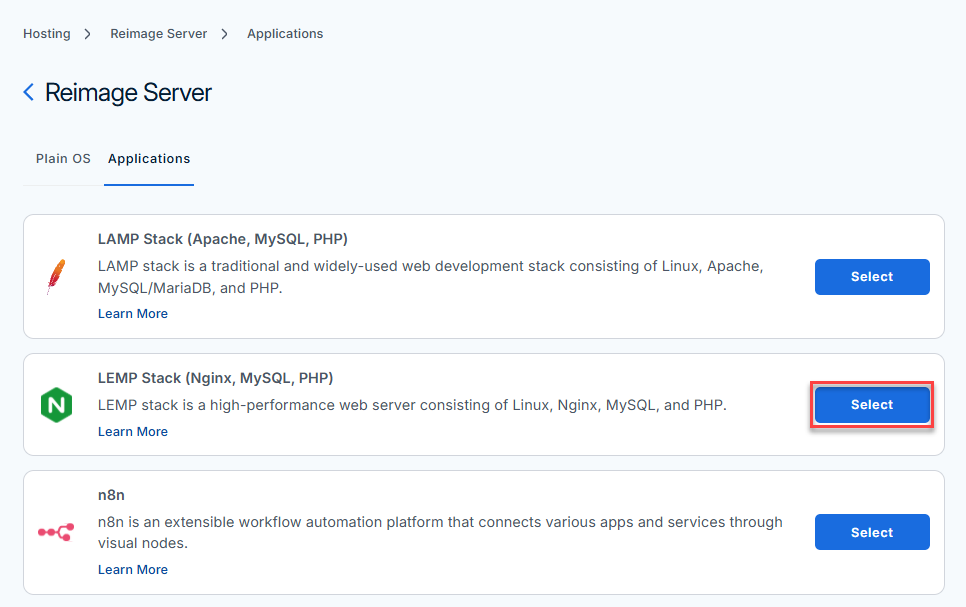
- From the list of available applications, click Select on your preferred application.
- On the pop-up message, type "reimage" in the field, then click Proceed.
- Wait for a few minutes for the process to complete. Once done, the new application will appear in the Server Image section.
Related Articles
Summary
Changing applications on your Bluehost Self-Managed VPS is a simple process that gives you control over your server’s software. Since only one application may be installed at a time, switching applications will remove the previous one completely. By following these steps in your Bluehost BH Portal, you can easily replace applications and keep your VPS configured exactly how you need it. Remember to wait a few minutes for the process to finish after making changes.