Bluehost Self-Managed VPS: Reimage Your Server for Hermes Agent + Open WebUI Installation
Learn how to reimage your Self-Managed VPS and install Hermes Agent + Open WebUI using the one-click installer. This guide covers how to start the process, select the application, and confirm your server update.
Reimage Your Server for Hermes Agent + Open WebUI Installation
Important:
- You can install only one application using the one-click installer.
- To change or delete your application, follow the guide: Bluehost Self-Managed VPS: How to Change and Delete an Application. Create a backup of your existing applications or templates.
- If you want to keep your current template, install the new application manually using SSH. The system will automatically apply the recommended OS for Hermes Agent + Open WebUI.
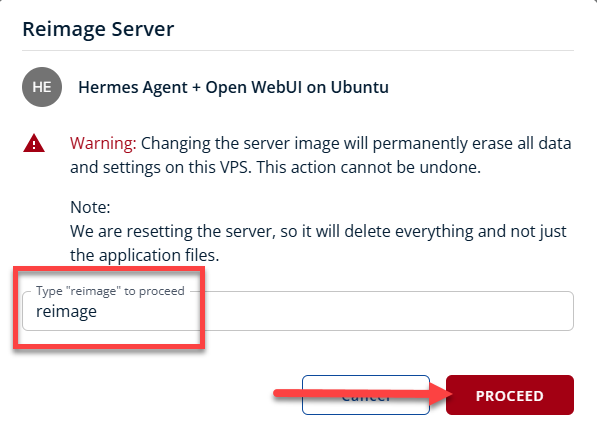
Changing the server image will permanently erase all data and settings on this VPS. This action cannot be undone.
- Log in to your Bluehost Portal.
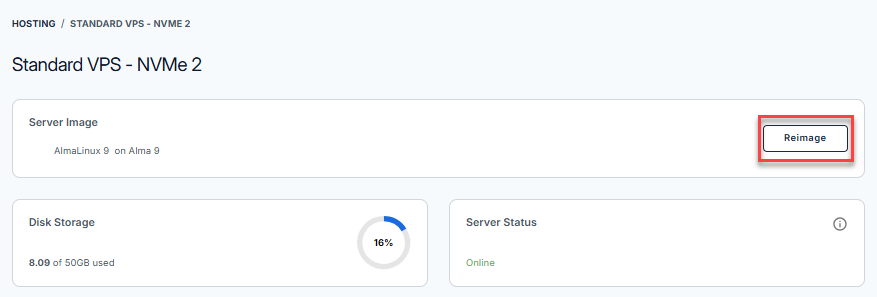
- In the left-hand menu, click Hosting.

- Click the Manage button on the Self-Managed VPS package.

- Click the Reimage button.
- Select the Applications tab.
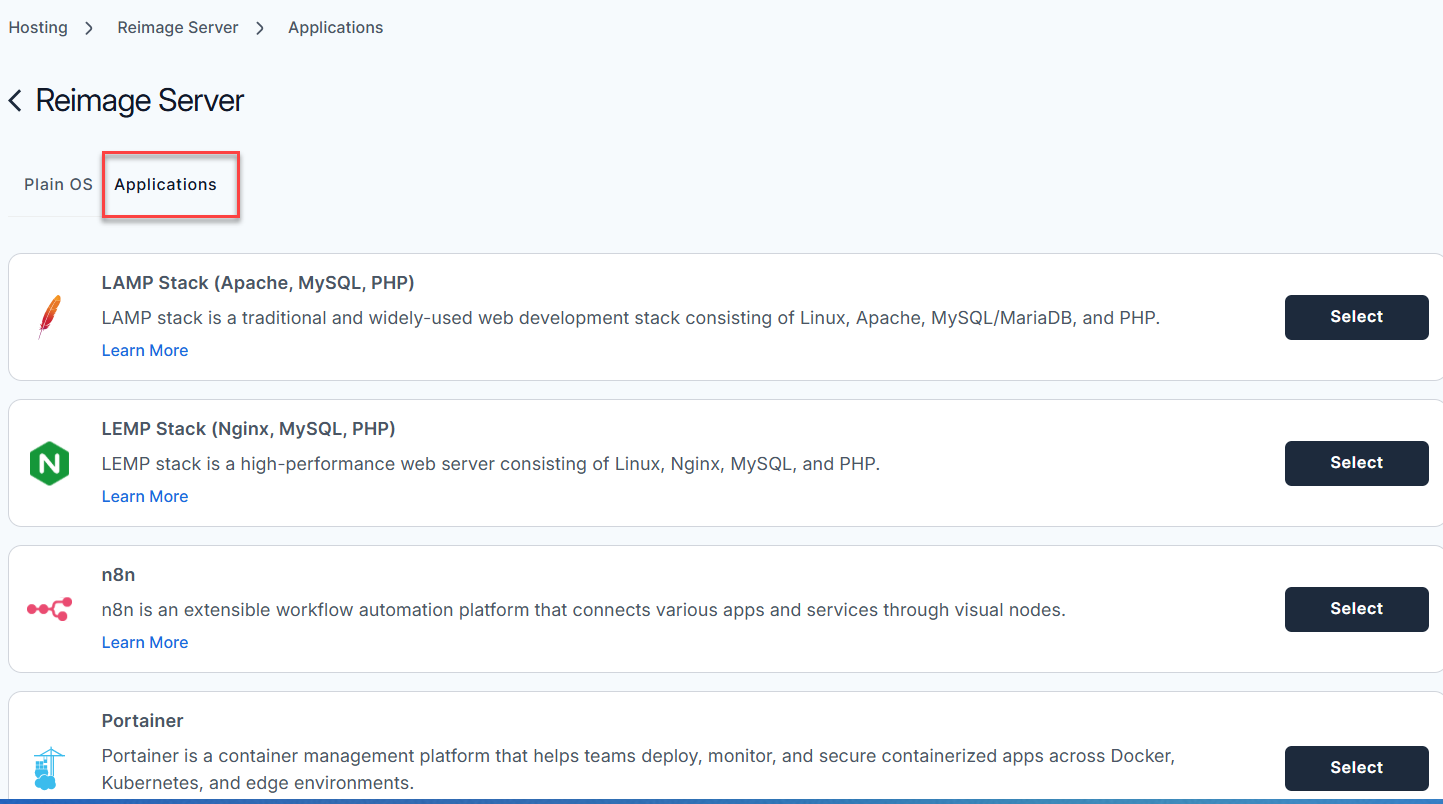
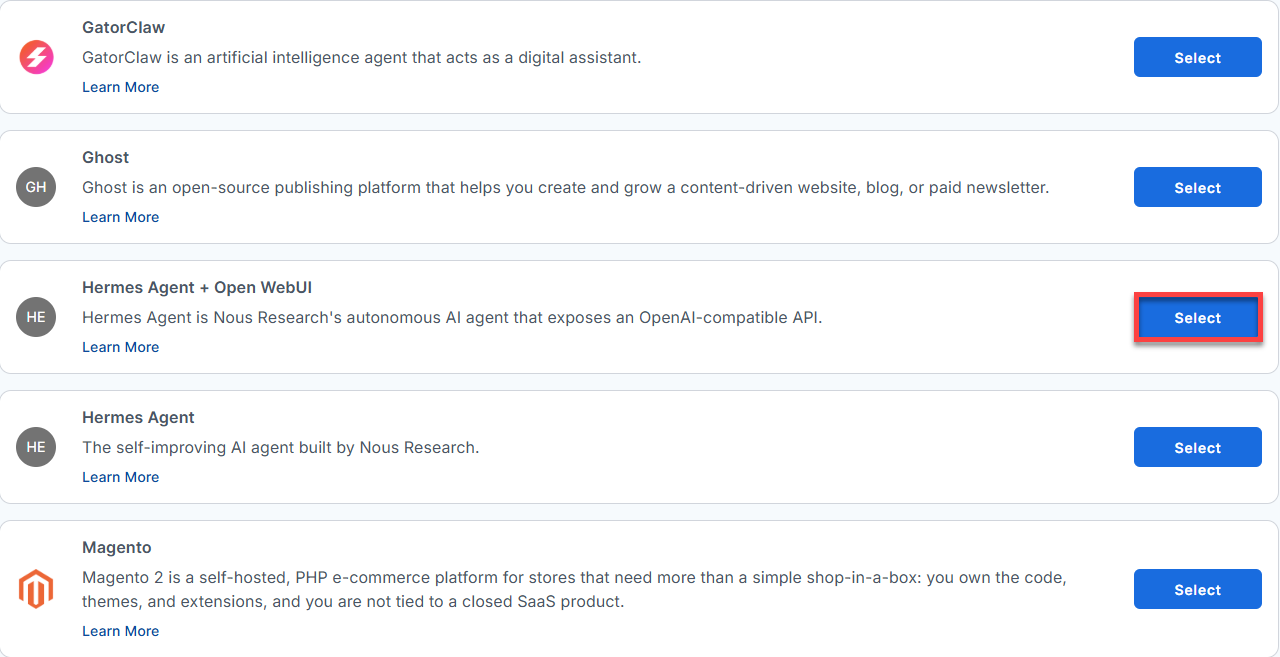
- From the list, locate Hermes Agent + Open WebUI and click Select.
- To confirm, type "reimage" and then click Proceed to start the process.
- Wait a few minutes while the installation completes.

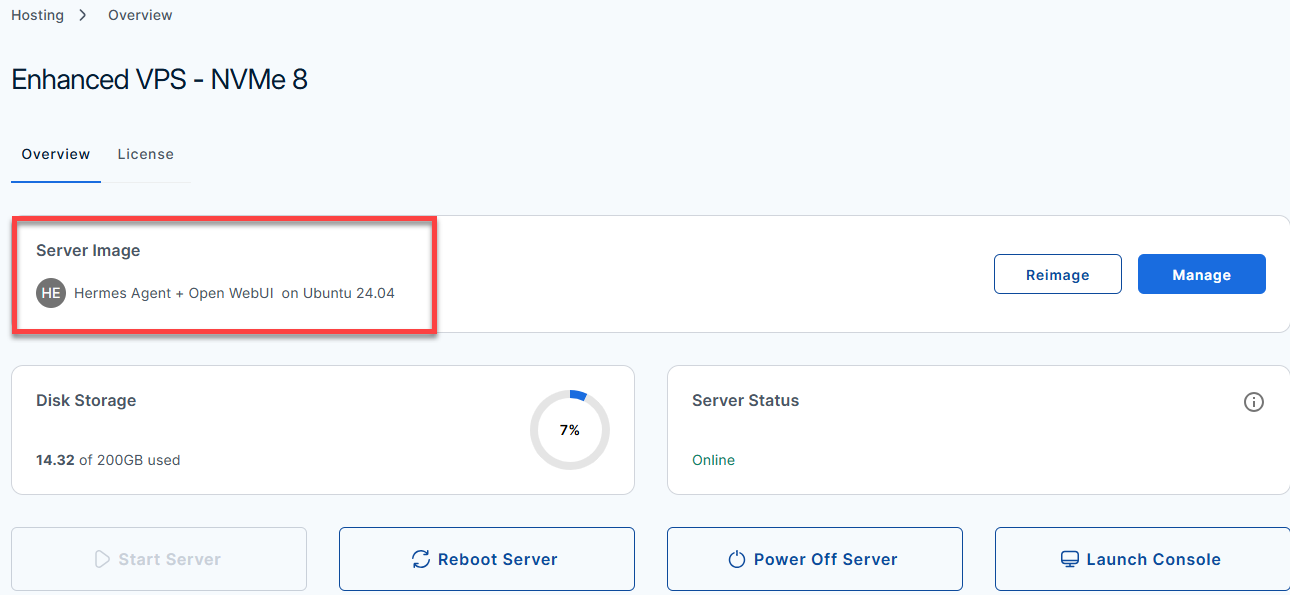
- Once completed, you will see Hermes Agent + Open WebUI listed in the Server Image section.
Summary
By following these steps, you can reimage your Self-Managed VPS to install Hermes Agent + Open WebUI using the one-click installer. Remember, reimaging will erase all existing data, so ensure you have backups before proceeding. Once complete, Hermes Agent + Open WebUI will be available on your server for use.
Did you find this article helpful?