Bluehost Self-Managed VPS: Reimage Your Server for Moodle Installation
Reimaging your Self-Managed VPS is like starting fresh with your VPS. It wipes your existing operating system and replaces it with Moodle. It wipes out everything on the server so you can rebuild in a clean, stable environment.
When you choose to reimage, the system will automatically install the latest available version of Moodle. Unlike during the initial purchase, there isn’t an option to select a specific OS version.
Why Reimage a Server?
Reimaging is usually the best option when starting over is faster and more effective than troubleshooting. You might consider it if:
- Your server has ongoing errors that are difficult to fix.
- You want to remove malware or security risks.
- Performance has noticeably slowed down.
- You’re preparing the server for a new project.
- Your current setup no longer fits your needs.
Advantages of Reimaging a Server
Switching to Moodle comes with several practical benefits:
- Clean slate – Removes clutter, unused files, and broken configurations.
- Better performance – Starts fresh with an optimized system.
- Improved security – Clears out hidden vulnerabilities or threats.
- Reliable environment – Moodle is a stable, enterprise-grade OS.
- Long-term support – Regular updates suitable for production use.
How to Reimage Your VPS to Moodle in your Bluehost Portal
- You can install only one application using the one-click installer.
- To change or delete your application, follow the guide: Bluehost Self-Managed VPS: How to Change and Delete an Application. Create a backup of your existing applications or templates.
- If you want to keep your current template, install the new application manually using SSH. The system will automatically apply the recommended OS for Moodle.
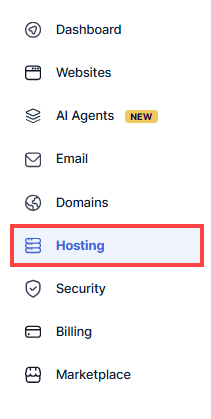
- Log in to your Bluehost Portal.
- In the left-hand menu, click Hosting.
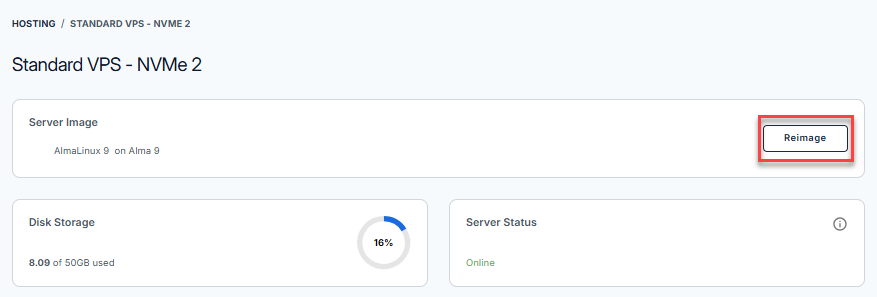
- Click the Manage button on the Self-Managed VPS package.

- Click the Reimage button.
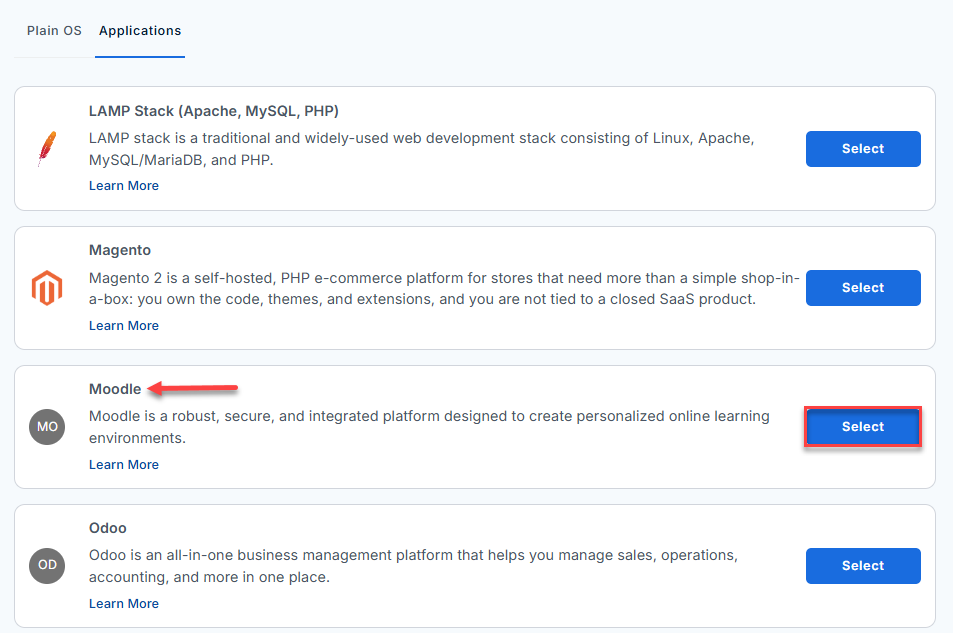
- Select the Applications tab.
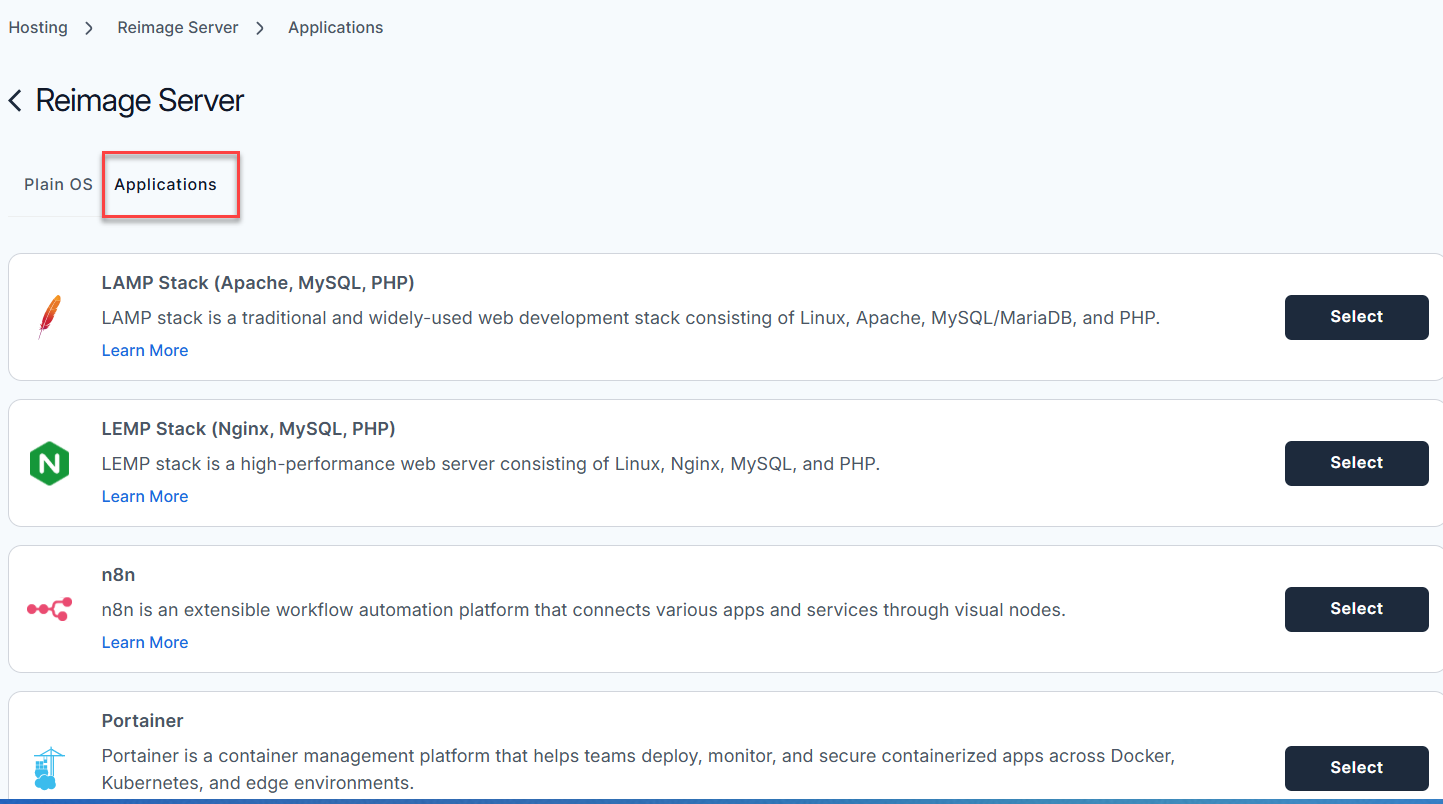
- From the list, locate Moodle and click Select.
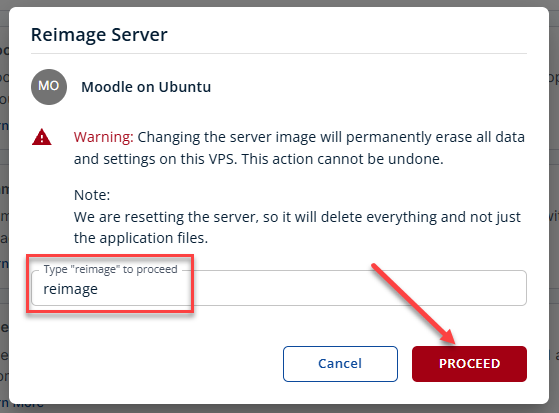
- To confirm, type "reimage" and then click Proceed to start the process.
- Wait a few minutes while the installation completes.

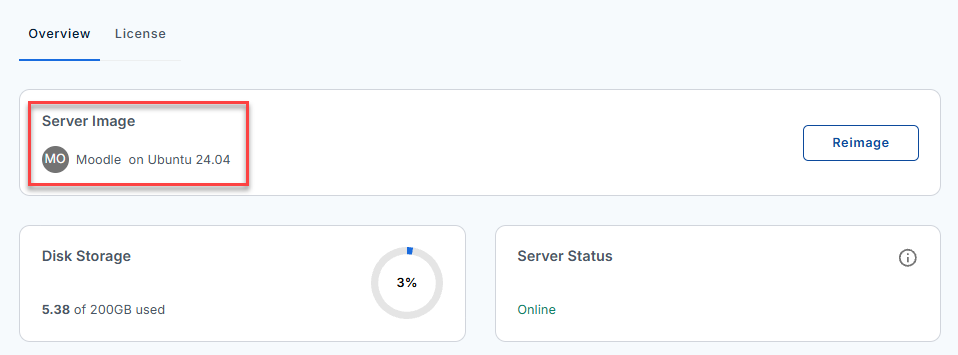
- Once completed, you will see Moodle listed in the Server Image section.
After Reimaging
Once the process is complete, take a moment to make sure everything is working as expected:
- Access your server and confirm it’s online
- Reinstall any required applications
- Restore your backups
- Test your websites and services
- Double-check configurations
Setting Up Your Moodle Base: A Step-by-Step Guide
Follow these steps to complete your initial setup.
Step 1: Set Up and Secure Your VPS
- Log in to your Bluehost Portal.
- In the left-hand menu, click the Hosting tab.
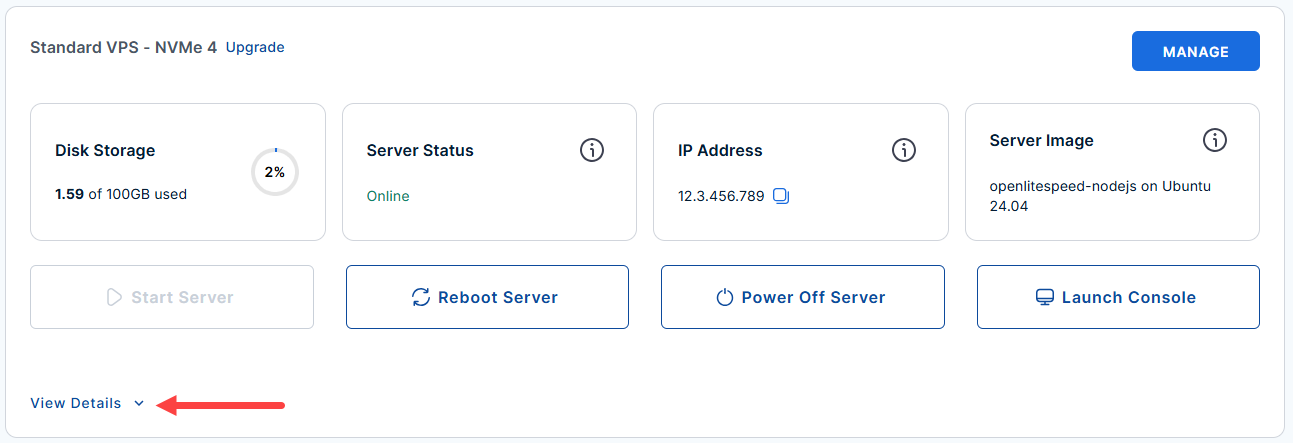
- Look for the server you want to manage then click the View Details to see more options.
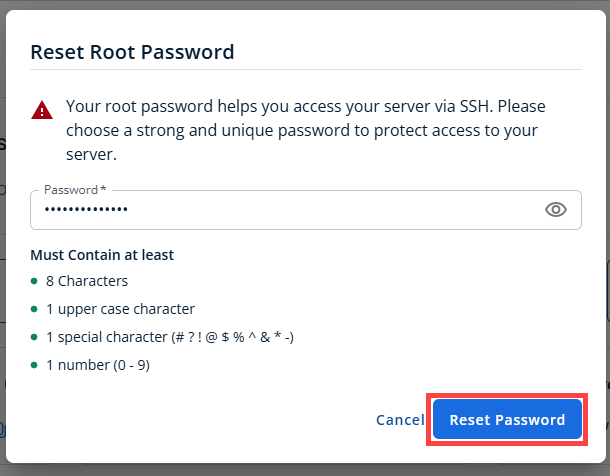
- Click the Reset Password.
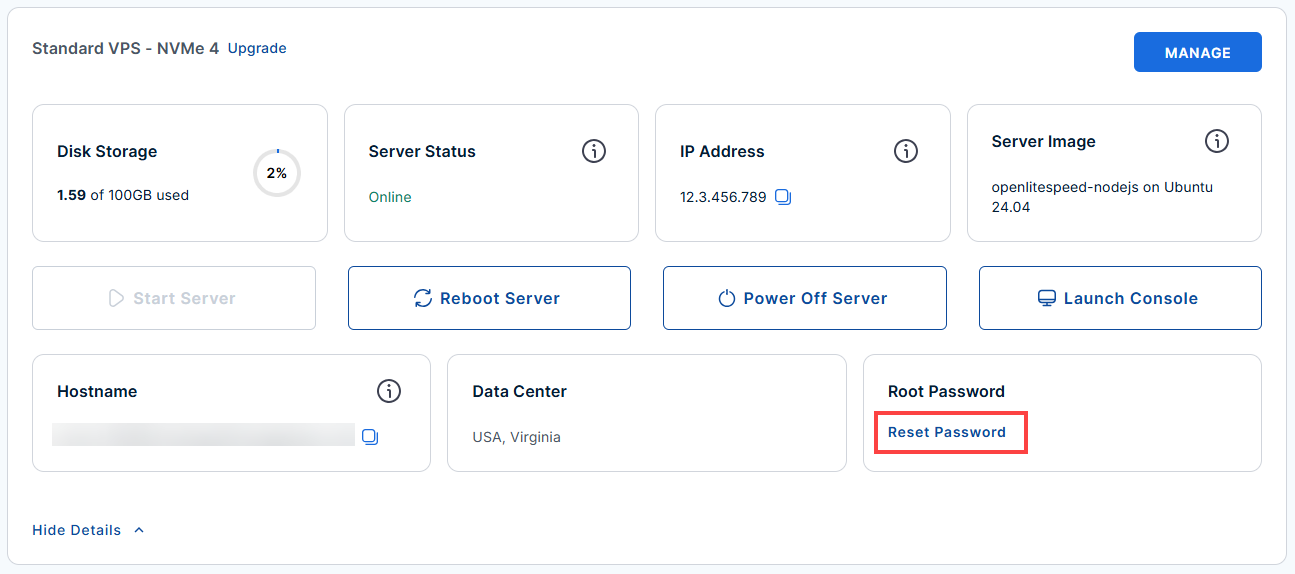
- In the pop-up window, type your new root password, then click Reset Password again to confirm and save the changes.
Step 2: Retrieve Your Initial Credentials
Your Moodle deployment automatically generates secure credentials during installation. These credentials are stored on your server.
- Connect to your VPS via SSH.
Open your computer's terminal (or an SSH client like PuTTY) and run the following command to log into your server as the administrator, using your server's public IP address:
Follow the prompts and enter the new root password you created in the step above.ssh root@your_server_ip - After logging in, you'll see the server's welcome message. This message includes:
- The Moodle administrator username (admin)
- The Moodle login URL
- The location of the generated passwords (/root/.app_passwords)
Example Output:
Welcome to Ubuntu 24.04.4 LTS (GNU/Linux 6.8.0-111-generic x86_64) ******************************************************************************** The UFW firewall is enabled. All ports are BLOCKED except 22 (SSH), 80 (HTTP), and 443 (HTTPS). You can access Moodle at: https://12.3.456.789/login/index.php User: admin Password is saved in /root/.app_passwords To change your site to load under a domain instead of an ip, on the server run: /root/domain-change For more details please see /root/README.md ******************************************************************************** To delete this message of the day: rm -rf /etc/update-motd.d/99-moodle - Retrieve your Moodle administrator credentials by running:
cat /root/.app_passwordsExample Output:
root@server-123456:~# cat /root/.app_passwords root_mysql_pass=t3st9K4Vmnw4_Vn admin_mysql_pass=R)sK?zd7)MFt3st app_mysql_pass=7J{V~t3stC4fh_f+ moodle_admin_pass=t3stNFfcM%Hb^b - Save the moodle_admin_pass value, as you will need it shortly.
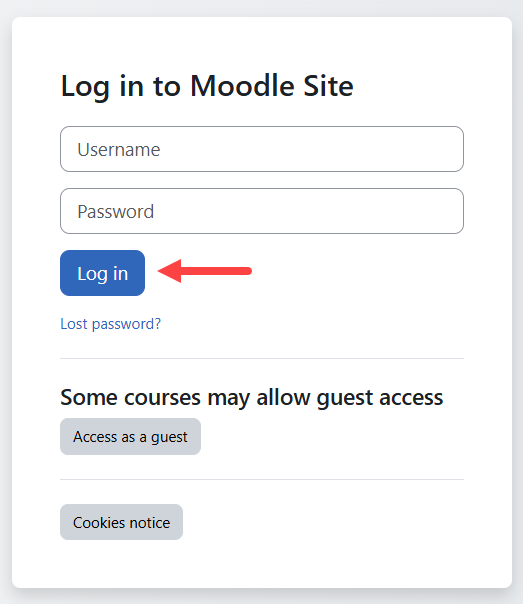
Step 3: Log In to Moodle
Once you have your administrator credentials, you can access the Moodle dashboard.
- Open a web browser and navigate to the Moodle URL provided in your server's welcome message: https://your-server-ip/login/index.php
Example:
https://12.3.456.789/login/index.php - From the log in screen. Enter the following:
- Username: admin
- Password: The value of moodle_admin_pass from
cat /root/.app_passwords
- Click Log in.
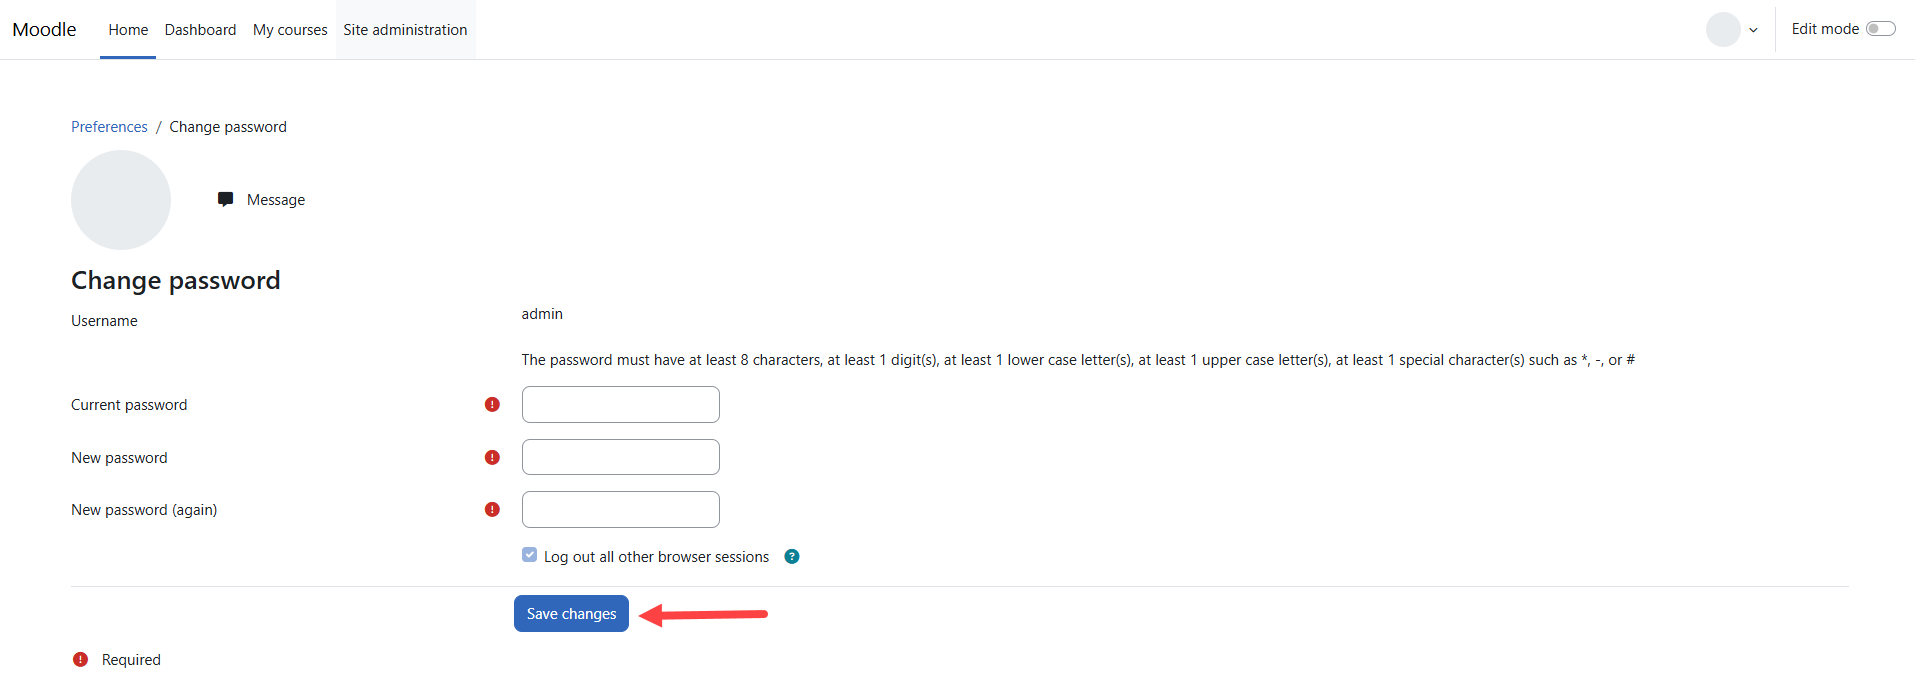
Step 4: Change the Moodle Administrator Password
For security reasons, Moodle requires you to replace the temporary administrator password during your first login.
- Enter your current password.
- Create a new administrator password.
- Confirm the new password.
Your new password must include:
- At least 8 characters
- One uppercase letter
- One lowercase letter
- One number
- One special character (such as *, #, or -)
- Click Save changes.
Step 5: Complete Your Administrator Profile
After updating your password, Moodle prompts you to verify your account information.
- Complete all required fields, including:
- First Name
- Last Name
- Email Address
- Scroll to the bottom of the page, then click Update profile.
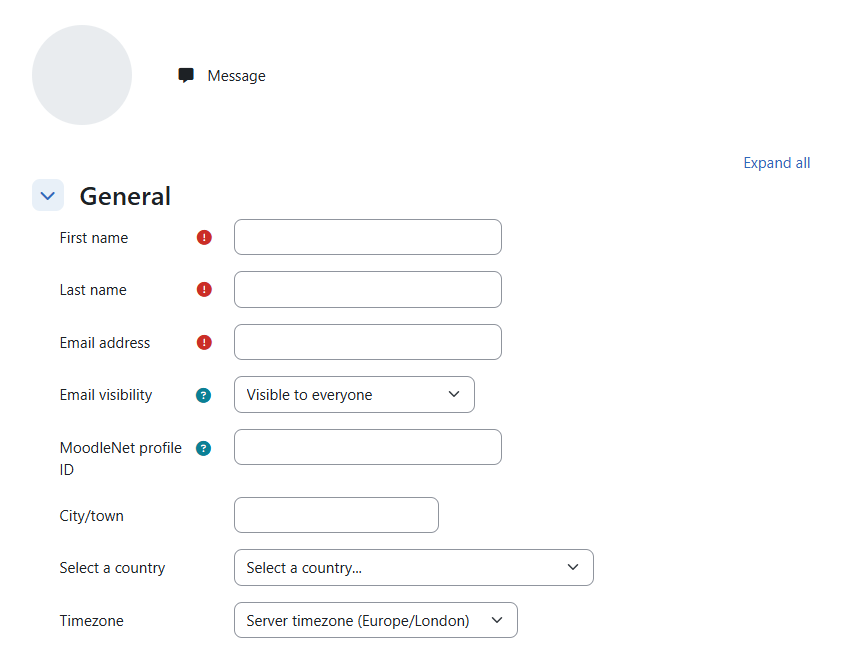
A confirmation message will appear after your profile has been successfully updated.
Next Step: Configure Your Domain
By default, Moodle is configured to use your server's public IP address.
When you're ready to access your Moodle site using your own domain name, connect to your server through SSH and run:
/root/domain-change
Follow the prompts to update Moodle's configuration with your domain. After the process finishes, you can access your learning platform using your custom domain instead of the server IP address.
Why a Domain Name is Important
- Security: You need a domain to get a free SSL certificate. This removes the "Not Secure" browser warning and encrypts user login data.
- User Experience: A web address (like learning.yourcompany.com) is much easier for people to remember and share than a random IP address (like 50.6.230.166).
- Email Reliability: If you just use an IP address, Moodle's automated emails (like password resets) will likely be blocked or sent to spam by providers like Gmail.
- Flexibility: If you ever upgrade or move your server, your IP address will change. A domain name stays the same, ensuring your users never lose access.
An IP address is perfectly fine for private testing. However, once you are ready to invite real learners to your platform, you should connect a domain name.
Additional Information and Example Documentation Output
You can run cat /root/README.md to see more information and useful commands:
Example Output:
# Moodle

## Description

Moodle is a robust, secure, and integrated platform designed to create personalized online learning environments. Whether you are managing a small classroom or a large-scale corporate training program, Moodle provides the flexibility to scale and adapt to your needs.

### Key Features
*   **Comprehensive Course Toolkit**: Build interactive courses with quizzes, assignments, forums, and wikis.
*   **Flexible & Customizable**: Personalize your site with custom themes and extend functionality via a massive plugin library.
*   **User-Friendly Management**: Access a personalized dashboard and use drag-and-drop tools to organize content easily.
*   **Powerful Progress Tracking**: Monitor learner performance with advanced grading, automated reporting, and analytics.
*   **Mobile-Ready**: A fully responsive interface and dedicated mobile app allow for learning anywhere, anytime.


## Services

Service         | Ports | Purpose
----------------|-------|---------
OpenSSH         | 22    | SSH
nginx           | 80/443| Website access

Ports are protected using ufw.


## How-to-use

Post installation the password for mysql and the moodle admin password will be stored in /root/.app_passwords.

The site will be installed and configured on an ip address. When you access the server via the console there will be instructions on how to run a script to change the site over to the domain of your choosing.

## Links

Documentation: [https://docs.moodle.org/501/en/Main_page](https://docs.moodle.org/501/en/Main_page)
Summary
Reimaging a Self-Managed VPS completely resets the server by replacing the existing system with the latest version of Moodle. This process deletes all data, applications, and settings, making it ideal for resolving major issues, improving performance or security, or preparing the server for a new project. Proper planning, including backups and noting installed applications, is essential before reimaging.