Bluehost Self-Managed VPS: Reimage Your Server for Sim Installation
You can set up a fast, high-performance Sim on your Bluehost Self-Managed VPS in just a few minutes. Sim is a powerful testing and automation tool that creates isolated sandboxes and replicates software behaviors. Running Sim on a Self-Managed VPS gives you dedicated server resources to handle heavy workloads, run parallel tasks, and build reliable automated workflows. Using our one-click installer saves you time and handles this technical setup automatically.
Reimage Your Server for Sim Installation
- You can install only one application using the one-click installer.
- To change or delete your application, follow the guide: Bluehost Self-Managed VPS: How to Change and Delete an Application. Create a backup of your existing applications or templates.
- If you want to keep your current template, install the new application manually using SSH. The system will automatically apply the recommended OS for Sim.
- Log in to your Bluehost Portal.
- In the left-hand menu, click Hosting.

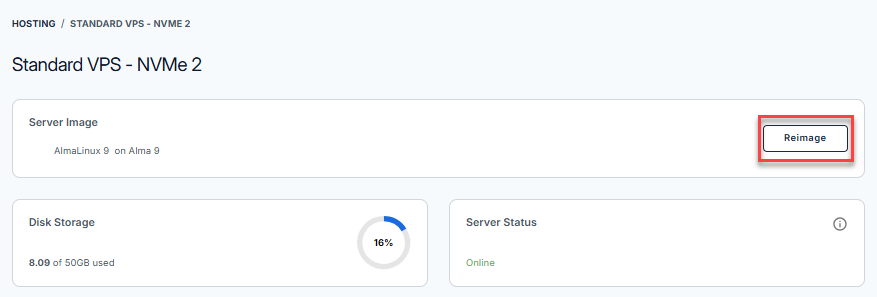
- Click the Manage button on the Self-Managed VPS package.

- Click the Reimage button.
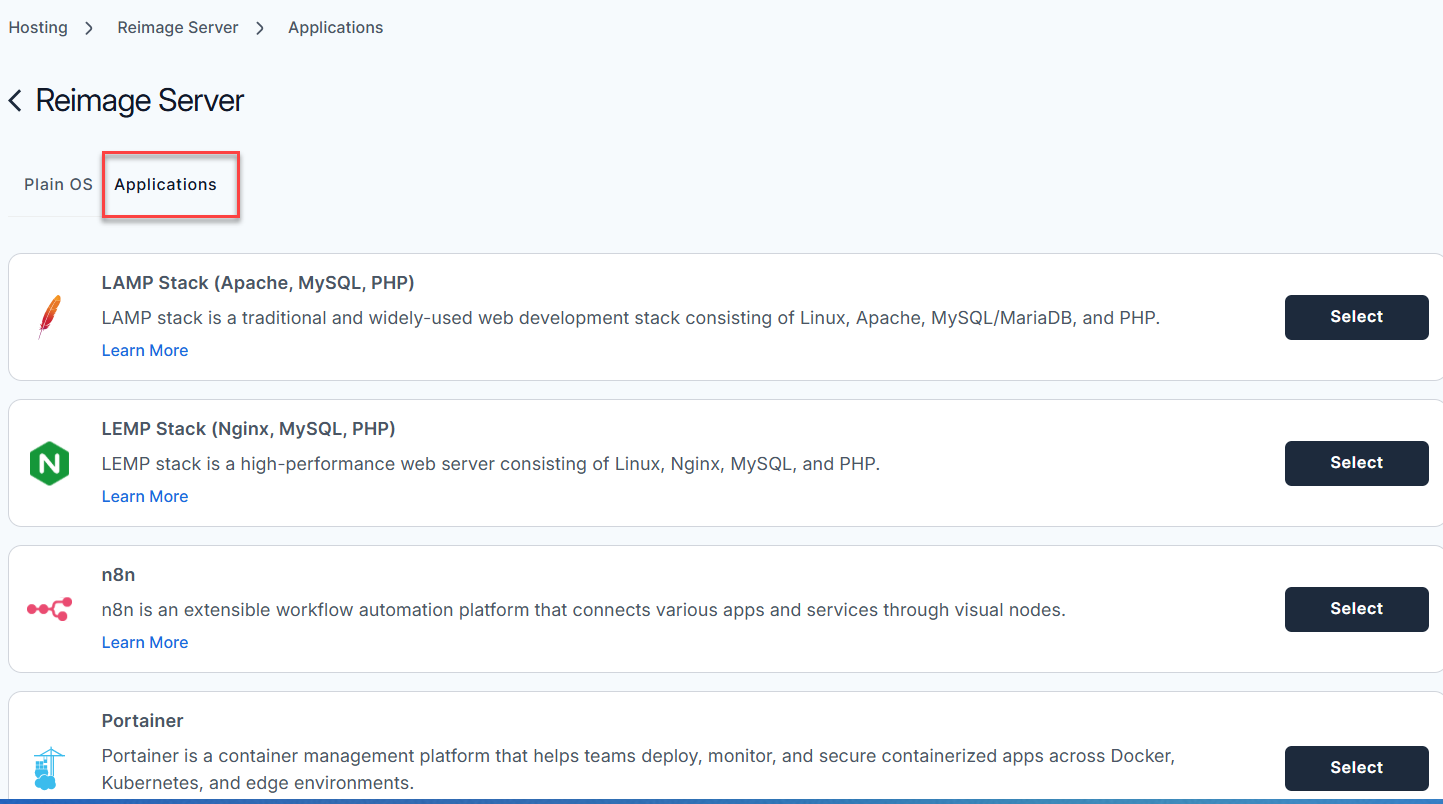
- Select the Applications tab.
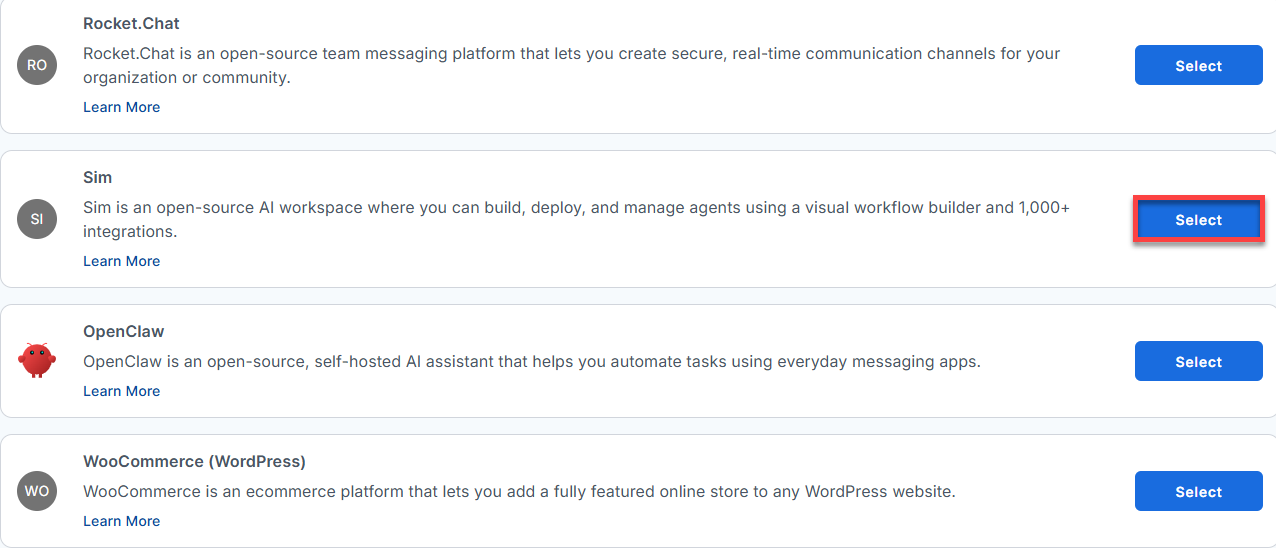
- From the list, locate Sim and click Select.
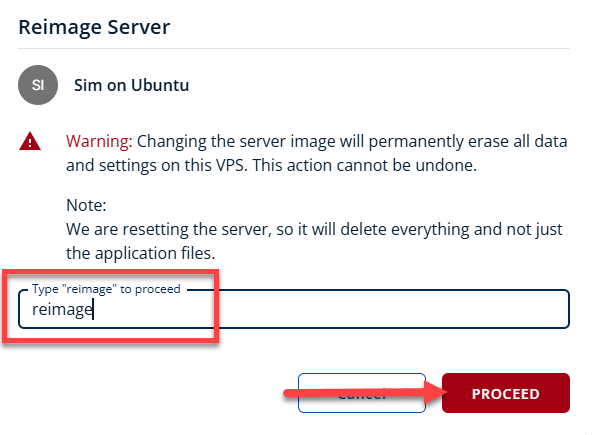
- To confirm, type "reimage" and then click Proceed to start the process.
- Wait a few minutes while the installation completes.

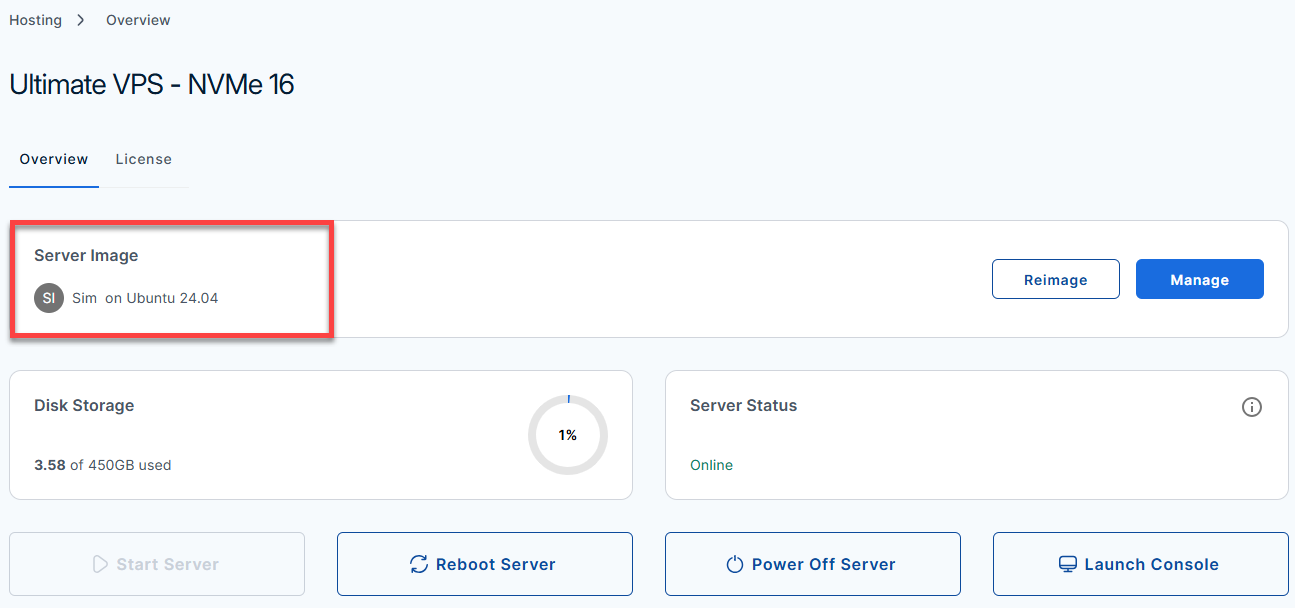
- Once completed, you will see Sim listed in the Server Image section.
How to Test and Verify Your Sim Setup
Here is your step-by-step walkthrough to get this up, running, and completely secured.
Pre-requisites & Server Provisioning
Before you turn on the server, you need to make sure your hardware meets the minimum requirements, or the local AI models will crash the system.
- Choose your Cloud Instance: Go to your cloud provider (AWS, DigitalOcean, Hetzner, etc.) and deploy a new VM using this Sim template image.
- Verify Hardware Specs: Make sure the instance has at least 4 vCPUs, 16 GB RAM, and 100 GB Disk.
- Configure DNS (Highly Recommended): Do you want a clean HTTPS connection without browser security warnings? Go to your domain provider before launching the VM.
- Create an A Record pointing your domain to the public IP address your cloud provider assigned to your VM.
- Log in to your Bluehost Portal.
- In the left-hand menu, click the Hosting tab.
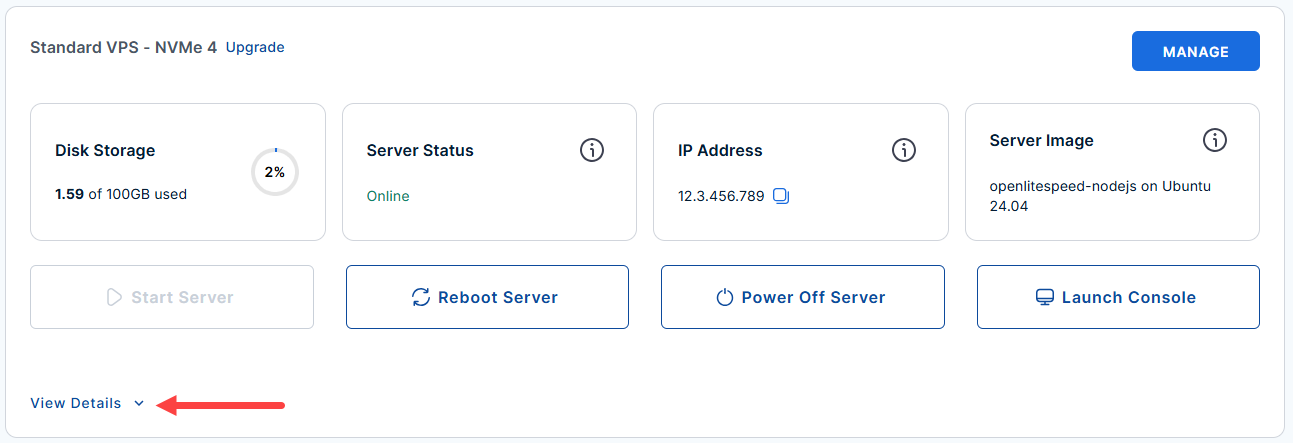
- Look for the server you want to manage then click the View Details to see more options.
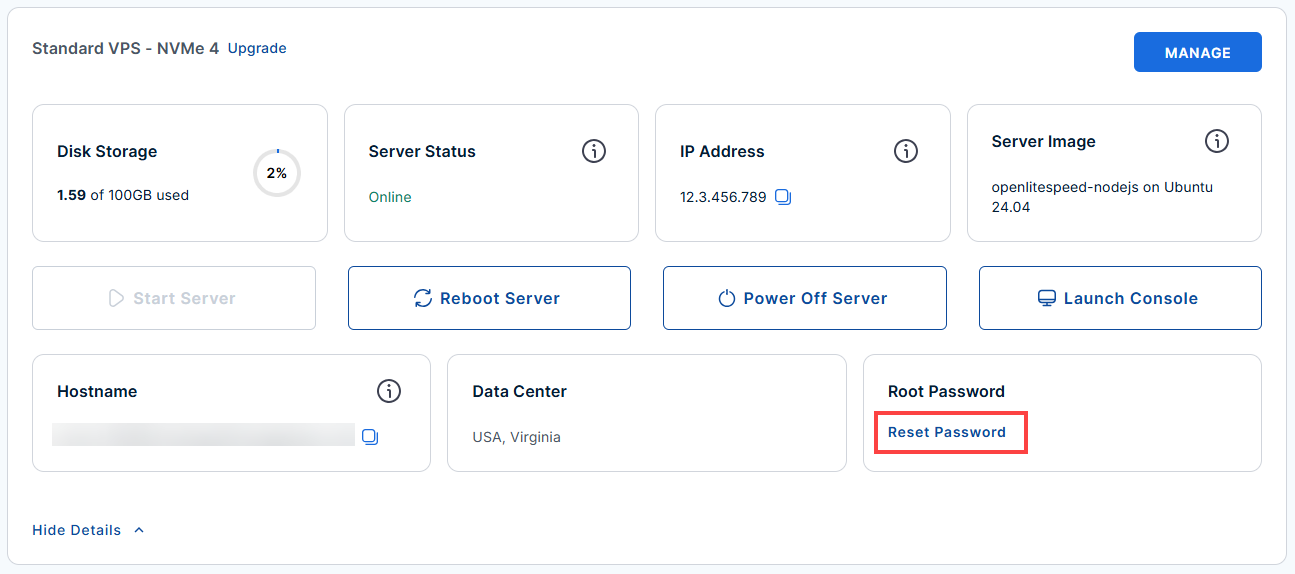
- Click the Reset Password.
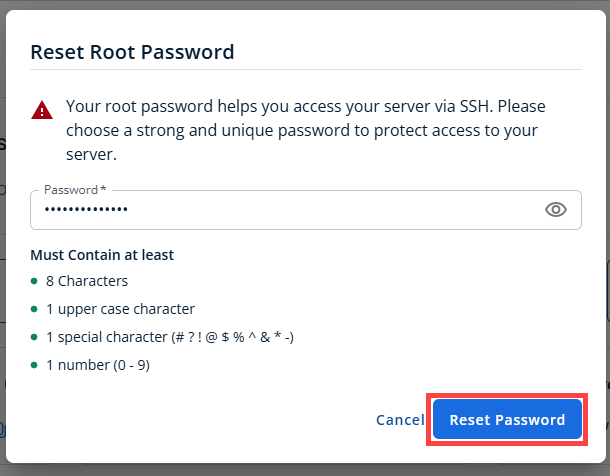
- In the pop-up window, type your new root password, then click Reset Password again to confirm and save the changes.
- Log in to your server via SSH.
When you log in to your server for the first time via SSH, you're greeted with a welcome message that includes all the essential commands and instructions for verifying Sim. The content looks like this:
ssh root@your-server-ipExample Output
Welcome to Ubuntu 24.04.4 LTS (GNU/Linux 6.8.0-124-generic x86_64) ******************************************************************************** Sim Web UI: https://12.6.123.166/ Initialized: 2026-06-16 20:27:28 UFW firewall is enabled. Open ports: 22 (SSH), 80 (HTTP->HTTPS redirect), 443 (HTTPS/Sim UI). Ollama: active (model: llama3.2:3b) IMPORTANT - Copilot API Key required: Sim Copilot requires an API key to function. 1. Go to https://sim.ai -> Settings -> Copilot 2. Generate a Copilot API key 3. Edit /opt/sim/.env and set: COPILOT_API_KEY=your-key 4. Restart Sim: systemctl restart sim Note: SIM_AGENT_API_URL=https://www.copilot.sim.ai is already pre-configured. Helpful commands: Check status: docker compose -f /opt/sim/docker-compose.prod.yml ps View logs: docker compose -f /opt/sim/docker-compose.prod.yml logs -f Restart Sim: systemctl restart sim First-boot log: cat /var/log/sim-onboot.log For more details please see /root/README.md To remove this message: rm -f /etc/update-motd.d/99_sim - Check the setup logs:
cat /var/log/sim-onboot.logExample Output
Last login: Tue Jun 16 21:28:14 2026 from 115.110.127.198 root@server-123456:~# cat /var/log/sim-onboot.log 2026-06-16 20:27:28 - Starting Sim first-boot setup 2026-06-16 20:27:28 - Instance IP: 12.6.123.166 (confirmed on interface) — real server, SSL will be configured 2026-06-16 20:27:28 - Secrets generated 2026-06-16 20:27:28 - /opt/sim/.env written 2026-06-16 20:27:28 - Ensuring Ollama is running 2026-06-16 20:27:28 - Ensuring Docker is running Rule added 2026-06-16 20:27:34 - Ollama URL set to http://172.18.0.1:11434 2026-06-16 20:27:34 - Starting Sim via docker compose 2026-06-16 20:27:34 - nginx started 2026-06-16 20:27:34 - SSL setup started for IP: 12.6.123.166 2026-06-16 20:27:34 - rDNS found (server.anothertestfornvme2.com) but forward lookup returned — treating as no domain 2026-06-16 20:27:34 - No domain detected — attempting Let's Encrypt certificate on IP 12.6.123.166... Saving debug log to /var/log/letsencrypt/letsencrypt.log Account registered. Requesting a certificate for 12.6.123.166 Successfully received certificate. Certificate is saved at: /etc/letsencrypt/live/12.6.123.166/fullchain.pem Key is saved at: /etc/letsencrypt/live/12.6.123.166/privkey.pem This certificate expires on 2026-06-23. These files will be updated when the certificate renews. NEXT STEPS: - The certificate will need to be renewed before it expires. Certbot can automatically renew the certificate in the background, but you may need to take steps to enable that functionality. See https://certbot.org/renewal-setup for instructions. - - - - - - - - - - - - - - - - - - - - - - - - - - - - - - - - - - - - - - - - If you like Certbot, please consider supporting our work by: * Donating to ISRG / Let's Encrypt: https://letsencrypt.org/donate * Donating to EFF: https://eff.org/donate-le - - - - - - - - - - - - - - - - - - - - - - - - - - - - - - - - - - - - - - - - 2026-06-16 20:27:38 - Let's Encrypt certificate issued for IP 12.6.123.166. nginx: the configuration file /etc/nginx/nginx.conf syntax is ok nginx: configuration file /etc/nginx/nginx.conf test is successful 2026-06-16 20:27:38 - HTTPS nginx configuration applied. 2026-06-16 20:27:38 - .env and instance.conf updated with URL: https://512.6.123.166 2026-06-16 20:27:38 - simstudio container restarted. 2026-06-16 20:27:38 - SSL setup complete. URL: https://12.6.123.166 2026-06-16 20:27:55 - Waiting for Sim to be healthy... Waiting for Sim... attempt 1/60 (HTTP 000000) Sim is up! (HTTP 307 after ~10s) ============================================================ Sim AI Platform — First Boot Complete ============================================================ URL: https://12.6.123.166 Logs: journalctl -u sim -f docker compose -f /opt/sim/docker-compose.prod.yml logs -f Status: docker compose -f /opt/sim/docker-compose.prod.yml ps ============================================================ 2026-06-16 20:28:00 - First-boot setup complete root@server-123456:~# - Verify the services are running:
systemctl status simExample Output
2026-06-16 20:28:00 - First-boot setup complete
root@server-123456:~# systemctl status sim
docker compose -f /opt/sim/docker-compose.prod.yml ps
● sim.service - Sim AI Agent Platform (simstudioai/sim)
     Loaded: loaded (/etc/systemd/system/sim.service; enabled; preset: enabled)
     Active: active (exited) since Tue 2026-06-16 20:27:55 UTC; 1h 41min ago
       Docs: https://github.com/simstudioai/sim
    Process: 3350 ExecStart=/usr/bin/docker compose -f /opt/sim/docker-compose.prod.yml up -d --remove-orphans (code=ex>
   Main PID: 3350 (code=exited, status=0/SUCCESS)
        CPU: 124ms

Jun 16 20:27:49 server-123456.anothertestfornvme2.com sim[3370]:  Container sim-realtime-1 Started
Jun 16 20:27:49 server-123456.anothertestfornvme2.com sim[3370]:  Container sim-migrations-1 Waiting
Jun 16 20:27:49 server-123456.anothertestfornvme2.com sim[3370]:  Container sim-realtime-1 Waiting
Jun 16 20:27:49 server-123456anothertestfornvme2.com sim[3370]:  Container sim-db-1 Waiting
Jun 16 20:27:50 server-123456.anothertestfornvme2.com sim[3370]:  Container sim-db-1 Healthy
Jun 16 20:27:50 server-123456.anothertestfornvme2.com sim[3370]:  Container sim-migrations-1 Exited
Jun 16 20:27:55 server-123456.anothertestfornvme2.com sim[3370]:  Container sim-realtime-1 Healthy
Jun 16 20:27:55 server-123456.anothertestfornvme2.com sim[3370]:  Container sim-simstudio-1 Starting
Jun 16 20:27:55 server-123456.anothertestfornvme2.com sim[3370]:  Container sim-simstudio-1 Started
Jun 16 20:27:55 server-123456.anothertestfornvme2.com systemd[1]: Finished sim.service - Sim AI Agent Platform (simstud>
lines 1-18/18 (END)
Access the Sim UI dashboard and Create an Account
- There is no default admin password. The first person to visit the website gets to create the admin account.
- Replace
domain.comwith your actual domain name. - Replace
your-server-ipwith your actual ip address.
- Open your web browser and navigate to your domain or server IP:
- If you set up a domain: Go to
https://sim.domain.com - If using raw IP: Go to
https://.your-server-ip(Note: You will have to click "Advanced -> Proceed anyway" if you get a self-signed certificate warning).
- If you set up a domain: Go to
- You will see a sign-up screen. Click Sign up to proceed.
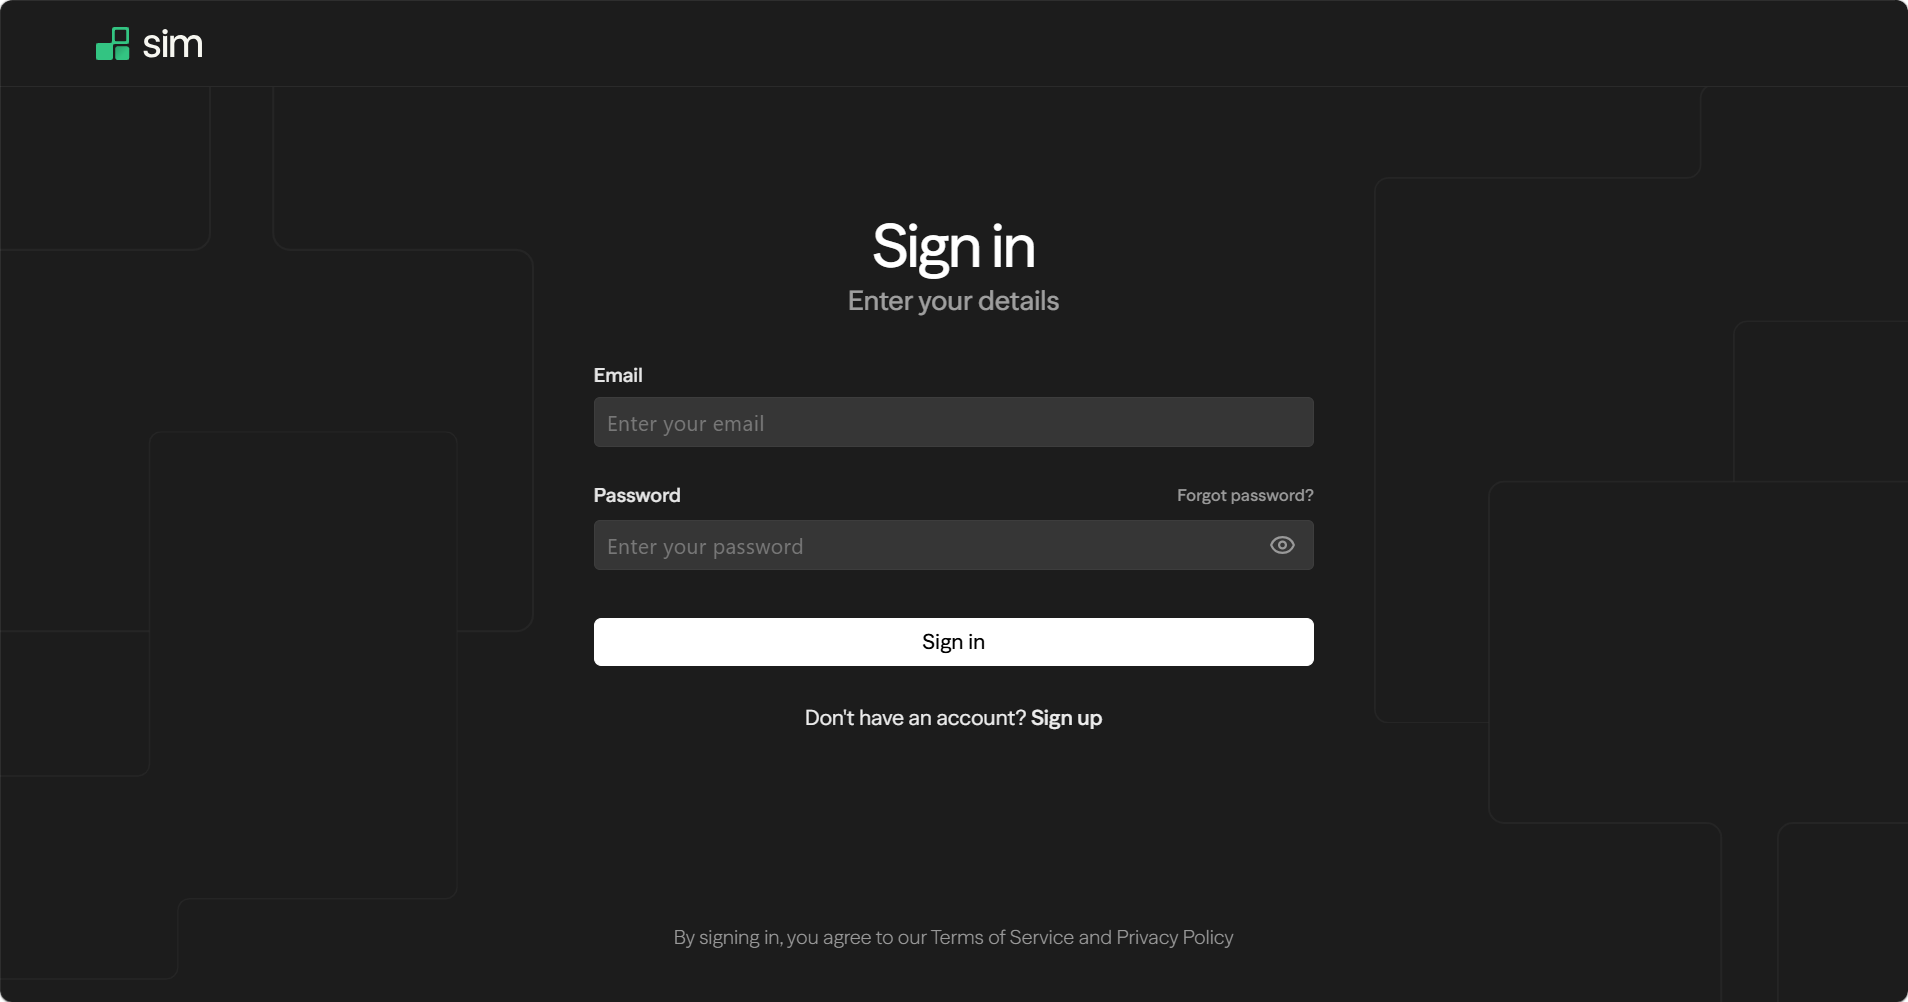
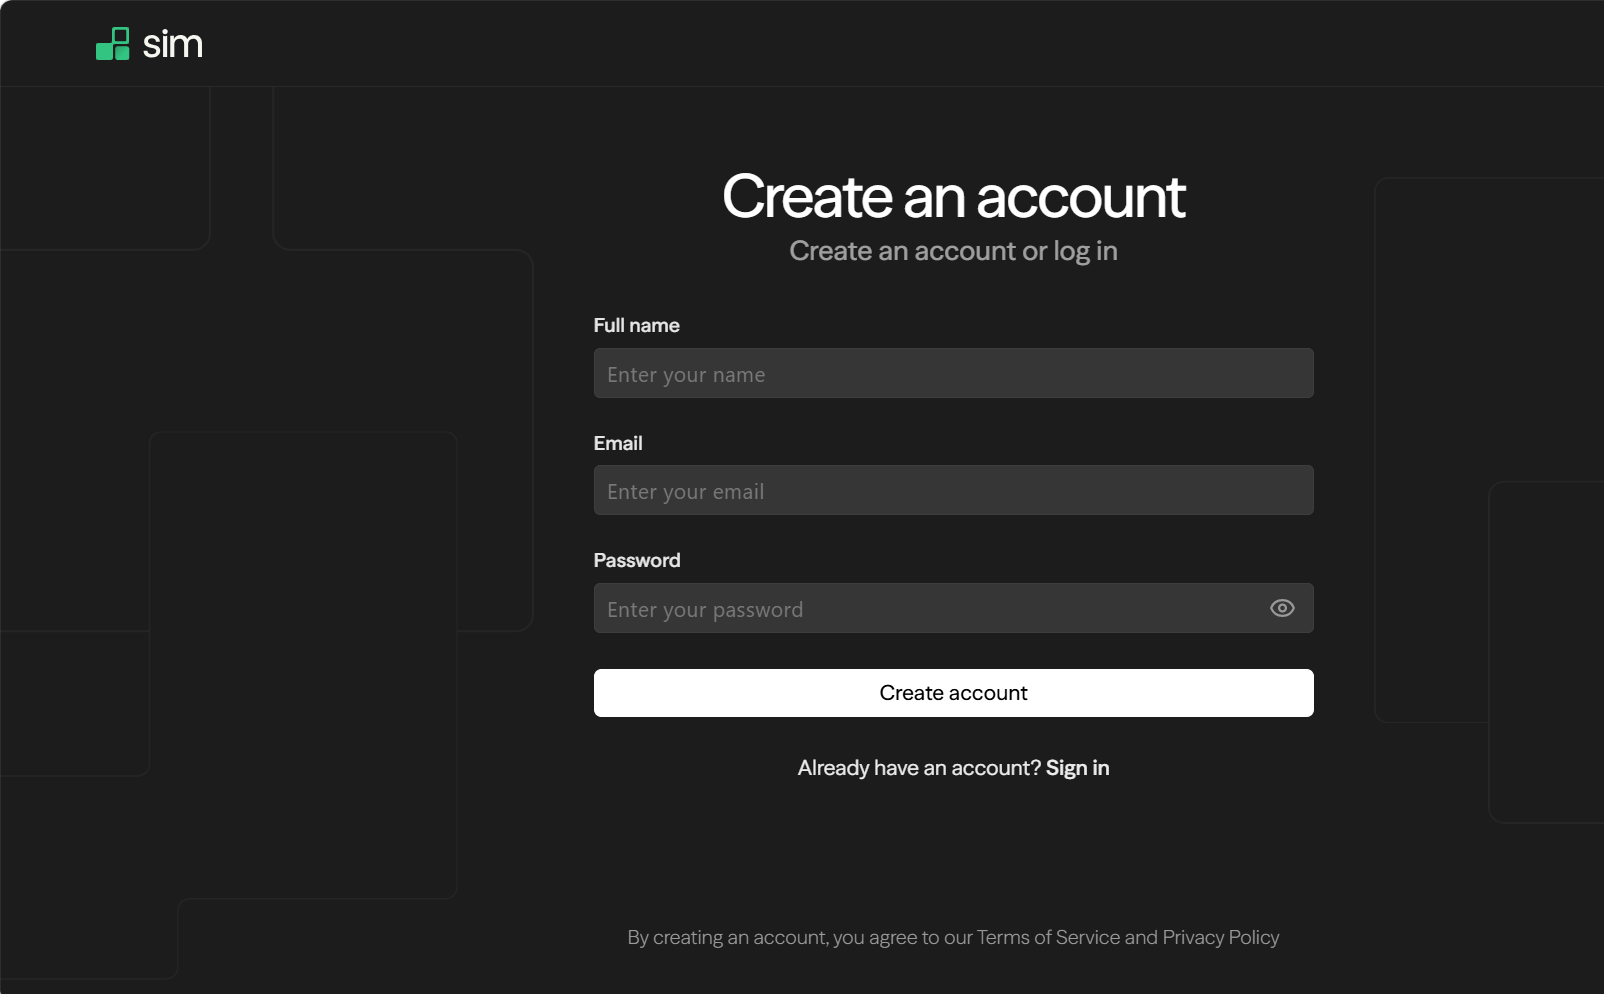
- Create your admin account here.
Please fill out the details below to set up your new account.
- Full name: Enter your first and last name as you would like them to appear on your profile.
- Email: Use a valid, active email address.
- Password: Choose a strong, secure password. Tip: Mix uppercase letters, lowercase letters, numbers, and symbols to keep your account safe.
- Go to https://sim.ai, choose Settings > Copilot, and create your API key.
- Open your environment file with a text editor (such as Nano).
Note:
- If you see a "command not found" error, it means the text editor (Nano) isn't installed yet.
Run this command to install it:
sudo apt update && sudo apt install nano -y - If you see a "Permission denied" or "File not found" error, it means you need administrator privileges or you are in the wrong folder.
Fix this by adding sudo to the front of your command to run it as an administrator:
sudo nano /opt/sim/.env
nano /opt/sim/.envExample Output
GNU nano 7.2 /opt/sim/.env # ============================================================================== # SIM ENVIRONMENT CONFIGURATION # ============================================================================== DATABASE_URL="postgresql://sim_user:aB7x9_mK29LpQ@localhost:5432/sim_db?schema=public" REDIS_URL="redis://localhost:6379/0" # Security Secrets (Generated automatically on first boot) BETTER_AUTH_SECRET="7f3d9e82b1c4a5f6e3d2c1b0a9f8e7d6c5b4a3_sample_secret_xyz" ENCRYPTION_KEY="a1b2c3d4e5f6a1b2c3d4e5f6a1b2c3d4e5f6a1b2c3d4e5f6a1b2c3d4e5f6b7c8" INTERNAL_API_SECRET="99fbc8d31a4c4e2b8a7d6e5c4b3a210f" # Public URL Routing NEXT_PUBLIC_APP_URL="https://192.168.1.50" # External AI Service Layer COPILOT_API_KEY=sk_sim_co_7a9x2f883d11bce5e93c8402f0a1d49e SIM_AGENT_API_URL="https://www.copilot.sim.ai" # Local AI Configuration OLLAMA_URL="http://172.17.0.1:11434" ^G Help ^O Write Out ^W Where Is ^K Cut ^T Execute ^C Location ^X Exit ^R Read File ^\ Replace ^U Paste ^J Justify ^_ Go To Line - If you see a "command not found" error, it means the text editor (Nano) isn't installed yet.
- Find the line that says
COPILOT_API_KEY=and paste your key right after the equals sign.Example Output
# External AI Service Layer COPILOT_API_KEY=sk_sim_co_7a9x2f883d11bce5e93c8402f0a1d49e SIM_AGENT_API_URL="https://www.copilot.sim.ai" - Restart the system to apply your new key.
systemctl restart sim
Additional Information & Example Documentation Output
You can run cat /root/README.md to see more information and useful commands:
Example Output
root@server-123456:~# cat /root/README.md
# Sim

## Description

Sim is an open-source AI workspace where you can build, deploy, and manage agents using a visual workflow builder and 1,000+ integrations. It connects every major LLM - including OpenAI, Claude, and Gemini - and includes pre-built templates for tasks like email triage, code review, and data enrichment, letting teams automate real work.

## Image contents

This template installs and configures:

- Sim AI Agent Platform (simstudioai/sim) via Docker Compose
- PostgreSQL 17 with pgvector extension for embeddings and vector search
- Redis for real-time pub/sub and session management
- Docker CE with Compose plugin and NVIDIA Container Toolkit
- nginx reverse proxy with HTTPS termination
- UFW firewall rules for SSH, HTTP, and HTTPS
- Sim application files at /opt/sim
- docker-compose.prod.yml at /opt/sim/docker-compose.prod.yml
- Runtime environment at /opt/sim/.env
- Logrotate configuration at /etc/logrotate.d/sim

## Services

| Service      | Ports    | Purpose                                                 |
|--------------|----------|---------------------------------------------------------|
| Sim (UI+API) | 3000     | Next.js application server (internal, proxied by nginx) |
| Sim Realtime | 3002     | WebSocket server for live workflow updates (internal)   |
| Redis        | internal | Session store and pub/sub for realtime service          |
| PostgreSQL   | internal | pgvector database (Docker Compose internal network)     |
| nginx        | 80, 443  | Reverse proxy, HTTP redirects to HTTPS                  |
| OpenSSH      | 22       | Remote access                                           |
| Ollama       | 11434    | Local LLM API (llama3.2:3b)   |

Ports are protected using UFW. Internal services are not exposed externally.

## Sim configuration

The runtime environment is stored at /opt/sim/.env.

Key settings include:

- DATABASE_URL - PostgreSQL connection string pointing to the db Compose service
- BETTER_AUTH_SECRET - session signing secret, generated on first boot
- ENCRYPTION_KEY - key for encrypting stored API credentials, generated on first boot
- INTERNAL_API_SECRET - internal API authentication between Sim services
- NEXT_PUBLIC_APP_URL - public URL used in emails and OAuth callbacks
- REDIS_URL - Redis connection string for the realtime service
- COPILOT_API_KEY - effectively required for Sim to function. Generate at https://sim.ai -> Settings -> Copilot
- SIM_AGENT_API_URL - pre-configured to https://www.copilot.sim.ai

The systemd service unit is sim and starts Sim via docker compose as root.

## First boot behavior

On the first boot, the cloud-init per-instance script /var/lib/cloud/scripts/per-instance/001_onboot:

- Detects the public IP address of the server via external lookup with hostname fallback
- Generates random secrets: POSTGRES_PASSWORD, BETTER_AUTH_SECRET, ENCRYPTION_KEY, and INTERNAL_API_SECRET
- Writes /opt/sim/.env with all real values replacing build-time placeholders
- Tears down any build-time Docker volumes so PostgreSQL initializes with the new password
- Starts all Docker Compose services: PostgreSQL, Redis, migrations, realtime, and simstudio
- Detects whether a domain name resolves to the server IP and requests a Let's Encrypt certificate for it
- Falls back to a self-signed certificate if no domain is detected
- Rewrites the nginx config with HTTP to HTTPS redirect and full HTTPS proxy block
- Waits up to 5 minutes for Sim to become healthy and logs the result

This guarantees that no credentials are baked into the image. Every instance gets unique credentials.

## First-time access (How to use)

SSH into your server using your cloud provider credentials and the server public IP:
    ssh root@
After the VM boots, access Sim at:
    https:///

On the first visit, Sim will show a sign-up screen. Create your first account to get started. There is no default admin password - accounts are created through the Sim UI on first access.
To get a trusted HTTPS certificate with no browser warning, point a domain name A record to the server IP before booting. The image will detect the domain automatically and request a Let's Encrypt certificate.

View the first-boot log to confirm setup completed successfully:
    cat /var/log/sim-onboot.log
View the generated secrets:
    cat /opt/sim/.env

## Using Ollama (Local AI)

Sim is pre-configured with a local AI model (llama3.2:3b) powered by Ollama.
No API keys required.

### Workflow Setup Guide

- Login: Open `https://` and log in to Sim UI
- Create a New Workflow: In the left panel, click **"+"** to create a new workflow
- Add Agent Block: Click the new workflow -> right panel -> **Toolbar** -> **Blocks** -> click on **Agent**
- Connect Blocks: **Start** and **Agent** blocks are automatically connected on the canvas
- Configure the Agent: Click **Agent** block -> select **`llama3.2:3b`** by scrolling down under **Model**
- Enter a Prompt: In **Messages** box, type your prompt
- Run: Click green **Run** button on top right
- View Response: Output appears in the **Output** panel at the bottom

> **Note:** Response time may take 1-3 minutes depending on server hardware.

---

## Useful commands

Check Sim container status:
    docker compose -f /opt/sim/docker-compose.prod.yml ps
View Sim logs:
    docker compose -f /opt/sim/docker-compose.prod.yml logs -f
Check Sim service:
    systemctl status sim
Check nginx service:
    systemctl status nginx
Restart Sim:
    systemctl restart sim
Pull latest Sim images and restart:
    cd /opt/sim && docker compose -f docker-compose.prod.yml pull && systemctl restart sim
View systemd journal for Sim:
    journalctl -u sim -n 100 --no-pager
Verify listening ports:
    ss -tulnp
Check Ollama status:
    systemctl status ollama
List available models:
    ollama list
Test Ollama responds:
    ollama run llama3.2:3b "hello"

## Minimum Resources

| Resource | Minimum  |
|----------|----------|
| CPU      | 4 vCPUs  |
| RAM      | 16 GB    |
| Disk     | 100 GB   |

Running Sim on an instance with less than 16 GB of RAM will likely result in out-of-memory errors during the first boot or under load.

## Notes

- All secrets are generated fresh on every new instance. The .env file in the image contains only placeholders.
- PostgreSQL and Redis are not exposed externally. They are only reachable within the Docker Compose network.
- Logs are written to /var/log/sim-onboot.log for first-boot events and to Docker container logs for runtime events.
- The Sim UI is served on port 443 (HTTPS). Port 80 redirects to HTTPS automatically.
- NVIDIA Container Toolkit is pre-installed to support GPU-accelerated model inference if the instance has a GPU.
- Ollama is pre-installed with llama3.2:3b. In Sim, select Ollama as the provider and pick llama3.2:3b to use the local model without any API keys.
- Ollama runs on the host and is accessible to Sim via the Docker bridge gateway. The OLLAMA_URL is set automatically on first boot.

## Links

**Sim**
* Manage: [https://{server_ip}](https://{server_ip})
* Documentation: [https://docs.sim.ai](https://docs.sim.ai)
* GitHub: [https://github.com/simstudioai/sim](https://github.com/simstudioai/sim)
* Website: [https://sim.ai](https://sim.ai)
* Docker CE: [https://docs.docker.com/engine/install/ubuntu/](https://docs.docker.com/engine/install/ubuntu/)
* pgvector: [https://github.com/pgvector/pgvector](https://github.com/pgvector/pgvector)
* Ollama: [https://ollama.com](https://ollama.com)
* Ollama Model Library: [https://ollama.com/library](https://ollama.com/library)
* Sim Self-Hosting Docs (Ollama): [https://docs.sim.ai/self-hosting/docker#ollama](https://docs.sim.ai/self-hosting/docker#ollama)
root@server-123456:~# cat /var/log/sim-onboot.log
Summary
This guide shows you how to quickly set up Sim, a powerful testing and automation tool, using the Bluehost VPS one-click installer. Keep in mind that using this installer completely overwrites your server and permanently deletes all existing files and data.