How to View and Manage Backup History in Xcitium
The View Backup History in Xcitium provides a centralized dashboard for monitoring and managing all your website backups.
With this tool, you can check backup status, troubleshoot failures, and restore your website data quickly and confidently.
What You Can See in Backup History
When you open your backup history, you can:
- View backup date and time
- Check backup status (completed or failed)
- See which files were included or skipped
- Access restore and download options
This helps you quickly understand your website’s backup health and readiness for recovery.
Your backups are stored for up to 90 days only. After that:
- Older backups are automatically deleted
- You will no longer be able to restore or download
If your backup storage becomes full:
- New backups may fail
- You’ll see alerts in your dashboard
To keep your backups running smoothly:
- Delete backups you no longer need
- Upgrade your storage if you run out of space
- Regularly check your backup status
When You Should Use Backup History
You can use this page to:
-
Confirm Backups Are Successful
Make sure your backups are completed properly, and your data is protected. - Troubleshoot Failed Backups
Identify issues and review logs to fix problems. -
Restore Your Website
Recover files or your full site from a previous backup. -
Download Backup Copies
Save backup files to your local device for extra security. -
Track Changes
Review file additions, deletions, or updates over time.
Why This Matters to You
By checking your backup history regularly, you can:
- Ensure your backups are working correctly
- Always have a restore point ready
- Protect your website from data loss or errors
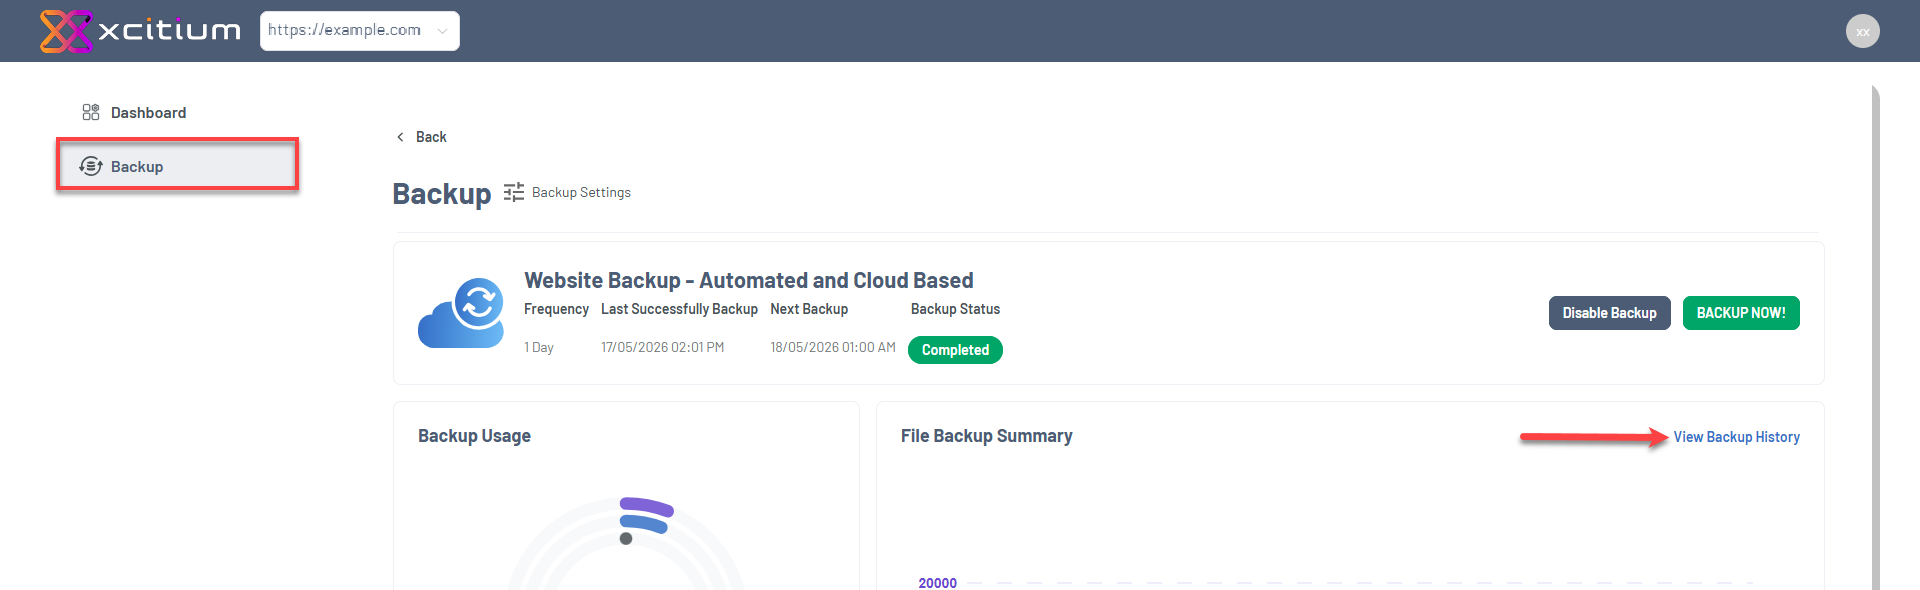
Access View Backup History
- Log in to your Bluehost Portal.
- In the left-hand menu, click Websites.
- Click the Manage Site button located next to the website you want to manage.

- Click Backups in the top menu.
- Under Premium Backup Services, click Manage for Xcitium.

- Navigate to the Backup section in the left menu, then click View Backup History.
How to Read Your Backup History Data
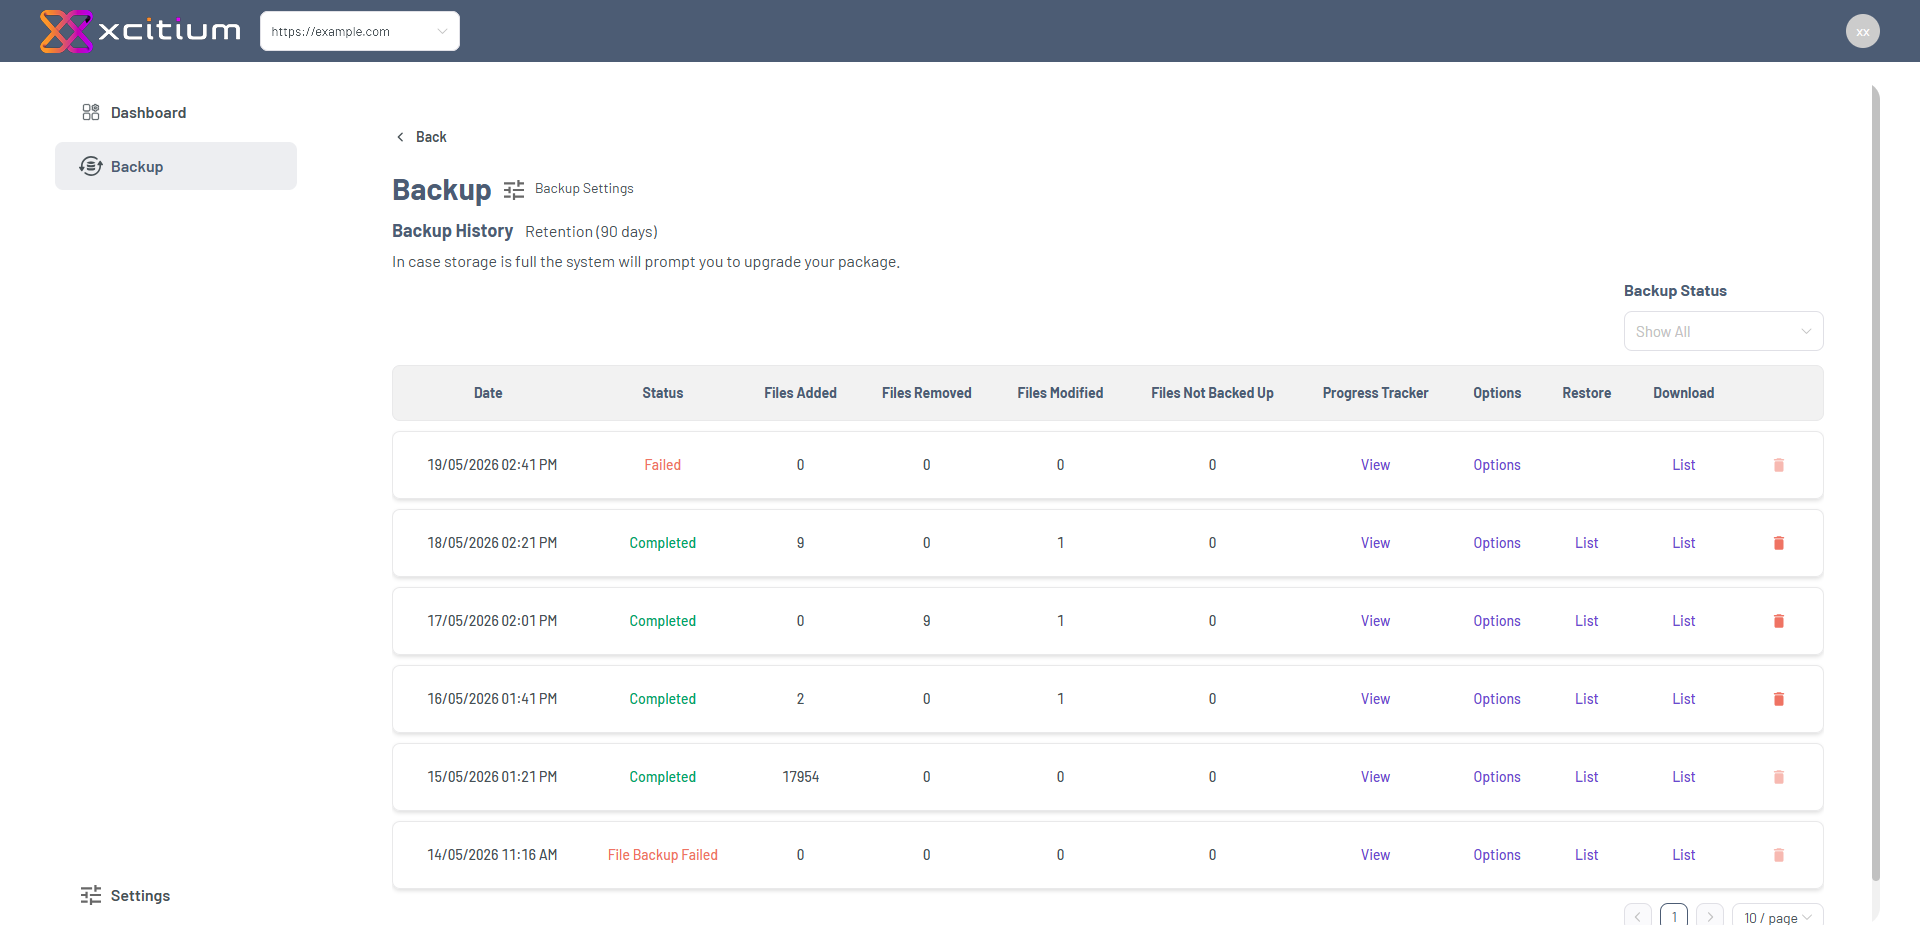
Date
See exactly when each backup was created. Use this to choose the correct restore point.
Backup Status
Helps quickly identify successful backups, ongoing processes, or failures that may require action.
Here’s what each status means:
- Completed – Your backup was successful
- Completed Partially – Some files were skipped
- In Progress – Backup is still running
- File Backup Failed – File backup failed
- DB Backup Failed – Database backup failed
- Failed – Backup did not complete
If something fails, check the Progress Tracker for details.
Files Added
Shows the number of new files included in the backup. This typically increases when new content is uploaded or during an initial/full backup.
Files Removed
Displays the number of files that were deleted since the previous backup. This helps track cleanup actions or removed data over time.
Files Modified
Indicates how many files were updated or changed since the last backup. Use this to monitor ongoing activity or frequent updates to existing files.
Files Not Backed Up
Shows files that were excluded or skipped during the backup process.
This may happen due to:
- File restrictions
- Errors during backup
- System limitations
Progress Tracker
The Progress Tracker helps you:
- See each step of the backup process
- Identify where failures happened
- Review timestamps for each action
To view it:
- Find a backup entry.
- Click View under Progress Tracker.
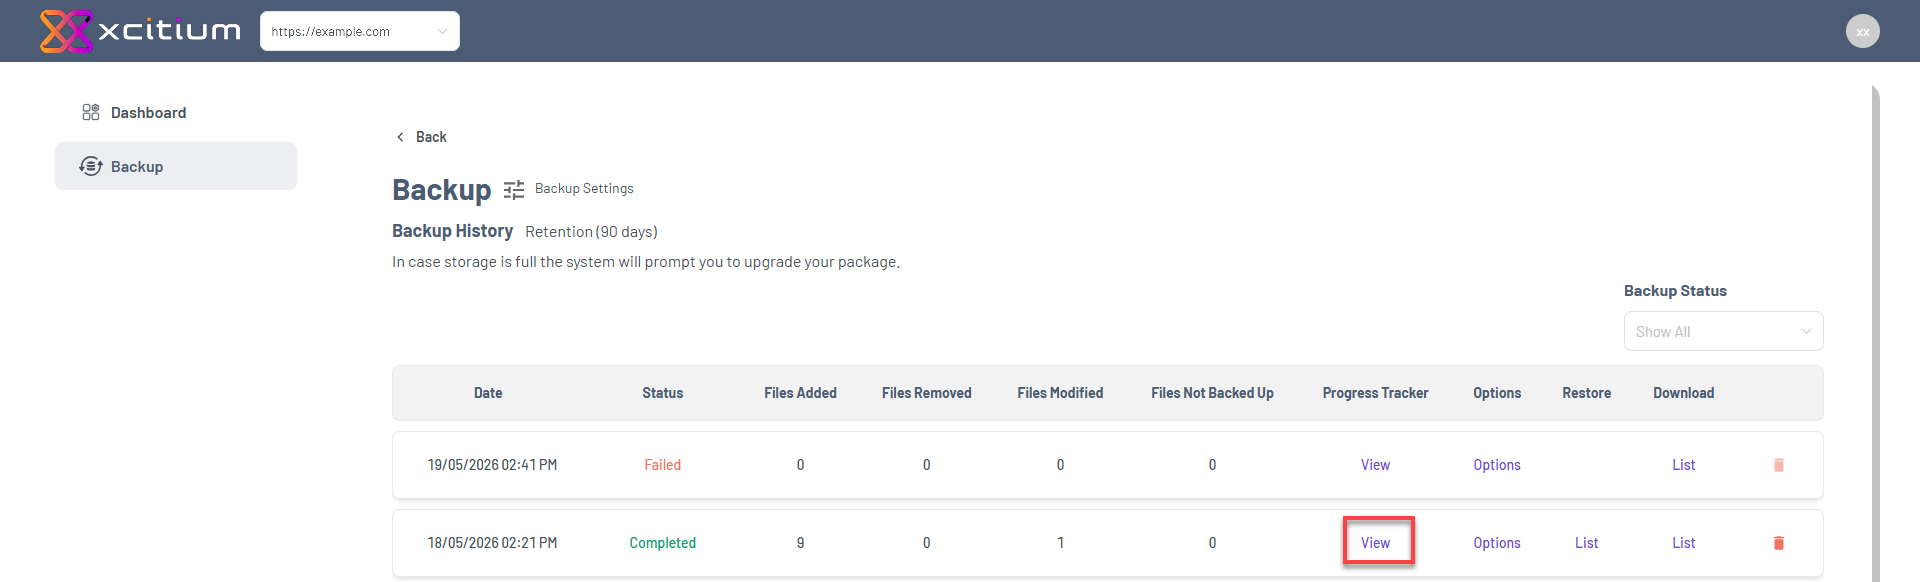
- Review backup progress tracker details.
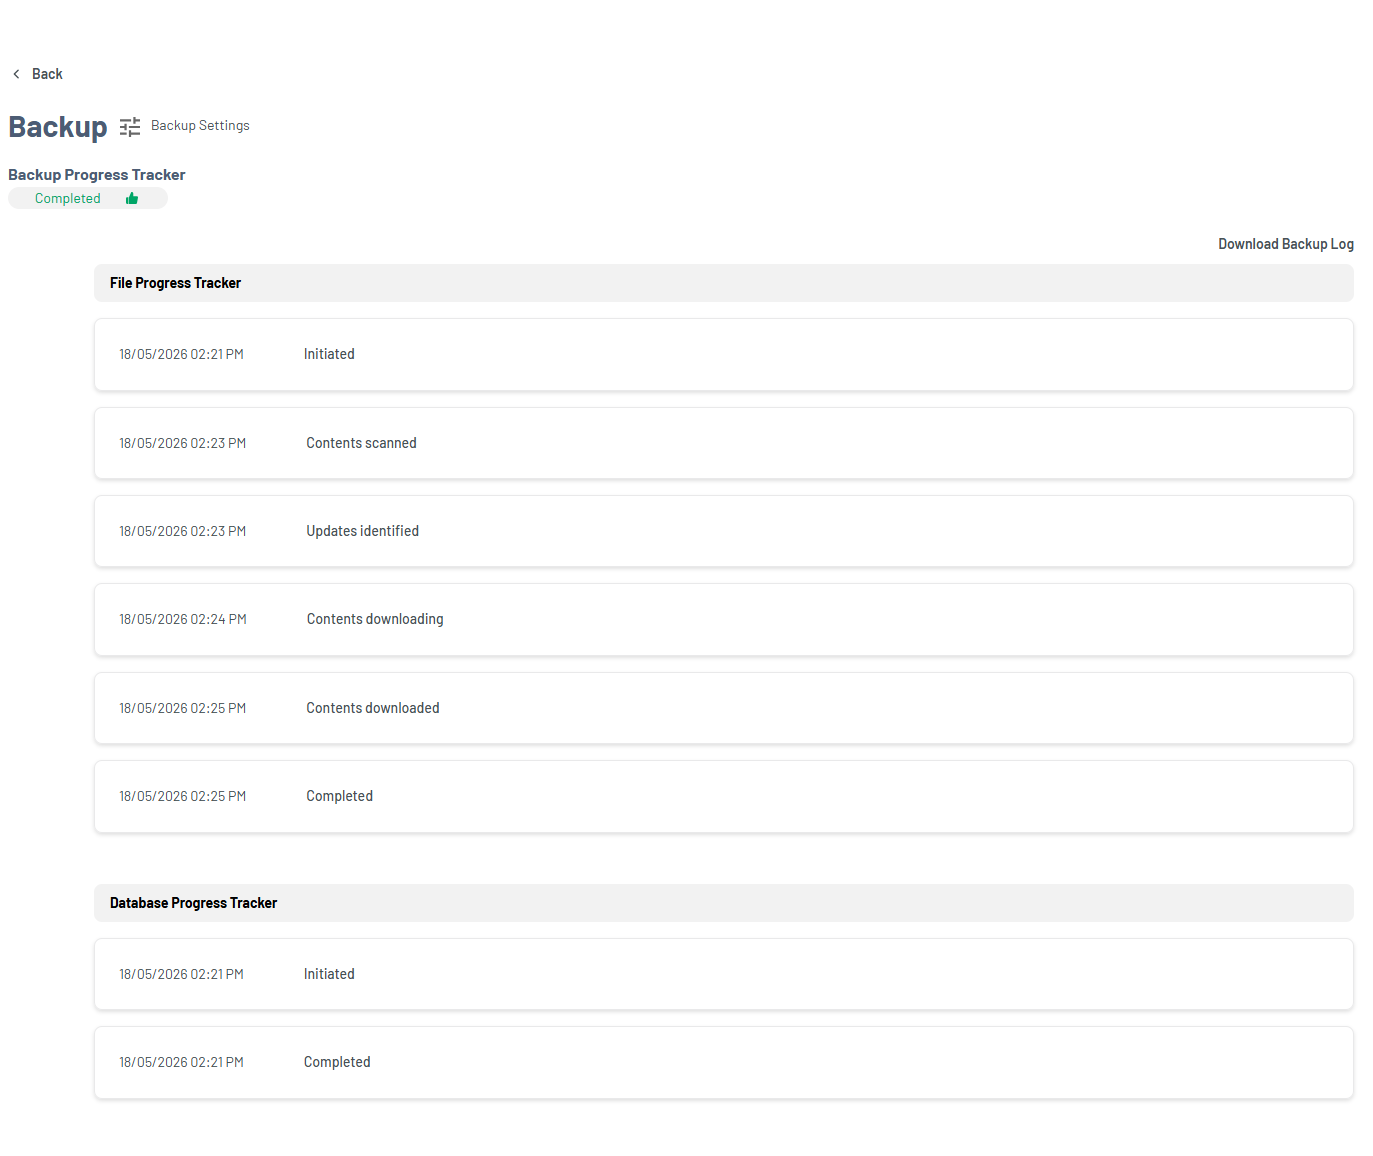
You can also download logs for detailed troubleshooting.
Option
Provides actions for a selected backup, including restore and download functions.
Click Options next to a backup to:
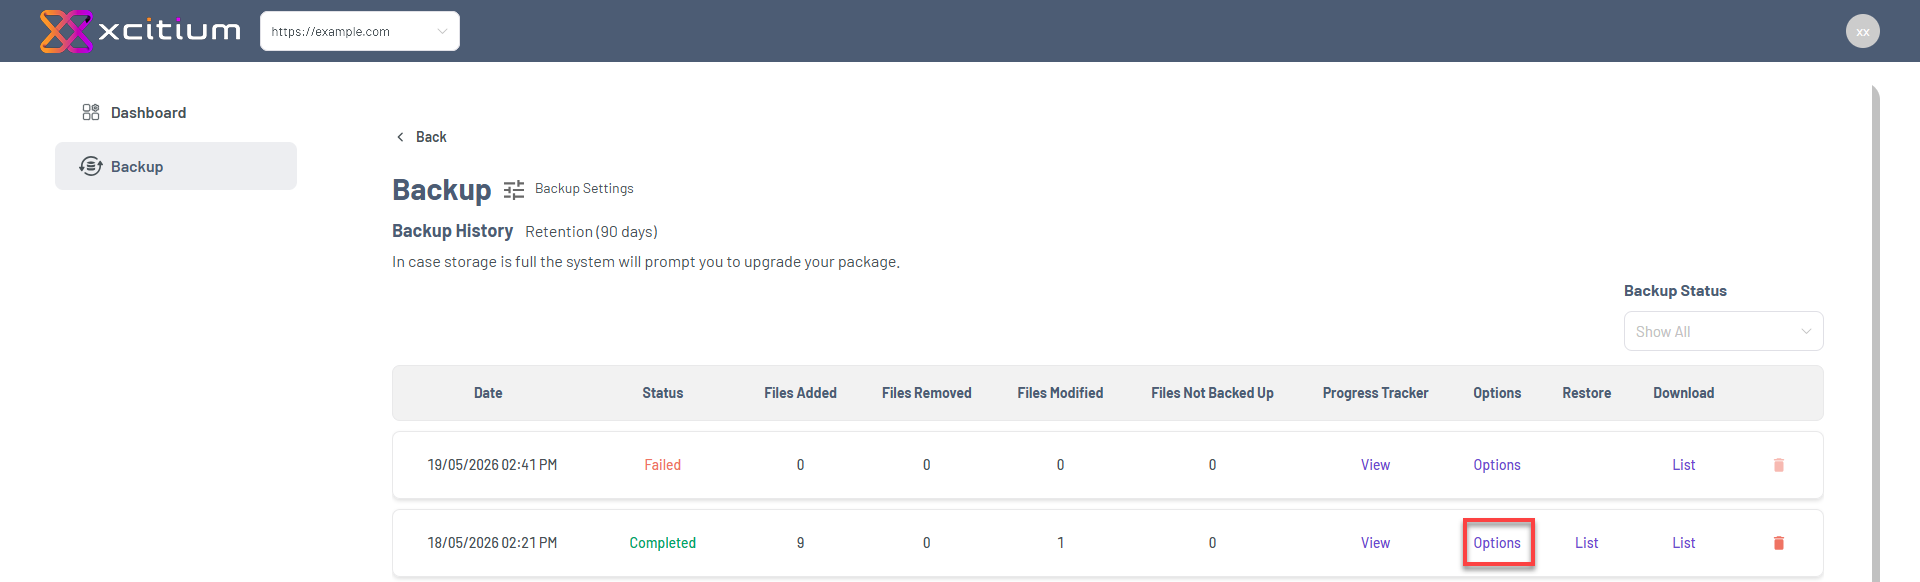
- Restore website files
- Restore your database
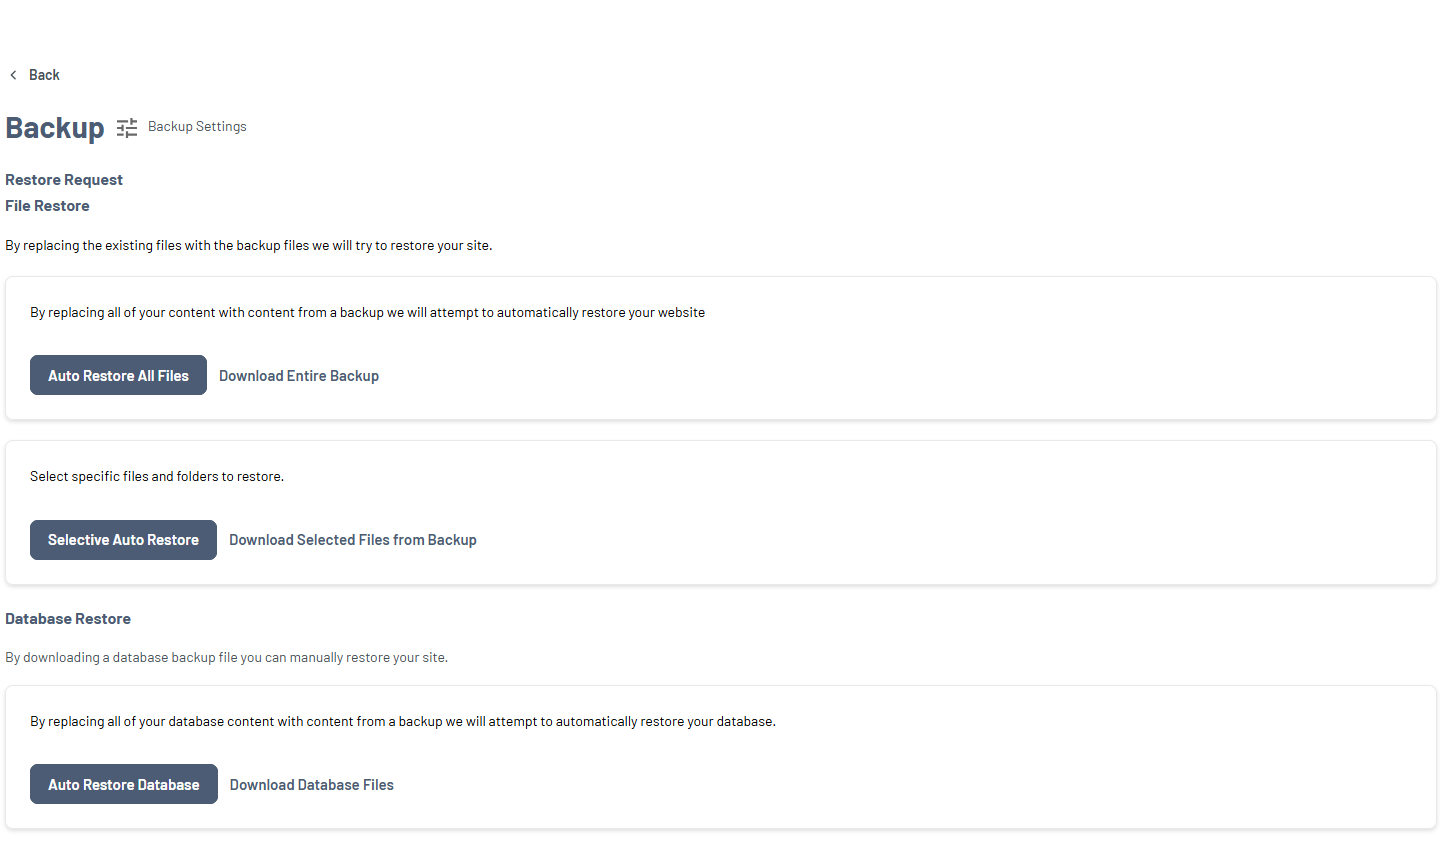
Be careful: restoring may overwrite your current data.
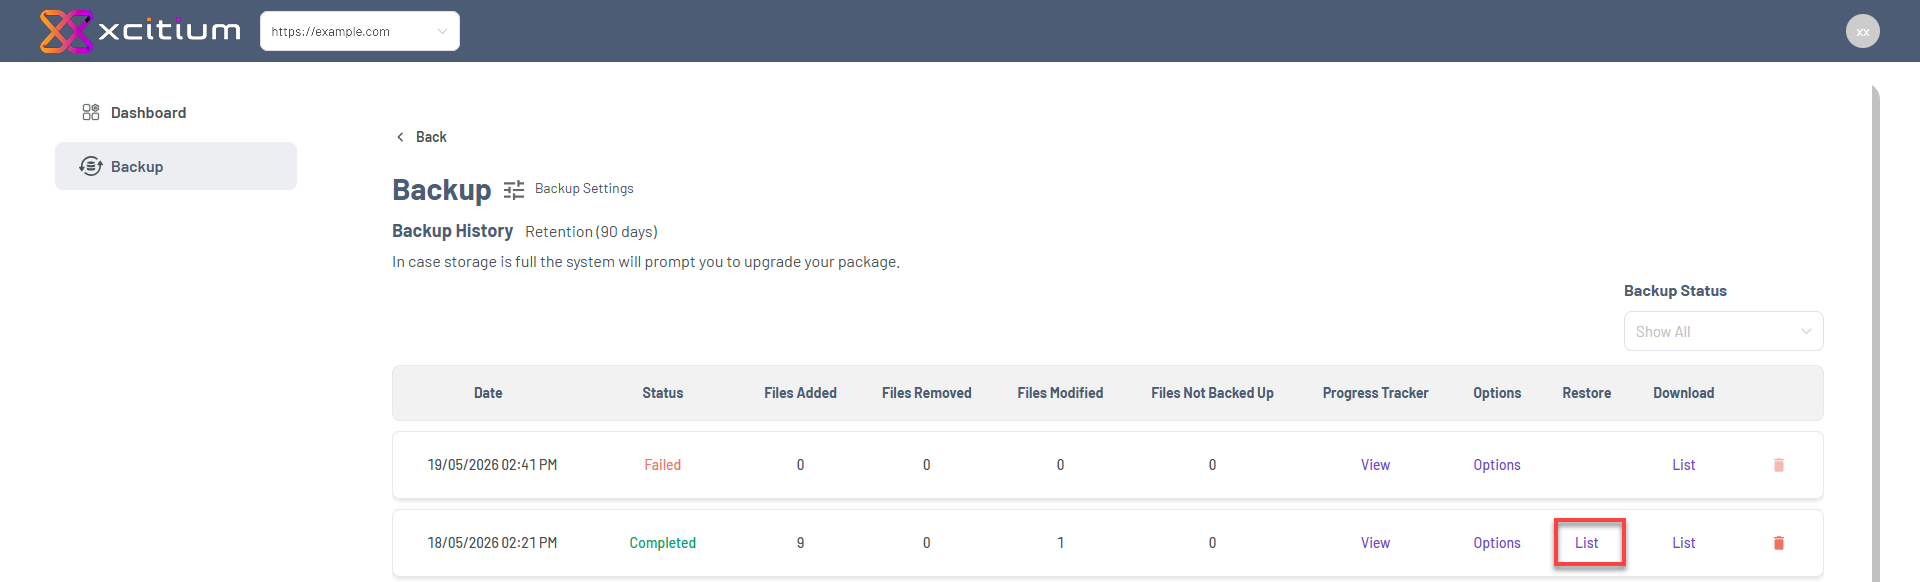
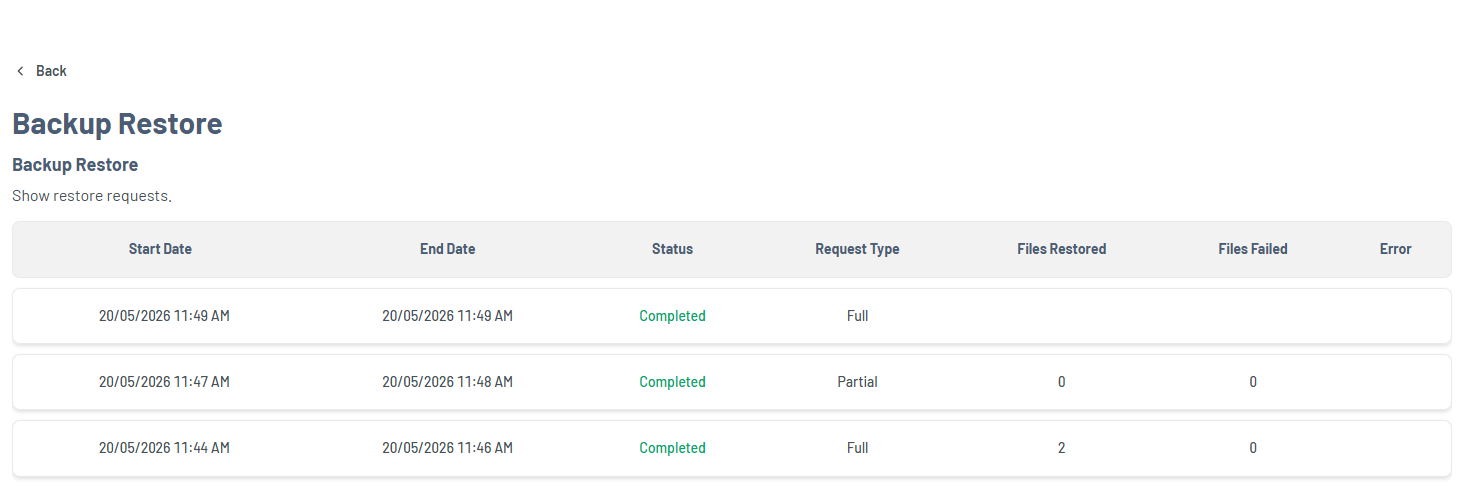
Restore
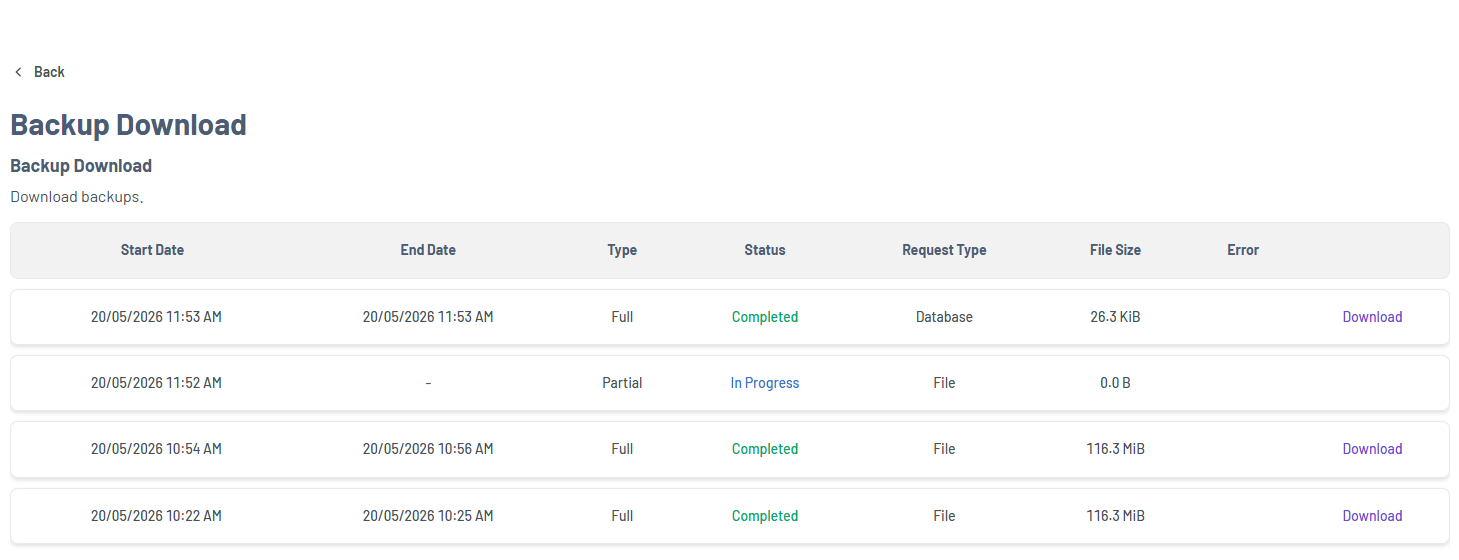
Allows you to view all restore request files from previous backups. By clicking List, available files can be browsed along with their details and status.
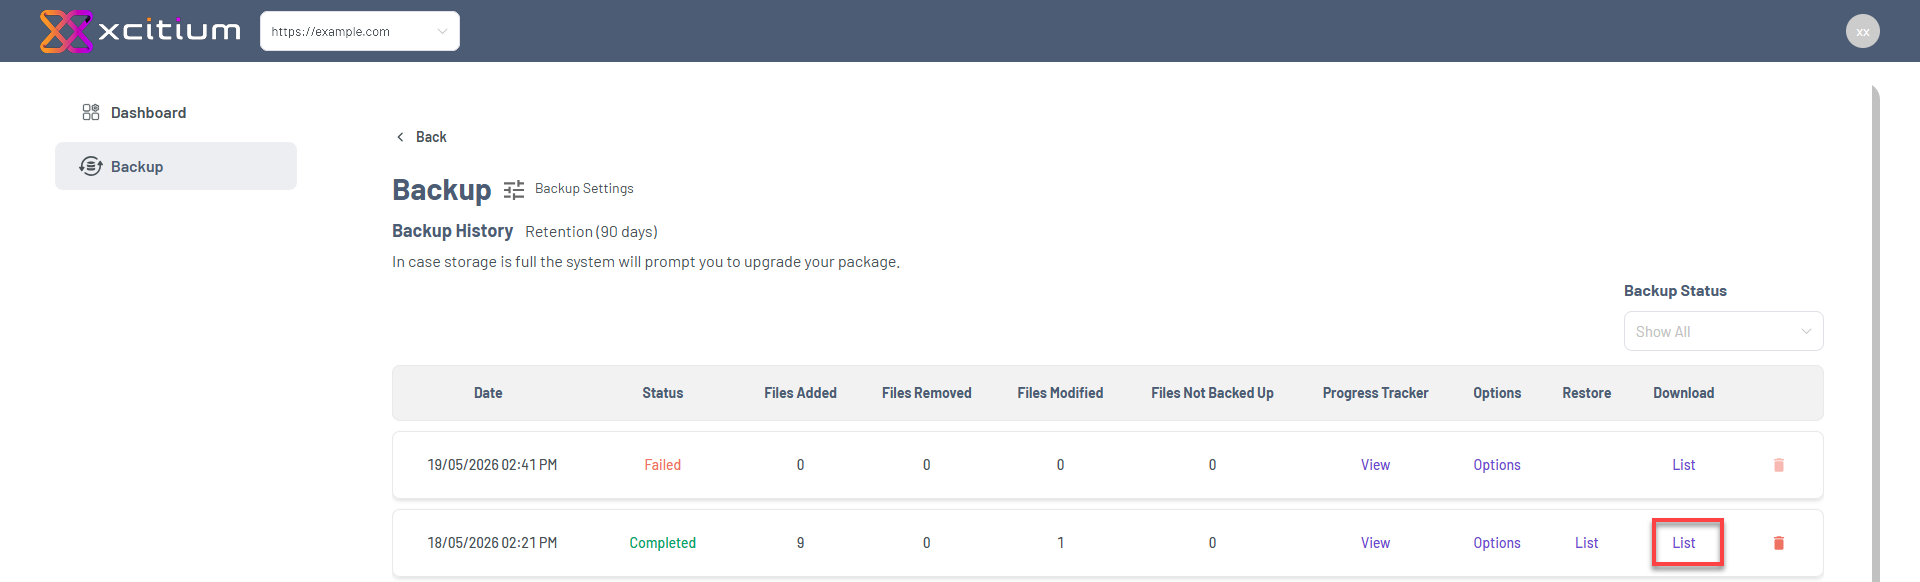
Download
Lets you save a copy of your backup files to your local device. Clicking List displays the available files you can download for offline access or safekeeping.
Delete
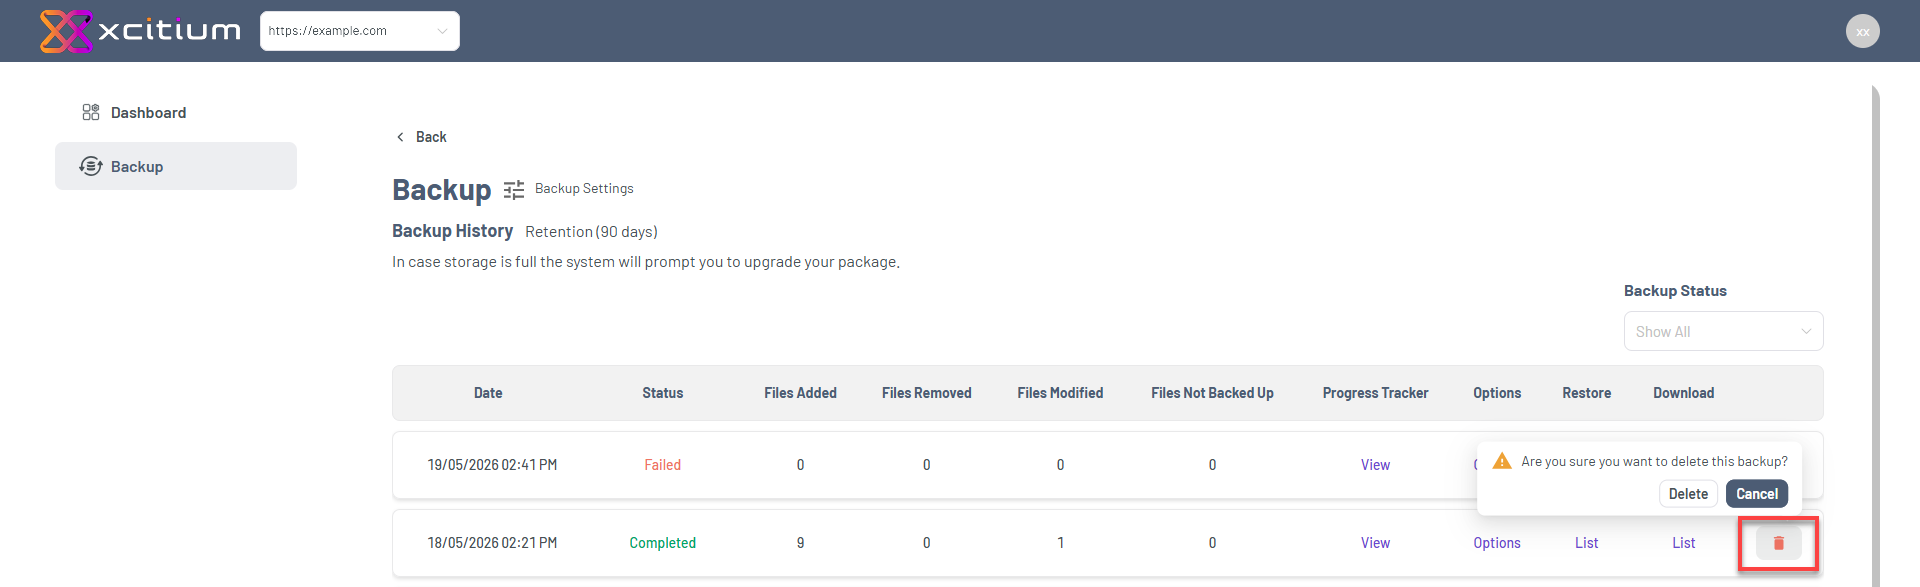
- Removes the backup permanently
- Cannot be undone
Summary
With Xcitium Backup History, you can:
- Monitor your backup performance
- Fix backup issues quickly
- Restore your website when needed
- Keep your website data safe
By reviewing this regularly, you ensure your website stays protected and recoverable at all times.
If you need further assistance, Bluehost Chat Support is available 24 hours a day, 7days a week while Bluehost Phone Support is available 7 days a week from 7 am-12 midnight EST.
- Chat Support - While on our website, you should see a CHAT bubble in the bottom right-hand corner of the page. Click anywhere on the bubble to begin a chat session.
- Phone Support -
- US: 888-401-4678
- International: +1 801-765-9400
You may also refer to our Knowledge Base articles to help answer common questions and guide you through various setup, configuration, and troubleshooting steps.