Billing Preferences
We're flexible, which is why we offer several billing preferences/payment options, adjustable renewal settings, and easy access to your billing history.
Payment Options
We strive to make paying for your hosting services as convenient as possible by offering various payment methods and renewal options.
Accepted Payment Methods
- Credit Cards
- PayPal
- Google Pay
- Checks & Money Orders
Renewal Settings
Your website is your business, security, and livelihood; thus, a long service interruption could be damaging. We want your hosting experience to be worry-free and without interruption, which is one of the many reasons that our services are set to auto-renew by default.
Automatic renewals are an easy and convenient way to ensure that your services are always paid up to date, preventing service interruptions and losing ownership. But if auto-renew isn't right for you, you can always change the settings by following the steps inside the article: Managing Renewal Options, and that is for each of your services to renew manually. We'll send you notices for upcoming auto-renewals, service expiration dates, and any time a transaction is processed on your account, so you'll always know what's going on. And in case you forget to read your emails, we'll save all of your transaction receipts in your Billing History. You've got a website to run; let us handle this!
Billing History
Have you ever looked at your bank statement and wondered what you were charged for? Perhaps you don't recognize the company name, or you just weren't expecting to be billed. We can help! Any charge from Bluehost will begin with FST*, followed by your domain name and our phone number. But your statement can't tell you exactly what the charge is for—there simply isn't enough room—but you can log in to your account and view your Billing History.
- Log in to your Bluehost Account Manager.
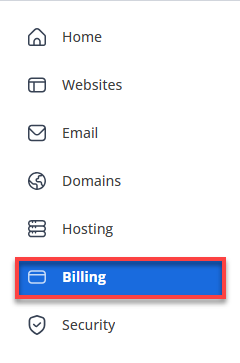
- In the left-hand menu, click Billing.

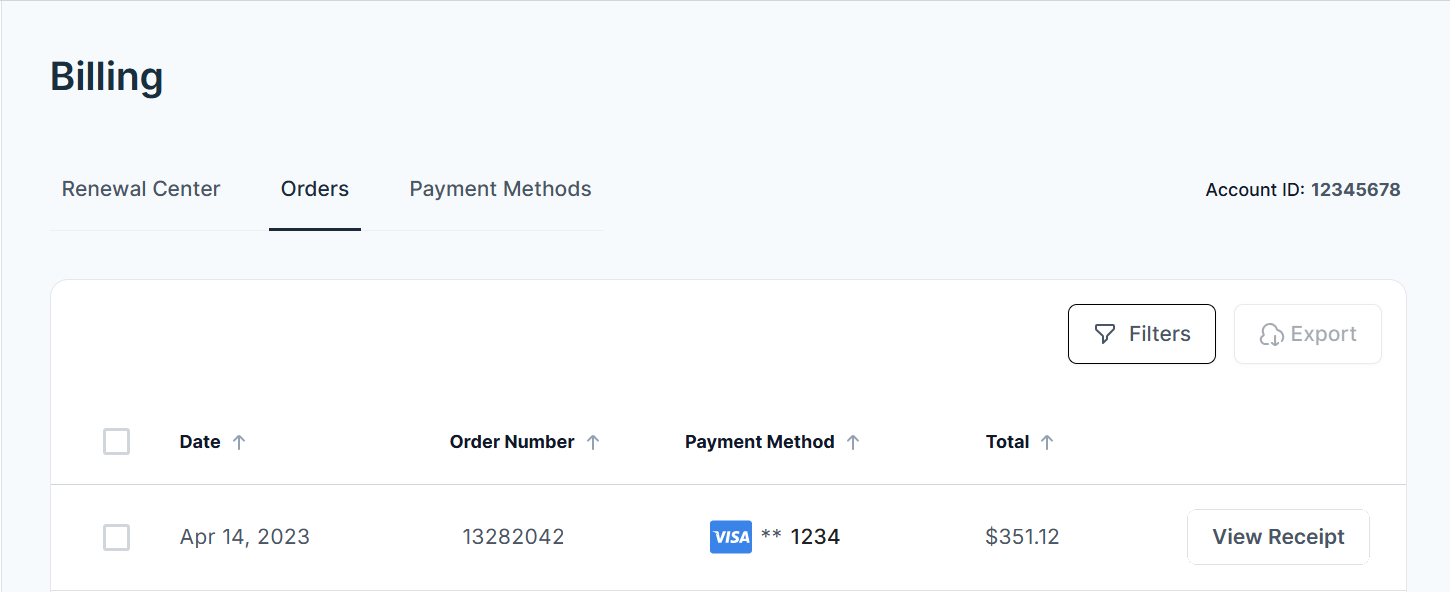
- Click the Orders tab.

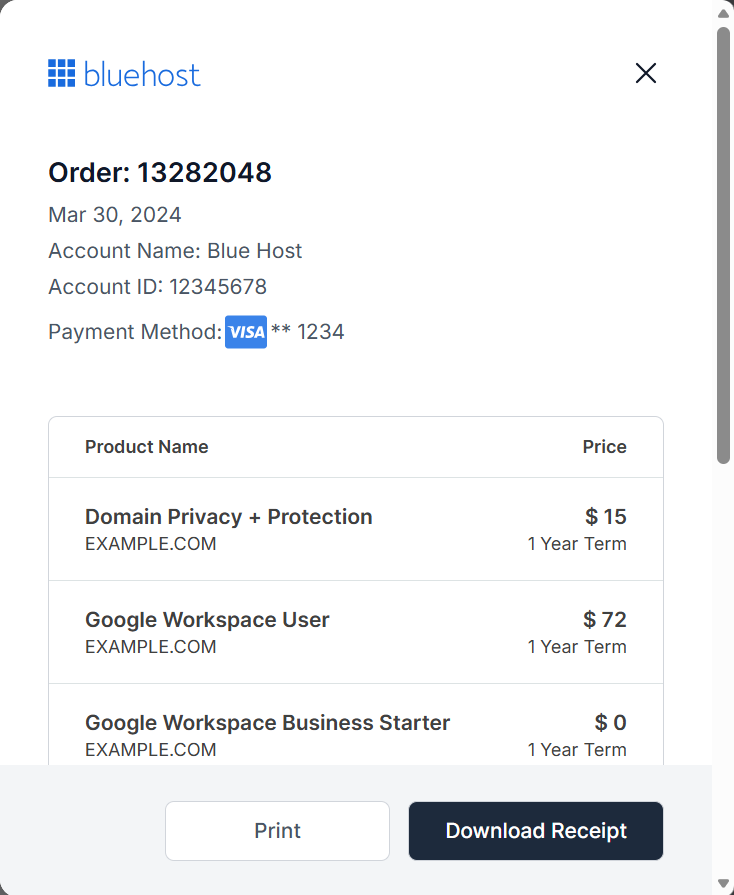
- Select View Receipt next to any order under your payments to open and view the full details of the purchase.
Any time a transaction is processed on the account, whether it's an auto-renewal or manual payment, the transaction receipt is saved in the Billing History, and a copy is emailed to the account administrator.
Transaction receipts include the following:
- Customer and Billing information
- Name
- Address
- Phone number
- Invoice number
- Date
- Amount
- Description

The customer and billing information listed on your receipt reflect what we have on file for the account when the transaction is made. Therefore, it's important to make sure your information is always up-to-date because changes cannot be made to receipts after the fact.
All receipts are listed from oldest to newest. Your first receipt for the origination of your account is available by midnight GMT on the date of purchase; all other receipts are available immediately upon payment.
Summary
Bluehost provides multiple payment options, including credit cards, PayPal, Google Pay, and checks. For convenience, you can enable automatic renewals or choose manual renewals instead. Your billing history is always accessible, allowing you to review transactions and manage your account with ease.
If you need further assistance, feel free to contact us via Chat or Phone:
- Chat Support - While on our website, you should see a CHAT bubble in the bottom right-hand corner of the page. Click anywhere on the bubble to begin a chat session.
- Phone Support -
- US: 888-401-4678
- International: +1 801-765-9400
You may also refer to our Knowledge Base articles to help answer common questions and guide you through various setup, configuration, and troubleshooting steps.