How Do I Set Up CodeGuard?
Businesses need to secure their data to maintain customer trust, protect sensitive information, and comply with regulations. Data breaches can lead to financial losses, damage to reputation, and legal consequences. That's why having CodeGuard on your account is crucial.
In this article, we will explain how to configure CodeGuard to back up and restore your website files and database data. CodeGuard’s backup capacity for websites varies based on your subscription plan. The steps in adding a new website are the same as those provided below. For instructions on restoring backups, see Restoring Backups with CodeGuard.
How to Set Up CodeGuard
Step 1: Set up FTP/ SFTP
- Log in to your Bluehost Portal.
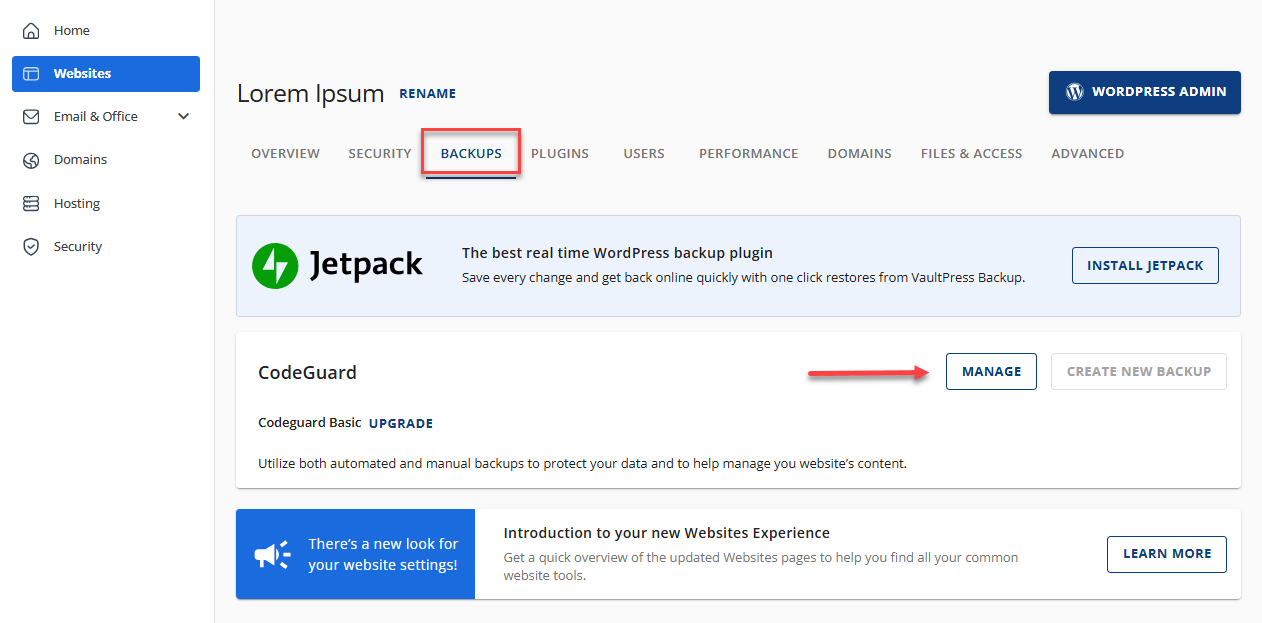
- In the left-hand menu, click Websites.
- Click the Manage Site button located next to the website you want to manage.

- In the BACKUPS section, press the MANAGE button to manage your CodeGuard.
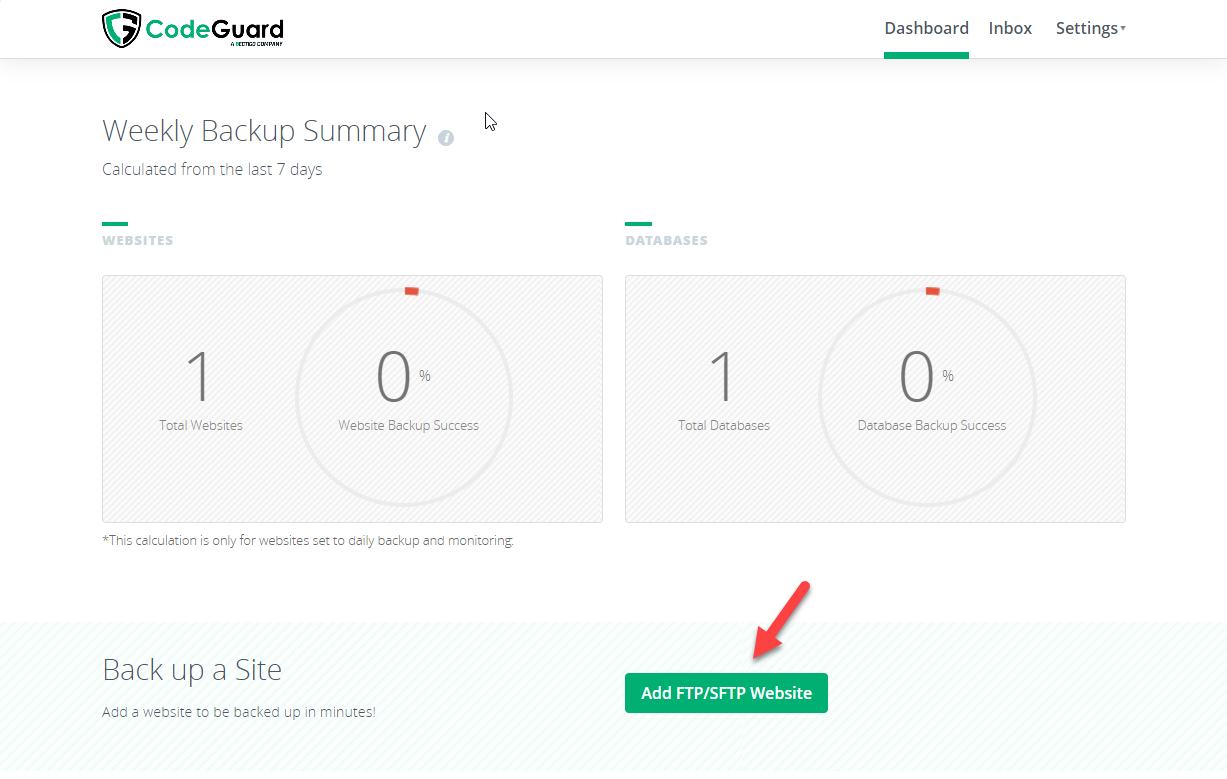
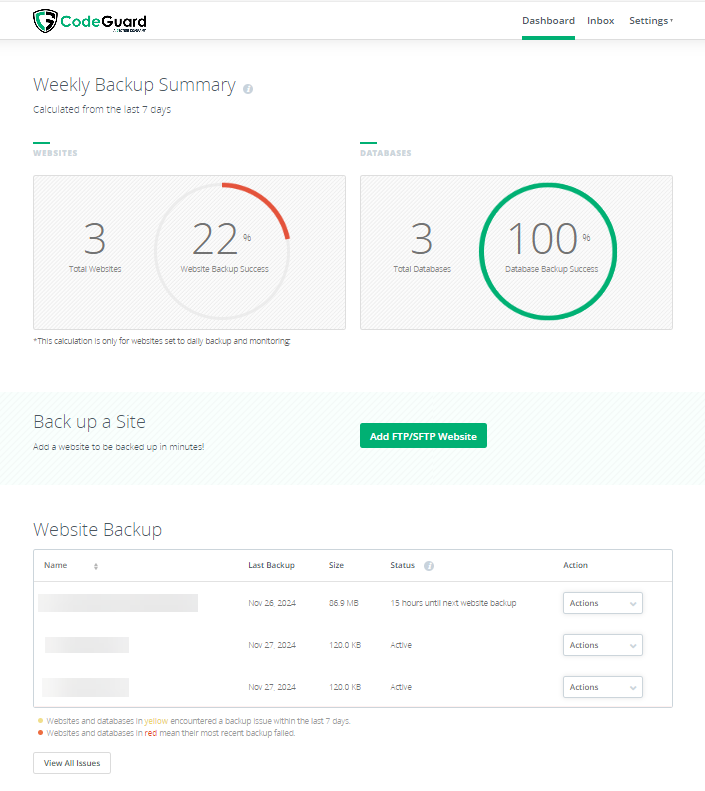
- The CodeGuard dashboard will show up. Click Add FTP/SFTP Website.
Step 2: Choose files for backup
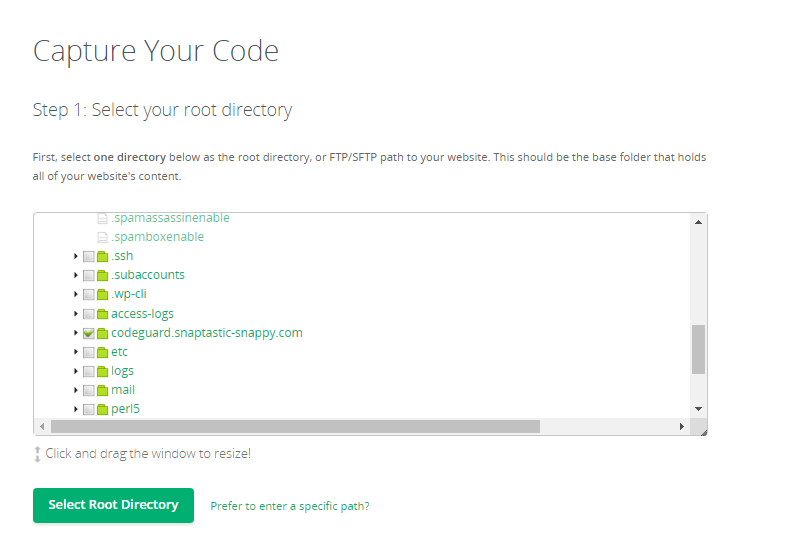
- Fill out the credentials needed and press Test Website Connection afterwards.

- Specify Root Directory: Identify and select the primary folder that contains your website's files and folders. This is often your website's root directory or FTP/SFTP path.
- Choose the Content for Backup: Carefully select the specific files and folders you wish to include in your backups. To optimize your backup process, consider excluding temporary files and folders such as cache, temp, and logs.
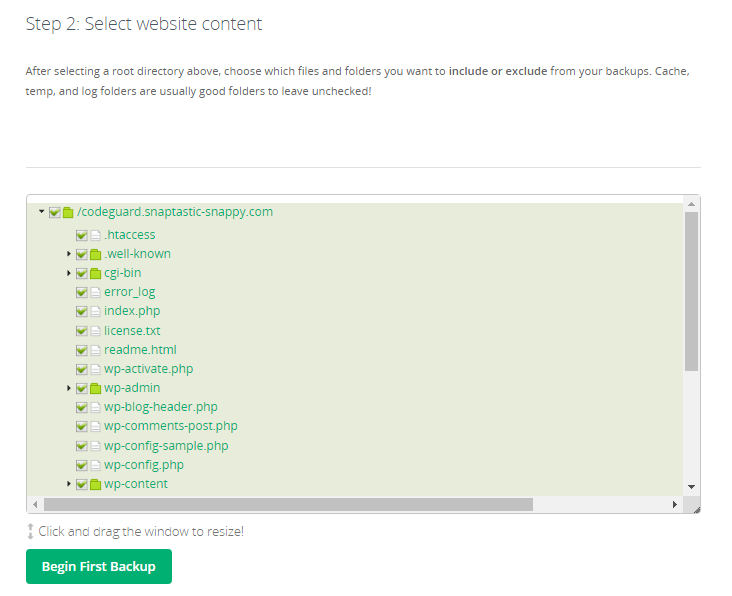
- Initiate Backup: Click the Begin First Backup button to start the initial backup process.

- Backup Completion: Upon successful completion of the backup, you will be presented with a confirmation page.

Please note that the database will be automatically included when CodeGuard identifies that you have a WordPress site or another Content Management System (CMS) that relies on a database. To finalize the setup, select the options that pertain to your website:
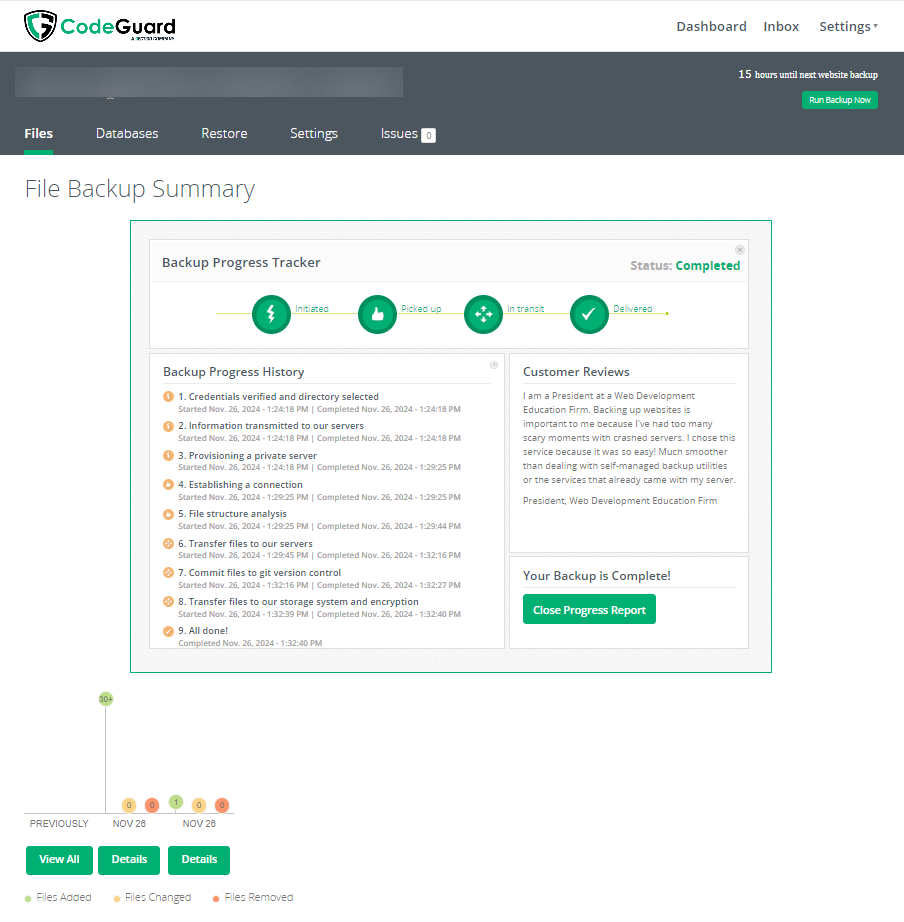
Go to Dashboard: Click here to view the File Backup Summary and track your Backup Progress.
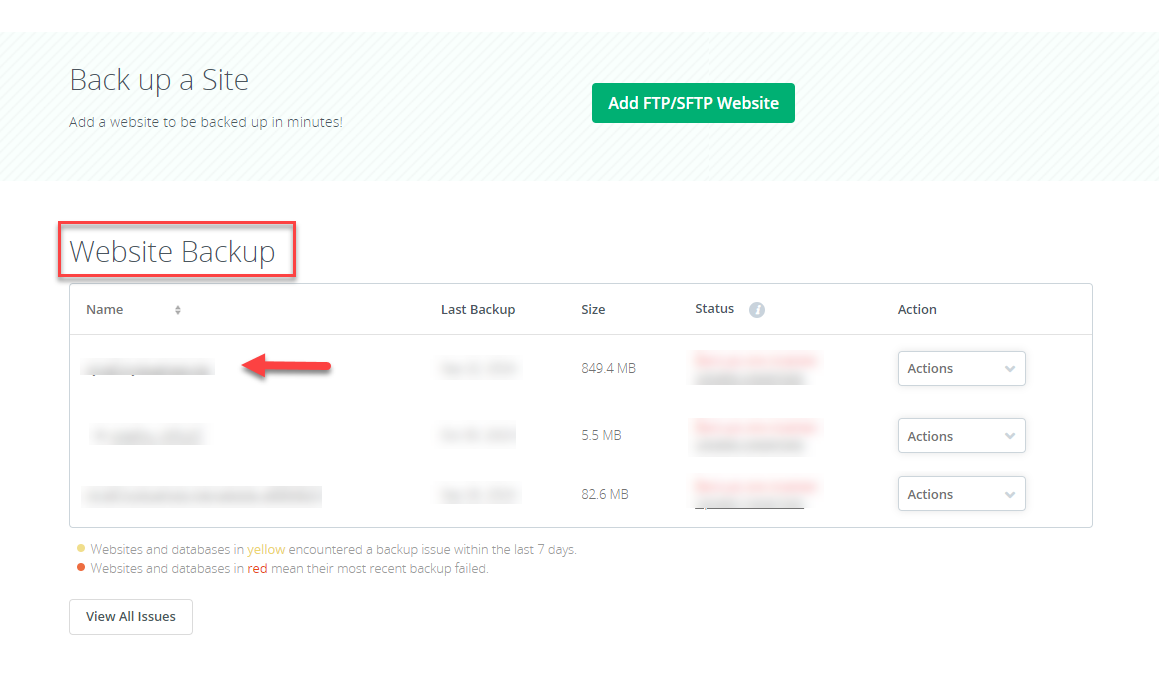
- After adding the websites, they will appear in a list right below the Backup a Site section. The Website Backup section offers more detailed information about completed backups and enables you to customize settings in CodeGuard.
How to Add a Database to Your CodeGuard Account
MySQL
- To add a database, go to the CodeGuard dashboard, scroll down, and next to Back up a site is Website Backup. Tap the backup name you would like to work on.
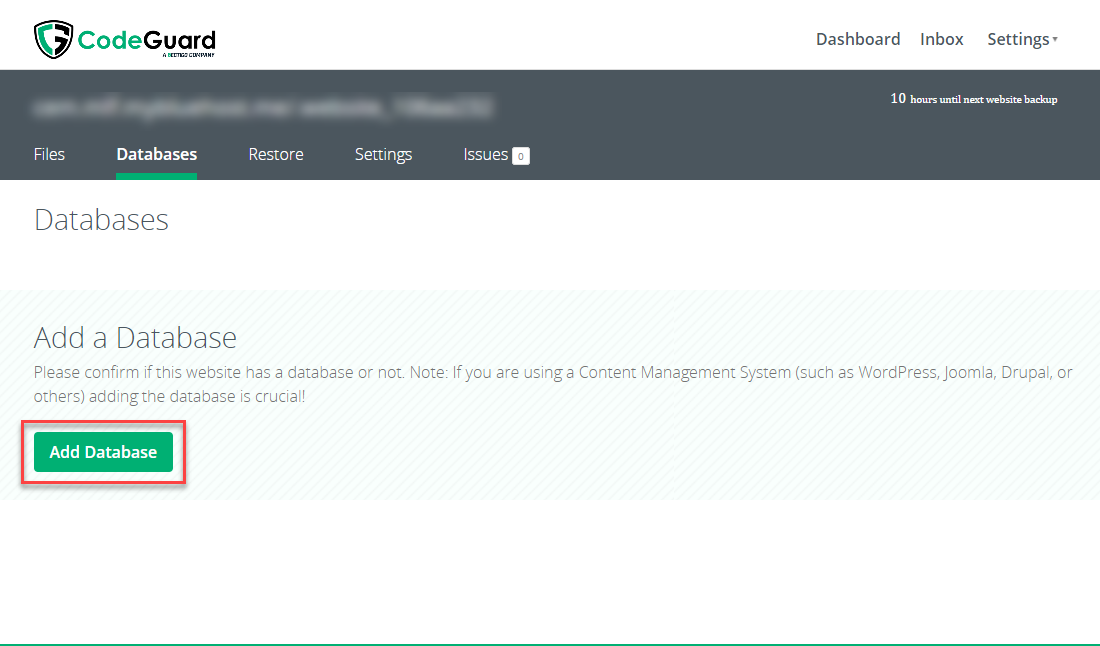
- After you click the website’s backup name, select Databases next to Files from the menu bar at the top. Then tap Add Database.
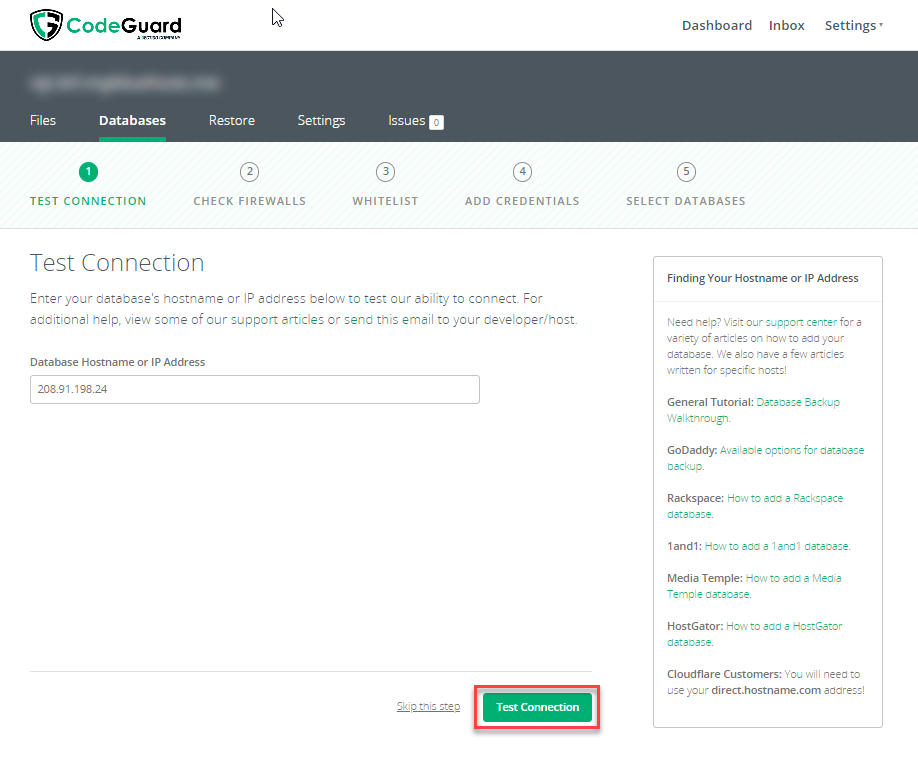
- Provide the Database Hostname or IP Address and tap Test Connection.
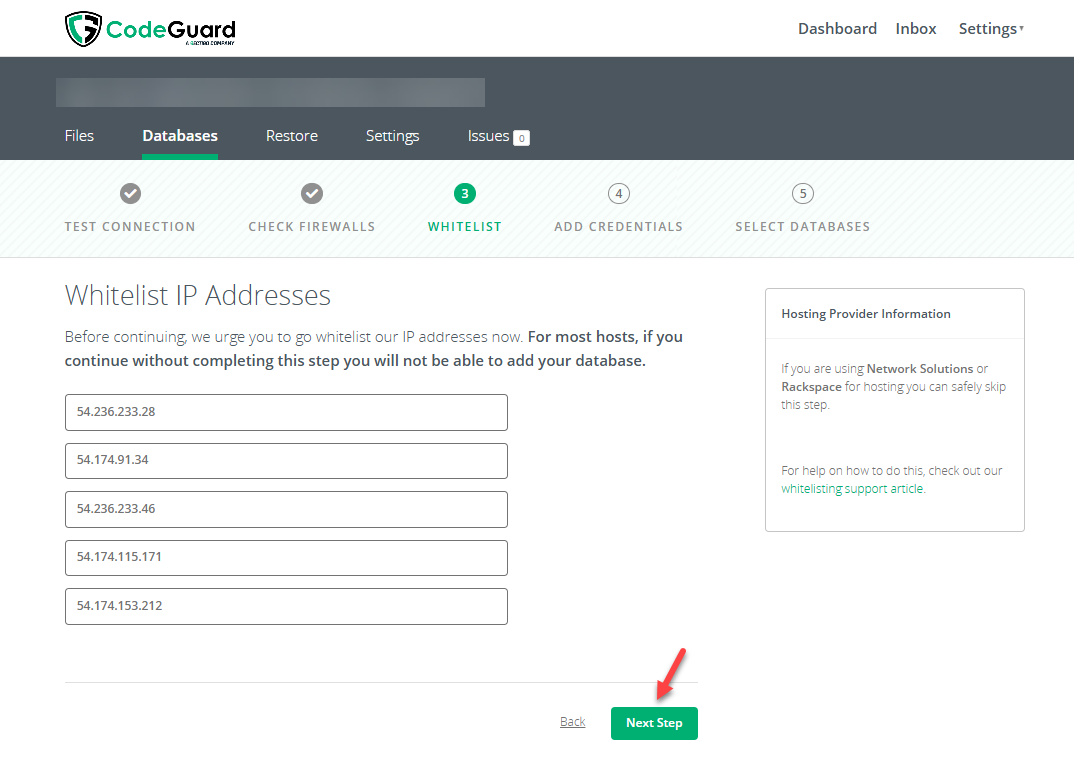
Make sure your hosting control panel has the IP addresses provided by CodeGuard whitelisted before continuing to use a direct MySQL connection.
- You must add the information to your database. If you have them, go on to step 6. You can retrieve the database details from an existing database if they are not immediately available.
Below is a description of this procedure for a few popular hosting control panels:
- cPanel:
- Click the MySQL Databases link in the Databases area of the cPanel control panel.
- Select the database user link under the Current Users section for a current user.
- Change the database user's password.
- Plesk:
- Select the Databases option from the Plesk control panel.
- You may see a list of the current databases here. On the Users tab, click.
- Now, you may see a list of the current database users. Please select the user link.
- Change the database user's password.
- cPanel:
- Check Firewalls section will be verified by CodeGuard. The connection will be indicated in green as shown if it is successful. Click Next Step.
- Once the IP Address is verified, go to the Whitelist tab. Tap Next Step afterwards.
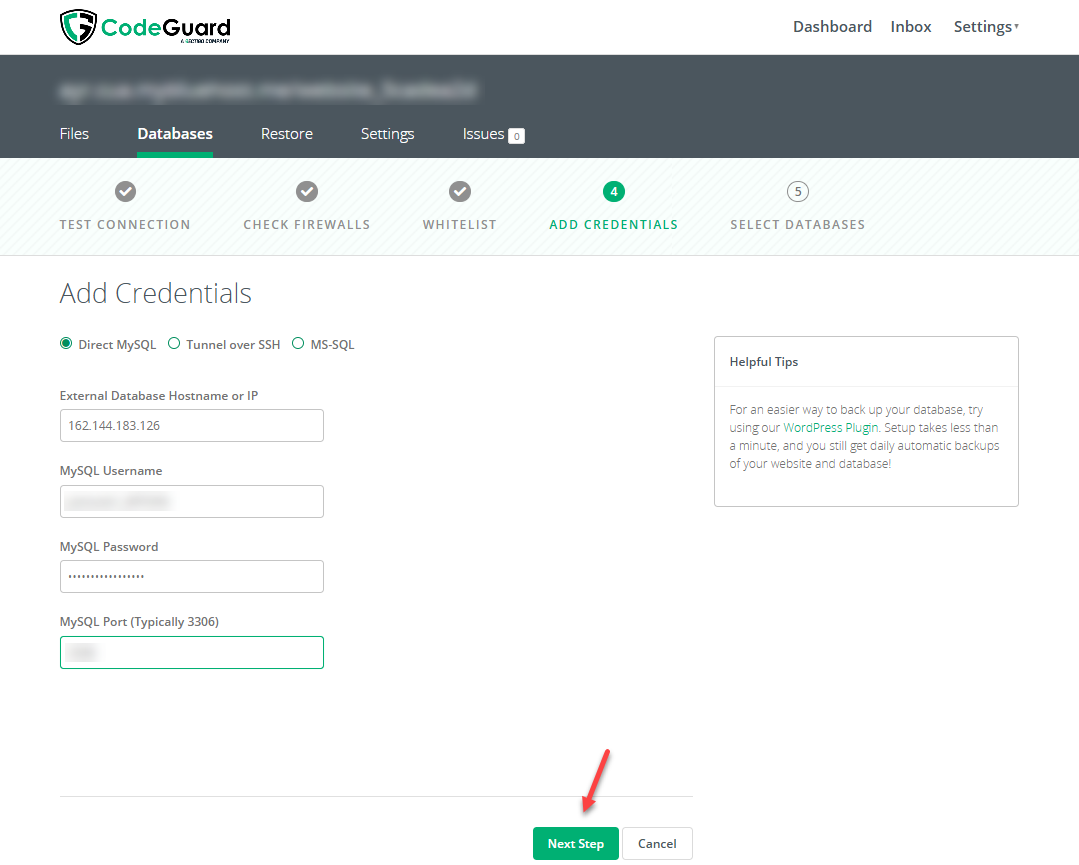
- On the Add Credentials page, select Direct MySQL and procure the necessary credentials. Then proceed to the Next Step.
You can connect to the database using SSH if your hosting account's SSH has been enabled. In this case, select the Tunnel option over SSH.
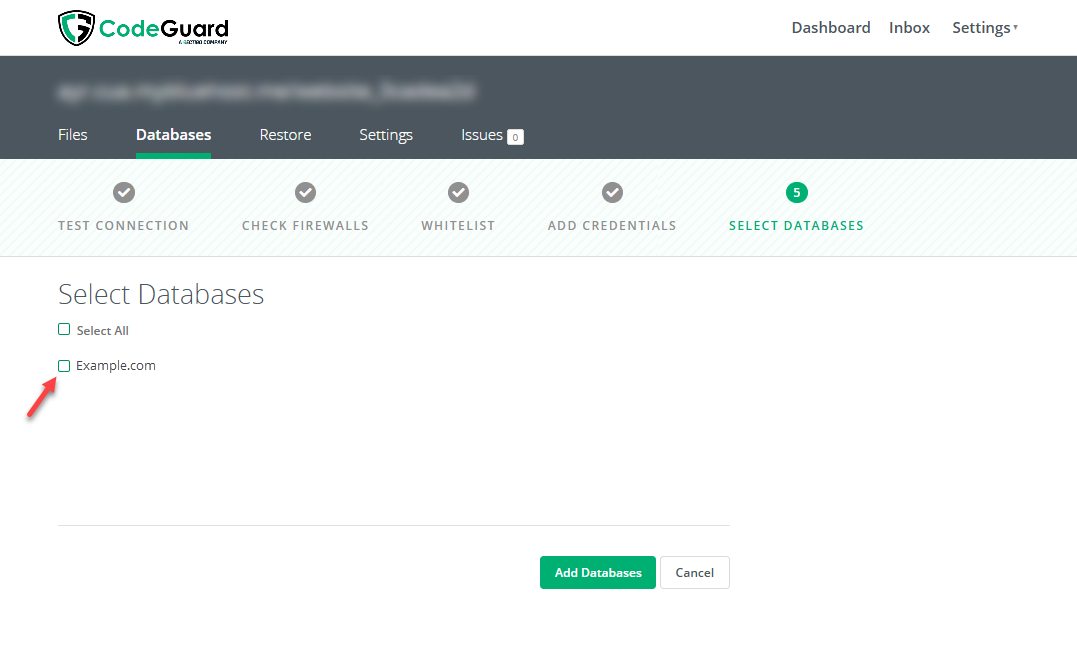
- Click the Add Databases option after choosing the domain’s database to be added. After that, CodeGuard will initiate the first backup procedure.
- You can see the progress of the backup procedure after it has begun. When the backup procedure is finished, the screen below will be displayed.
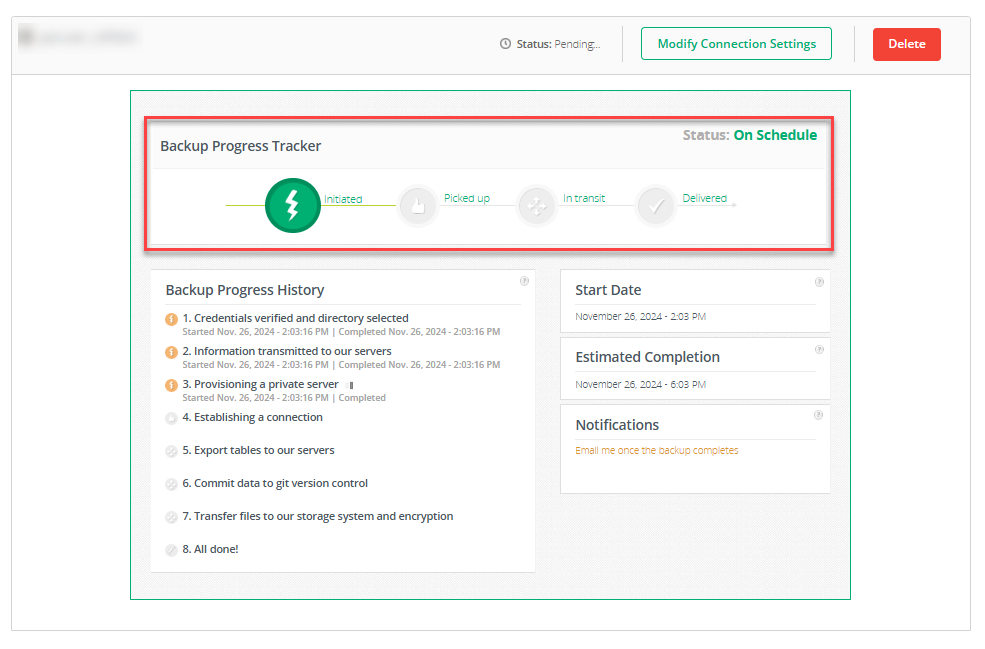
The Backup Progress Tracker may take some time, depending on the statistics being processed by CodeGuard. The status will be displayed in the top left corner, and the icons below will change automatically to indicate a successful backup process.
MS-SQL
The instructions below can be used to add an MS-SQL database to CodeGuard.
- Click Databases on the navigation bar, then click Add Database if you still need to configure a database for your website.
- Take note of the database hostname or IP address from your Plesk control panel.
- Enter the server’s IP address or database hostname. Click on Test Connection.
- Firewall access will be verified by CodeGuard. The connection will be indicated in green as shown, if it is successful. Then select Next.
- Click Next Step on the Whitelist IP Addresses page.
- If you want to connect a database to CodeGuard, enter the database login and password. To continue, click Next.
The database name is from the Plesk Panel.
- Click Add Database after entering the domain's database name you want to add to CodeGuard.
- Once the database has been successfully added, you will see a success screen.
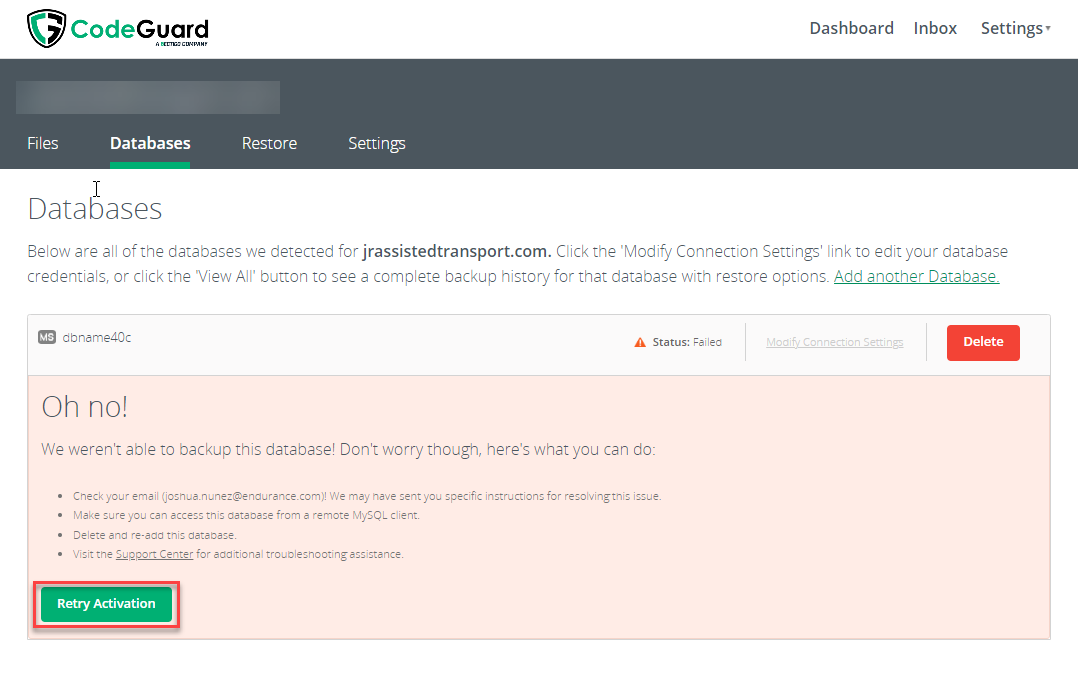
The database should be added, and the backup procedure should begin. If you receive the error as indicated, please wait approximately five minutes and then select RETRY ACTIVATION.
The procedure for adding a website and a database to your CodeGuard account is now complete. Your website and database will be checked by CodeGuard on a regular basis; if any modifications are found, a backup will be made.
How to View Backups Taken by CodeGuard
- Click on the link for the website or database under Website Backup in the CodeGuard dashboard.
- Click the website backup’s name to open the file backup summary.
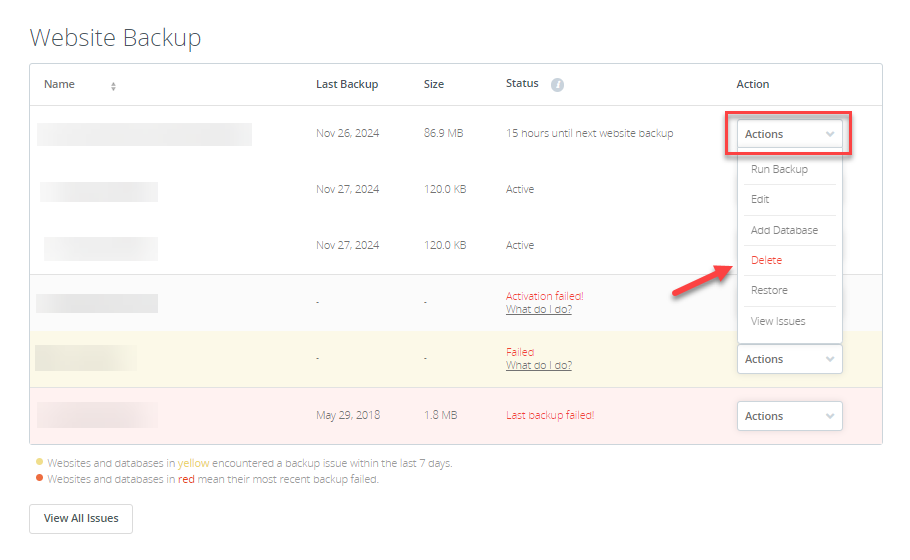
- If necessary, you can remove a website or database by choosing Delete from the ACTION menu that corresponds to that website or database.
Summary
Learning how to set up CodeGuard is crucial to protecting your data and ensuring trust and compliance. This guide helps you set up CodeGuard, add databases, view backups, restore data, and troubleshoot issues easily. Just follow the steps to secure your digital assets and stay worry-free.
With CodeGuard, you can rest assured knowing your digital assets are protected and easily recoverable.
If you need further assistance, Bluehost Chat Support is available 24 hours a day, 7days a week while Bluehost Phone Support is available 7 days a week from 7 am-12 midnight EST.
- Chat Support - While on our website, you should see a CHAT bubble in the bottom right-hand corner of the page. Click anywhere on the bubble to begin a chat session.
- Phone Support -
- US: 888-401-4678
- International: +1 801-765-9400
You may also refer to our Knowledge Base articles to help answer common questions and guide you through various setup, configuration, and troubleshooting steps.