How to Configure SSL Certificate and Submit Validation
An SSL (Secure Sockets Layer) certificate secures the data exchanged between your website and its visitors. It encrypts transactions, protects personal information, builds visitor trust, and boosts your website’s SEO rankings. After obtaining an SSL certificate from Bluehost, this guide will show you how to configure SSL, including updating DNS records and verifying your domain.
Configure SSL Certificate on Bluehost
When you purchase hosting and an SSL certificate with Bluehost, many SSL types—such as Premium and Wildcard Domain Validation (DV) certificates—are automatically installed. If your SSL is not automatically fulfilled or an error occurs, follow the steps below to manually configure and activate your SSL certificate.
- Ensure you issue your SSL certificate to the exact version of the domain or subdomain you intend to assign it to (e.g., example.com, www.example.com, or store.example.com). Remember that once the domain is assigned, it cannot be changed.
- For DV (Domain Validation) certificates, a post-purchase configuration process involving additional steps will be necessary.
Step 1: Assign Domain
- Log in to your Bluehost Portal.
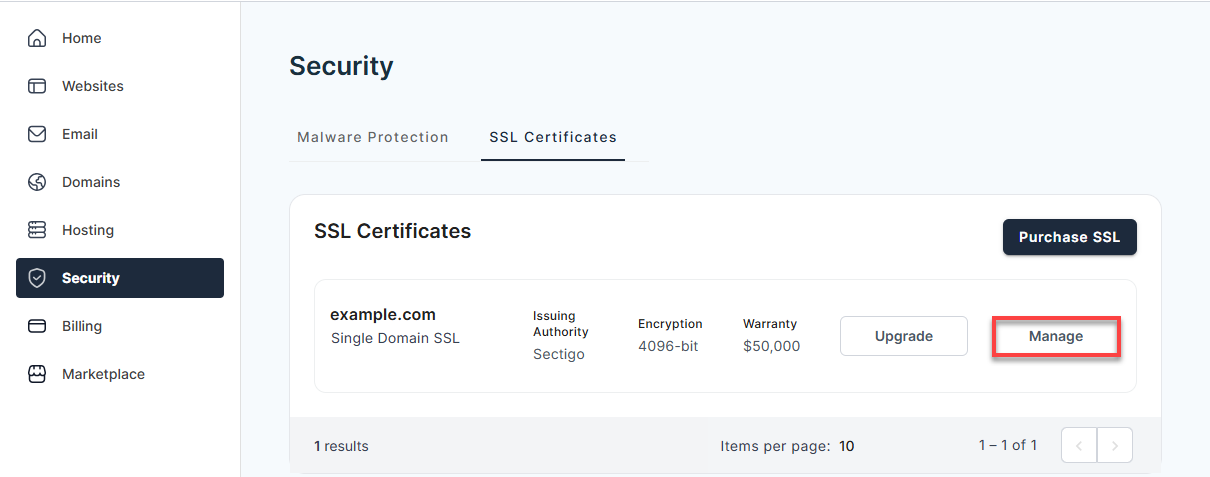
- Click Security on the left-side menu.
- Under the SSL Certificates tab, locate the SSL plan you want to manage, and then click the Manage button next to it.
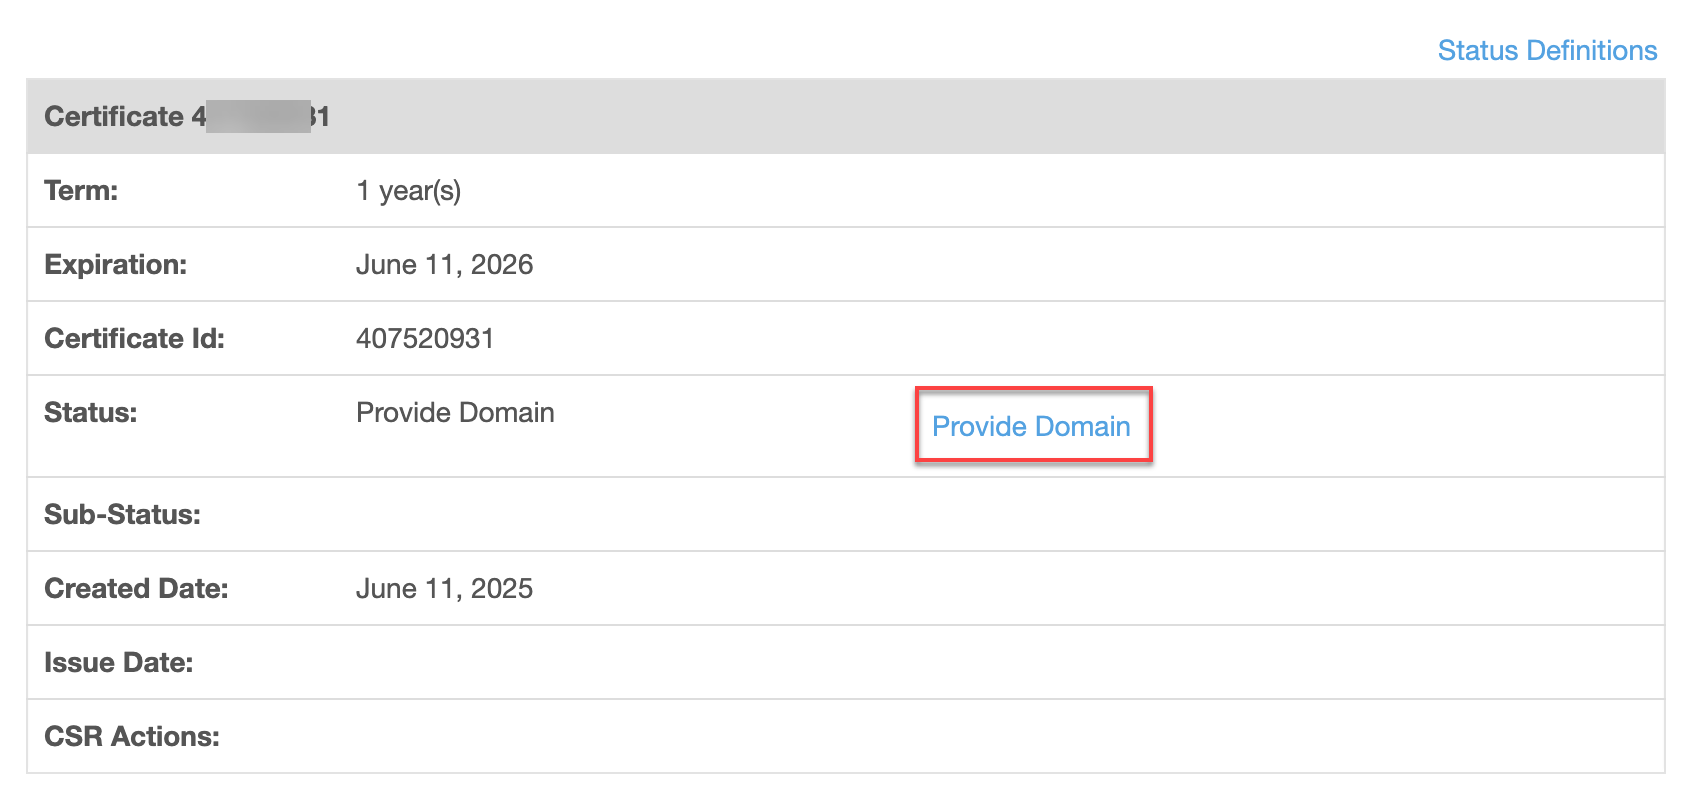
- In the SSL Control Panel pop-up, click the Provide Domain link.
- Assign the domain you want to secure:
- Enter and re-enter your domain name.
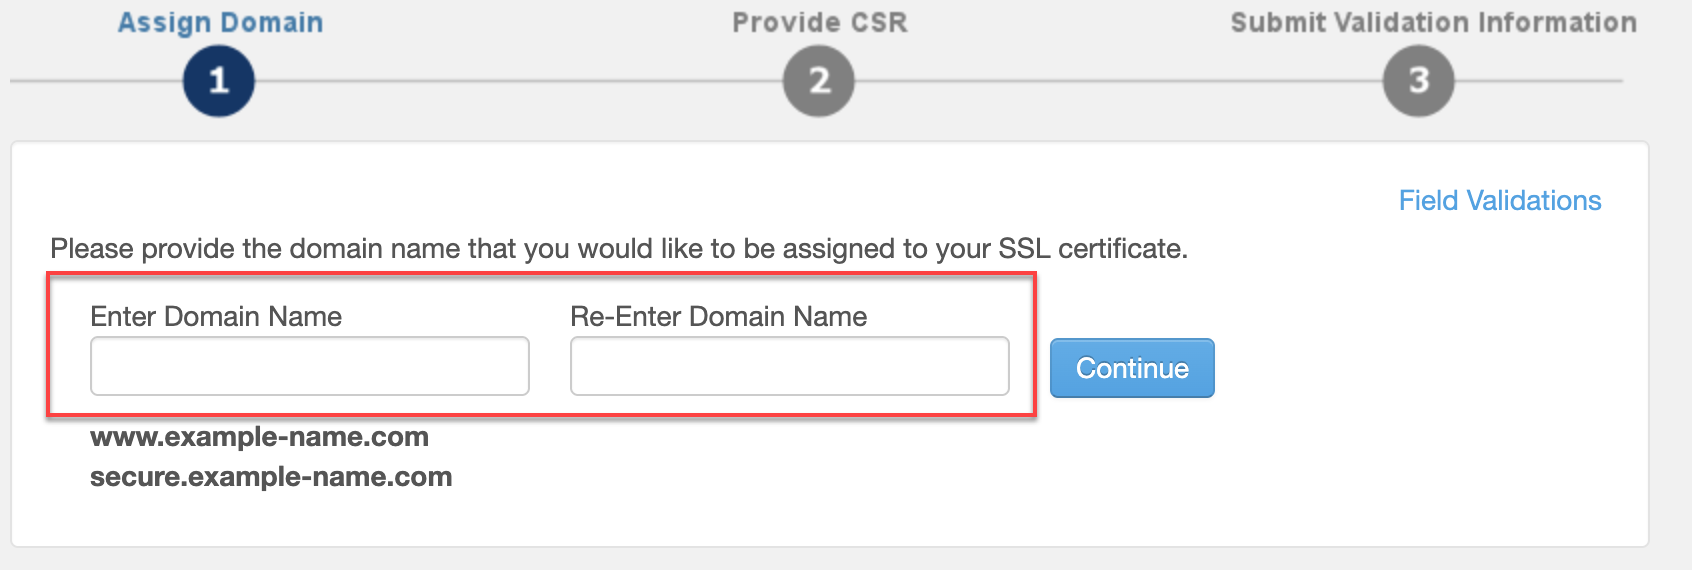
- Click Continue.
- Enter and re-enter your domain name.
- Proceed to Step 2.
Step 2: Provide CSR
The CSR includes vital details such as your domain, server information, and encryption level. It’s required to generate SSL installation files.
- If Bluehost hosts your site, CSR generation is handled automatically.
- If hosted by a third-party provider:
- Choose your server software type.
- Paste the CSR provided by your host into the Enter CSR From Web Host field.
- Click Continue to move forward with installation.
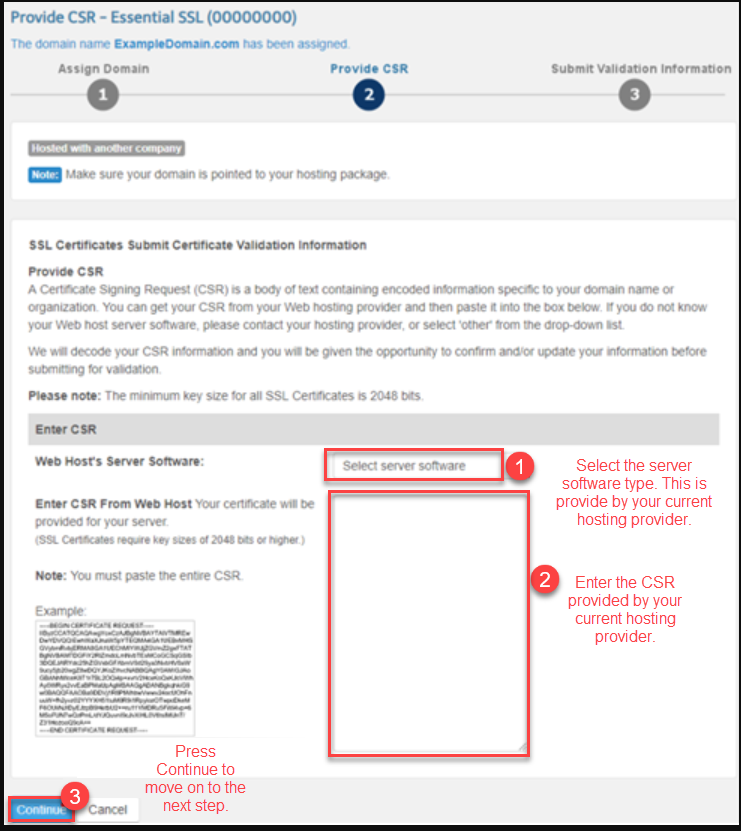
Move on to Step 3.
Step 3: Submit Validation Information
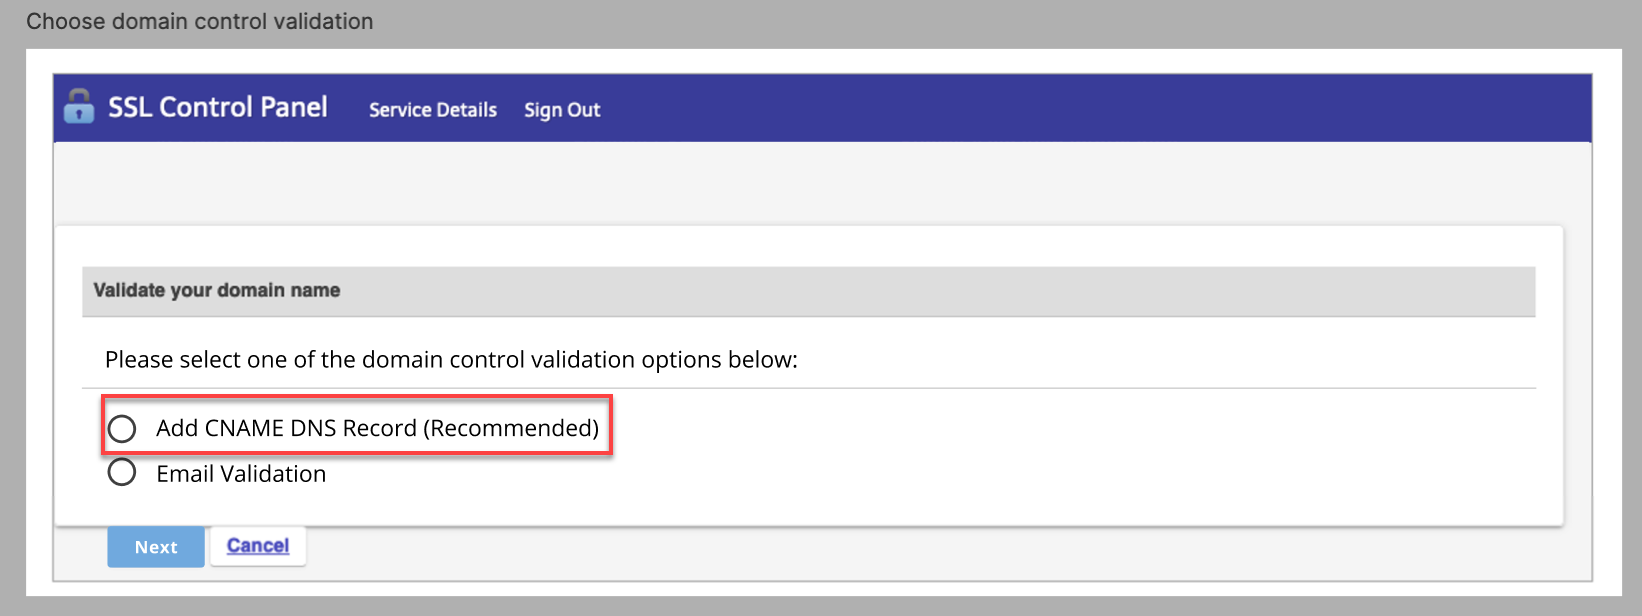
Validation confirms ownership of the domain before the SSL certificate is issued. Bluehost supports the following validation methods:
Option 1: CNAME Validation (Recommended)
CNAME validation requires adding a unique DNS record to your domain’s DNS settings. Once added and confirmed, your SSL certificate can be issued securely.
Key Benefits:
- More reliable than email validation
- Compatible with domains that have privacy protection
- Recommended by our support teams and Certificate Authorities
How to Validate SSL Using CNAME Records
- Select Add CNAME DNS Records (Recommended) and then click Next.
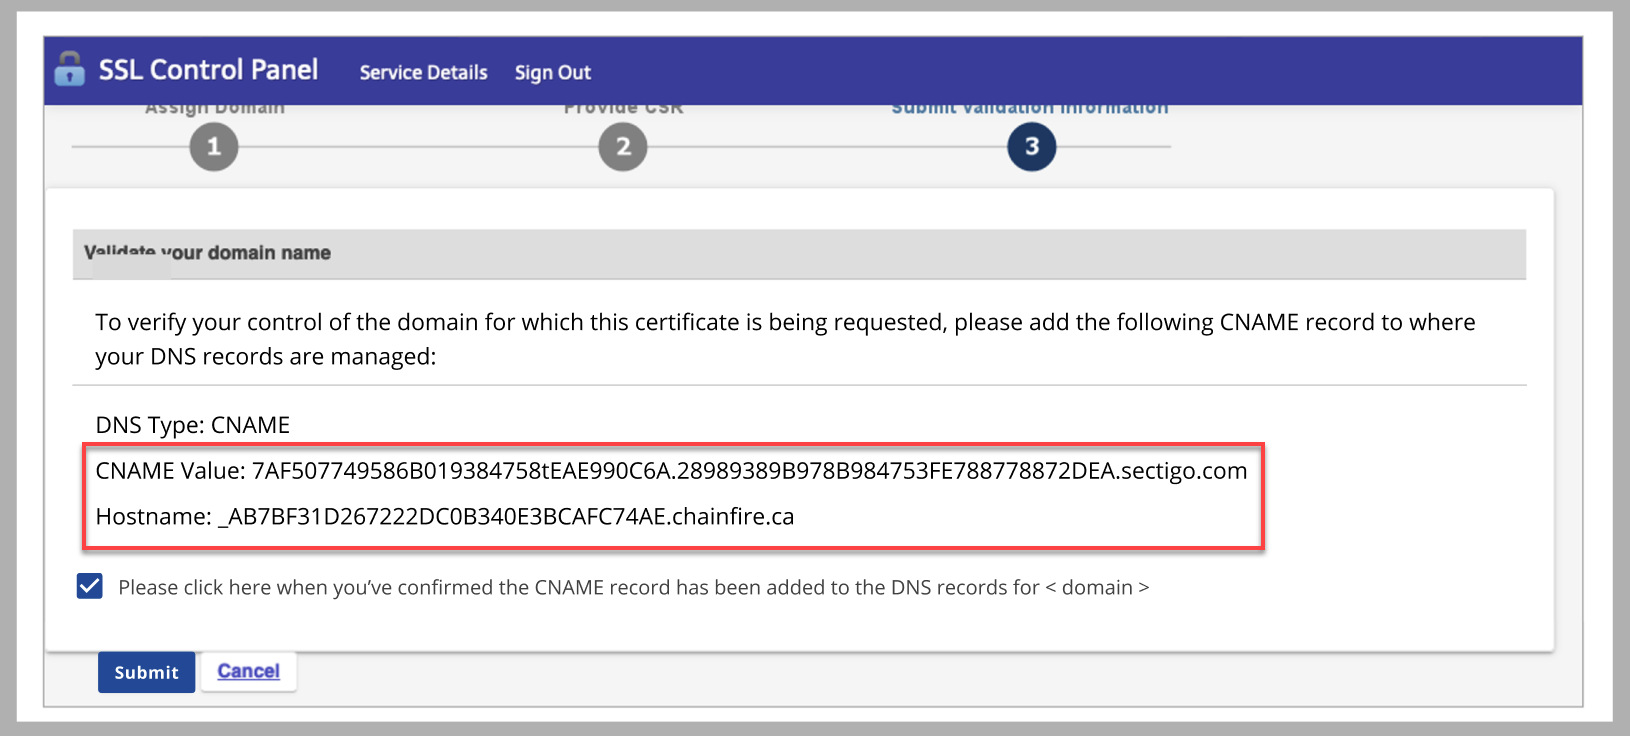
- Copy the CNAME Value and Hostname.
- Add the CNAME Record to your DNS.
- If your domain is hosted with Bluehost, follow these steps:
- Go to the Domains section and navigate to the DNS tab.
- Click Add Record, then choose CNAME.
- Fill in the details:
Field Value Type CNAME Refers to Other Host Host Name (Paste the CNAME Value) Alias (Points to) ( Paste the Hostname — Must begin with an underscore _) TTL 2 Hours Double-check for typos or extra spaces in the fields before saving.To revalidate or reissue your SSL certificate, replace the old CNAME record with a new one. - Save the changes.
- If your domain is hosted outside Bluehost, please contact your DNS provider directly to update the CNAME records.
- If your domain is hosted with Bluehost, follow these steps:
- After adding the CNAME record, return to the SSL Control Panel.
- Check the box:
“Please click here when you've confirmed the CNAME record has been added to the DNS records for <domain>.”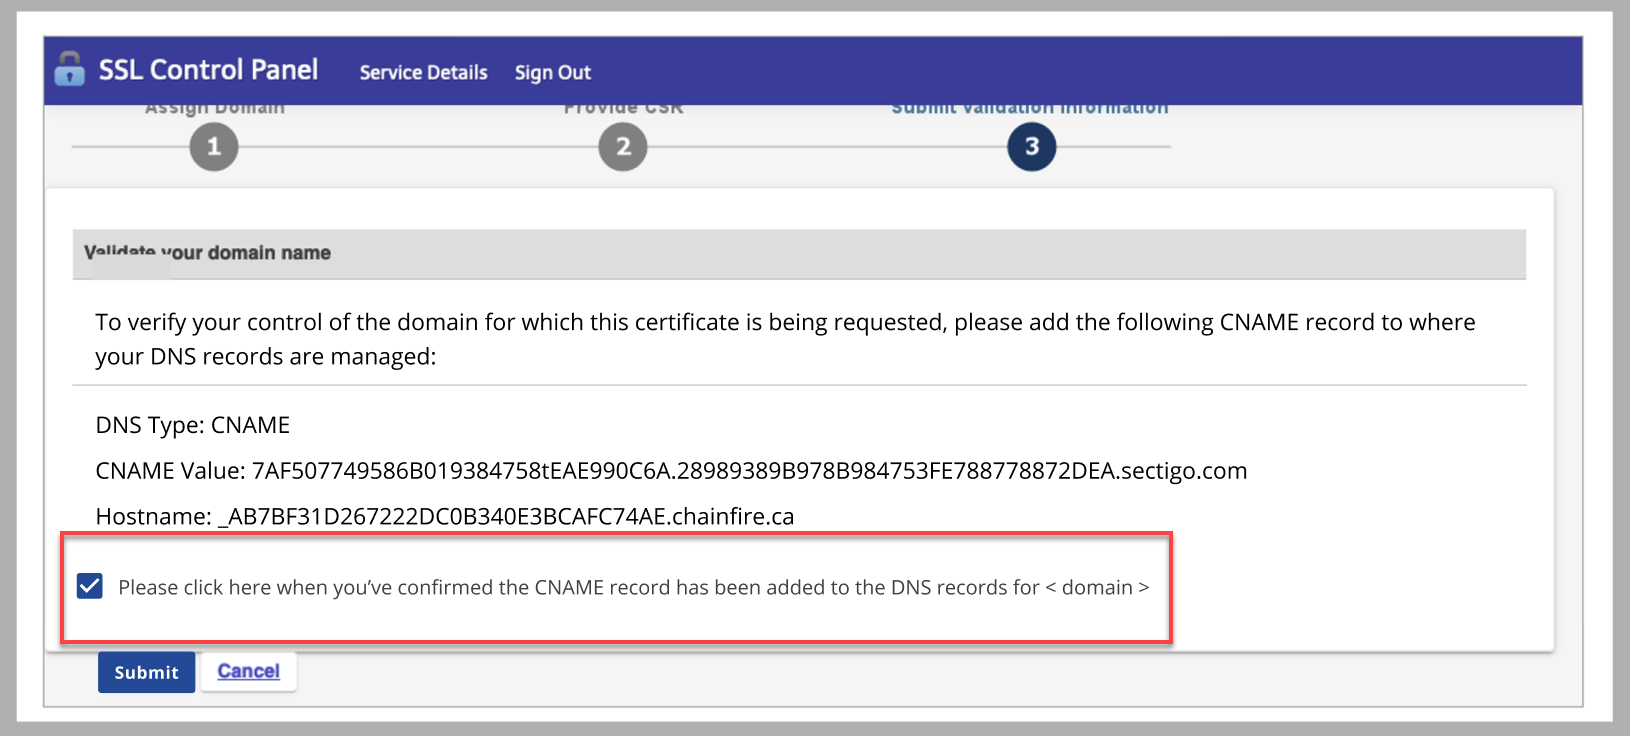
- Click Submit.
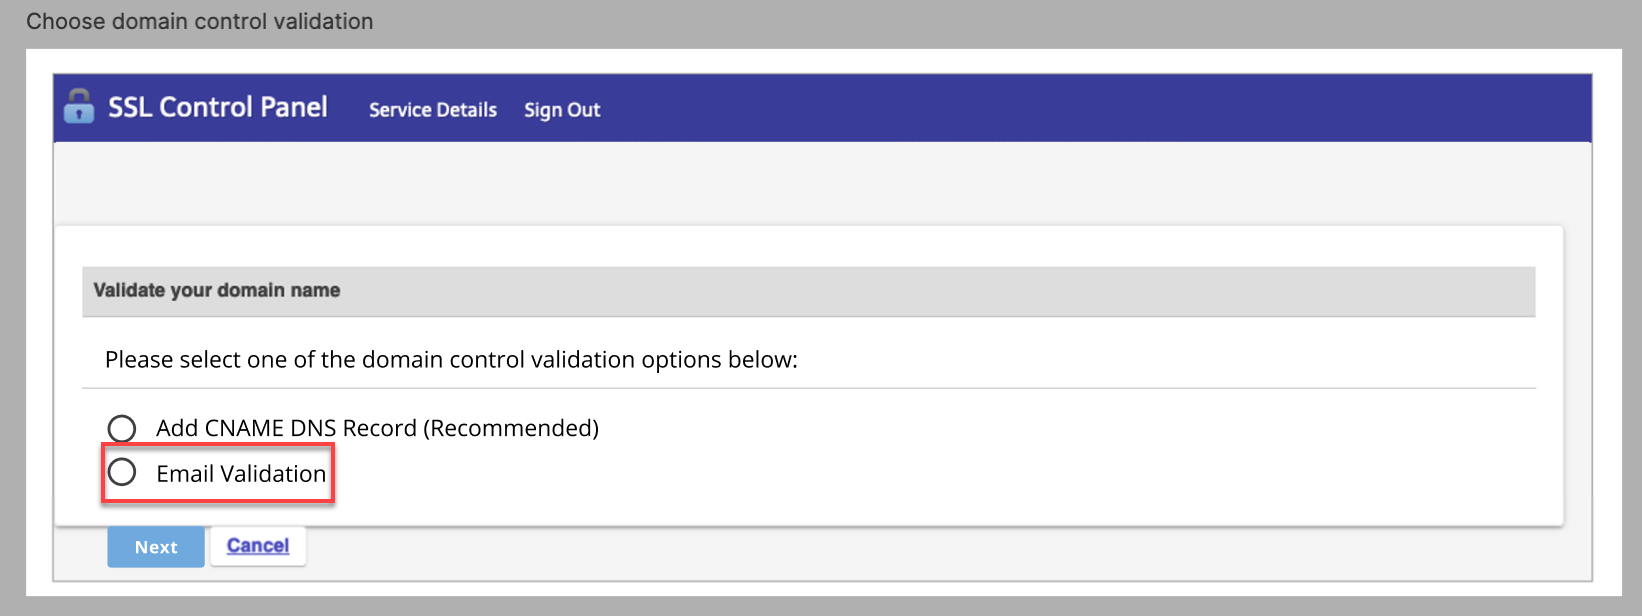
Option 2: Email Validation (Limited availability)
Email validation is still available, but only for these 5 WHOIS-based email addresses:
How to Validate SSL Using Email
- Select Email Validation and then click Next.
- Select an email address from the list for the domain validation process and then click Submit.
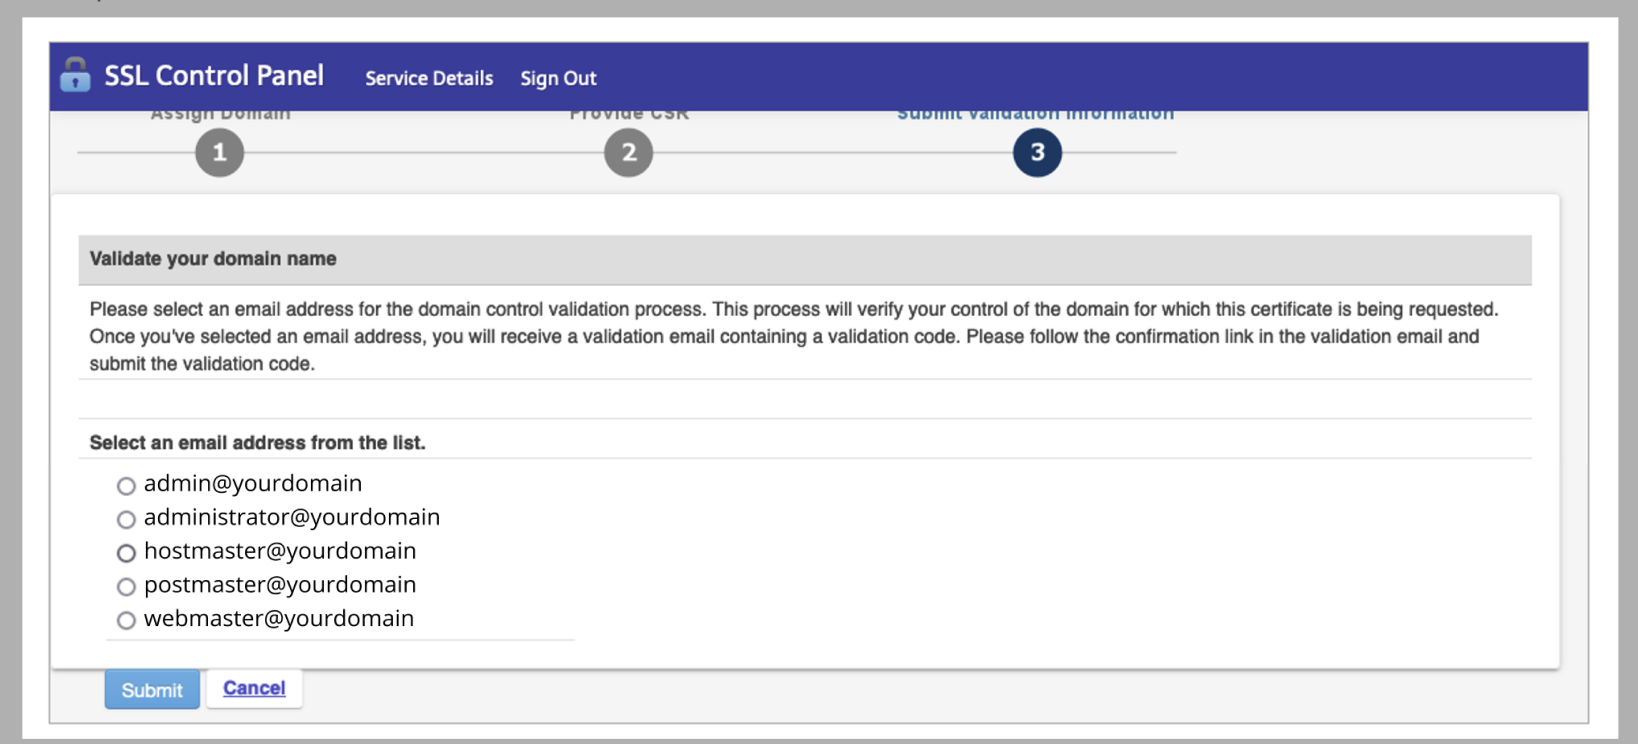
- Once you've selected an email address, you will receive a validation email containing a validation code.
- Follow the confirmation link in the validation email and submit the validation code.
- Wait for the validation to complete.
Additional Steps for Organization, Extended Validation, and Wildcard SSL
In addition to the steps mentioned for Domain Validation certificates, OV and EV certificates require additional information. You'll need to fill out an additional form with details related to your business or organization, which will be included in the SSL files.
Completing Validation Next Steps for OV, EV, or Wildcard Certificates
- Validating via HTTP TXT File
Each SSL validation request generates a unique MD5 hash code. Our support agent uses this information to create a .txt file to upload to your FTP site files. No email confirmation is needed for HTTP validation, and the validation team may take 1-2 hours to confirm
- Validating via Phone Call
In addition to email, CNAME, or .txt file validation, you must respond to an email that triggers a verification phone call. This automated call is initiated by clicking a link in the phone verification email, providing you with a PIN.
- Timeframes
After the configuration and validation steps are completed, the SSL files will be issued and uploaded to your Bluehost Portal. You will also receive email notifications. The SSL validation and issuance timeframe vary based on the SSL type and how promptly you complete the validation steps.
Summary
Configuring your SSL certificate is critical in securing your website and gaining visitor trust. Whether you're using a Domain Validation (DV), Organization Validation (OV), or Extended Validation (EV) certificate, this guide walks you through the full process of configuring your SSL certificate, from domain assignment and CSR generation to validation via email, CNAME, or HTTP file. For Bluehost-hosted websites, we've also included instructions for updating your DNS records with CNAME to complete SSL validation and activation.
If you need further assistance, Bluehost Chat Support is available 24 hours a day, 7days a week while Bluehost Phone Support is available 7 days a week from 7 am-12 midnight EST.
- Chat Support - While on our website, you should see a CHAT bubble in the bottom right-hand corner of the page. Click anywhere on the bubble to begin a chat session.
- Phone Support -
- US: 888-401-4678
- International: +1 801-765-9400
You may also refer to our Knowledge Base articles to help answer common questions and guide you through various setup, configuration, and troubleshooting steps.